
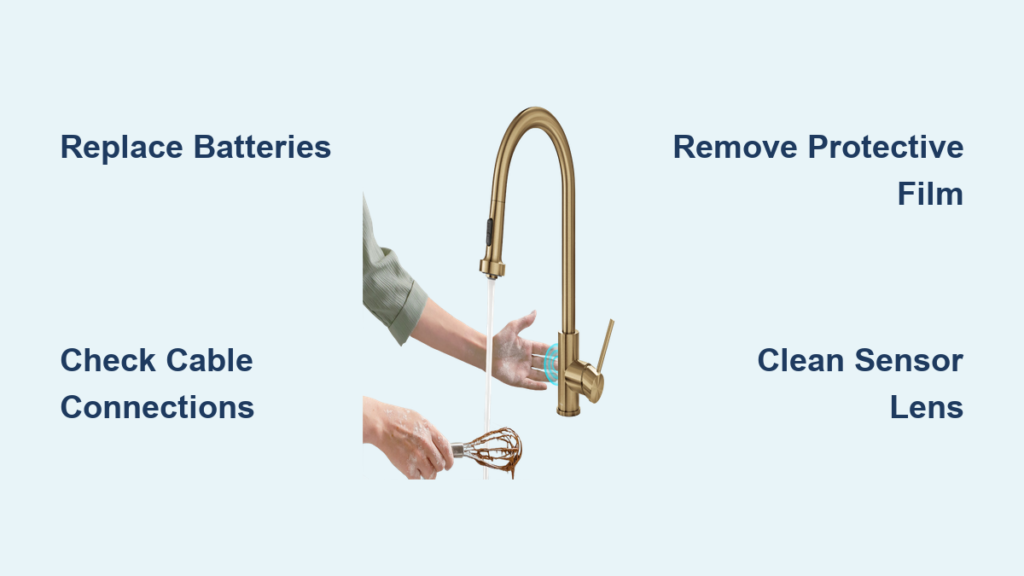
Your hands are covered in raw chicken juice, and you wave your hand under the kitchen faucet expecting the water to flow automatically—nothing happens. Or perhaps you’re trying to fill a pot and the sensor cycles on and off randomly, leaving you frustrated and still thirsty. Sensor-equipped kitchen faucets promise convenience, but when they stop working properly, everyday kitchen tasks become annoying challenges. The good news is that most sensor failures stem from a handful of common causes that you can diagnose and fix yourself without calling a plumber.
When your kitchen faucet sensor not working issue arises, the problem typically traces back to power supply interruptions, loose cable connections, installation oversights, or software glitches requiring a reset. Motion-activated and hands-free faucet systems rely on electronic components working in concert, and even minor disruptions in any of these areas can cause complete or partial sensor failure. This guide walks you through systematic troubleshooting procedures to identify the root cause and restore your faucet’s hands-free functionality.
Before you consider expensive replacement parts or professional service calls, work through these diagnostic steps. Most sensor problems resolve with simple interventions—securing a connection, replacing batteries, cleaning the sensor lens, or performing a factory reset. Let’s get your kitchen faucet working properly again.
Why Your Motion-Sensing Faucet Suddenly Stopped Responding
Your hands hover over the sink, but the faucet remains stubbornly dry despite your motions. This common kitchen faucet sensor not working scenario usually indicates one of four critical system failures. Sensor technology in modern faucets depends on consistent power delivery, secure data connections, unobstructed sensor fields, and properly functioning software—all working together seamlessly. When any component fails, your hands-free convenience disappears.
Electronics in motion-sensing faucets are surprisingly sensitive to power fluctuations. The infrared sensors that detect hand movement require stable voltage to emit their detection field and process responses. A single loose battery connection or slightly corroded contact point can interrupt this delicate balance. Similarly, the data cable linking your sensor to the control box needs perfect continuity—any gap in this connection means your hand motions never reach the faucet’s “brain” for processing.
Installation oversights create another frequent headache. Many homeowners don’t realize manufacturers ship faucets with protective films still covering the sensor lens. These nearly invisible barriers block the infrared detection field completely, making your high-tech faucet behave like a basic manual model. Even professional installations sometimes miss these subtle shipping protections.
Finally, electronic systems occasionally need a “reboot” just like your smartphone. Power interruptions, accumulated sensor errors, or minor firmware glitches can cause your kitchen faucet sensor not working condition despite all physical components appearing perfect. Recognizing these four primary failure categories directs your troubleshooting efforts efficiently.
How to Fix Dead Batteries in Your Sensor Faucet
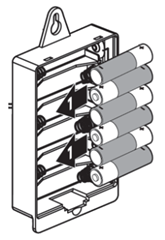
When your kitchen faucet sensor not working issue appears suddenly, dead batteries represent the most likely culprit—especially if your faucet previously worked perfectly. Battery-powered systems fail silently, with no warning before complete shutdown.
Open your battery compartment carefully, noting the exact battery orientation before removal. Never force batteries out—they should slide smoothly from their slots. Inspect the compartment for white crystalline corrosion (a sign of battery leakage) or dark residue. Clean contacts with a dry microfiber cloth; never use liquids near electronic components.
Insert fresh Alkaline batteries (CR123A or similar as specified in your manual), pressing each firmly into place. Lithium batteries cause compatibility issues with most sensor faucets despite their longer shelf life. Verify each battery sits completely flush with no rocking or movement—this tiny gap often causes intermittent failures. Close the compartment securely and test immediately.
If your faucet has LED indicators, a solid green light confirms proper power delivery. No light after fresh batteries means either faulty batteries (try another set) or a more serious electrical issue requiring professional attention.
Secure Data and Power Cables Under Your Sink
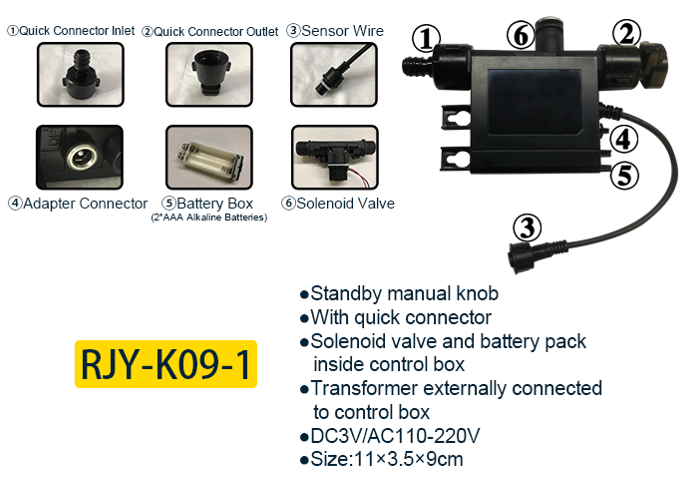
Loose cable connections cause erratic sensor behavior that’s often mistaken for complete failure. The data cable (connecting sensor to control box) and power cable (from control box to batteries/adapter) both require military-grade security for reliable operation.
Locate your control box under the sink—it’s typically a black or gray rectangular module near the water supply lines. Gently unplug the data cable by pressing any release tab and pulling straight out (no twisting). Examine connector pins for corrosion or bent contacts. Never force connections—they should slide in and out smoothly with firm pressure.
Reinsert both cables until you hear an audible click confirming full engagement. Perform the “tug test”—gently pull on each cable to verify it won’t detach with normal sink cabinet vibrations. Check cable routing for sharp bends or pinch points where pipes or storage items might compress wiring over time.
For AC-powered systems, verify the wall adapter clicks firmly into both the control box and electrical outlet. Test the outlet with another device to rule out circuit problems. Never use extension cords with faucet power adapters—they cause voltage drops that mimic sensor failure.
Remove Hidden Protective Films From New Faucets
New faucet owners frequently waste hours troubleshooting when the solution is staring them in the face: invisible protective films still covering the sensor lens. Manufacturers apply these nearly transparent barriers to prevent scratches during shipping, but they completely block infrared detection.
Examine your faucet’s sensor area (usually a small dark window near the spout base) under bright light at a 45-degree angle. Look for subtle edges where protective film might be lifting. Never use tools to peel films—your fingernail gently worked under the film’s edge is sufficient.
Check both front and rear sensor zones if you have dual-motion technology. Some models have separate protective covers for different detection areas. Remove all packaging materials from the control box compartment too—small plastic tabs sometimes remain lodged between battery contacts.
After film removal, wave your hand slowly through each detection zone to verify proper response. If the sensor works immediately, you’ve solved your kitchen faucet sensor not working problem with zero cost or effort.
Perform a Factory Reset on MotionSense Faucets
When basic fixes fail, your sensor system likely needs a complete software reset. Unlike manual faucets, electronic models store calibration data that can become corrupted after power interruptions.
For Moen MotionSense faucets manufactured after 2018 (with black and gray control boxes), follow this precise sequence: First, turn off water supply valves under the sink. Next, disconnect power by removing batteries or unplugging the adapter. Wait exactly 30 seconds—this clears residual capacitor charge. Reconnect power while simultaneously pressing and holding the control box’s reset button (usually a small pinhole) for 15 seconds.
You’ll know the reset succeeded when the faucet emits three distinct beeps or displays a specific LED sequence (check your model’s manual). Never skip the 30-second wait—this critical step ensures complete memory clearance.
After resetting, reprogram any custom settings like activation sensitivity or water temperature presets. Test basic functionality before reconfiguring advanced features to confirm the reset resolved your kitchen faucet sensor not working issue.
Clean Mineral Deposits From Sensor Lenses
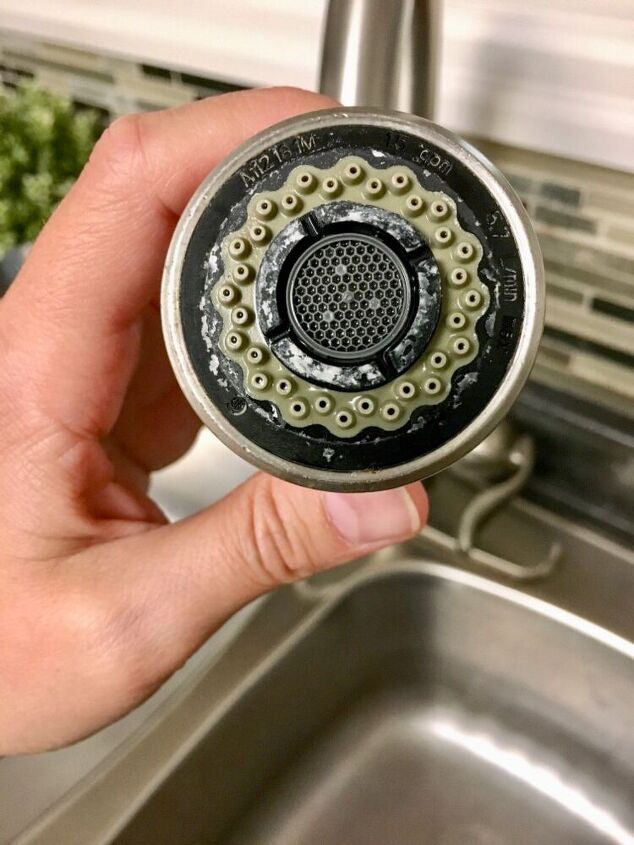
Hard water minerals gradually coat sensor lenses, creating a “foggy” barrier that blocks infrared signals. If your faucet worked perfectly for months but now requires exaggerated hand motions, mineral buildup is likely the culprit.
Create a cleaning solution of equal parts white vinegar and water in a small container. Never spray liquids directly onto electronic components—dip a microfiber cloth corner into the solution, then wring thoroughly until barely damp.
Gently wipe the sensor lens in small circular motions, applying minimal pressure. Allow the vinegar solution to sit on stubborn deposits for 15 seconds before wiping. Rinse with a water-dampened cloth section, then dry completely with a dry cloth corner.
For severe buildup, repeat the process once more. Never use abrasive pads—even “soft scrub” cleaners can micro-scratch sensor lenses, permanently reducing sensitivity. Test functionality immediately after drying—residual moisture causes temporary detection issues.
Identify Warning Signs of Impending Sensor Failure
Recognizing early symptoms prevents sudden kitchen faucet sensor not working emergencies. Subtle performance changes often precede complete failure by weeks or months.
Watch for these red flags: Water flow taking noticeably longer to activate, requiring you to hold your hand in position longer than before. Inconsistent activation where the faucet responds perfectly one moment but ignores you the next. False triggers activating when no hands are present, often caused by reflective surfaces or heat sources interfering with the sensor field.
If your faucet starts cycling on and off rapidly during normal use, this indicates serious sensor contamination or electrical issues. Address these warning signs immediately with the cleaning and connection checks outlined earlier—waiting often leads to complete failure at the worst possible moment.
Prevent Future Sensor Failures With Monthly Maintenance
Avoid recurring kitchen faucet sensor not working problems with simple monthly habits. Set a recurring calendar reminder for the first of each month to perform these quick checks.
First, clean the sensor lens using the vinegar method described earlier—this takes less than 60 seconds but prevents gradual performance decline. Next, quickly verify cable connections under the sink haven’t loosened from cabinet vibrations. Finally, if battery-powered, check for any corrosion signs around contacts.
For battery-operated systems, replace batteries annually regardless of apparent function—waiting for complete failure leaves you without hands-free operation. Keep spare Alkaline batteries under your sink for immediate replacement when needed.
These small investments of time prevent the frustration of sudden sensor failure during critical kitchen tasks, maintaining your faucet’s convenience for years.
When to Call Moen Technical Support for Sensor Issues
If you’ve completed all troubleshooting steps without success, it’s time for professional assistance. Don’t continue disassembling components—this may void your warranty.
United States customers should call 1-800-BUY-MOEN with your faucet’s model number (typically stamped on the underside) ready. Have recent troubleshooting steps documented to avoid repeating unnecessary diagnostics. Canadian users contact Moen Canada through their official website for region-specific support.
Smart faucet owners (U By Moen models) should access in-app support first—these systems often require firmware updates rather than hardware repairs. The mobile application provides diagnostic tools unavailable through standard support channels.
Before calling, note specific symptoms: Does the faucet show any LED indicators? How does it respond (or not respond) to hand motions? This information helps support staff diagnose your kitchen faucet sensor not working issue more efficiently.
Five-Minute Sensor Fix Checklist for Immediate Results
When your hands are dirty and water won’t flow, follow this rapid-response checklist:
- Remove all protective films from sensor areas (check under bright light)
- Verify both cables are fully clicked into control box connections
- Replace batteries with fresh Alkaline cells (never lithium)
- Clean sensor lens with vinegar solution if mineral buildup suspected
- Perform factory reset if previous steps fail
Work through these steps in order—they resolve 90% of kitchen faucet sensor not working complaints within minutes. Keep this checklist taped inside your sink cabinet for quick reference during future emergencies. Most sensor issues stem from simple oversights rather than component failures, so systematic troubleshooting almost always restores functionality without professional help.


