
Your kitchen mat accumulates more than just dirt—it traps food particles, grease, bacteria, and moisture from daily cooking activities. A neglected mat becomes slippery, smelly, and unsanitary, compromising one of your home’s most important hygiene zones. Knowing exactly how to wash a kitchen mat properly prevents this common household problem while extending your mat’s lifespan. This guide delivers specific, actionable techniques for every mat type, so you can eliminate stubborn stains, prevent odors, and maintain a truly clean kitchen floor—without damaging your investment through improper cleaning methods.
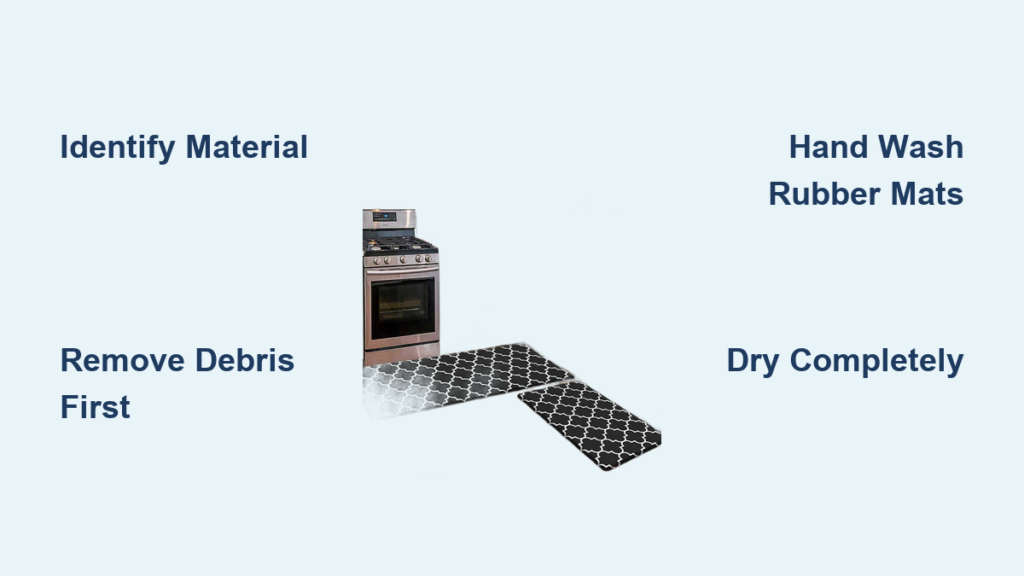
Identify Your Mat Material Before Washing
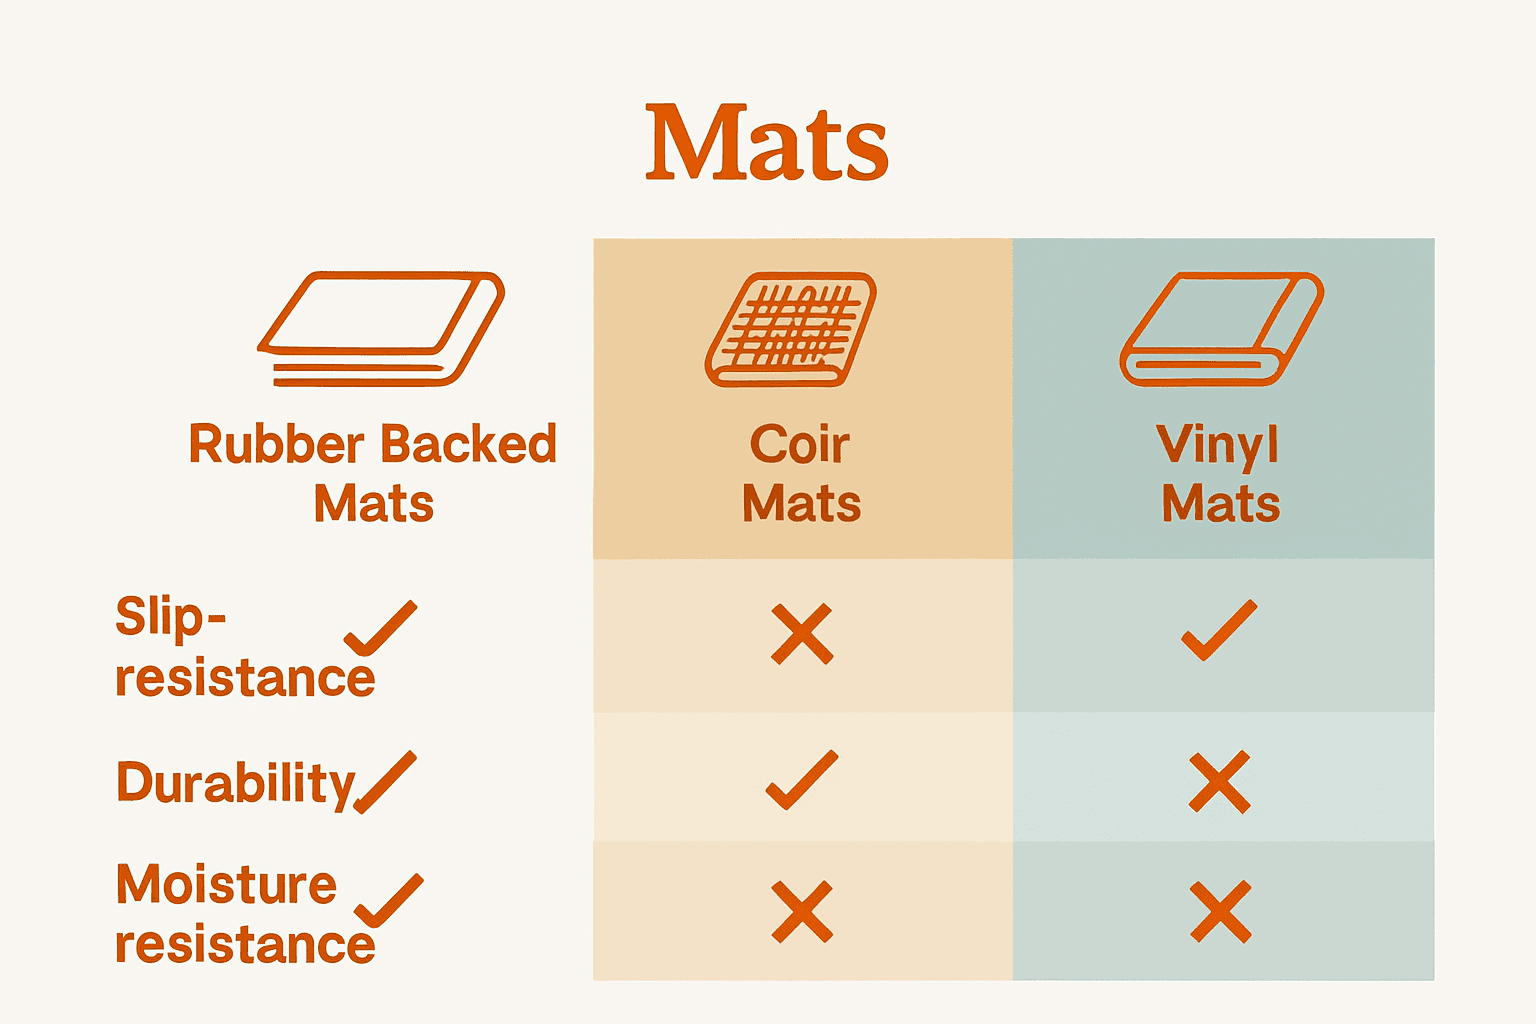
Before water touches your kitchen mat, determine what it’s made from—this decision prevents costly mistakes that ruin your mat permanently. Check for manufacturer tags sewn into the corners or printed on the backing that specify material composition. Rubber-backed mats feature a non-slip bottom layer that warps when machine washed, while memory foam varieties lose cushioning when exposed to harsh detergents. Fabric-only mats withstand machine washing, but those with mixed materials require special handling.
How to Recognize Common Kitchen Mat Types
Kitchen mats fall into three distinct categories requiring different cleaning approaches. Fabric mats with fabric backing (like cotton or microfiber rugs) feel soft throughout and generally tolerate machine washing. Rubber or gel-backed mats have a smooth, flexible underside that grips floors but melts in hot water cycles. Combination mats feature a fabric top layer stitched to a rubber or gel base—these need partial disassembly or hand washing only. When in doubt, perform a water test on an inconspicuous corner: dab with warm water and check for color bleeding or texture changes before proceeding.
Why Material Matters for Cleaning Success
Washing a rubber-backed mat in your machine creates irreversible damage within minutes. The agitation separates the backing from the top layer, leaving you with a useless, wavy mess that won’t lie flat. Memory foam mats compress permanently when spun at high speeds, eliminating their comfort benefits. Using bleach on colored fabric mats causes fading that makes them look older than they are. Understanding your specific mat type prevents these common disasters while ensuring effective cleaning that actually removes kitchen grime instead of spreading it around.
Remove Surface Debris Before Deep Cleaning
Shaking loose crumbs and dirt from your kitchen mat takes less than 60 seconds but dramatically improves your cleaning results. Carry your mat outside and vigorously shake it 8-10 times to dislodge food particles trapped in fibers. For mats with textured surfaces or drainage holes, this preliminary step prevents clogged washing machines and ensures cleaning solutions reach deep into problem areas.
Vacuuming Techniques for Stubborn Particles
Pet hair and fine flour dust require more than shaking—use your vacuum cleaner’s brush attachment on low suction to lift embedded debris without damaging mat fibers. Start from the center and work outward in overlapping strokes, paying special attention to seams and edges where crumbs accumulate. For rubber or gel mats, hold the vacuum nozzle 2 inches above the surface to avoid suction marks while removing grease particles that attract more dirt over time.
Machine Wash Fabric Mats Safely
Fabric-only kitchen mats withstand machine washing when you follow three critical steps. Set your washer to cold water on the gentle cycle with minimal agitation—this prevents fraying and maintains texture. Add just one tablespoon of mild detergent (never bleach or fabric softener) that won’t leave residue attracting future dirt. Place the mat alone in the drum or with similar-sized items to ensure balanced spinning that prevents excessive wrinkling.
Timing Your Machine Wash Perfectly
Overloading causes poor cleaning while underloading creates imbalance—position your mat evenly around the drum’s center. Run a 20-minute cycle maximum for standard thickness mats; add 5 minutes for extra-thick varieties. Immediately remove your mat when finished to prevent musty odors from developing in the damp environment. Never skip the spin cycle completely, as excess water prolongs drying time and increases mildew risk—aim for medium spin speed that extracts moisture without damaging fibers.
Hand Wash Non-Fabric Mats Without Damage
Rubber, gel, and memory foam mats require hand washing in a tub or large sink to maintain their structure. Fill with 3 inches of warm water (never hot) and add 2 drops of dish soap—enough to cut grease without degrading materials. Submerge your mat completely and scrub both sides with a soft sponge using circular motions that lift dirt without scratching surfaces.
Special Care for Contoured Gel Mats
Mats with raised patterns need extra attention in their grooves where food particles hide. Use an old toothbrush with soft bristles to gently clean textured areas without forcing dirt deeper. For persistent odors, add ¼ cup baking soda to your wash water and let the mat soak for 15 minutes before scrubbing. Rinse thoroughly with clean water until no suds remain—leftover soap creates slippery surfaces dangerous in kitchen environments.
Eliminate Kitchen-Specific Stains Immediately
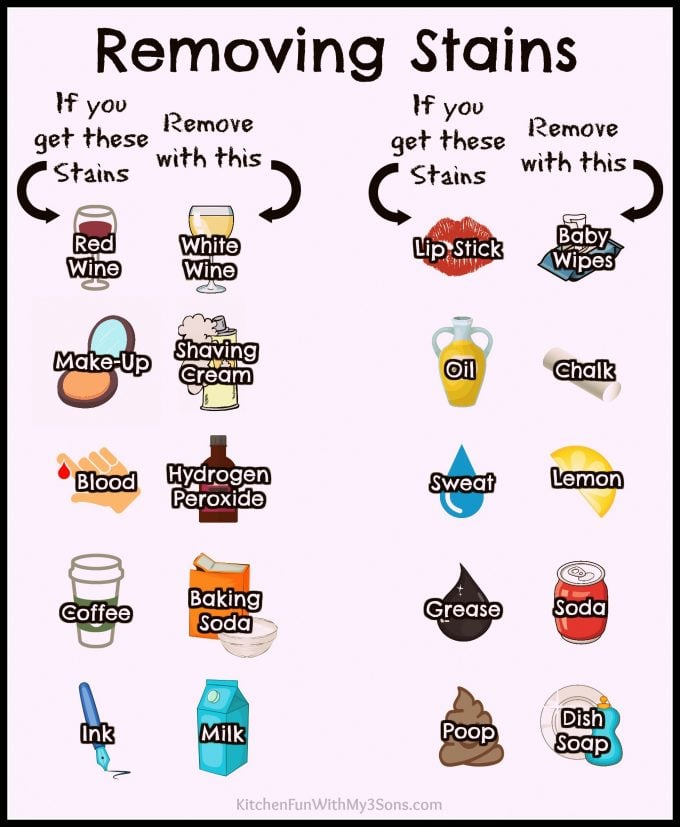
Cooking oil and grease stains require immediate treatment before they set permanently. Blot excess oil with paper towels, then apply undiluted dish soap directly to the stain and let it penetrate for 5 minutes. Gently rub the area with a microfiber cloth using light pressure—rubbing hard pushes oil deeper into fibers. Rinse with warm water and repeat if necessary before the stain becomes visible.
Neutralizing Food and Drink Spills
Coffee and wine stains respond well to a paste made from baking soda and water. Apply the thick mixture to the affected area and let it sit for 30 minutes before rinsing. For tomato-based stains, dab with hydrogen peroxide (3%) using a clean cloth, then rinse thoroughly. Never use steam cleaners on rubber-backed mats—high heat causes backing separation that ruins your mat within minutes.
Dry Mats Completely to Prevent Mold

Air drying is non-negotiable for rubber and gel mats—tumble drying destroys their structure within minutes. Lay flat on a clean towel in a well-ventilated area away from direct sunlight that fades colors. Flip the mat every 2 hours until completely dry (typically 4-6 hours). For faster drying, stand contoured mats on edge against a wall to maximize air exposure on all sides.
Accelerating Fabric Mat Drying
Fabric mats benefit from a low-heat dryer cycle with tennis balls that fluff fibers while absorbing moisture. Remove while slightly damp and finish air drying to prevent shrinkage. Never hang heavy wet mats on clotheslines—the weight distorts their shape permanently. Check for residual moisture in the center by pressing your palm firmly against the mat; if your hand comes away damp, continue drying to prevent musty odors.
Establish a Maintenance Schedule That Works
Weekly quick cleans prevent deep buildup that requires intensive effort later. Vacuum or shake your mat every Sunday while making your bed—this habit takes under 2 minutes but maintains appearance between deep cleans. For households with children or pets, add a Wednesday spot check for visible spills requiring immediate attention.
Monthly Deep Cleaning Made Simple
Mark your calendar for the first Saturday of each month to deep clean your kitchen mat. Fabric mats go in the washer while rubber varieties get hand washed during your regular laundry routine. This consistent schedule prevents odor development and extends your mat’s life by 2-3 years compared to irregular cleaning. Keep a small container of baking soda under your sink for quick odor treatments between scheduled washes.
Recognize When Replacement Is Necessary
Persistent odors after thorough cleaning signal deep bacterial growth that washing can’t eliminate. Cracks in rubber backing create slip hazards even when the surface looks clean. Mats that no longer lie flat cause tripping risks and indicate structural failure from improper washing methods. When your mat shows these signs, replacement becomes a safety issue rather than just an aesthetic upgrade.
Choosing Your Next Mat Wisely
Select mats with removable, machine-washable covers for effortless maintenance. Darker patterns hide everyday dirt better than solid colors in high-traffic kitchen areas. Opt for seamless construction that prevents moisture trapping between layers—a common cause of premature mat failure. Investing $5-10 more upfront saves frequent replacements and ensures years of reliable service with proper cleaning.
Your kitchen mat works hard protecting your floors and providing comfort during meal preparation—return the favor with proper cleaning that matches its specific needs. By identifying your mat type first, removing surface debris thoroughly, and using material-appropriate washing methods, you’ll maintain a hygienic kitchen environment while extending your mat’s life significantly. Implement the monthly deep cleaning schedule outlined here and you’ll never face the frustration of a smelly, damaged mat again. Remember: proper drying completes the cleaning process—never reinstall a damp mat, as this invites mold growth that compromises your entire kitchen’s cleanliness. With these techniques mastered, your kitchen mat will stay fresh, safe, and functional for years to come.


