
Imagine pulling fresh, velvety vanilla ice cream from your KitchenAid stand mixer on a hot summer afternoon—the kind with rich flavor and perfect texture that beats any store-bought version. Making homemade ice cream with your KitchenAid ice cream maker attachment is simpler than you think once you master the temperature control and timing. Whether you own the classic freezer bowl model or the compressor-based unit, this guide shows you exactly how to transform liquid mixtures into restaurant-quality frozen desserts in under 30 minutes. Forget complicated techniques or expensive equipment—your KitchenAid stand mixer is already your secret weapon for creating custom flavors with premium ingredients.
The difference between icy disappointment and creamy perfection comes down to three critical factors: bowl temperature, ingredient preparation, and churning timing. Most home ice cream failures happen because the freezer bowl wasn’t cold enough, ingredients were too warm, or mix-ins were added at the wrong stage. In the next few minutes, you’ll learn the exact protocols professional ice cream makers use with KitchenAid attachments—including how to identify your specific model, prepare components properly, and troubleshoot common issues before they ruin your batch. Get ready to impress your family with homemade mint chocolate chip, salted caramel, or strawberry sorbet that rivals your favorite ice cream shop.
Identify Your KitchenAid Ice Cream Maker Model Before Starting

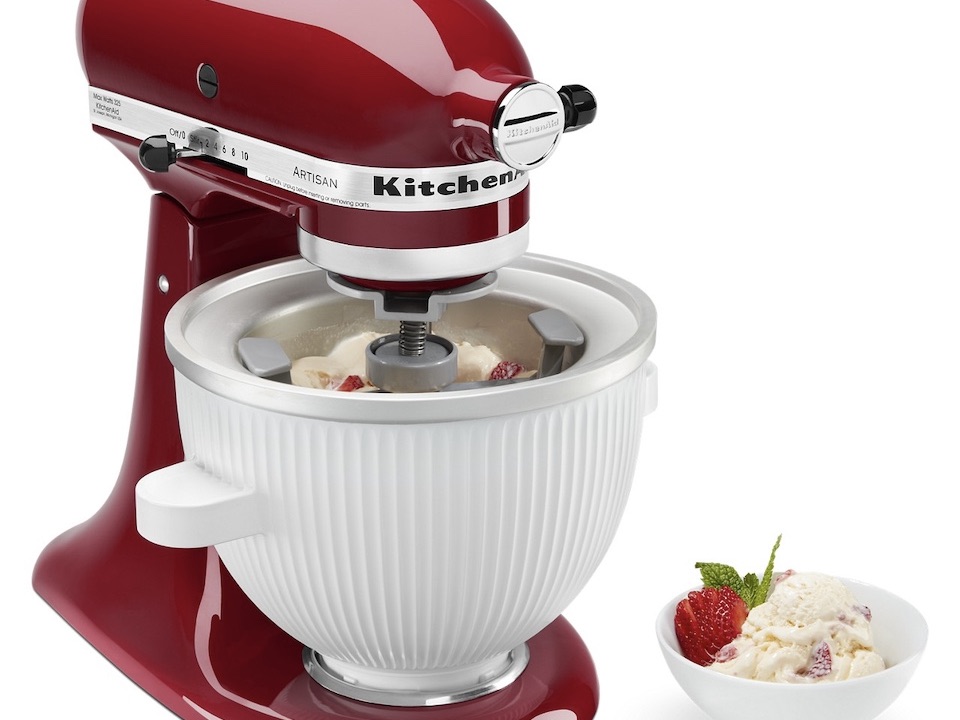
Knowing which KitchenAid ice cream attachment you own determines your entire process—don’t skip this step. The freezer bowl model (most common) requires 11-22 hours of pre-freezing in your home freezer and produces 1.5-2 quarts per batch. This stainless steel bowl contains special coolant liquid in the double walls that must be completely solid before churning. When properly frozen, you won’t hear liquid sloshing when you shake it. If you own the KitchenAid Pro Line compressor model, you have a standalone unit with built-in freezing technology that works without pre-freezing time between batches.
Check your model number underneath the bowl—freezer bowl models typically begin with KICA, while compressor units start with KICM. The freezer bowl attaches directly to your stand mixer’s hub, while the compressor unit operates independently. Critical warning: Never attempt to use the freezer bowl attachment without proper pre-freezing—it won’t thicken properly and may damage your mixer motor from overworking. If you’re unsure which model you have, look for the feed chute on top; both models have this feature, but only the freezer bowl requires significant freezer time.
Freeze Your Ice Cream Bowl to Exactly -18°C for Best Results
The single most common mistake home ice cream makers make is using an under-frozen bowl. Your freezer bowl must reach -18°C (0°F) before churning—most home freezers run warmer than this, especially near the door. Place the empty bowl in the back bottom shelf of your freezer (the coldest spot) with the lid off for 24 hours before first use. Subsequent batches require 15-22 hours depending on your freezer’s actual temperature—use a freezer thermometer to verify.
Test readiness by gently shaking the bowl—no liquid movement should be detectable. Frost crystals on the exterior confirm proper freezing. If your freezer runs above 0°F, extend freezing time by 4-8 hours. Pro tip: Keep a spare bowl permanently frozen so you can make consecutive batches without waiting. Never store the bowl in the freezer door where temperature fluctuates with each opening—that location adds 3-6 hours to freezing time.
Set Up Your Stand Mixer with Correct Attachment Sequence
Attach your ice cream maker to your KitchenAid stand mixer in this exact order to prevent damage: First, lock the attachment hub into the mixer’s front slot. Next, place the frozen bowl onto the hub, ensuring it sits flush with the mixer base. Finally, insert the dasher (paddle) through the top feed chute until it clicks into the drive mechanism. Never force the dasher—if it doesn’t seat smoothly, realign the bowl.
Before adding ingredients, test the rotation at speed 1 for 10 seconds. The dasher should rotate freely without wobbling or scraping noises. If you hear grinding, disassemble and reattach everything. Clear your workspace around the mixer with a silicone mat to catch drips—you only have 90 seconds from freezer to churning before the bowl starts warming. Have all chilled ingredients measured and ready in squeeze bottles for quick pouring through the feed chute.
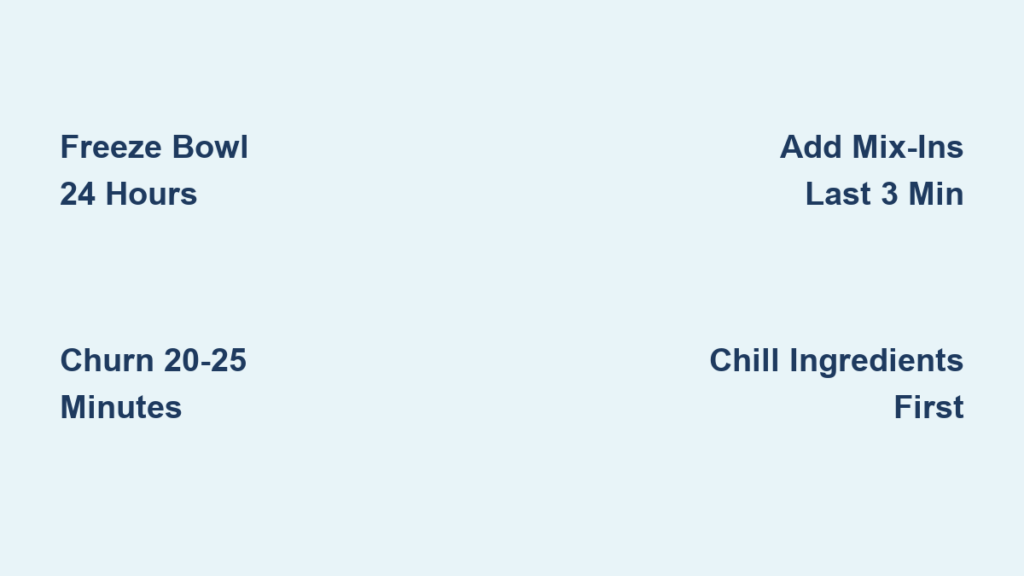
Churn Ice Cream in Exactly 20-25 Minutes for Perfect Texture
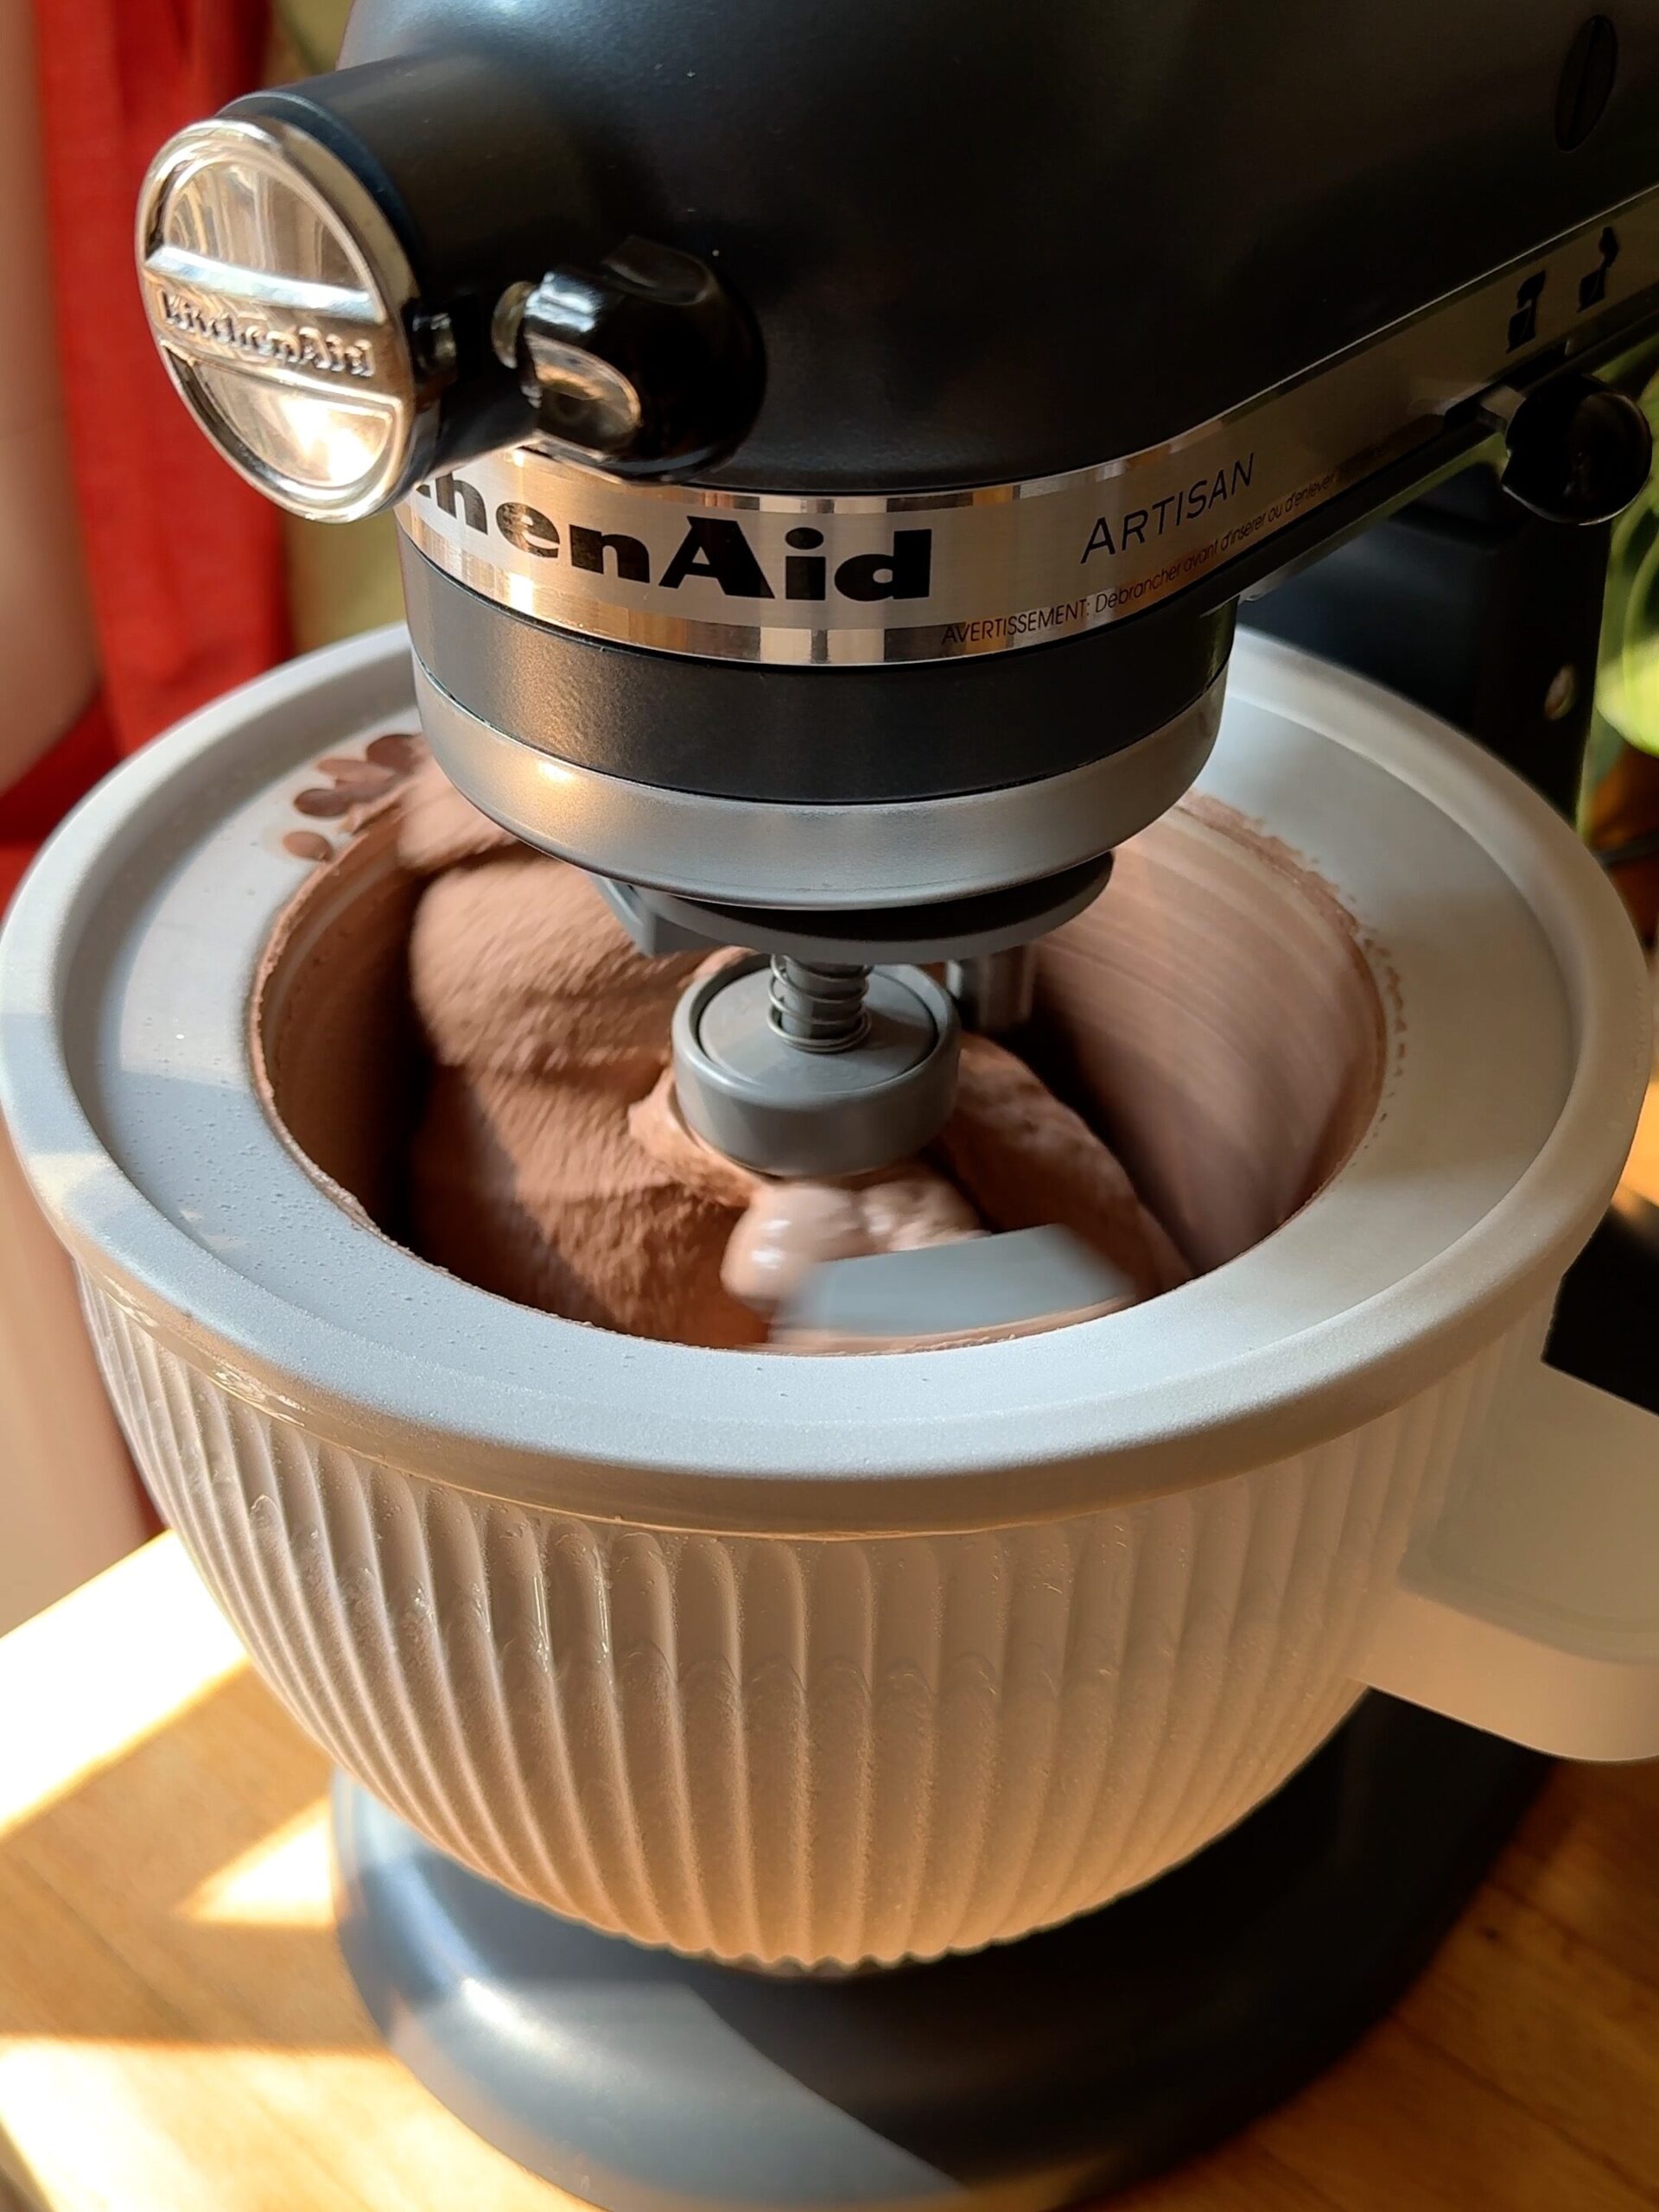
Start the mixer at speed 1 and immediately pour your chilled mixture (35-40°F) through the feed chute. Do not exceed 1.5 quarts—overfilling causes overflow and poor churning. Watch for these critical stages during the 20-25 minute process:
- Minutes 0-8: Thin liquid mixture coats the bowl walls
- Minutes 9-15: Mixture thickens to milkshake consistency
- Minutes 16-22: Dasher slows noticeably as mixture reaches soft-serve texture
- Minutes 23-25: Mixture mounds slightly when dropped from spoon
Stop churning when the ice cream holds its shape for 3-5 seconds off the dasher. Over-churning creates buttery separation—if you see yellow flecks, stop immediately. Transfer to an airtight container with plastic wrap pressed directly on the surface, then freeze 2-4 hours for scoopable firmness.
Add Chocolate Chips and Mix-Ins During Final 3 Minutes Only
Timing mix-ins correctly prevents sinking, clumping, or uneven distribution. Add all solid ingredients in the last 3 minutes of churning when the mixture has thickened to soft-serve consistency. Reduce speed to 1 before adding anything through the feed chute. Follow these specific guidelines:
- Chocolate chips/nuts: Add frozen for best distribution
- Cookie dough/fruit chunks: Hand-add while mixer runs slowly
- Sauces/swirls: Drizzle in final minute for ribbon effect
- Maximum volume: No more than 1 cup per quart of base
Adding mix-ins too early grinds them into the base, while late additions create pockets of plain ice cream. For chunky add-ins like brownie pieces, pulse the mixer on/off for 30 seconds after adding to prevent breakage.
Fix Thin or Icy Ice Cream in Under 5 Minutes
When your mixture stays soupy after 25 minutes, immediately check these three culprits: Your freezer bowl wasn’t cold enough (most common), ingredients were too warm, or your kitchen temperature exceeds 80°F. For thin mixture, stop the mixer, let it sit 5 minutes at room temperature, then restart—this allows ice crystals to form before continuing.
If ice cream develops large crystals, your mixture likely warmed during churning. Prevent icy texture by: chilling all ingredients to 35°F, using a recipe with 30-40% fat content, and adding 1 tablespoon vodka per quart to lower freezing point. For custard bases, ensure eggs were properly tempered to 170-175°F before churning—undercooked custard causes graininess.
Clean and Store Components to Extend Lifespan 3+ Years
Never put your freezer bowl in the dishwasher—the heat damages the sealed coolant system. Immediately after churning, remove the dasher and wash both components in warm soapy water with a soft sponge. Rinse thoroughly and dry completely with a microfiber cloth—residual moisture causes ice buildup that affects future batches.
Store the bowl with the lid off in the back of your freezer to maintain optimal temperature. Every 10 uses, deep-clean with a vinegar solution (1 cup vinegar to 2 cups water) to remove mineral deposits. Inspect the dasher monthly for warping—replace if it wobbles during rotation. With proper care, your KitchenAid ice cream maker will reliably produce perfect batches for 3-5 years before the coolant degrades.
Three Starter Recipes That Never Fail in KitchenAid
Classic Vanilla (Philadelphia Style): Combine 2 cups heavy cream, 1 cup whole milk, ¾ cup sugar, 1 tbsp vanilla, and ¼ tsp salt. Chill 2 hours, then churn 22 minutes. Add ½ cup frozen chocolate chips at minute 20.
Rich Chocolate: Whisk ½ cup cocoa powder with ¾ cup sugar. Heat 1 cup cream to simmer, pour over cocoa, then add 4 oz melted bittersweet chocolate. Mix with remaining cream and 1 cup milk. Chill 3 hours before churning.
Strawberry Sorbet: Puree 2 cups hulled strawberries with ½ cup sugar and 1 tbsp lemon juice. Strain, mix with 1 cup water, and chill 4 hours. Critical: Add 2 tbsp vodka before churning to prevent rock-hard texture.
Homemade ice cream maintains peak quality for 1-2 weeks when stored airtight with plastic wrap pressed on the surface. For best texture, let it sit at room temperature 5-10 minutes before serving. With these techniques mastered, you’ll create custom flavors that impress everyone—try adding espresso to vanilla or swirls of salted caramel to chocolate for restaurant-worthy results.


