
Your KitchenAid food processor opens up a world of efficient food preparation, handling chopping, slicing, shredding, kneading, and pureeing with remarkable ease. However, achieving consistent, professional-quality results depends entirely on proper assembly and correct operating techniques. Many owners overlook critical setup steps that directly impact performance and safety, leading to uneven cuts, motor strain, or potential injury. This comprehensive guide walks you through every aspect of KitchenAid food processor operation—from initial assembly to daily use and long-term maintenance—so you can maximize your appliance’s capabilities with confidence.
Before diving into specific techniques, understand that your food processor consists of several key components working in harmony: the motor base providing power, the processing bowl containing ingredients, the blade or disc assembly performing the cutting action, and the lid with feed tube enabling safe ingredient introduction. Each connection point must be properly aligned and secured before operation. Taking an extra minute during assembly prevents frustrating malfunctions and extends your appliance’s lifespan significantly.
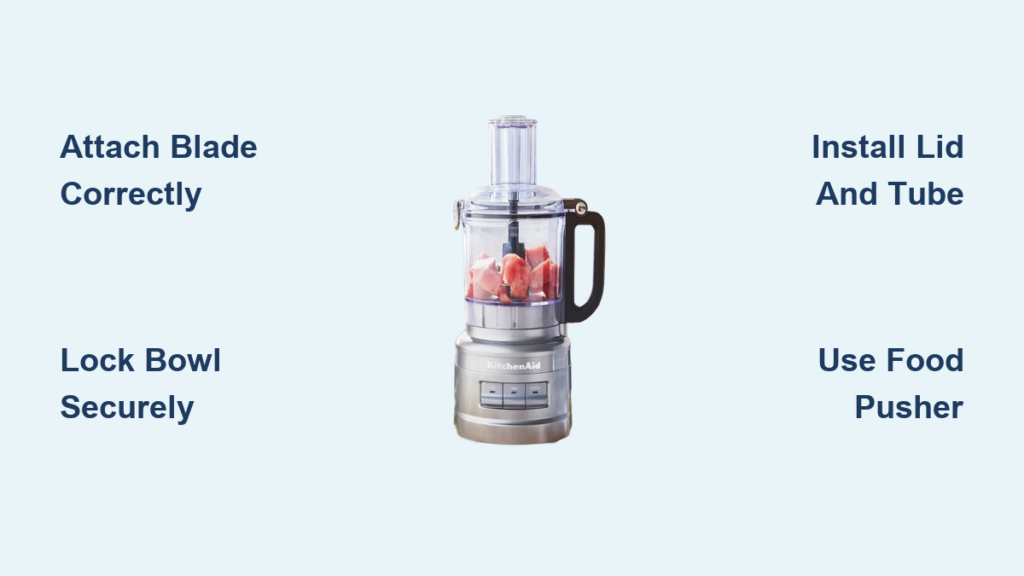
Attach Blade Assembly Correctly

The blade assembly serves as the heart of your food processor’s cutting mechanism, and proper installation determines whether you achieve uniform chops or dangerous wobbling during operation. Before handling the blade, always unplug your unit from the electrical outlet to prevent accidental startup—a critical safety step that takes only seconds but prevents severe injuries.
Position the metal blade directly onto the center post of your processing bowl, ensuring the flat side of the blade faces downward toward the bowl interior. This orientation allows the blade to make full contact with ingredients as it rotates. Confirm that the blade sits level on the post without any visible tilting or rocking when you gently press one side. A misaligned blade produces inconsistent results and places uneven stress on the motor.
Once properly positioned, thread the locking ring onto the center post in a clockwise direction—the same direction the blade rotates during operation. Continue turning until the ring is snug and the blade feels firmly secured when you attempt to move it. A properly tightened blade prevents dangerous movement during high-speed operation and ensures consistent cutting results every time you process ingredients.
Avoid These Blade Installation Mistakes
Overlooking blade orientation causes most uneven chopping issues. Many users accidentally install the blade upside down, which significantly reduces cutting efficiency. Always verify the flat side faces down toward the bowl interior, not up toward the lid.
Insufficient tightening is another common error. If the locking ring isn’t snug, the blade will wobble during operation, creating inconsistent cuts and potentially damaging the drive mechanism. Test your installation by attempting to rotate the blade slightly—properly secured, it should resist movement.
Forgetting to unplug before blade installation is a dangerous oversight. The safety interlocks only function when the unit is properly assembled; during setup, there’s no protection against accidental activation. Always disconnect power before handling any components.
Install Bowl On Base Securely

With the blade assembly in place, you’re ready to connect the bowl to the motor base. Hold the bowl with the blade assembly facing downward throughout this entire process; flipping the bowl after blade installation can dislodge or misalign the blade, requiring you to start over.
Locate the small tab on the exterior of your bowl—this tab serves as the key alignment mechanism ensuring proper electrical and mechanical connection with the base. Position this tab so it aligns precisely with the corresponding slot on your base unit. This tab-slot system isn’t merely a design convenience; it engages critical safety interlocks that prevent operation when the bowl isn’t properly seated.
Rotate the bowl clockwise in a smooth, steady motion until you hear or feel a distinct click. This click indicates the bowl has locked fully into place and the safety interlock system is engaged. After hearing the click, gently attempt to rotate the bowl in either direction to verify it cannot be removed or shifted. A securely locked bowl protects you from accidents and ensures the motor’s power transfers efficiently to the blade assembly.
Position Lid and Feed Tube Properly
The lid contains essential safety mechanisms that prevent operation when improperly secured, making correct installation your next critical step. Position the lid on top of the bowl, centering it carefully so the lid’s center opening aligns directly with the center of the bowl. Any misalignment here prevents proper food processing and may trigger safety interlocks that keep your processor from starting.
Insert the feed tube into the central opening of the lid, pushing it downward with steady pressure until it reaches its fully seated position. When properly installed, the feed tube sits flush with no visible gaps around its base and exhibits no wobble when you gently attempt to move it. The feed tube must be completely stable before you begin processing—any movement could cause ingredients to jam or create unsafe conditions.
Before proceeding further, verify that both the lid and feed tube are properly positioned with no edges raised or corners misaligned. The lid should completely cover the bowl opening with its edges resting evenly all around. Some KitchenAid models include visual or tactile indicators showing when the lid is fully engaged; familiarize yourself with your model’s specific indicators during initial setup.
Add Slicing or Shredding Discs for Specific Tasks
When your recipe calls for uniform slices or shreds rather than irregular chops, specialized discs replace or supplement the standard blade assembly. Begin by selecting the appropriate disc for your desired output—slicing discs create uniform thin pieces while shredding discs produce fine or coarse strands depending on which side you use.
Position the disc onto the blade shaft, orienting it so the grooves on the disc’s underside face toward the blade or cutting edge. This orientation ensures the disc engages properly with the drive mechanism and processes ingredients efficiently. Some KitchenAid discs feature directional indicators showing exactly which side should face up or down; always check for these indicators and consult your model’s documentation for specific requirements.
Attach the locking ring to the shaft and turn clockwise until the disc feels snug and cannot rotate independently when you gently test it. Unlike blade installation, overtightening isn’t necessary here—a snug contact that prevents wobble during operation is all you need. The disc should spin true and stable once the locking ring is properly secured.
Perform Final Safety Verification Before Operation
Before powering on your food processor, perform a comprehensive verification of all components to ensure safe and effective operation. This final check takes less than a minute but prevents most common issues users experience during food processing.
Confirm all components are tightly secured with no loose parts. Check the locking ring by attempting to turn it slightly—if it moves easily, continue tightening until snug. Verify the lid is properly locked onto the bowl by attempting to lift it slightly; most KitchenAid models feature a visual or tactile indicator showing when lid engagement is complete. Test the blade or disc by rotating it manually (with the unit unplugged) to confirm it spins freely without any scraping or resistance that might indicate improper installation.
Ensure the feed tube is fully seated and ready for ingredient introduction. Gather your food pusher and have it within reach before turning on the processor. These final moments of preparation set the stage for smooth, safe operation throughout your food preparation task.
Operate Your Food Processor for Perfect Results Every Time
Proper technique separates mediocre results from professional-quality food preparation. Before your first use, remove all packaging materials and protective coverings from every component, then wash all removable parts in warm, soapy water according to the manufacturer’s cleaning instructions. Dry everything thoroughly before reassembly, and take time to review your model’s specific documentation for any unique features or requirements that differ from general guidelines.
During operation, process ingredients in batches appropriate to your model’s capacity rather than attempting to process large quantities at once. The motor works most efficiently with moderate loads, and overloading causes uneven processing while placing harmful stress on the motor assembly. When processing multiple ingredients, work in stages rather than adding everything simultaneously.
Use the small feed tube for continuous processing of single ingredients like carrots or celery, applying firm, even pressure with the food pusher to maintain consistent contact with the feed tube wall. The wide feed tube accommodates larger items or multiple ingredients fed together. Always use the food pusher—never your fingers—to guide ingredients through the feed tube, and position ingredients firmly against the feed tube wall before applying pressure to achieve uniform cuts rather than irregular chunks.
Clean and Store Components for Longevity
Regular cleaning after each use prevents food residue from hardening and becoming difficult to remove while maintaining hygienic food preparation conditions. The bowl, lid, blades, discs, and feed tube are typically dishwasher-safe on the top rack, though hand washing the metal blade preserves its sharpness longer than repeated dishwasher cycles. Never immerse the motor base in water or place it in the dishwasher—wipe this component with a damp cloth only, ensuring you disconnect it from power first.
Handle blades with extreme caution since the cutting edges remain extremely sharp even after repeated use. Grip blades exclusively by the central post, avoiding any contact with the sharp edges themselves. Inspect blades and discs regularly for signs of damage, dullness, or corrosion, replacing compromised components immediately to maintain performance and safety standards. Store blades and discs in a protected location, preferably their original packaging or a dedicated container, to prevent accidental contact damage and preserve their sharpness.
Motor maintenance requires avoiding extremely hard foods that could stall or damage the motor assembly. This includes unsoftened butter, ice cubes (unless your specific model handles them), and very dense root vegetables processed in large quantities. If the motor stalls during operation, immediately unplug the appliance, reduce the food load, and allow the motor to cool before resuming. Professional servicing should only be performed by authorized KitchenAid repair personnel—never attempt internal repairs yourself.
Troubleshoot Common KitchenAid Food Processor Issues
Understanding typical issues and their solutions keeps your food processor running smoothly for years. If your processor fails to start, first verify the bowl is fully locked in place with an audible click and the lid is properly secured—the safety interlocks prevent operation until all components are correctly installed. Check that the power cord is firmly connected to both the outlet and the base, and test the outlet with another device to rule out electrical issues.
Uneven processing results typically stem from improper blade installation or overfilling. Remove the lid and verify the blade sits level on the center post without wobbling. If the blade appears properly installed, reduce your batch size and process in multiple cycles instead of attempting to process everything at once. For slicing or shredding discs, confirm the disc is oriented correctly with grooves facing the proper direction.
Strange noises during operation often indicate the blade or disc isn’t fully secured, or that a small piece of bone or pit was accidentally processed. Stop the processor immediately, unplug it, and inspect the blade assembly. Tighten the locking ring if necessary, and check for any foreign objects that shouldn’t have been in your food. Unusual vibrations usually resolve once the securing components are properly tightened and the processing bowl is fully seated on the base.


