
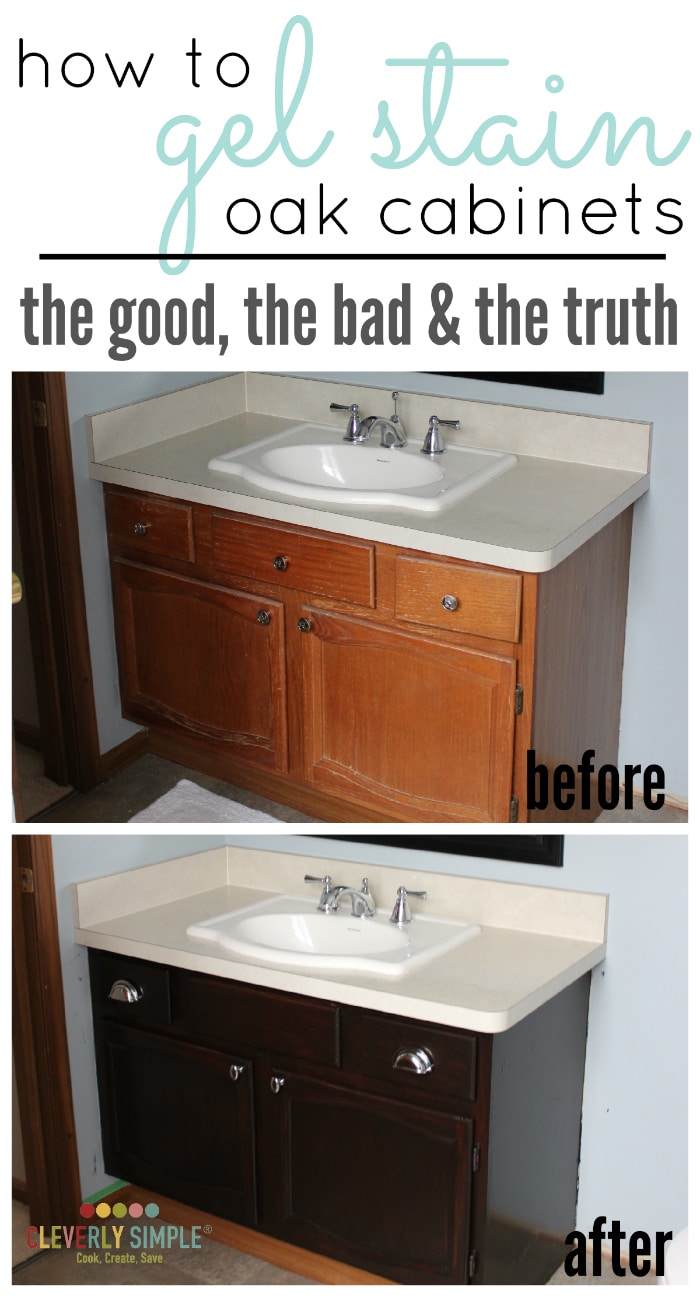
Tired of dated, yellowed, or worn kitchen cabinets but dreading the cost and disruption of a full replacement? Gel stain offers the perfect solution for homeowners seeking professional-looking results without professional prices. Unlike traditional liquid stains that soak into wood fibers and often create uneven, blotchy finishes—especially on problematic woods like oak—gel stain sits on top of the surface, delivering consistent color with remarkable ease. This thicker consistency eliminates common staining frustrations: no drips, no streaks, and minimal sanding required. Whether you’re working with oak’s prominent grain, maple’s tight pores, or previously painted surfaces, gel stain transforms tired cabinets into custom-looking focal points in just days. Best of all, you’ll achieve results that withstand kitchen wear and tear while saving thousands compared to cabinet replacement.
The magic of gel stain lies in its unique formulation. Its thick, pudding-like texture allows precise application even on vertical surfaces, giving you control traditional stains simply can’t match. Because it doesn’t penetrate deeply, you avoid the blotchiness that plagues liquid stains on porous woods—a common headache with oak cabinets. Plus, gel stains typically contain urethane binders that create a more durable base than traditional stains, meaning your newly transformed cabinets resist daily kitchen abuse better. Before you begin, understand that proper preparation separates amateur attempts from professional results. This guide walks you through every critical step—no generic advice, just actionable techniques that guarantee stunning cabinet transformation.
Gather Essential Materials and Supplies
Skipping proper preparation guarantees staining disappointment. Assemble everything before starting to maintain workflow momentum and prevent mid-project interruptions that compromise results. Your material list makes the difference between a flawless finish and frustrating redo.
Staining Supplies Checklist:
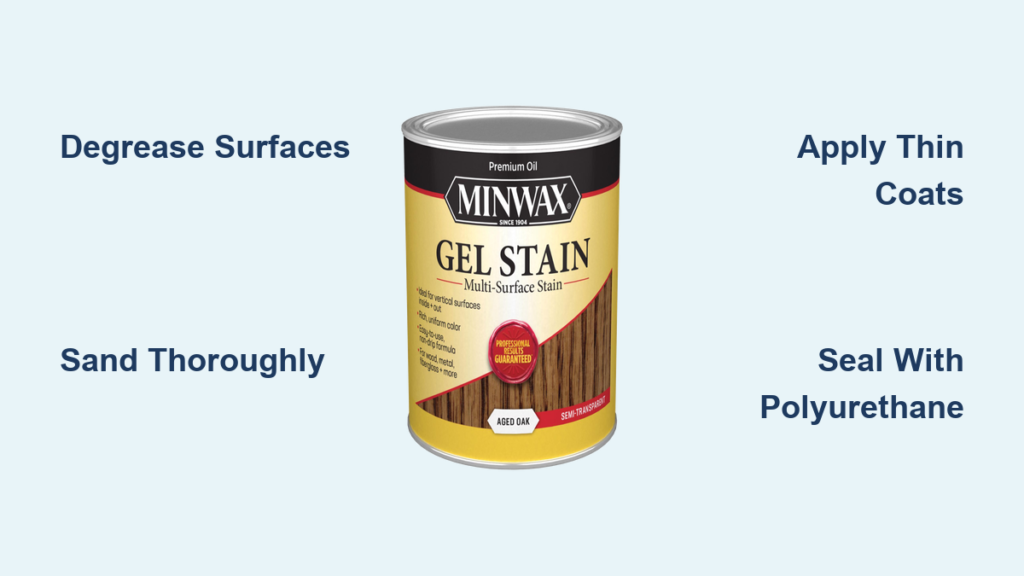
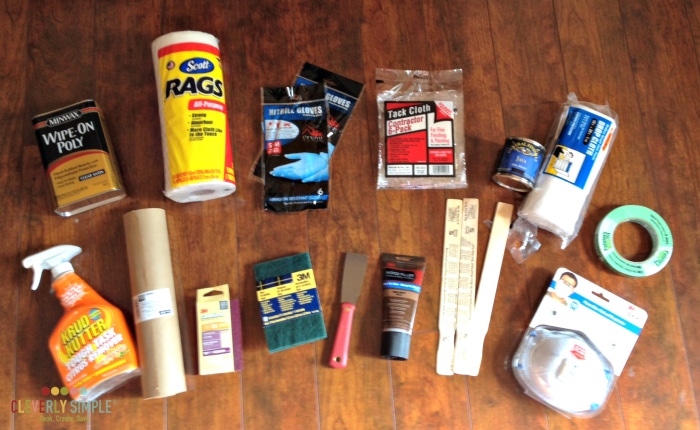
Quality gel stain in your chosen color represents your primary investment—popular cabinet choices include General Finishes Java for dramatic espresso or Minwax Early American for warm traditional tones. You’ll need 1-2 quarts depending on cabinet size. Purchase natural-bristle brushes (2-3 inches wide) specifically designed for gel products—foam brushes work but leave more visible texture. Prepare multiple clean, lint-free cotton rags (old t-shirts work perfectly) for wiping excess stain. Mineral spirits for cleanup and a sturdy stir stick complete your core staining kit. Never skip thorough stirring—gel stains separate in the can, and uneven pigment distribution creates patchy results.
Preparation and Protection Essentials:
Professional results require professional protection. Cover countertops and floors with canvas drop cloths (plastic traps moisture). Use 3M Blue Painter’s Tape to mask off wall edges and backsplashes—press edges firmly to prevent bleed-through. Stock up on 220-grit sandpaper (100+ sheets), a random orbital sander for flat surfaces, and sanding sponges for intricate details. Purchase TSP (trisodium phosphate) for degreasing—kitchen cabinets accumulate invisible grease that repels stain. Tack cloths and nitrile gloves (latex melts in mineral spirits) complete your protection system. Don’t underestimate the importance of proper ventilation—open windows and use fans to circulate air while working.
Prepare Cabinet Surfaces Thoroughly
Surface preparation accounts for 80% of your final results—no amount of stain can overcome poor prep. This phase demands meticulous attention but pays dividends in professional-looking cabinets that appear custom-finished.
Begin by removing all cabinet doors, drawers, and hardware. Label each piece with numbered painter’s tape and corresponding numbers on your kitchen walls—this system prevents reassembly confusion. Place all screws and knobs in labeled zip-top bags. Remove cabinet face frames if possible—this allows staining edges that would otherwise show through as unfinished lines. Working outdoors or in a garage makes this messy process considerably easier.
Degrease every surface with a TSP solution (1/4 cup TSP per gallon of warm water). Kitchen cabinets accumulate years of cooking grease invisible to the naked eye—this residue prevents proper stain adhesion. Use nylon brushes to work the solution into grain patterns, especially on oak cabinets where grease penetrates deep into pores. Rinse thoroughly with clean water and allow complete drying—any moisture trapped beneath stain creates bubbles and adhesion failure.
Sand all surfaces with 220-grit paper using an orbital sander for flat panels and sanding sponges for raised details. Your goal isn’t aggressive material removal but creating “tooth” for stain adhesion—visible wood grain should remain intact. Pay special attention to previously painted surfaces, which require more aggressive sanding to remove the glossy top layer. Wipe every surface with a tack cloth immediately after sanding—any remaining dust creates texture defects magnified by the stain.
Apply Gel Stain with Proper Technique
Gel stain application requires specific techniques that differ significantly from liquid stains. Master these methods to achieve uniform coverage without brush marks or uneven color—common pitfalls that ruin otherwise well-prepared cabinets.
Stir your gel stain thoroughly for 3-5 minutes until completely uniform—never shake, as this introduces air bubbles that create texture defects. Test color on a hidden area first; gel stain appears darker when wet and lightens slightly as it dries. Apply in thin, even coats using a natural-bristle brush loaded with moderate stain—too much product creates drips, while too little produces patchy coverage.
Work in 2×2 foot sections, applying stain with long, smooth strokes following the wood grain. Avoid going back over areas—you won’t have time to correct mistakes with gel stain’s quick drying time. Allow stain to sit for exactly 3 minutes (set a timer)—this critical window allows initial adhesion without significant drying. Wipe excess with a clean rag using firm, consistent pressure in the grain direction. Your wiping pressure controls final color intensity—light pressure creates darker finishes, while thorough wiping produces lighter results.
Build Color with Strategic Layering
Most DIYers make the critical error of trying to achieve final color in one heavy coat. Gel stain builds color gradually—multiple thin coats produce superior results that resist peeling and maintain wood character.
Apply first coat lightly, aiming for even coverage rather than deep color. Allow 4 hours drying time before assessing—gel stain continues to darken slightly as it cures. Most cabinets require 2-3 coats for optimal color depth, with darker shades needing fewer applications. Maintain consistent wiping pressure across all coats to prevent visible variations. Sand lightly between coats with 320-grit paper to remove any raised grain or dust nibs—this step creates the ultra-smooth finish that distinguishes professional results.
Seal and Protect Your Newly Stained Cabinets
Gel stain alone offers minimal protection against kitchen wear—your topcoat determines whether cabinets maintain beauty for years or show damage within months. Choose and apply your sealer correctly for lasting results.
Water-based polyurethane provides the best balance of durability and ease for kitchen cabinets. Its crystal-clear finish won’t yellow over time like oil-based alternatives, preserving your true stain color. Apply with a high-quality synthetic brush using thin, even coats—thick applications create visible brush marks that ruin your hard work. Allow 2 hours drying between coats, sanding lightly with 400-grit paper after the second coat. Apply three total coats for maximum protection against moisture, heat, and daily use. Most importantly, allow full 72-hour cure time before rehanging cabinets—rushing this step creates permanent indentations from hardware pressure.
Avoid Common Gel Stain Mistakes That Ruin Results
Even experienced DIYers make critical errors that compromise otherwise perfect projects. Recognize these pitfalls before they sabotage your cabinet transformation.
Applying stain to inadequately cleaned surfaces causes adhesion failure and visible blotching—TSP degreasing isn’t optional for kitchen cabinets. Working in temperatures below 50°F or above 85°F creates drying problems that cause sticky finishes or premature wear. Skipping proper sanding between topcoat layers results in poor adhesion and eventual peeling. Most critically, rushing the final cure period before rehanging cabinets creates permanent hardware indentations that require complete refinishing to fix.
Maintain Your Gel Stained Cabinets for Lasting Beauty
Proper maintenance preserves your investment—gel-stained cabinets withstand kitchen use but require specific care to maintain their beauty for years.
Clean weekly with a soft cloth dampened with mild soap solution—never spray cleaners directly onto surfaces. Address water spots immediately with a dry microfiber cloth to prevent moisture penetration at edges. Avoid abrasive cleaners that wear down the protective topcoat over time. Every six months, apply a thin coat of paste wax to high-wear areas like drawer fronts to maintain luster. Keep touch-up supplies on hand—small stains or scratches respond well to spot treatment with matching gel stain and a cotton swab when addressed promptly.
Transforming kitchen cabinets with gel stain delivers professional results that elevate your entire kitchen without the cost and disruption of replacement. By following these precise techniques—thorough preparation, strategic color building, proper sealing, and consistent maintenance—you’ll achieve custom-looking cabinets that withstand daily kitchen life. The secret isn’t special products but professional methods applied correctly. With these guidelines, your DIY cabinet transformation becomes one of your most satisfying home improvement achievements—one that guests will mistake for a professional renovation.


