
Your Cuisinart sandwich maker transforms basic bread into crispy, triangular pockets of melted delight in minutes—but only if you master its unique triangular mold and high-pressure system. Unlike panini presses with confusing controls, this appliance operates through simple plug-and-play mechanics, yet improper loading or cleaning can turn promising ingredients into a sticky disaster. With the right technique, you’ll consistently achieve that signature golden crunch while avoiding the common pitfalls that make users abandon this compact kitchen hero. Discover how to leverage its space-efficient design for everything from classic grilled cheese to Korean bulgogi creations without triggering the dreaded cheese overflow.
Let’s cut through the frustration and unlock restaurant-quality pressed sandwiches at home. You’ll learn precise buttering methods, ingredient limits that prevent leaks, and the critical light signals that guarantee perfect browning every time. Plus, we’ll tackle the cleaning challenges head-on with pro-tested solutions for those stubborn hinge crevices.
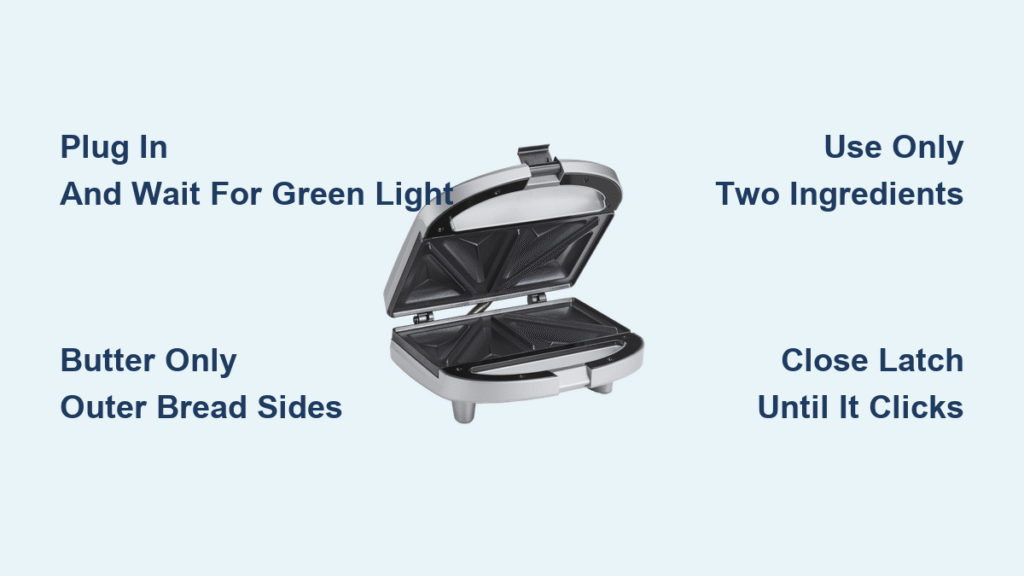
Plug In and Preheat Correctly
Forget complicated controls—your Cuisinart sandwich maker starts working the instant it hits a standard outlet. The dual-color indicator light eliminates guesswork: a steady red glow means it’s ramping up to ideal cooking temperature, while the green light confirms it’s ready for action. This preheat phase takes just 2-3 minutes, but skipping the wait guarantees soggy results.
Why timing matters: Placing sandwiches too early traps steam between the plates, preventing that essential crispy shell. The high-pressure clamps need full heat to instantly seal the bread edges upon contact. Always verify the green light—never assume it’s ready after a fixed countdown. Humidity and room temperature affect heating speed, so trust the indicator, not your clock.
Load Sandwiches Without Mess

Butter Bread for Crispy Results
Spread softened butter only on the outer surfaces of both bread slices. This creates the golden, crackling exterior that defines perfect pressed sandwiches. Buttering the inner sides sabotages the seal—moisture from fillings prevents the bread from fusing under pressure. Use a thin, even layer; excess butter pools in the drip tray and causes smoking.
Fill Strategically Within Space Limits
Place fillings on the unbuttered side of the bottom slice before adding the top slice (buttered side out). Crucially, never exceed two ingredients—the triangular cavity has minimal depth. Overfilling causes leaks that cement cheese into hinges and screws. Position ingredients slightly inward from the edges to accommodate the mold’s pressing pattern.
Pro tip: Shred hard cheeses like cheddar for even melting. Avoid thick tomato slices—they create soggy zones that break the seal. For meats, use thin deli slices folded once to prevent height issues.
Close Latch Firmly

Bring the lid down until you hear a distinct click. This latch isn’t optional—it ensures uniform pressure across all four corners of the triangular mold. Without full closure, one side stays pale while the other burns, and fillings escape through uneven gaps.
Warning: Forcing the latch when ingredients are overloaded cracks the non-stick coating. If resistance feels excessive, reopen and reduce fillings. Properly loaded sandwiches close smoothly with minimal pressure.
Monitor Cooking Progress
The indicator light doubles as your precision timer. After loading:
1. Light turns red immediately—cooking has begun
2. Wait for green light return—this signals perfect doneness
3. Total cook time: 3-5 minutes (thicker bread or cold fillings add 60 seconds)
Peek like a pro: Check the side gap at the 2-minute mark for golden edges and bubbling cheese. If bread looks pale, close and wait 30 seconds more. Overcooking creates brittle, hard-to-handle triangles that shatter when cut.
Remove Hot Sandwiches Safely
Open the lid away from your body to avoid steam burns—trapped moisture releases explosively when unlatched. Sandwiches will be fused into two connected triangles, extremely hot, and oozing with melted fillings.
Critical removal steps:
– Use silicone-tipped tongs or a heat-resistant spatula (never metal)
– Lift from the center seam to avoid splitting
– Rest on a wire rack for 30 seconds before cutting
– Slice down the center with a serrated knife for clean separation
Master Two-Ingredient Rule

This isn’t a suggestion—it’s physics. The triangular mold’s shallow cavity (designed for speed, not volume) rejects third ingredients. Three components cause leaks 90% of the time, per user reports. Stick to these proven duos:
| Winning Combos | Why They Work |
|---|---|
| American cheese + ham | Cheese melts into ham’s nooks, creating structural integrity |
| Peanut butter + jelly | PB acts as moisture barrier for leak-prone jelly |
| Bulgogi + shredded cheese | Thin meat layer allows cheese to seal edges |
| Nutella + marshmallow fluff | Both spreadable; minimal steam production |
Disaster duos to avoid:
– Cold cuts stacked >2 slices high (prevents sealing)
– Whole tomato slices (juice breaks bread adhesion)
– String cheese blocks (melts unevenly, creates pressure points)
Clean the Beast Effectively
Immediate Post-Cooking Care
Wait exactly 5 minutes after unplugging. Cleaning while scorching hot warps plates; waiting too long lets cheese solidify into concrete. The sweet spot is warm-but-not-hot—when you can briefly rest a finger on the housing.
Step-by-Step Deep Clean
- Wipe plates with damp microfiber cloth to remove loose debris
- Dislodge trapped bits using toothpicks in hinge screws and drip channels
- Scrub drip tray behind the unit with soft-bristled brush (neglecting this causes smoke on next use)
- Dry thoroughly with paper towels—residual moisture rusts internal components
Pro tip: Place a folded paper towel in the drip tray during cooking to catch leaks. This reduces post-meal scrubbing by 70%.
Creative Recipe Variations
Breakfast Sandwiches
- Egg & cheese: Layer pre-scrambled eggs (cooled slightly) with shredded cheddar. The egg proteins fuse with cheese for a leak-proof seal.
- Cinnamon toast: Dip bread in beaten egg, sprinkle with cinnamon sugar before pressing.
Leftover Transformations
Turn dinner scraps into lunch magic:
– Thanksgiving special: Thin turkey slices + brie + micro-dab of cranberry sauce (more = disaster)
– BBQ rescue: Pulled pork + quick-pickled slaw (squeeze liquid first!) + pepper jack
– Veggie reboot: Roasted peppers + goat cheese (spread thinly to avoid oil seepage)
Troubleshooting Common Issues
Sandwiches Stick to Plates
Cause: Insufficient butter or premature loading (before green light)
Fix: Generously butter outer surfaces AND wait for the indicator’s green signal. If sticking occurs mid-cook, unplug immediately—forcing removal scratches plates.
Cheese Leaks Out Back
Cause: Overfilling or using low-moisture cheeses like mozzarella
Fix: Shred cheeses for better distribution. Place a single slice of American cheese directly against the bread—it melts into a waterproof seal.
Uneven Browning
Cause: Warped bread or loose latch engagement
Fix: Use uniform, fresh slices (stale bread cracks under pressure). Always press down firmly until the latch clicks audibly.
Store for Maximum Use
Visibility drives usage: Units stored on countertops get used 4-5 times weekly; those buried in high cabinets average once monthly. Dedicate 10×8-inch counter space near your toaster—its compact 10″x8″x4″ footprint fits most kitchens.
Vertical storage trick: Stand it upright with plates facing inward to save space. Never stack items on top—this misaligns the hinge mechanism over time.
When to Replace Your Grill
Upgrade immediately if you notice:
– Flaking non-stick coating (ingesting particles is unsafe)
– Green light never illuminates (indicates electrical failure)
– Persistent uneven heating despite proper use
– Hinge wobble that prevents full closure
Stop settling for mediocre pressed sandwiches. By respecting the Cuisinart sandwich maker’s two-ingredient limit and cleaning its hinge crevices religiously, you’ll transform weeknight dinners into crispy, molten-center delights that outshine restaurant versions. Start with buttered bread and American cheese tonight—master the light signals and latch click—then graduate to bulgogi experiments. The secret isn’t complexity; it’s precision within its triangular boundaries. Your perfectly sealed, golden-brown comfort food awaits, just between two slices of pressed and toasted bread.


