

That new Cuisinart rice cooker sitting on your counter promises perfectly fluffy rice every time, but you’re staring at it wondering why your first batch turned into a gummy mess—or worse, burnt to the pot. The secret isn’t complicated cooking techniques; it’s understanding the precise measurements and timing that make this simple appliance work its magic.
This guide transforms your Cuisinart rice cooker from confusing gadget into your most reliable kitchen companion. You’ll master the exact ratios, timing tricks, and troubleshooting fixes that separate restaurant-quality rice from disappointing results. By the time you finish reading, you’ll know exactly how to use Cuisinart rice cooker to consistently produce perfect rice.
Measure Rice Correctly With the Right Tools
The biggest mistake new Cuisinart owners make happens before they even turn the machine on. Ignore the measuring cup in your kitchen drawer—your Cuisinart came with its own special cup, and using anything else guarantees failure. This isn’t just manufacturer preference; it’s critical to the appliance’s thermostat mechanism that automatically switches from cooking to warming mode.
Why the Provided Measuring Cup Is Non-Negotiable
Your Cuisinart’s plastic measuring cup holds just 6 ounces, not the standard 8-ounce cup. This difference seems minor but creates massive ratio problems. Think of it as the difference between following a recipe in metric versus imperial—same ingredients, completely different results. The thermostat relies on precise water-to-rice ratios to function correctly, and substituting measuring cups throws off this delicate balance.
- For rice measurements: Always use the included cup—no exceptions
- For water/broth: Use standard 8-ounce measuring cups from your kitchen
- Never substitute: Even a “close enough” standard cup ruins ratios and triggers thermostat errors
How to Read Inner Pot Markings Properly
The inner cooking pot features etched lines showing exactly where rice and water should reach. These markings account for the smaller rice measuring cup, creating foolproof ratios when followed precisely. When measuring rice directly into the pot, fill to the line matching your serving size—not the line matching your cup count. This subtle distinction prevents common overfilling errors that lead to uneven cooking.
Water Ratios by Rice Type That Actually Work

Different rice varieties behave like different personalities—some need more hydration, others prefer less. Your Cuisinart handles these variations beautifully once you know the rules. The thermostat mechanism depends on precise water absorption timing, so getting these ratios right is non-negotiable for perfect results.
White Rice Formula That Never Fails
Basic ratio: 1 rice cooker cup rice + 2 standard cups water
This works perfectly for most white rice brands. However, premium varieties need slight adjustments:
- Jasmine/Basmati: Reduce water by 2-3 tablespoons to prevent gumminess (these delicate grains absorb water quickly)
- Carolina/River rice: Stick with the full 2:1 ratio (these hardier grains need maximum hydration)
- Parboiled (Uncle Ben’s): Full 2:1 ratio required (the parboiling process makes grains more water-absorbent)
Brown Rice Requirements You Must Follow
Brown rice demands more liquid due to its bran layer. The manual provides specific measurements:
Small batch (2-4 servings):
– 1 rice cooker cup brown rice
– 1¾ standard cups liquid
Medium batch (3-5 servings):
– 1½ rice cooker cups brown rice
– 2½ standard cups liquid
Pro tip: Many users successfully use a simpler 1:2 ratio (1 rice cooker cup rice to 2 standard cups liquid) for brown rice, adding 1-2 extra tablespoons if the first batch seems dry. The bran layer requires extra water to soften properly—skimping here guarantees crunchy results.
Step-by-Step Cooking Process Without Mistakes
Load Ingredients Properly in 5 Critical Steps
- Rinse rice in fine mesh strainer until water runs clear (this removes excess starch that causes gumminess)
- Measure rice using provided cup, level off excess with a straight edge
- Add rice first to inner pot (prevents clumping when liquid is added)
- Measure liquid in standard cup, pour over rice (use broth for flavor enhancement)
- Level rice gently with finger or spoon handle (ensures even water distribution)
Start Cooking Sequence Without Errors
- Place inner pot into base, ensuring it sits flat (an uneven pot disrupts thermostat function)
- Close lid completely—you’ll hear it click (steam leakage ruins cooking consistency)
- Press the single “Cook” button (the CRC-400 has only one button—no confusing settings)
- Critical: Resist lifting the lid during cooking (steam loss resets the thermostat timer)
Rest After Cooking for Perfect Texture
When the cooker switches to “Warm,” wait 15-20 minutes before opening. This steaming phase transforms good rice into exceptional rice by allowing final moisture absorption. Skipping this step leaves you with unevenly cooked grains—some too wet, others still crunchy. The thermostat has done its job, but the rice needs this final resting period to achieve that perfect fluffy texture.
Fix Common Rice Problems Immediately

Burnt or Crispy Bottom: Three-Step Repair
Quick diagnosis:
– Check you’re using the provided rice measuring cup (most common error)
– Increase liquid by 2-4 tablespoons for next batch
– Test with fresh white rice—old rice burns easily due to moisture loss
Immediate fix: Add ¼ cup hot water, stir gently, let sit on “Warm” for 10 minutes. This rehydrates the bottom layer without making the rest of the rice mushy. If burning persists, your thermostat may be malfunctioning—test with white rice using exact manual specifications.
Hard or Crunchy Texture: Two Reliable Solutions
Solutions:
– Add ¼ cup additional liquid next time (especially crucial for brown rice)
– Let rice steam longer on “Warm” mode (up to 25 minutes for brown rice)
– Increase water by 25% for brown rice varieties (the bran layer needs extra hydration)
Gummy or Wet Results: Three Troubleshooting Steps
Troubleshooting steps:
– Reduce water by 2-3 tablespoons for next batch (especially for Jasmine/Basmati)
– Extend resting time to 20 minutes (allows more moisture absorption)
– Verify correct rice measurement (too little rice causes gumminess as water overwhelms grains)
Advanced Flavor Techniques for Restaurant-Quality Rice
Transform basic rice into restaurant-quality sides with these simple upgrades that won’t disrupt your how to use Cuisinart rice cooker process:
Liquid Substitutions That Enhance Without Compromising
Replace water with equal amounts of:
– Chicken broth for savory depth (ideal for white rice in pilafs)
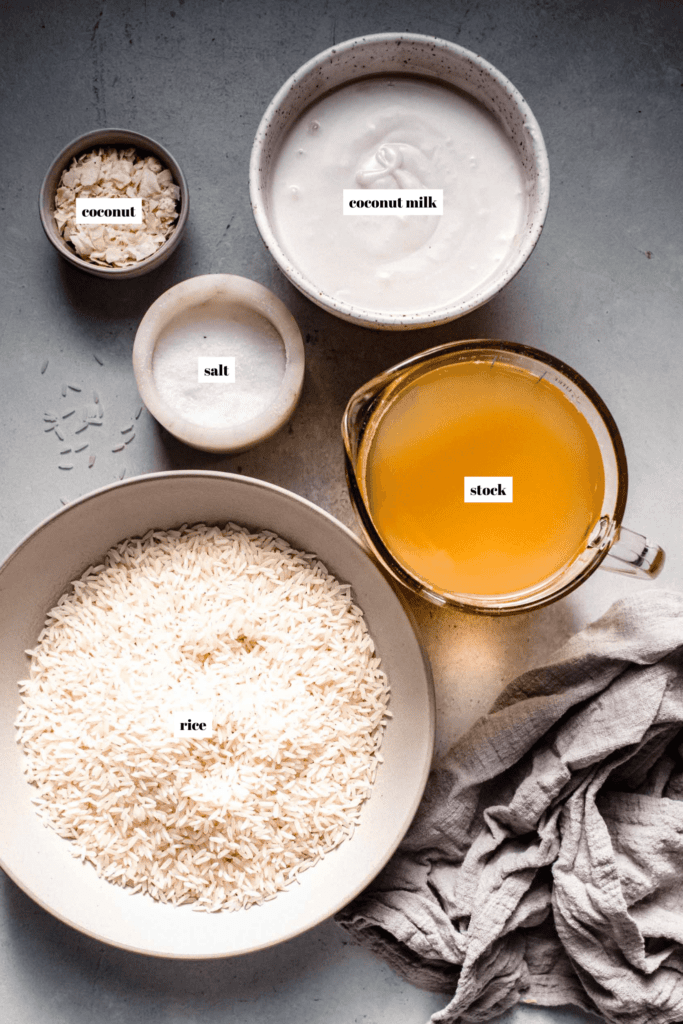
– Coconut milk (half water, half milk) for Thai-style rice (use full-fat for best results)
– Vegetable broth for herb-infused flavor (add a bay leaf to the pot for extra dimension)
Batch Size Rules You Must Follow
Never guess serving sizes. Your Cuisinart manual includes a precise chart—follow it exactly. Cooking amounts outside specified ranges leads to uneven results because the thermostat relies on specific rice-to-water ratios. For the CRC-400, the minimum is 1 rice cooker cup of rice; going below this prevents proper thermostat function. Maximum capacity is clearly marked on the inner pot—exceeding it risks overflow and inconsistent cooking.
Quick Reference Chart for Perfect Rice Every Time
Brown Rice Success Formula (CRC-400 Specific)
- 1 cup rice + 1¾ cups liquid (2-4 servings)
- 1½ cups rice + 2½ cups liquid (3-5 servings)
Universal Success Rules for All Cuisinart Models
- Use provided cup for rice only (this is the most overlooked step in how to use Cuisinart rice cooker properly)
- Never lift lid during cooking (steam loss resets the thermostat)
- Rest 15-20 minutes after cooking (non-negotiable for perfect texture)
- Rinse rice before cooking (removes excess starch that causes gumminess)
- Clean pot thoroughly after each use (prevents residue buildup that affects future batches)
Master these fundamentals and your Cuisinart rice cooker becomes your most dependable kitchen tool. Perfect rice isn’t about complex techniques—it’s about respecting the precise ratios and timing that make this simple appliance deliver consistent, delicious results every single time. Whether you’re cooking basic white rice or experimenting with specialty grains, following these guidelines ensures you’ll never wonder how to use Cuisinart rice cooker correctly again. The next time you need perfectly cooked rice, you’ll know exactly what to do—measure correctly, use the right ratios, and let the thermostat do its job without interference.


