
Nothing beats the satisfaction of pulling a perfectly crisp, bubbling pizza from your own countertop oven. The Cuisinart pizza oven transforms frozen pies and fresh dough into restaurant-quality results in minutes—but only when you know the right techniques. Whether you’re battling soggy crusts or uneven cooking, mastering how to use Cuisinart pizza oven starts with understanding its unique features and settings.
This guide walks through every step from first setup to advanced techniques, ensuring your next pizza night delivers consistent, professional results every time. Forget disappointing takeout—your countertop appliance can become the star of your kitchen with these essential methods.
Positioning Your Cuisinart Pizza Oven for Optimal Performance

Where you place your oven dramatically impacts both safety and cooking results. Many users make critical mistakes during initial setup that compromise performance from day one.
Proper Countertop Placement Requirements
Your Cuisinart pizza oven needs breathing room to function safely and efficiently. Place it on a heat-resistant surface with at least 6 inches of clearance on all sides and 12 inches above. Never position near cabinets, curtains, or other heat-sensitive materials. Before first use, remove all packaging materials including the cardboard base protector and plastic film from interior surfaces—these often get overlooked but can cause smoke or odors during initial heating.
Critical Pre-Use Safety Checks
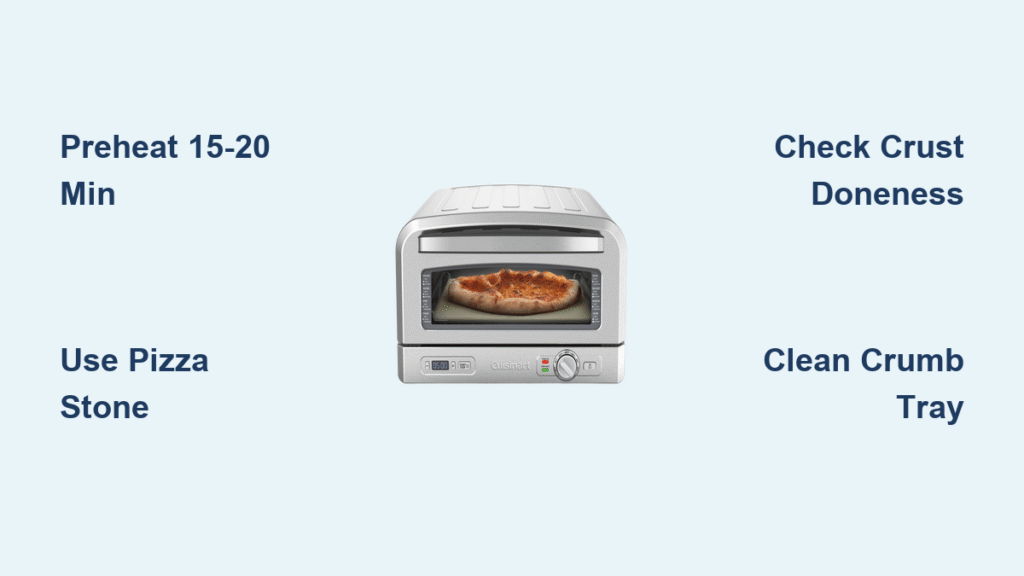
Verify the crumb tray slides smoothly in and out before your first pizza. Check that the pizza stone sits level on the heating element with no wobbling. Ensure the door seals properly by closing it gently and confirming no light leaks around the edges. Never operate the oven without the stone properly positioned—this can damage heating elements and create fire hazards.
Mastering Cuisinart Pizza Oven Temperature Settings

The Cuisinart pizza oven offers precise temperature control from 350°F to 700°F, but each range serves different pizza styles with specific timing requirements.
Perfect Thin Crust Settings for Different Dough Types
For frozen thin crust pizzas, set your oven to 425°F and cook for 10-12 minutes. Fresh dough 10-12 inch pies perform best at 475°F for 12-15 minutes. When making ultra-thin artisan crusts, crank the temperature to 500°F and reduce cooking time to 8-10 minutes for that perfect crisp texture without burning. Pro tip: Always preheat for 15-20 minutes at your target temperature—the stone must reach thermal equilibrium before baking.
Deep Dish Pizza Temperature Strategies
Chicago-style deep dish requires lower temperatures to cook through without burning the exterior. Set your Cuisinart pizza oven to 425°F and expect 18-22 minutes of cooking time. For stuffed crust varieties, start at 400°F for the first 15 minutes, then increase to 425°F for the final 5 minutes to crisp the edges. Pan pizzas with heavy toppings need 450°F for 15-18 minutes, but add 25°F for every additional topping beyond three ingredients to compensate for moisture release that cools the stone.
Pizza Stone Preparation Techniques That Make All the Difference
The pizza stone is your secret weapon for authentic results. How you prepare and maintain it directly impacts crust quality and oven longevity.
Seasoning Your New Pizza Stone Properly
Before baking your first pizza, run the empty oven at 500°F for 30 minutes to burn off manufacturing residues. After cooling completely, brush the stone with a thin layer of cornmeal—never use oil which creates sticky buildup during high-heat cooking. This initial seasoning creates a natural non-stick surface that improves with each use.
Correct Stone Preheating Sequence
Always place the stone in a cold oven, then set your temperature. This gradual heating prevents thermal shock cracks that occur when cold stone meets extreme heat. The stone reaches full temperature 5-7 minutes after the oven indicator shows ready—many beginners make the mistake of loading pizza too soon, resulting in soggy bottoms. Test stone readiness by carefully placing your hand near (not on) the surface—you should only hold it there for 2-3 seconds before the heat becomes uncomfortable.
Dough Handling Methods for Flawless Pizza Results
Success starts before the oven door opens. How you prep your dough directly impacts final results and prevents common disasters.
Room Temperature Dough Rules You Must Follow
Remove dough from refrigeration 30-45 minutes before shaping—cold dough tears easily and bakes unevenly. Test readiness by pressing gently with your fingertip; dough should hold an indentation without springing back completely. If it snaps back immediately, it needs more warming time. Never skip this step—forcing cold dough into the oven guarantees dense, chewy crust instead of light and airy.
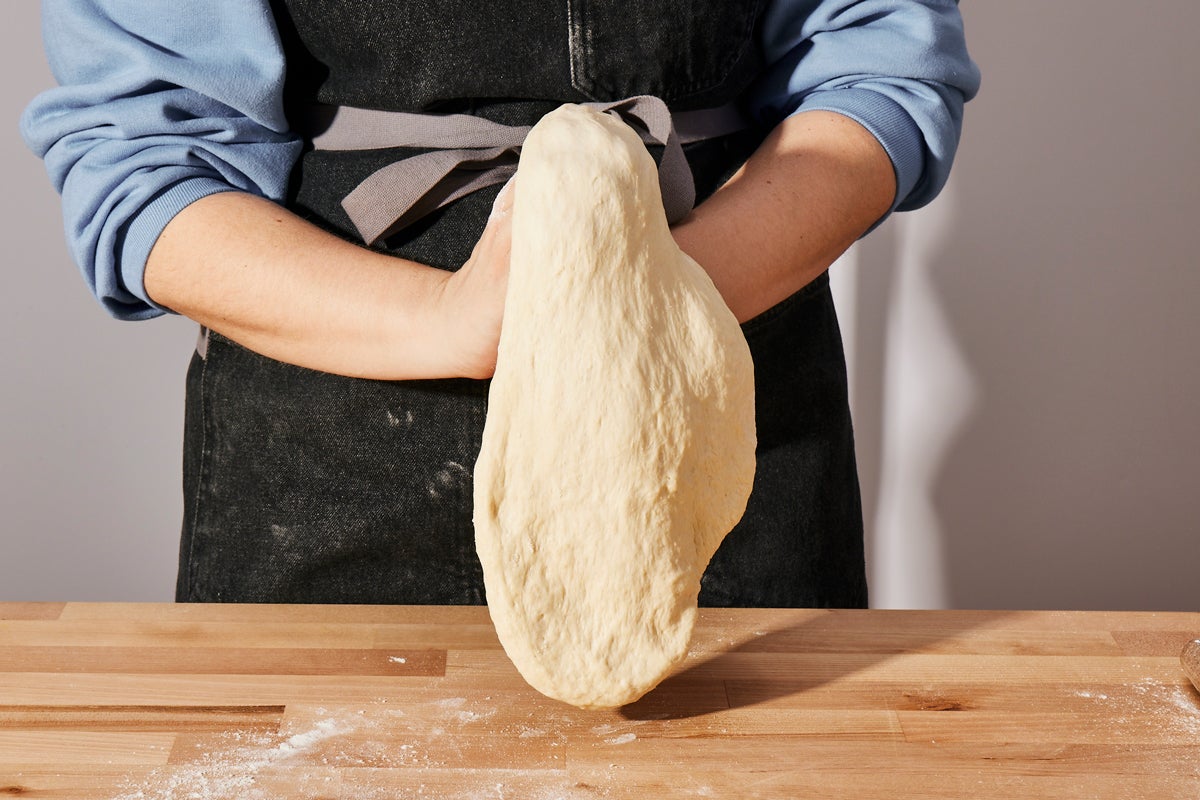
Professional Shaping Techniques Without Special Tools
Lightly flour your work surface and hands, not the dough itself—excess flour creates dry, crumbly crust. Stretch from center outward using your knuckles, rotating the dough quarter turns as you go. Avoid rolling pins which compress air bubbles needed for proper rise and texture. For stubborn dough, let it rest 5 minutes then try again—forcing it causes tearing. Transfer shaped dough to parchment paper for easy oven loading.
Precise Placement and Timing for Professional Results

Where you position your pizza in the oven determines browning patterns and cooking speed, making all the difference between good and great results.
Strategic Rack Positioning for Different Pizza Styles
For most standard pizzas, the center rack position delivers even cooking top to bottom. Want extra-crispy crust? Lower the rack one position to bring the pizza closer to the heating element. Need more cheese browning without burning the base? Move to the upper rack for the final 2 minutes only. Never overload the oven—one pizza at a time ensures proper heat circulation.
Visual Timing Cues Better Than Clock Watching
Personal pan pizzas (6-8″) typically need 6-8 minutes, but rely on visual cues over timers. Watch for cheese bubbling consistently in the center and golden-brown crust edges. Standard 12″ pizzas take 10-12 minutes, but check at 8 minutes for signs of completion. Deep dish varieties require 18-22 minutes with careful monitoring during the final 5 minutes. Frozen rising crust pizzas need 15-18 minutes with extra attention to prevent topping burn while the base finishes.
Immediate Cleaning Methods Between Pizza Batches
Quick maintenance between pies prevents flavor transfer and maintains performance for consecutive baking sessions.
Effective Warm Stone Cleaning Procedure
Use the included pizza stone brush to remove cornmeal and cheese residue while the stone is warm—not hot. For stubborn stuck-on bits, scrape gently with the flat edge of a metal spatula using light pressure. Never use water on a warm stone—this causes thermal shock and cracks. Allow the stone to cool completely before any wet cleaning.
Crumb Tray Management for Continuous Baking
Empty the crumb tray after every 2-3 pizzas during multi-pizza sessions. Accumulated crumbs burn and create off-flavors that transfer to subsequent pizzas. Wipe the glass door interior with a damp cloth between batches to maintain visibility—splattered cheese obstructs your view of critical browning stages.
Fixing Soggy Bottoms and Uneven Cooking Issues
Even experienced users encounter problems. Quick diagnosis saves dinner when your pizza isn’t turning out right.
Three-Step Soggy Bottom Solution
Increase preheat time by 5 minutes to ensure full stone saturation. Reduce sauce quantity to 2-3 tablespoons maximum for a 12″ pizza—excess moisture is the #1 cause of soggy crusts. For particularly wet toppings like fresh tomatoes, par-bake the crust for 3 minutes before adding sauce and toppings. If problems persist, lower the rack position to bring the crust closer to the heat source.
Rotational Technique for Perfectly Even Browning
Rotate your pizza 180° halfway through cooking to counteract hot spots common in countertop ovens. Verify you’re not overloading the oven—only one pizza at a time for proper heat circulation. If uneven browning continues, test for hot spots by toasting bread slices on different parts of the stone during preheating.
Advanced Techniques for Pizzeria-Quality Results
Ready to elevate your pizza game beyond basics? These pro techniques deliver restaurant results that will impress even pizza connoisseurs.
Steam Injection Method for Perfect Crust Texture
Place a small metal pan on the oven floor while preheating. Just before baking, carefully add 2 tablespoons of water to create instant steam—this produces extra-crispy exteriors with chewy interiors by delaying crust setting during initial baking. Use extreme caution with this technique—keep your face clear when adding water to avoid steam burns.
Multi-Pizza Session Optimization
Between consecutive pizzas, let the oven recover for 3-4 minutes at temperature to maintain stone heat for consistent cooking. Prepare toppings on parchment sheets sized to your pizza for quick assembly and transfer. Keep a spray bottle of water nearby to mist the stone if it appears to be cooling too much between batches.
Safety Protocols and Long-Term Maintenance
Proper care extends your oven’s lifespan and ensures safe operation through hundreds of pizza nights.
Essential Cool-Down Procedure After Baking
Always let the oven cool with the door slightly ajar using a wooden spoon to hold it open. This prevents moisture buildup that damages heating elements over time. Never place the hot stone directly on cold countertops—use the wire cooling rack provided to allow air circulation during cooling.
Monthly Deep Cleaning Schedule
Weekly: Remove and wash the crumb tray with warm soapy water, drying thoroughly before reuse. Monthly: Give the stone a thorough brushing and wipe interior walls with a damp cloth. Replace the stone immediately if cracks develop or persistent black spots appear that don’t clean off—these indicate thermal damage that affects performance.
Mastering how to use Cuisinart pizza oven transforms dinner nights from ordinary to extraordinary. The key is consistent preheating, proper stone care, and watching for visual cues rather than blindly following timers. Start with a simple cheese pizza to dial in your preferred settings, then build complexity with toppings and techniques. Soon you’ll serve pizzas that rival your favorite pizzeria—without the delivery fee or wait time. Your perfect homemade pizza journey begins the moment you understand these essential techniques.


