
Your kitchen mandolin sits in the cabinet, intimidating with its sharp blades, while you resort to uneven hand-sliced vegetables that take twice as long. That pile of cucumbers for salad wobbles dangerously on your cutting board as you struggle to create uniform slices. Professional chefs achieve those paper-thin onion slices and perfect julienne carrots with ease, but your attempts often end with wasted food or, worse, a trip to the first aid kit. Learning how to use a kitchen mandolin properly transforms your meal prep from frustrating to flawless, saving valuable time while delivering restaurant-quality results. This guide reveals the essential techniques for safely operating your mandolin slicer to achieve consistent cuts for everything from delicate cucumber ribbons to sturdy potato gratins. You’ll discover the proper hand positioning that prevents accidents, learn which blade configuration works for specific dishes, and master the food holder technique that keeps your fingers intact while producing perfect slices every time.
Essential Safety Setup Before First Use
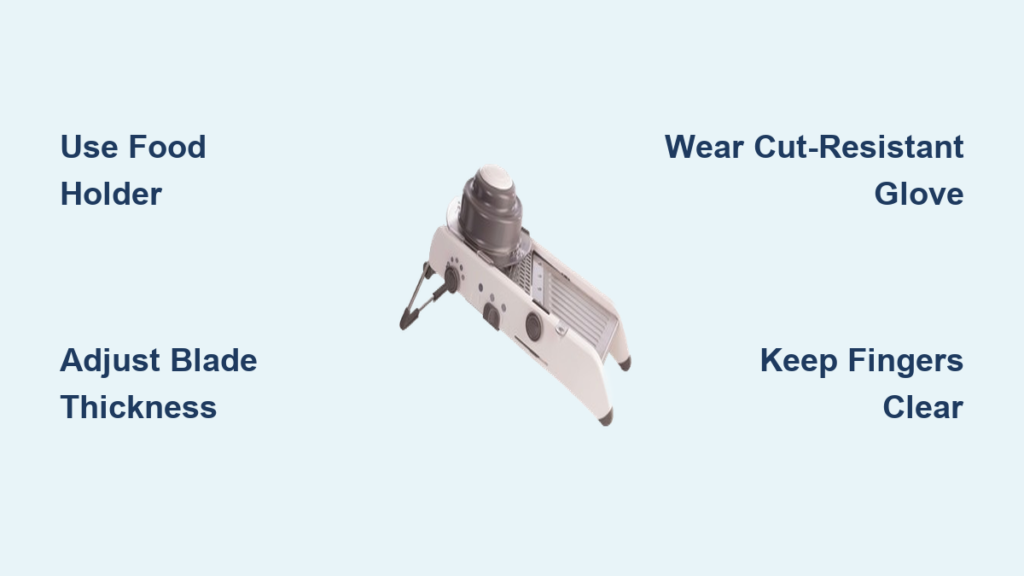
Before touching any blade, establish your safety foundation to prevent the most common mandolin injuries. Position your mandolin on a stable, non-slip surface away from counter edges where it might tip during use. Most models include a non-slip base or require placement on a damp towel—never operate a mandolin on a smooth, unstable surface. Adjust the blade guard to its highest position initially, creating maximum distance between your fingers and the cutting surface as you gain confidence. The most critical safety tool isn’t included with most mandolins: invest in a high-quality cut-resistant glove that fits snugly on your food-holding hand, providing essential protection without sacrificing dexterity. Place a bowl or container directly beneath the cutting area to catch slices immediately, preventing buildup that could cause slipping or uneven cuts.
Proper Hand Positioning to Avoid Mandolin Accidents
Your hand placement determines whether you’ll enjoy perfect slices or visit the emergency room. Always use the food holder accessory that came with your mandolin—never substitute with your bare hand. Grip the food holder at the very top, keeping your knuckles well above the vegetable being sliced, and apply even downward pressure without forcing the food. Maintain a 45-degree angle as you push food across the blade, allowing the mandolin’s design to do the work rather than applying excessive force. When approaching the last inch of your vegetable, stop immediately and reposition using the food holder—never attempt to slice the final portion where fingers get dangerously close to blades. For round vegetables like onions or tomatoes, cut a flat base first to create stability before mandolin slicing.
Why Your Mandolin Slices Unevenly (And How to Fix It)
Inconsistent pressure causes the most common mandolin frustration: thick and thin slices appearing in the same batch. Maintain steady, even pressure as you move food across the blade—rushing creates thin spots while hesitation causes thick sections. Ensure your vegetable sits flush against the adjustment plate without tilting, as angled placement creates wedge-shaped slices. Check that your mandolin base remains stable during operation; movement between the base and cutting surface disrupts slice consistency. For harder vegetables like carrots or beets, partially cook them first to soften slightly, making them easier to slice evenly without excessive force. If your mandolin has adjustable tension screws, tighten them slightly to reduce vibration during cutting.
Blade Selection Guide for Perfect Cuts Every Time
Your mandolin’s versatility comes from interchangeable blades, each designed for specific culinary applications. The straight blade creates uniform slices from paper-thin to 1/4 inch thick, ideal for potato gratins, cucumber salads, or onion rings. The julienne blade transforms vegetables into matchstick shapes perfect for stir-fries or coleslaw, while the waffle cut blade produces crinkle-cut vegetables that hold dressings beautifully. The grating blade works for cheese, nutmeg, or hard vegetables like potatoes for hash browns. Always verify blade compatibility with your specific mandolin model before installation, as universal blades don’t exist across brands.
How to Change Mandolin Blades Without Injury
Blade changes require extreme caution since edges remain sharp even when not in use. Always disconnect removable blades from the mandolin before handling—never attempt to clean or adjust blades while assembled. Hold blades by their edges only, avoiding contact with cutting surfaces. When inserting new blades, align them precisely with manufacturer guides and secure firmly before testing. Store spare blades in their original packaging or a dedicated blade case away from children’s reach. After use, disassemble blades immediately for cleaning rather than leaving them exposed on the countertop.
Perfecting Specific Cutting Techniques

Different ingredients require specialized approaches to maximize your mandolin’s potential while maintaining safety. For tomatoes, chill them thoroughly before slicing to prevent crushing, and use the lowest thickness setting with minimal pressure. When preparing potatoes for gratins, soak slices in cold water immediately after cutting to prevent oxidation and maintain perfect texture during cooking. Cabbage transforms into restaurant-quality coleslaw in seconds when quartered, cored, and sliced with the julienne blade—just remember to use the food holder for the dense center portion. Hard vegetables like sweet potatoes benefit from a light oil coating on the blade to prevent sticking and ensure smooth operation.
Fixing Common Mandolin Mistakes in Seconds
Food sticking to blades creates dangerous situations when you instinctively reach in to clear the blockage. Instead, turn off or disengage the mandolin completely before using a soft brush or wooden stick to clear debris—never use metal utensils that could damage blades. If your mandolin slips during operation, immediately stop and place it on a damp kitchen towel for traction. When slices become progressively thicker, check that the adjustment knob hasn’t loosened during use and tighten if necessary. For vegetables rolling instead of lying flat, create a stable base by slicing a small portion off one side before mandolin processing.
Cleaning and Maintenance for Long-Lasting Performance
Immediate post-use care prevents the most common mandolin deterioration issues. Disassemble all components right after use while food remains moist, as dried residues create stubborn buildup around blade mechanisms. Hand-wash all parts in warm, soapy water using a soft sponge—never place mandolin components in the dishwasher where high heat and harsh detergents damage blades and plastic components. Pay special attention to the blade housing area where small food particles accumulate, using a soft brush to gently remove debris without contacting sharp edges. Dry all components thoroughly before storage to prevent rust on metal blades and warping of plastic parts.
When to Replace Mandolin Blades for Optimal Performance
Dull blades create dangerous situations as users apply excessive force to compensate for reduced cutting efficiency. Replace blades when you notice increased effort required for slicing, uneven cuts despite proper technique, or visible nicks along the blade edge. Most home cooks should replace mandolin blades annually with regular use, though professional kitchens may need quarterly replacements. Test blade sharpness by attempting to slice a ripe tomato—the blade should glide through effortlessly without crushing. Always purchase manufacturer-recommended replacement blades rather than generic alternatives that may not fit properly or maintain safety standards.
Advanced Mandolin Applications Beyond Basic Slicing
Professional chefs utilize mandolins for techniques that transform ordinary dishes into extraordinary presentations. Create delicate vegetable confetti by stacking multiple thin slices of different colored vegetables and cutting them into fine strips with a chef’s knife. Produce perfect citrus zest by carefully using the grating blade on unwaxed lemons or limes, rotating the fruit to avoid bitter pith. Make uniform apple chips for dehydrating by slicing apples paper-thin with the straight blade, then soaking in lemon water to prevent browning before drying. For sophisticated garnishes, use the waffle blade on firm vegetables like zucchini, then quickly blanch the waffle slices to create elegant rolled garnishes.
Preventing Long-Term Mandolin-Related Injuries
Repetitive mandolin use creates strain injuries that develop over time rather than dramatic cuts. Take frequent breaks during extended slicing sessions to prevent hand and wrist fatigue that leads to accidents. Alternate hands when possible, though always maintain proper food holder technique with whichever hand guides the food. Consider ergonomic mandolin models with contoured handles that reduce grip strain during prolonged use. If you experience persistent wrist pain after mandolin use, consult a physical therapist before continuing, as early intervention prevents chronic issues.
Final Note: Consistent mandolin mastery comes from respecting its power while implementing these safety-focused techniques. Always prioritize proper hand positioning over speed, and never sacrifice safety for convenience when working with such sharp blades. Store your mandolin with blade guards in place and out of children’s reach when not in use. With practice using these methods, you’ll transform your meal prep efficiency while achieving professional-quality results that elevate every dish. The time invested in proper mandolin technique pays dividends in both kitchen safety and culinary excellence for years to come.


