
That moment when your gas stove burner refuses to ignite with the built-in spark system—you’re left searching for matches while dinner waits. Kitchen lighters solve this common frustration, providing reliable flame delivery for gas stoves, grills, fireplaces, and culinary applications. Learning how to use a kitchen lighter properly transforms what could be a fire hazard into a safe, efficient tool that becomes indispensable in any kitchen or outdoor cooking setup. This guide reveals the exact techniques professionals use to maximize performance while minimizing risks.
Whether you’re firing up the barbecue for weekend gatherings or need to ignite a stubborn gas burner, understanding proper lighter operation ensures consistent results every time. You’ll discover how to select the right lighter for your specific needs, master ignition techniques for different appliances, and maintain your device for years of dependable service—without risking burns or accidents.
Select the Right Kitchen Lighter for Gas Stoves, Grills & Fireplaces

Choosing the appropriate kitchen lighter based on your specific cooking setup prevents frustration and enhances safety during ignition tasks. Three main types dominate the market, each engineered for particular applications with distinct advantages.
Long-reach grill lighters feature extended handles (typically 8-12 inches) that keep your hands safely away from heat sources when lighting charcoal or gas grills. The press-and-pull mechanism found in quality models like the Kingsford Grill Lighter provides controlled ignition that reaches deep into grill chambers without risking burns from hot coals or rising heat. These prove essential for charcoal grilling where hand proximity to burning embers presents serious danger.
Compact stovetop lighters measure 4-6 inches for easy maneuverability around burner grates and supports. Their focused flames efficiently engage individual gas burners, making them ideal for everyday kitchen use. Look for models with precision tips that fit between grate supports without awkward positioning.
Electronic ignition systems eliminate open flame dependency entirely, using piezoelectric sparks or battery-powered arcs to ignite released gas. These enhance safety by removing fuel hazards and work reliably even in breezy conditions—perfect for outdoor kitchens where wind typically compromises traditional lighter performance.
Master Press-and-Pull Ignition for Reliable Grill Lighting
The press-and-pull mechanism found in quality grill lighters requires specific technique to prevent accidental activation while ensuring reliable flame generation. This dual-action design significantly reduces fire hazards during storage and handling compared to single-action lighters.
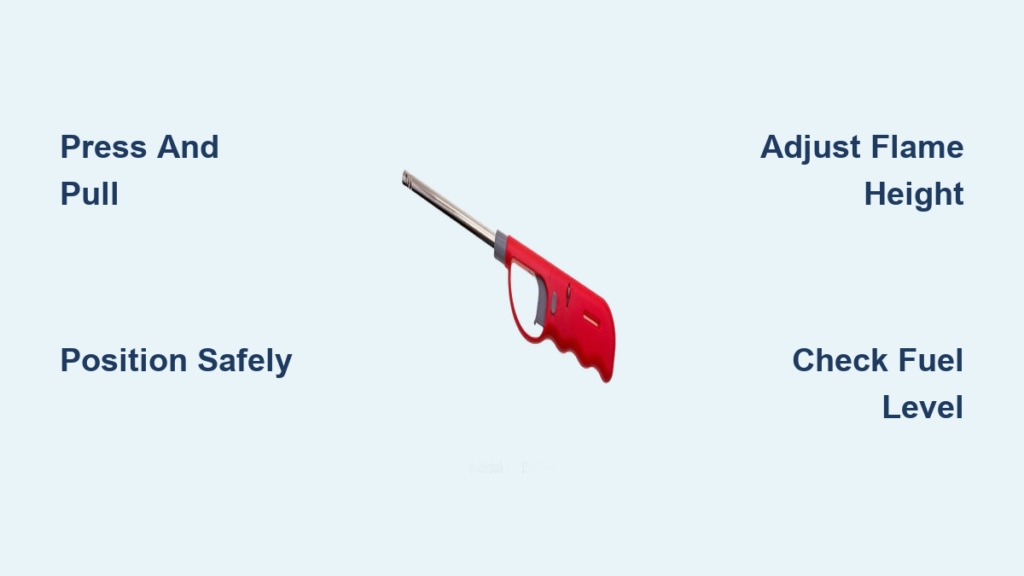
Position Before You Activate
Always position the flame outlet near your ignition source before engaging the mechanism. For gas grills, place the tip directly over the burner assembly; for charcoal, lower it into the chamber near your charcoal arrangement. Never activate the lighter away from your target—this wastes fuel and creates unnecessary flame exposure.
Execute the Dual-Action Sequence
Depress the ignition button fully while simultaneously pulling the trigger—this synchronized action produces both spark and fuel release. Hold this position for 2-3 seconds until the flame establishes, then maintain contact with your ignition source until it catches and sustains combustion. Attempting to rush this process causes failed ignitions and repeated attempts.
Adjust Flame Height for Your Task
Once ignited, calibrate flame height using the control knob. For stubborn burners or dense charcoal, use a robust 2-3 inch blue flame. For delicate culinary tasks like caramelizing sugar, reduce to a 1-inch pilot flame. Proper adjustment prevents flare-ups while ensuring sufficient heat transfer.
Critical Safety Shields That Prevent Kitchen Lighter Burns
Modern kitchen lighters incorporate protective mechanisms designed specifically to prevent the most common accidents during use.
Shield Your Hands from Direct Flame Contact
The metal safety shield surrounding quality lighter flames serves dual purposes: it blocks wind interference while creating a physical barrier between your hands and the flame. When lighting grills or fireplaces, always position your hand behind this shield—never alongside or above the flame outlet. This simple positioning prevents 90% of reported lighter burns according to consumer safety data.
Recognize Anti-Leak Valve Protection
Built-in valves automatically seal fuel chambers when lighters aren’t in active use or when stored improperly. Always store lighters upright to maximize this safety feature, and listen for the distinctive “hiss” when first activating a stored lighter—this indicates proper valve release rather than dangerous leakage.
Verify Flame Failure Protection
Higher-end models automatically cut off fuel supply if the flame extinguishes unexpectedly. Test this feature monthly by deliberately blowing out the flame—properly functioning units will immediately stop fuel flow rather than continuing to emit gas.
Light Gas and Charcoal Grills Without Burning Your Hands
Grilling applications demand specific techniques to achieve reliable ignition while maintaining safety throughout the process.
Gas Grill Ignition Protocol
- Position the lighter tip directly over the burner assembly
- Engage press-and-pull mechanism and hold for 3 seconds
- Maintain flame contact until burner ignites consistently (5-10 seconds)
- Reduce flame height once ignition occurs to conserve fuel
- Critical step: Listen for the gas valve click confirming burner activation before removing the lighter
Charcoal Lighting Technique
Lower the flame into the grill chamber near your charcoal arrangement without direct contact. Activate the ignition and maintain position until charcoal catches—typically 30-60 seconds depending on charcoal density. The adjustable flame control allows you to match ignition intensity to conditions: use maximum flame in windy conditions, reducing as charcoal ignites to prevent flare-ups.
Ignite Stubborn Gas Stovetops and Fireplaces in Seconds
Gas stovetops with failed ignition systems respond exceptionally well to proper lighter techniques.
Position the flame outlet directly over the burner hole, activate the ignition, and hold position until the flame establishes (usually 3-5 seconds). The compact design of stovetop lighters allows precise navigation between grate supports without awkward angles. For fireplaces, position yourself to the side rather than directly in front—this prevents accidental contact if the flame flares unexpectedly during ignition.
Extend Your Kitchen Lighter’s Life with Proper Fuel Management
Quality butane lighters deliver hundreds of ignitions when maintained properly, but neglect cuts their lifespan dramatically.
Refuel with Precision Timing
Refill when flame height drops below 1 inch or produces inconsistent blue coloring. Never overfill—stop when you hear fuel resistance during injection (typically 3-5 seconds of steady pressure). Allow 2 minutes for pressurized fuel to stabilize before use. Using high-purity butane prevents clogs and extends component life by up to 40% compared to standard fuel.
Clean Burner Ports Monthly
Blockages cause weak flames and inconsistent performance. Turn off gas supply, remove fuel source, then use compressed air to clear ports. For stubborn residue, gently brush ports with a soft toothbrush—never use metal objects that could damage precision openings.
Fix Weak Flames and Ignition Failures in 3 Simple Steps
Even well-maintained lighters occasionally experience issues. Diagnose problems systematically:
- Check fuel level by comparing weight to a new lighter (significant difference indicates depletion)
- Purge and refill with high-quality butane if fuel is low
- Clean ignition electrode with isopropyl alcohol if clicking occurs but no flame appears
Pro tip: If your lighter fails to ignite after these steps, check for debris in the safety shield vents—this common issue blocks proper air-to-fuel ratios needed for combustion.
Avoid Kitchen Lighter Accidents with These 5 Safety Rules
Following these non-negotiable safety practices prevents the most common accidents:
- Always operate in well-ventilated areas—never in confined spaces where gas could accumulate
- Maintain 12 inches of clearance from flammable materials including paper, oils, and solvents
- Never leave an active lighter unattended, even for “just a second” during ignition
- Allow complete cooling (5+ minutes) before storage after extended use
- Store upright in locked cabinets away from children and temperature extremes
Critical warning: If you smell gas during ignition attempts, stop immediately, ventilate the area, and do not reignite until the source is identified and resolved. Gas accumulation creates explosion risks far exceeding the inconvenience of delayed cooking.
By selecting the right kitchen lighter for your specific needs and applying these precise techniques, you’ll transform a potentially hazardous tool into a reliable kitchen companion. Proper usage extends lighter lifespan while ensuring safe, efficient ignition for every cooking task—from weekly family dinners to special occasion barbecues. The small investment in learning these proper techniques pays immediate dividends in safety, convenience, and cooking confidence.


