
The sizzle of batter hitting hot plates and the golden-brown aroma filling your kitchen—that’s the magic of a perfectly cooked waffle. But if your new Cuisinart waffle iron sits unused because you’re unsure how to operate it properly, you’re missing out on effortless weekend breakfasts. Many home cooks struggle with uneven browning, sticky waffles, or batter overflow simply because they skip critical setup steps or misjudge cooking times.
This definitive guide cuts through the confusion with precise, step-by-step instructions straight from Cuisinart’s specifications. You’ll master batter ratios that prevent sogginess, learn the exact moment to open the lid, and discover why room-temperature ingredients make all the difference. No more guessing games—just consistently crisp, restaurant-quality waffles every time you fire up your iron.
Gather Essential Ingredients and Prep Your Station
Before plugging in your Cuisinart waffle iron, assemble everything within arm’s reach. Place the unit on a heat-resistant countertop near an outlet, ensuring plates are clean and dry. Any residual oil or crumbs from previous use can cause sticking or uneven cooking. Wipe plates gently with a damp cloth if needed, but never use abrasive cleaners on the non-stick surface.
Critical tools you’ll need:
– Large mixing bowl for dry ingredients
– Separate bowl for wet ingredients
– Whisk or fork for smooth blending
– Measuring cups and spoons for accuracy
– Heat-resistant spatula or fork for removal
Having these ready prevents rushed movements while the iron heats. Crucially, verify your waffle iron’s plates are properly aligned—misaligned plates create uneven cooking zones that leave parts underdone. Close the lid gently to check alignment before preheating.
Why Temperature Matters for Batter Success
Room-temperature eggs and milk blend seamlessly into batter, eliminating lumps without overmixing. Cold ingredients cause batter to seize, leading to dense, chewy waffles. If you forgot to set out ingredients, submerge eggs in warm water for 5 minutes and microwave milk for 15 seconds (not hot). This small step ensures air pockets form during cooking for that signature fluffy interior.
Mix Batter Using the Two-Bowl Method
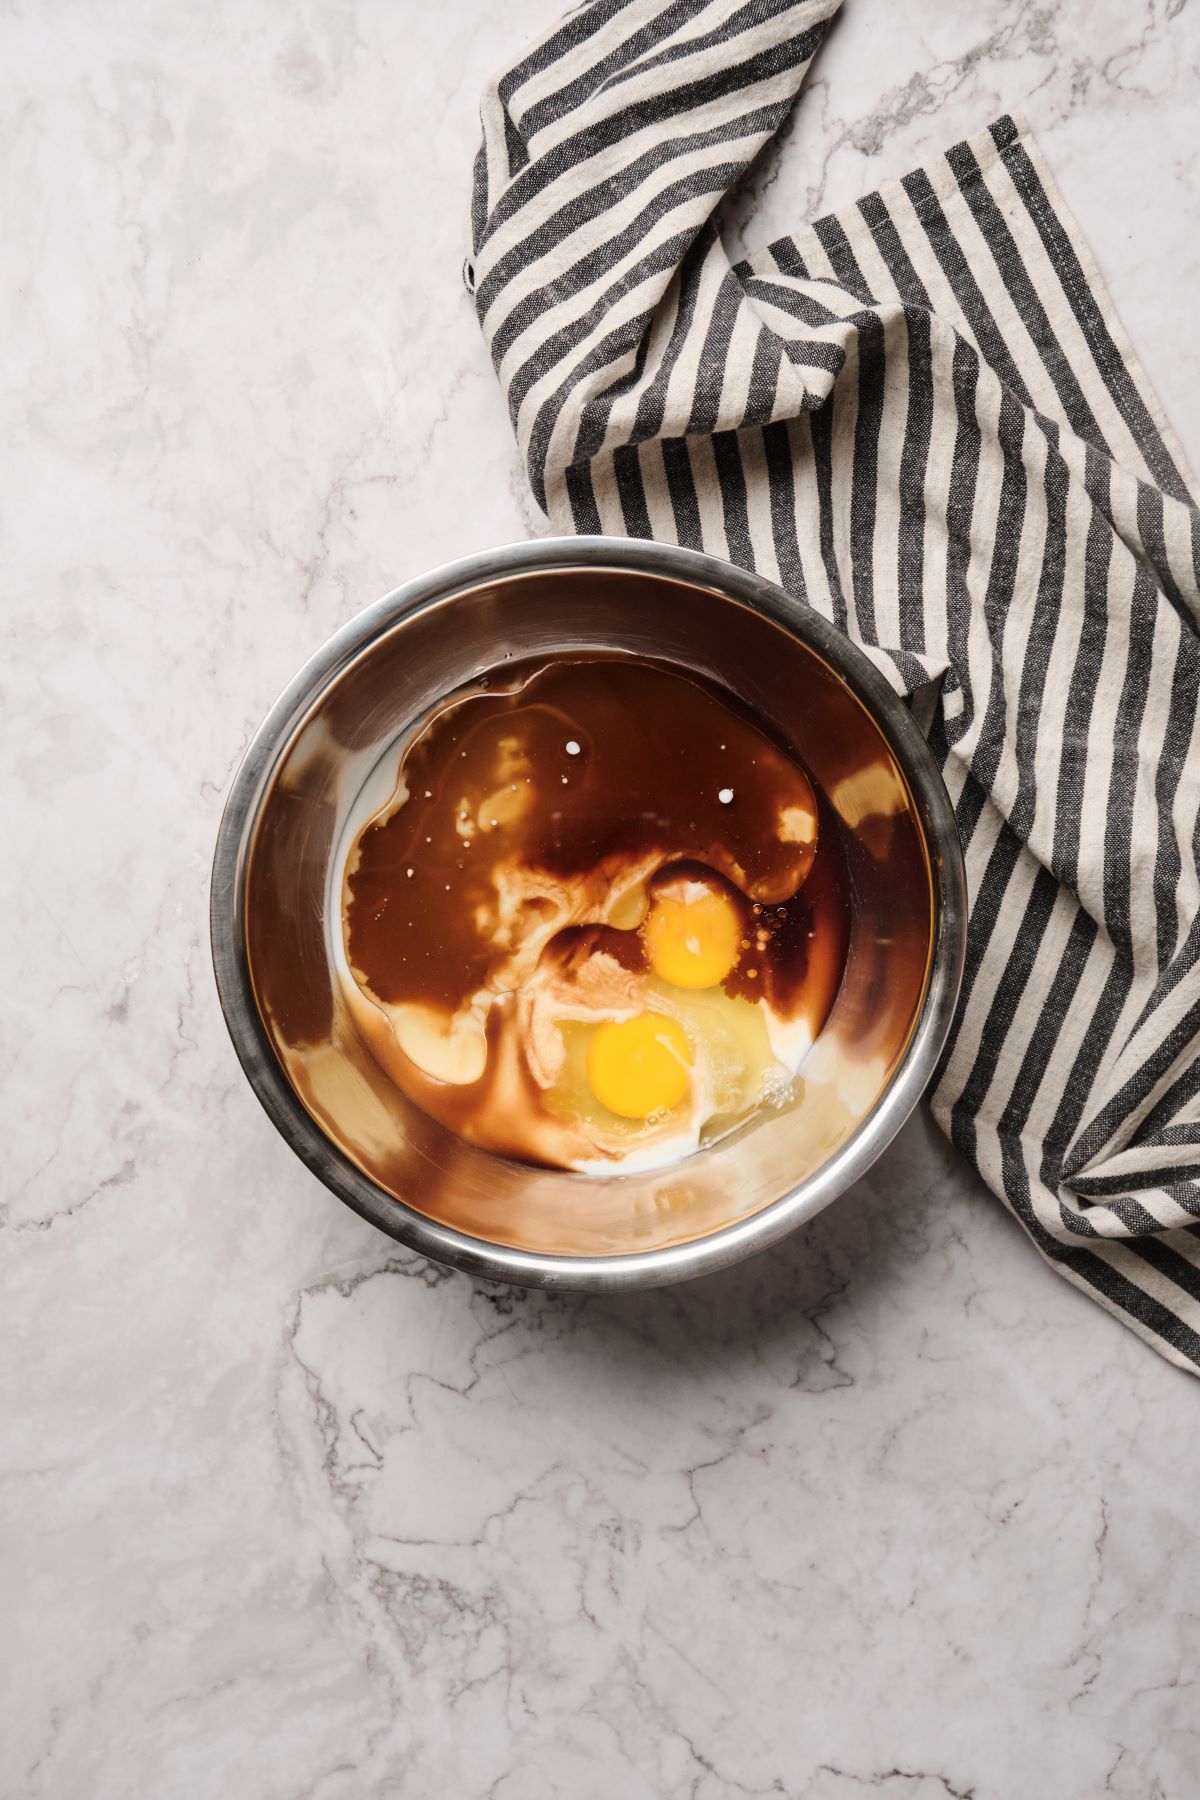
Overmixing activates gluten in flour, resulting in tough waffles instead of tender ones. The solution? Combine dry and wet ingredients separately, then fold together minimally.
Dry ingredients (in large bowl):
– 2 cups all-purpose flour
– 2 tablespoons sugar
– 2 teaspoons baking powder
– ½ teaspoon salt
Wet ingredients (in separate bowl):
– 2 large eggs
– 1½ cups milk
– ½ cup melted butter or neutral oil
– 1 teaspoon vanilla extract (optional)
Whisk wet ingredients until smooth, then pour into the dry mixture. Fold gently with a spatula just until no flour streaks remain—small lumps are ideal. Overmixing is the #1 cause of rubbery waffles, so stop as soon as ingredients combine. Let batter rest 5 minutes while the iron preheats; this hydrates the flour for optimal rise.
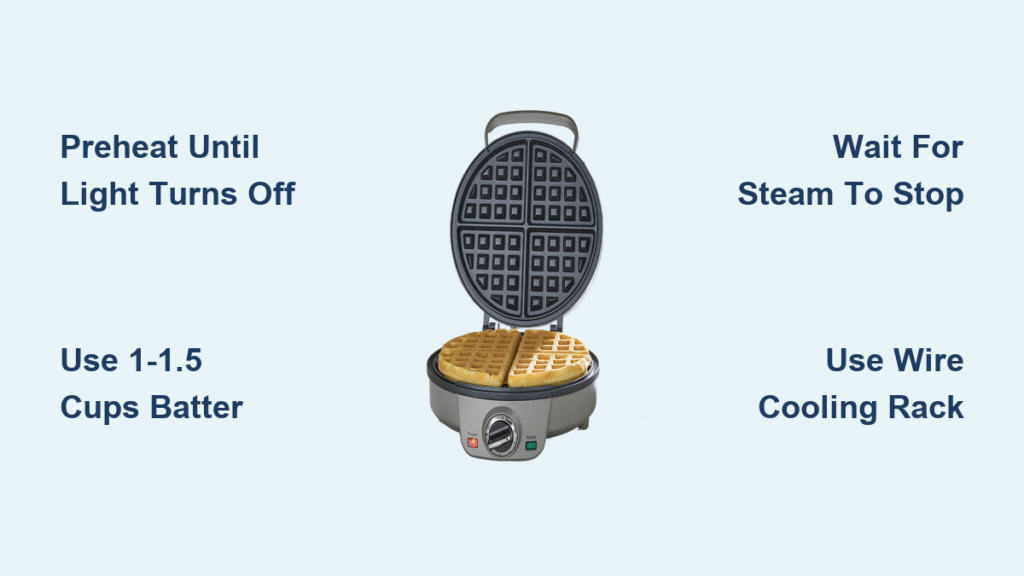
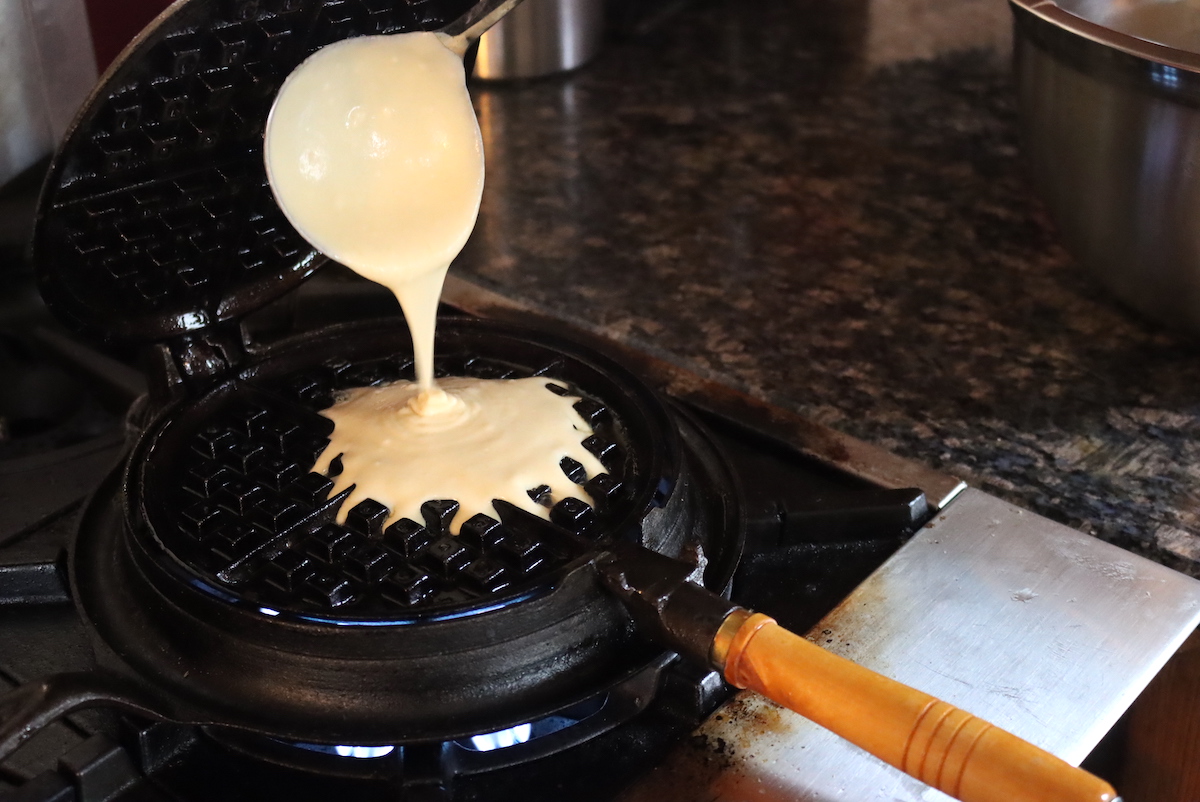
How Much Batter to Pour for Perfect Coverage
Most beginners overfill their Cuisinart waffle iron, causing messy overflow that hardens on hinges. Use exactly 1 to 1½ cups of batter depending on your model:
– Standard 7-inch models: ¾ to 1 cup
– Belgian-style (deeper grids): 1 to 1½ cups
Pour batter into the center of the lower plate—it will spread naturally when you close the lid. Never spread batter with a spoon; this compresses air bubbles and creates uneven thickness. If batter creeps toward the edges, reduce quantity by ¼ cup next time.
Preheat to the Exact “Ready” Signal
Plug in your Cuisinart waffle iron and turn it on. Wait 3–5 minutes for full preheating—this is non-negotiable for even cooking. Most models feature an indicator light that turns off when optimal temperature (around 375°F) is reached. During preheating:
- Do not open the lid—releasing heat extends preheating time by 2+ minutes
- Watch for subtle steam escaping vents (normal)
- Avoid touching plates; they’ll appear slightly darker when hot
Once preheated, lightly coat plates with cooking spray or oil. Even non-stick surfaces need this barrier since waffle batter contains sugar that can caramelize and stick. Use a pastry brush for even coverage, avoiding excess that causes splatter.
Why Skipping Preheating Ruins Waffles
Cold plates absorb batter moisture instantly, creating a gummy texture. Under-preheated irons also cause batter to seep into hinge mechanisms, creating hard-to-clean residue. Always wait for the indicator light—rushing this step guarantees stuck waffles.
Cook Until Steam Stops—Not Just Golden Brown
Close the lid gently after pouring batter. Set a timer for 4 minutes, but rely on visual cues over strict timing:
- Minutes 1–2: Vigorous steam escapes as water evaporates
- Minutes 3–4: Steam slows significantly; edges turn golden
- Minutes 4–6: Steam nearly stops; waffle releases easily
Critical warning: Never open the lid before steam reduces. Premature opening tears waffles and traps steam inside, creating soggy centers. When steam is minimal, carefully lift the lid. If the waffle sticks, close it for 30 more seconds—it’s not done.
Troubleshooting Common Cooking Issues
- Soggy center? Batter was overmixed or too cold. Next time, fold gently and use room-temperature ingredients.
- Burnt edges? Your iron runs hot. Reduce cooking time by 30 seconds next batch.
- Uneven browning? Plates weren’t preheated fully. Wait for indicator light next time.
Remove and Serve for Maximum Crispness

Once the lid opens freely, slide a fork under one edge and lift the entire waffle. Never shake the iron—that distorts shape. Place waffles directly on a wire cooling rack; contact with a plate traps steam, making bottoms soggy within 60 seconds.
For crowd-sized batches:
– Keep cooked waffles warm in a 200°F oven on the rack
– Never stack waffles—they steam each other soft
– Serve within 2 minutes for peak crispness
Top immediately with maple syrup, fresh berries, or a dusting of powdered sugar. The contrast between the crackly exterior and airy interior is why homemade waffles beat frozen ones every time.
Pro Tips for Flawless Waffles Every Time
Prevent Overflow and Uneven Cooking
Overfilling is the top mistake with Cuisinart waffle irons. Fill only ⅔ full—batter expands as steam forms. If you notice batter creeping toward hinges during cooking, reduce quantity by ¼ cup next time. For deep Belgian grids, pour batter in a circular motion starting from the center to ensure even distribution.
Boost Crispness with Oven Warming
While finishing batches, keep cooked waffles in a 200°F oven on a wire rack. This maintains crispness without drying them out—critical for serving groups. Never cover waffles with foil; trapped moisture creates sogginess.
Customize Flavors Without Ruining Texture
Fold in ¼ cup of mix-ins after combining batter:
– Chocolate chips (press into batter gently to prevent sinking)
– Fresh blueberries (pat dry first to avoid bursting)
– Cinnamon (½ teaspoon max to avoid overpowering)
Never add liquid ingredients like fruit juice—they alter batter consistency and cause steaming issues. Stick to dry or solid add-ins for reliable results.
Final Note: Mastering your Cuisinart waffle iron hinges on respecting three non-negotiables: preheat until the indicator light turns off, pour the exact batter amount for your model, and wait for steam to nearly stop before opening. Within two batches, you’ll recognize the subtle shift from vigorous to minimal steam—the true signal of waffle perfection. Clean the cooled plates with a damp cloth after each use (never submerge in water), and you’ll enjoy golden, crisp-on-the-outside, fluffy-on-the-inside waffles for years. Your weekend breakfasts just earned a permanent upgrade.


