
Tired of squinting while chopping vegetables under that single, harsh overhead light? If your kitchen still relies on outdated fluorescent panels or builder-grade fixtures from decades past, you’re missing out on both functionality and style. Modern kitchen lighting transforms your workspace into an efficient, inviting environment where meal preparation becomes enjoyable rather than a chore. The good news is that updating old kitchen lighting has never been more accessible for DIYers, with energy-efficient LED options and simplified installation methods making this renovation project achievable for most homeowners.
Whether you’re dealing with flickering fluorescents that cast unflattering shadows, inadequate task lighting that makes cooking difficult, or simply a dated aesthetic that drags down your entire kitchen’s appearance, this guide provides the practical steps to transform your space. You’ll discover how to create layered lighting that serves multiple purposes—from bright task illumination for food prep to warm ambient lighting for evening gatherings—all while saving energy and enhancing your home’s value. Let’s dive into the specific steps that will bring your kitchen lighting into the 21st century.
Identify Problem Areas in Your Existing Kitchen Lighting
Start by spending three to five days observing your kitchen at different times of day and during various activities. Notice where shadows fall when you’re preparing food, which areas feel too dim for reading recipes, and where glare makes it uncomfortable to stand. Most kitchens from the 1980s through early 2000s suffer from “single-point lighting syndrome”—relying on one central fixture that creates harsh overhead shadows when you work at countertops.
Document specific pain points with a simple checklist:
– Areas where shadows interfere with food preparation
– Zones that feel uncomfortably dim during evening hours
– Locations where glare reflects off countertops or appliances
– Tasks requiring additional light sources (like reading small labels)
– Outdated fixtures that no longer match your kitchen’s style
Take photos of your current setup, including close-ups of existing fixtures, switch locations, and any problematic shadow patterns. This visual documentation helps you communicate with lighting specialists if needed and ensures you don’t forget critical observations when planning your upgrade.
Create a Layered Lighting Plan for Maximum Functionality

Professional kitchen designers rely on three distinct lighting layers that work together to create a space that’s both beautiful and practical. Your updated kitchen lighting should include all three:
Ambient lighting forms your foundation—providing general illumination that allows safe movement through the space without harsh shadows. Modern solutions include:
– Recessed LED downlights spaced 3-4 feet apart
– Track lighting systems that can be reconfigured as needs change
– Flush or semi-flush ceiling fixtures with diffused light
Task lighting targets specific work areas where precision matters:
– Under-cabinet LED strips for countertop illumination
– Adjustable recessed lights focused on cooking surfaces
– Pendant lights positioned directly over islands and peninsulas
Accent lighting adds visual interest and highlights architectural features:
– Inside-cabinet lighting to showcase glassware
– Toe-kick lighting along base cabinets for nighttime navigation
– Uplighting above upper cabinets to create depth
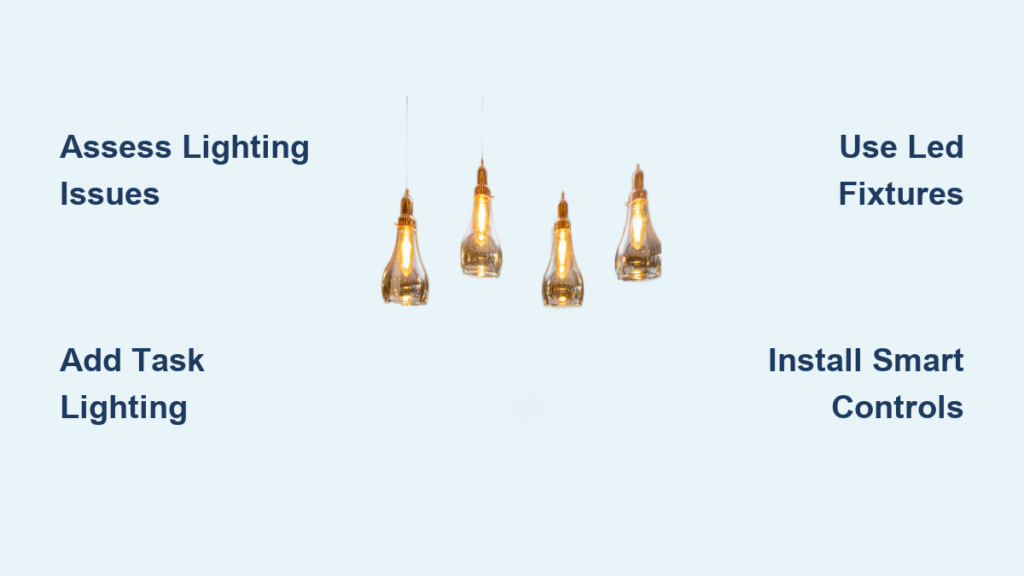
Choose Modern Fixtures That Match Your Kitchen’s Layout

Your fixture selection depends heavily on your kitchen’s specific configuration. For galley or L-shaped kitchens with limited counter space, under-cabinet lighting becomes essential while recessed lights provide ambient illumination. Larger kitchens with islands benefit from statement pendant fixtures combined with layered recessed lighting.
Recessed lighting has evolved significantly since older incandescent “can lights” that wasted energy and created hot spots. Modern LED retrofit kits drop into existing housings, providing brighter, more even light while using 75% less energy. For kitchens with 8-9 foot ceilings, 4-inch recessed fixtures spaced 4 feet apart create ideal coverage without overwhelming the space.
Under-cabinet lighting deserves special attention—this single upgrade often makes the biggest difference in kitchen functionality. Look for LED tape lights with:
– High color rendering index (CRI) of 90+ for accurate food colors
– 3000K-3500K color temperature for natural-looking illumination
– Adhesive backing for easy installation without visible hardware
– Dimmable capability to adjust brightness for different tasks
For kitchen islands, select pendant lights sized proportionally to your space—typically 12-18 inches wide for standard 24-30 inch deep islands. Hang them 30-36 inches above the countertop surface, spacing multiple pendants 24-30 inches apart. Choose fixtures with diffusers that direct light downward rather than creating glare.
Select Energy-Efficient Bulbs with the Right Color Quality
Bulb selection dramatically impacts both your utility bills and how food appears in your kitchen. Modern LED technology offers significant advantages over older options:
- Wattage equivalents: Replace 60W incandescents with 8-10W LEDs, 100W bulbs with 14-16W LEDs
- Color temperature: Choose 2700K-3000K for warm, inviting light similar to traditional bulbs
- Lumens output: Aim for 4,000-8,000 total lumens in a standard 10×12 kitchen
- CRI rating: Select bulbs with 90+ CRI to make food colors appear natural and vibrant
Avoid common mistakes like mixing different color temperatures throughout your kitchen, which creates visual confusion. Stick with one temperature range (typically 3000K) for consistency, though some homeowners install tunable LEDs that shift from cool white (4000K) for daytime tasks to warm white (2700K) for evening ambiance.
Execute Safe Electrical Upgrades Without Professional Help
Many lighting updates can be completed safely as DIY projects with proper precautions. Always begin by turning off power at the circuit breaker and verifying with a voltage tester—never assume the power is off. For simple fixture replacements, match wire colors (black to black, white to white, ground to ground) and secure connections with wire nuts.
When adding new fixtures to existing circuits, calculate your total load to avoid overloading:
– Add up wattage of all new fixtures
– Ensure total stays below 80% of circuit capacity (1,150 watts for a 15-amp circuit)
– Consider installing a dedicated lighting circuit if adding multiple new fixtures
For under-cabinet lighting, plug-in options avoid electrical work entirely while hardwired versions provide cleaner aesthetics. If hardwiring, run new cable from an existing junction box following local code requirements for kitchen circuits. When in doubt about electrical requirements, consult a licensed electrician before proceeding.
Install Smart Controls for Enhanced Functionality
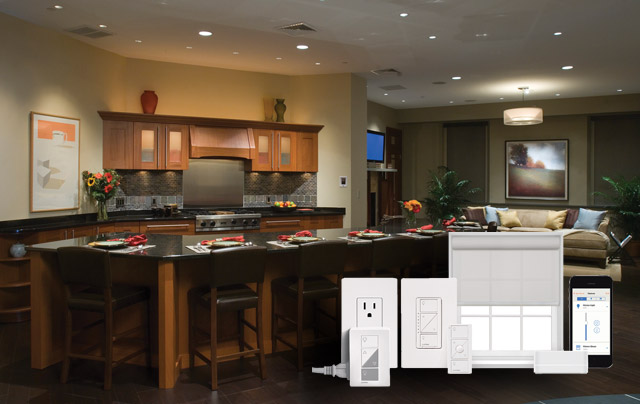
Modern lighting controls transform how you interact with your kitchen environment. Start with LED-compatible dimmer switches that allow you to adjust brightness for different activities—bright for food prep, softer for dining. Brands like Lutron and Leviton offer models specifically designed for smooth LED dimming without flickering.
For maximum convenience, consider smart lighting systems that enable:
– Voice control through Amazon Alexa or Google Assistant
– Automated schedules that brighten in morning and dim in evening
– Remote control when you’re away from home
– Scene settings for cooking, dining, or entertaining
Motion sensors add hands-free convenience for under-cabinet lighting or pantry areas. Install them to activate only when someone is present, reducing energy waste while providing light exactly when needed. Set activation periods to 15-30 seconds to avoid premature shut-offs during cooking tasks.
Maintain Your New Lighting System for Long-Term Performance
Proper maintenance keeps your updated lighting performing at its best. Clean fixtures every three months using a microfiber cloth to remove dust and kitchen grease that reduces light output by up to 20%. For glass shades, remove and wash with mild soap, ensuring complete drying before reinstallation.
Check LED performance annually—while LEDs last years longer than traditional bulbs, their brightness gradually diminishes over time. When you notice areas appearing dimmer, replace entire LED modules rather than expecting individual “bulb” replacements like with older technologies.
Test dimmer functionality quarterly by slowly adjusting brightness through the full range. If you experience flickering or inconsistent performance, the dimmer may need replacement or adjustment for your specific LED load. Most modern dimmers include load calibration features to optimize performance with various LED configurations.
Upgrading old kitchen lighting delivers immediate benefits that transform your daily experience in this essential space. With strategic planning and the right fixtures, you’ll create a kitchen that’s both beautiful and highly functional—where shadows no longer interfere with food preparation, energy bills decrease significantly, and the atmosphere adapts seamlessly from morning coffee to evening entertaining. Start with a thorough assessment of your current pain points, then implement the three essential lighting layers using modern LED technology and smart controls. The investment pays dividends in both daily enjoyment and long-term home value, turning your kitchen into the bright, welcoming heart of your home that it deserves to be.


