
Tired of staring at boring, empty kitchen shelves that look like an afterthought? You’re not alone—studies show 78% of homeowners with open shelving struggle with creating displays that feel intentional rather than cluttered. The truth is, styling open kitchen shelves transforms your kitchen from purely functional to a curated space that reflects your personality while keeping daily essentials within arm’s reach. This guide reveals professional techniques that turn chaotic clutter into elegant displays, whether you’re working with a single floating shelf or a full wall of open storage. By the end, you’ll know exactly how to arrange your dishware, incorporate decorative elements, and maintain a display that looks magazine-worthy without requiring constant upkeep.
Why Open Shelving Works in Modern Kitchens
Open shelves offer a unique opportunity to blend storage with style, creating visual interest while keeping everyday essentials accessible. Unlike closed cabinets, open shelving showcases your carefully selected dishware and decorative items, making your kitchen feel more personalized and lived-in. The absence of cabinet doors also creates a sense of openness and space, which is particularly valuable in smaller kitchens where bulky cabinets can feel overwhelming.
Beyond aesthetics, open shelving encourages organization. When your items are visible, you’re more likely to maintain tidy arrangements and put things back in their proper place. This visibility also makes meal preparation more efficient—you can instantly see what plates, bowls, or cooking tools you have available without opening and closing multiple cabinet doors. For best results, position your most frequently used items at eye level where they’re easiest to access, with heavier cookware on lower shelves for safety and lighter decorative pieces above.
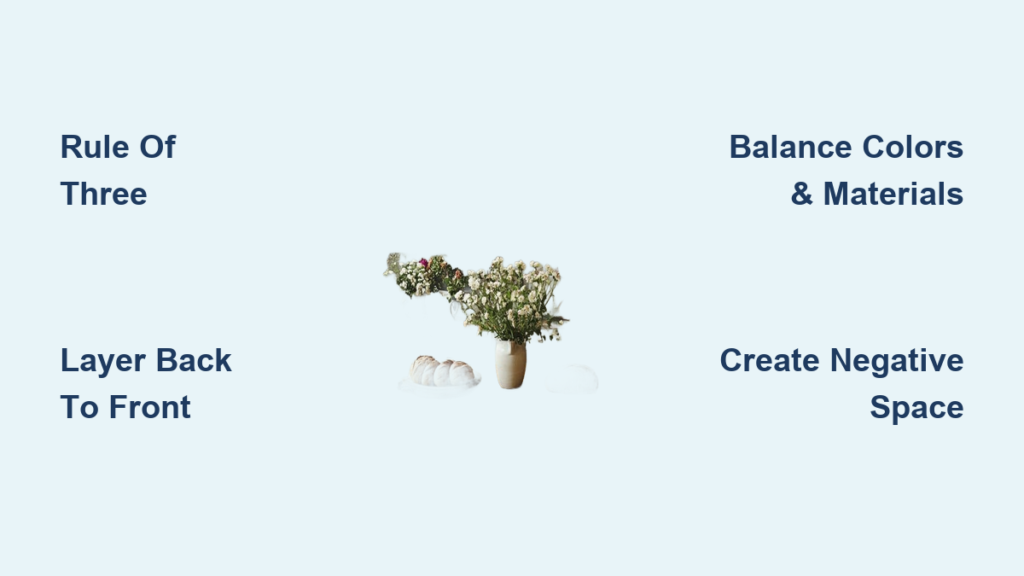
Master the Rule of Three for Visual Appeal
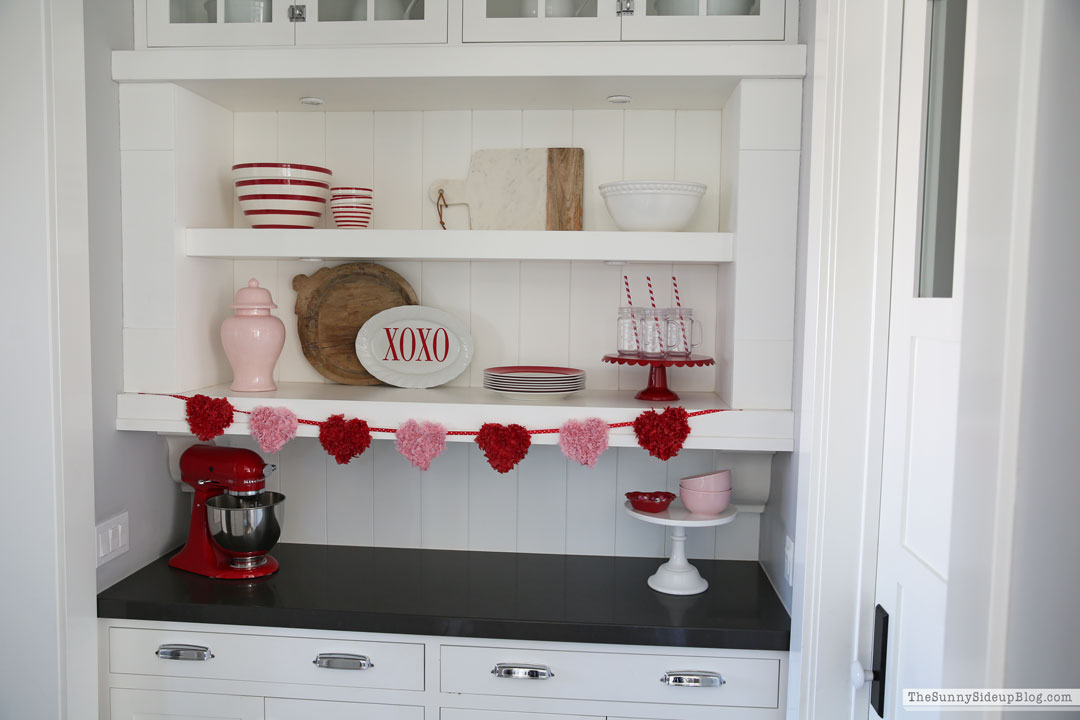
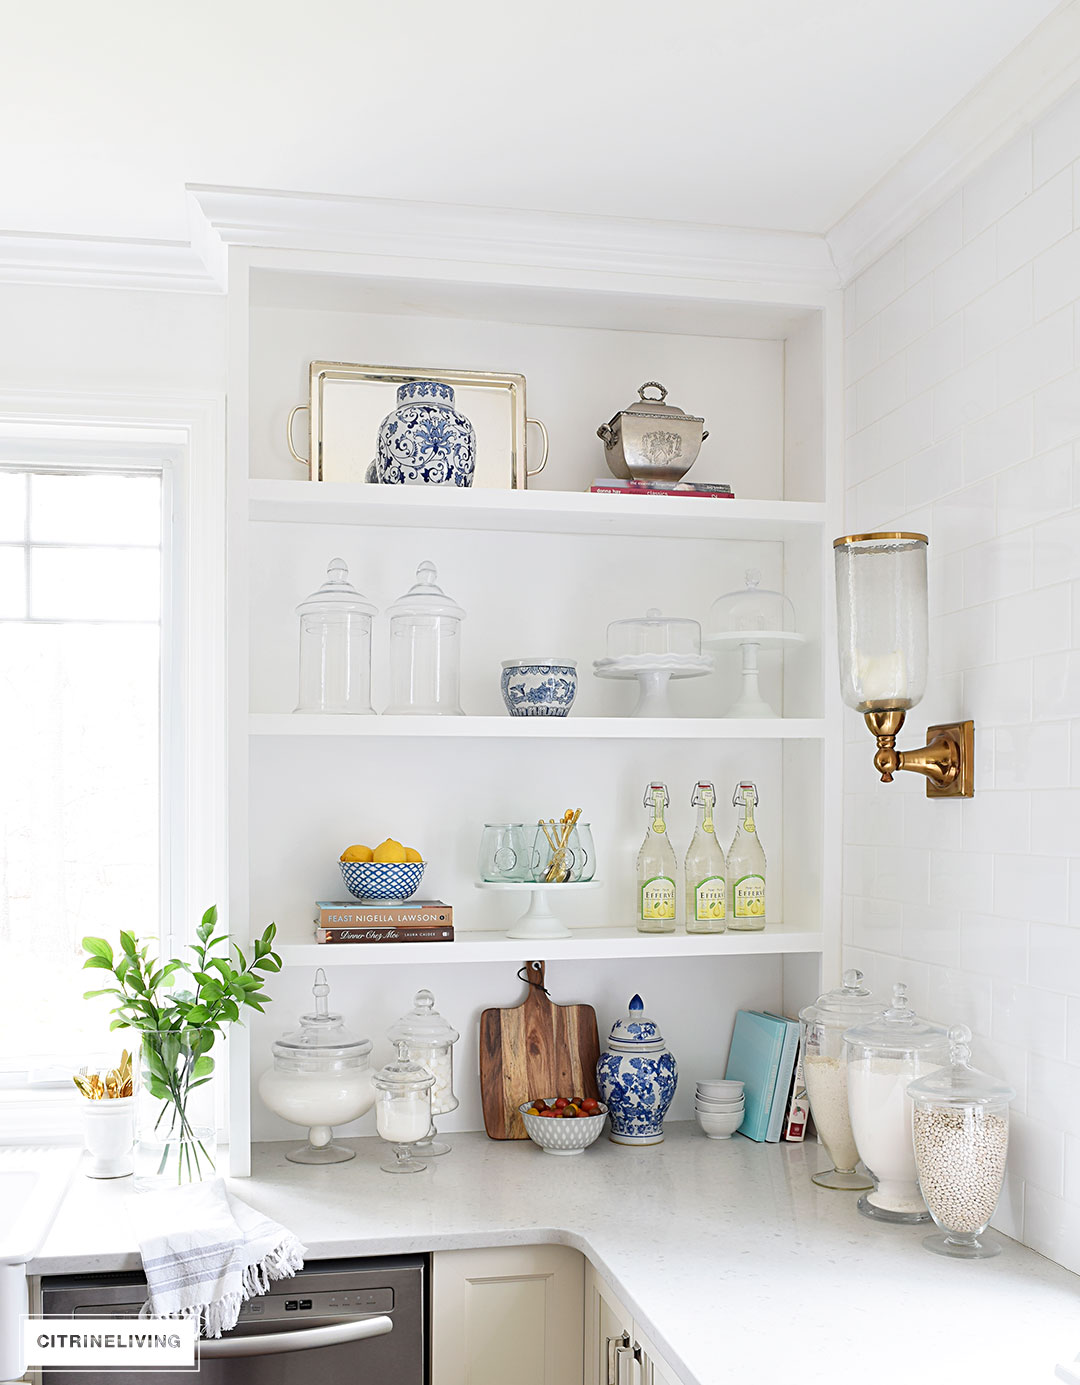
The rule of three is a foundational principle in interior design that works exceptionally well for open shelving. When arranging items, group objects in odd numbers—typically three—to create natural visual interest. An odd number of items forces the eye to move across the arrangement, creating a more dynamic and pleasing composition than perfectly symmetrical even-numbered groupings.
Apply this principle by clustering three similar items together, such as three ceramic bowls of varying heights, or grouping a vase, a small plant, and a decorative bowl into a single vignette. Vary the heights within each grouping to add dimension; tall items should anchor the back of the arrangement while shorter pieces fill the foreground. Pro tip: Place your tallest item slightly off-center within each grouping for more organic movement. This layered approach prevents your shelves from looking flat or one-dimensional, creating depth that draws the eye upward and makes your kitchen feel more thoughtfully designed.
Balance Colors and Materials Thoughtfully
Creating a cohesive color palette across your open shelves ties your kitchen together and prevents the display from feeling chaotic. Choose a dominant color—perhaps white, cream, or a warm wood tone—and use it as your foundation. Then introduce secondary colors that complement your kitchen’s existing palette, saving bold accent colors for single statement pieces that draw the eye.
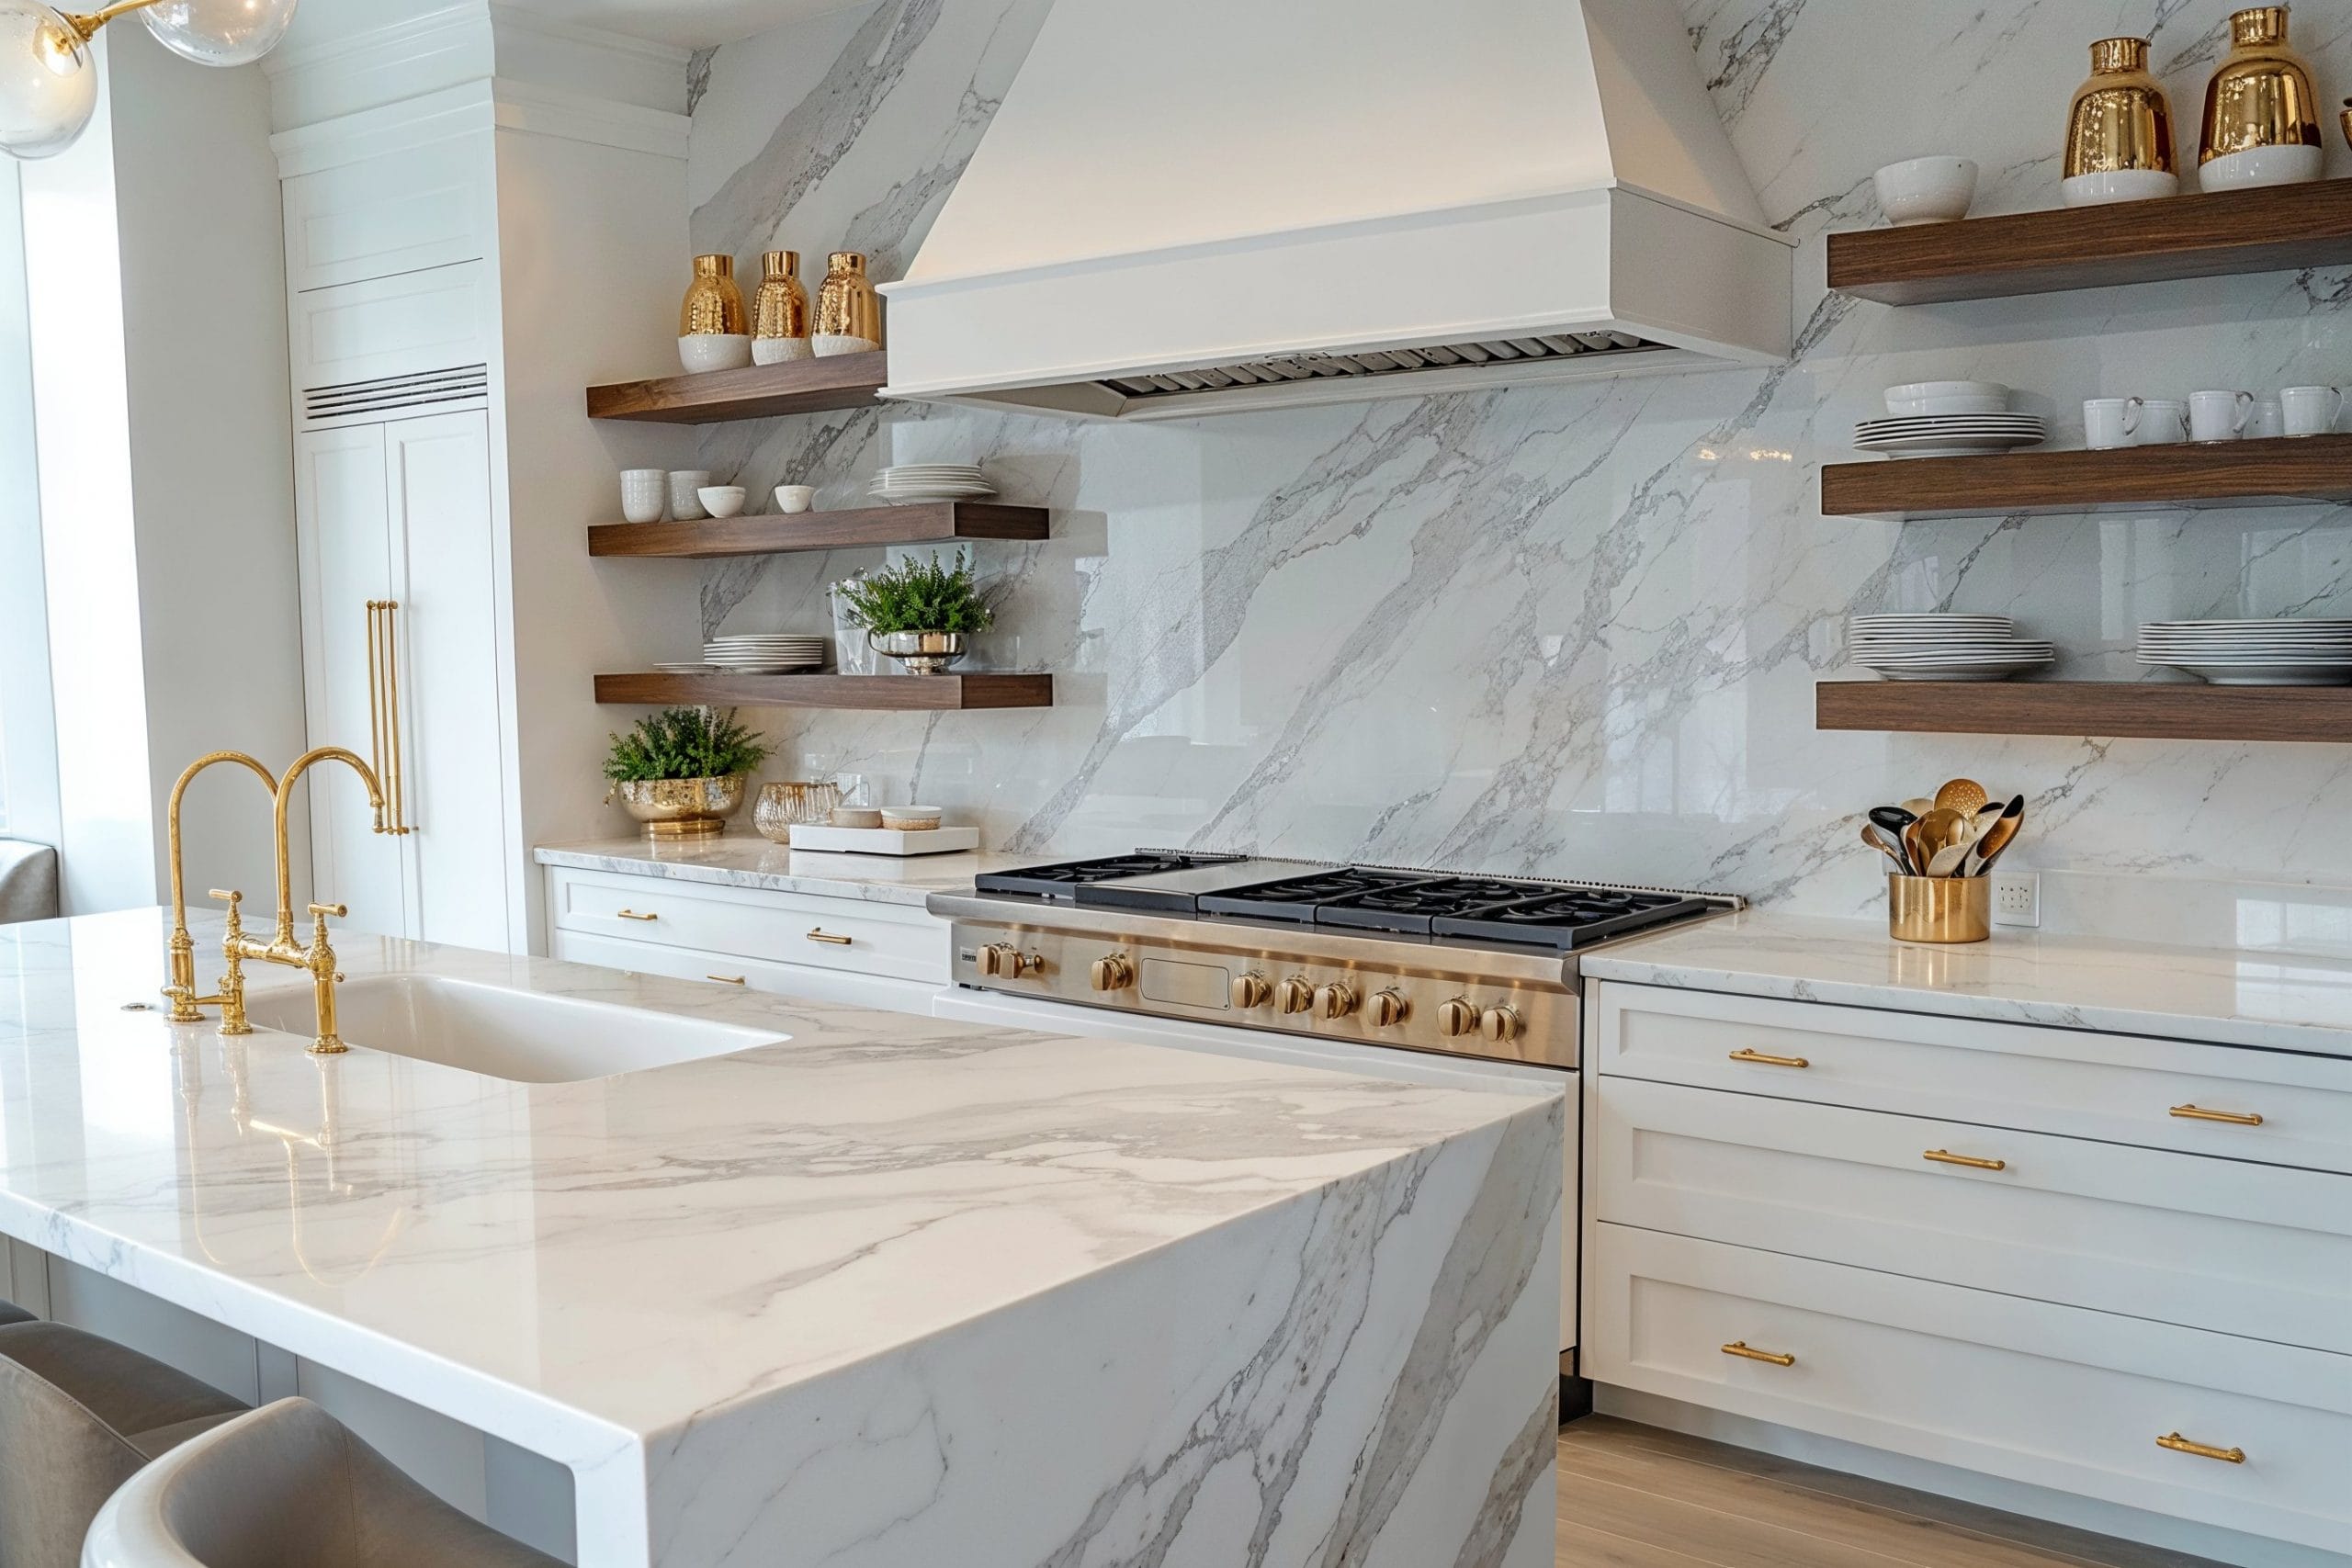
Material mixing adds texture and visual richness to your shelf display. Combine smooth ceramics with rough stoneware, sleek glass with warm wood, and polished metal with matte finishes. For example, pair a glossy white pitcher with a matte black vase and a woven basket for contrast. However, avoid overwhelming the space with too many competing materials; stick to two or three primary materials for a cohesive look that still feels layered and intentional. When in doubt, repeat one material throughout your display to create visual continuity.
Layer Items from Back to Front
Effective shelf styling requires thinking in three dimensions, using depth to create arrangements that feel substantial and considered. Start by placing the tallest items along the back of the shelf, creating a natural backdrop for your display. These anchor pieces might include tall pitchers, stacked cookbooks, or floor-standing vases with dried branches or greenery.
Medium-height items occupy the middle ground, filling gaps between your anchor pieces while adding visual weight to the arrangement. These might include everyday dishware, decorative boxes, or sculptural objects that bridge the gap between your tall back pieces and smaller front items. Finally, position the smallest items in the front, ensuring they don’t get visually lost behind larger pieces. Try this step-by-step approach:
- Place your tallest anchor items against the back wall
- Add medium-height pieces slightly forward
- Position small accents in the very front
- Step back and adjust until you achieve balanced visual weight
This back-to-front layering creates depth that makes your shelves feel professionally styled rather than simply functional storage.
Mix Function with Decorative Display
The most successful open shelf arrangements balance everyday usability with visual appeal. Reserve your most accessible shelves for items you use daily—frequently used plates, go-to drinking glasses, and cooking tools that stay within reach during meal preparation. These functional items can still look beautiful; choose dishware in cohesive colors and styles that contribute to your overall aesthetic even when strictly utilitarian.
Dedicate upper shelves or less accessible areas to decorative items that preserve the beauty of your display while keeping practical items where you need them. Reserve these prime display spots for special occasion dishware, inherited pieces with sentimental value, or decorative objects that bring you joy. For rental-friendly styling, consider using peel-and-stick shelf liners in subtle patterns to add visual interest without permanent changes.
Curate Cookbooks as Stylish Focal Points
Cookbooks serve dual purposes on open shelves: they provide practical reference material while contributing color, texture, and visual interest to your arrangement. Stack cookbooks horizontally to create varying heights across your shelf, or arrange them vertically with a small decorative object resting on top to prevent them from toppling. The spines of well-chosen cookbooks often feature beautiful typography and colors that enhance your overall palette.
Consider the visual weight of your cookbook collection when arranging them alongside other items. Heavier, larger cookbooks work well as anchors at the back of shelves or as the base of stacked arrangements. Smaller, thinner volumes can fill gaps and add variety to your groupings. Rotate seasonal or thematic cookbooks to the front of your collection to keep your display fresh and reflect your current cooking interests—this small change makes a big impact without requiring new purchases.
Incorporate Live Plants for Freshness
Greenery breathes life into kitchen shelf arrangements, adding organic shapes and natural color that soften the often-hard surfaces of a kitchen. Choose plants that thrive in kitchen environments—humidity-loving herbs like basil and mint work beautifully in sunny spots, while pothos and snake plants tolerate lower light conditions further from windows. Consider the shelf location when selecting plants; items near heat sources or in direct sunlight require different plant choices than those in cooler, shadier spots.
Integrate plants into your shelf styling by using them as natural focal points or as part of larger groupings. A single trailing pothos cascading from a shelf edge adds movement and softness to rigid shelf lines. Group several small succulents together for a collected, naturalistic display. herbs planted in matching ceramic pots create both beauty and functionality, providing fresh garnishes and flavors within arm’s reach of your cooking station. Just remember to choose non-toxic varieties if you have curious pets!
Create Negative Space for Visual Rest
Resist the temptation to fill every inch of your open shelves. Negative space—the empty areas between and around your displayed items—is crucial for preventing a cluttered, overwhelming appearance. Give each item room to breathe, allowing the eye to rest between groupings and appreciate individual pieces without competing for attention.
Negative space also makes rearranging and updating your display easier, as you won’t need to completely disassemble crowded arrangements when adding or removing items. Aim for roughly sixty to seventy percent coverage of your shelf surfaces, leaving the remaining space open and uncluttered. This balanced approach creates a more sophisticated, gallery-like aesthetic that feels intentional rather than chaotic. When in doubt, remove one item from each shelf—your display will instantly look more curated.
Maintain Your Styled Shelves Long-Term
Open shelves require regular maintenance to preserve their beauty over time. Dust accumulation is inevitable when items remain exposed, so schedule monthly cleaning sessions where you remove all items, wipe down shelf surfaces, and clean each object before returning it to its place. This routine prevents the dull buildup that makes even beautiful displays look neglected.
Rotate decorative items and seasonal pieces every few months to keep your shelf display feeling fresh and relevant. During rotation, take the opportunity to edit your collection—donate or store items that no longer serve your aesthetic or functional needs, ensuring your shelves always reflect your current style and priorities. For quick touch-ups between deep cleans, keep a microfiber cloth handy to dust shelves while putting away clean dishes.
Final Thoughts on Open Shelf Styling
Styling open kitchen shelves is both an art and a practice, requiring an eye for composition alongside ongoing attention and care. By mastering fundamental principles like the rule of three, thoughtful color balancing, and strategic layering, you create displays that feel professionally designed while reflecting your personal taste. Remember that function must coexist with beauty; the most stunning shelf arrangement fails if it impedes your daily kitchen activities.
Start with what you have, trusting that your eye will develop and your confidence will grow with practice. Edit ruthlessly, keeping only items that serve a purpose or bring you genuine joy. Step back frequently to evaluate your arrangements from different angles and distances, making adjustments until the composition feels balanced and right. With patience and intention, your open shelves will become a defining feature of your kitchen—a curated display that welcomes you home every day while making your daily kitchen routine more enjoyable.


