
Water pooling under your kitchen sink? That persistent drip that won’t quit? A poorly sealed kitchen sink creates more than just annoying puddles—it can lead to serious water damage, mold growth, and costly repairs. Properly sealing your kitchen sink is one of the most effective preventive measures you can take to protect your home. In this guide, you’ll learn exactly how to seal kitchen sink components correctly, whether you’re installing a new sink or fixing leaks in an existing one. You’ll discover the right materials to use, common mistakes to avoid, and professional techniques that ensure a watertight seal that lasts for years.
Why Proper Kitchen Sink Sealing Matters More Than You Think
Ignoring a leaky sink seal can cause thousands in damage before you notice the problem. Water seeping beneath your countertop doesn’t just create a mess—it weakens cabinet structures, ruins drywall, and creates perfect conditions for toxic mold. The average homeowner underestimates how quickly minor leaks escalate; just one drip per second wastes over 700 gallons of water annually. When you know how to seal kitchen sink properly, you’re not just fixing a current problem—you’re preventing future disasters. A properly sealed sink should remain watertight for 5-10 years with quality materials and correct installation techniques.
What Causes Kitchen Sink Seals to Fail
Most sink leaks develop from improper initial installation rather than material failure. The three most common causes include:
– Insufficient sealant application around the sink perimeter
– Using the wrong type of sealant for specific sink materials
– Failing to clean surfaces thoroughly before applying sealant
Critical Areas That Need Sealing
Your kitchen sink has three primary areas requiring proper sealing:
– The perimeter where the sink meets the countertop
– Around the faucet base
– The drain assembly connection points
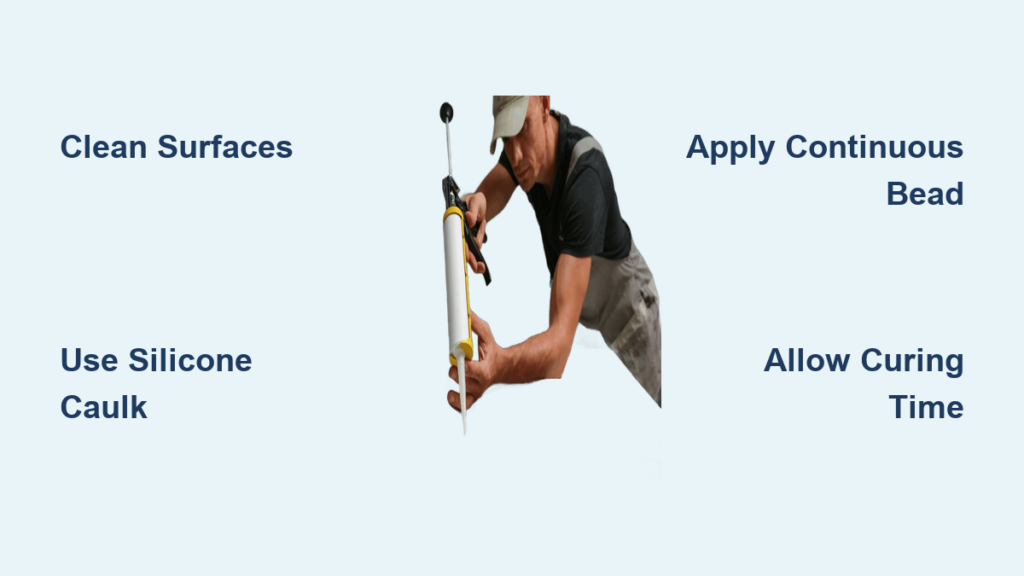
Essential Tools and Materials for Sealing Your Kitchen Sink
Must-Have Supplies for a Professional Result
Before you begin learning how to seal kitchen sink components, gather these essential items:
- High-quality silicone caulk specifically formulated for kitchen/bath use (not regular caulk)
- Caulk gun with precision tip control
- Rubbing alcohol and lint-free cloths for surface preparation
- Painter’s tape (1/4 inch width) for clean lines
- Utility knife for cutting caulk tubes and trimming excess
- Latex or nitrile gloves to keep hands clean
- Damp sponge for smoothing caulk lines
Why Silicone Outperforms Other Sealants
Not all sealants work equally well for kitchen sinks. Standard acrylic caulk dries hard and cracks under temperature fluctuations, while plumber’s putty can dry out and crumble over time. 100% silicone sealant remains flexible through temperature changes, resists mold and mildew, and creates a permanent watertight barrier. Look for mold-resistant silicone labeled for kitchen and bathroom use—it contains additives that prevent microbial growth in moisture-prone areas.
Step-by-Step Process: How to Seal Kitchen Sink Perimeter
Complete Surface Preparation (The Make-or-Break Step)
Proper surface preparation accounts for 80% of sealing success. Skipping this step guarantees premature failure:
- Remove all existing sealant completely using a plastic putty knife (metal can scratch surfaces)
- Clean the area with rubbing alcohol on a lint-free cloth—never water, which leaves residue
- Ensure surfaces are completely dry—any moisture prevents proper adhesion
- Apply painter’s tape along the countertop edge, 1/8 inch from the sink rim, creating a clean boundary
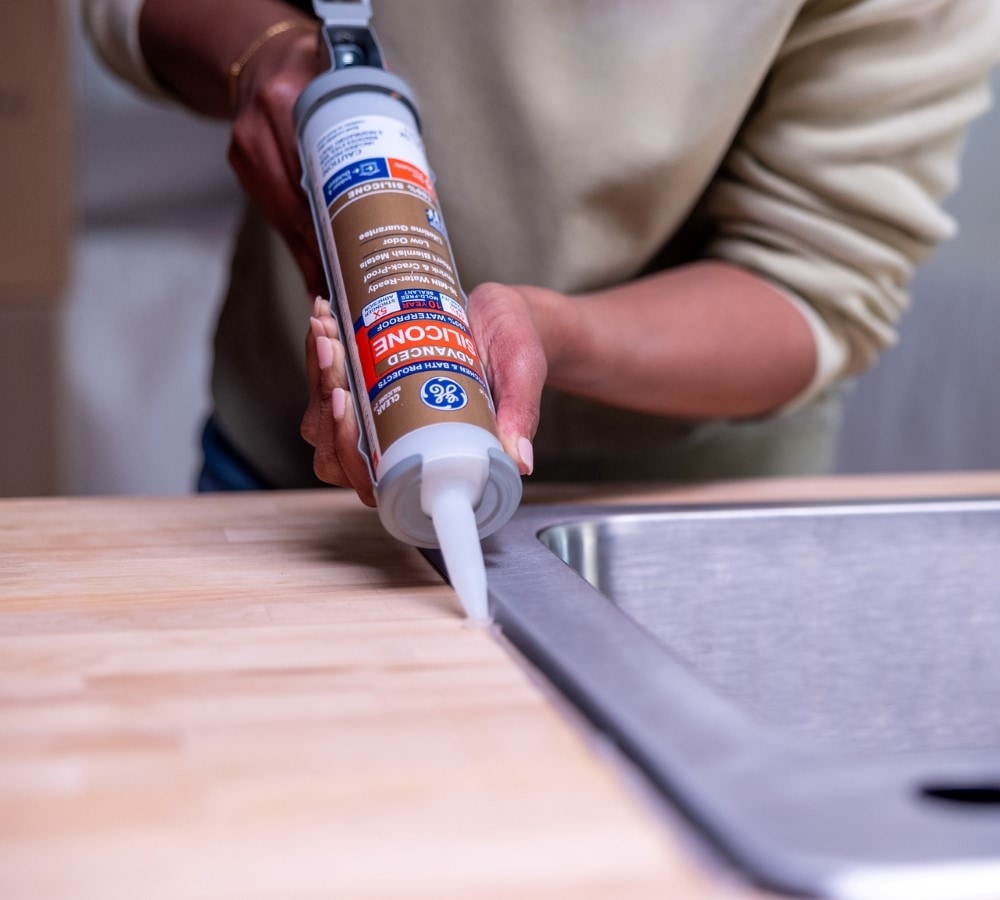
Applying Sealant Like a Professional
The technique matters more than the product when learning how to seal kitchen sink properly:
- Cut the caulk tube tip at a 45-degree angle to create a small opening (1/8 inch for sink perimeter)
- Hold the caulk gun at a 45-degree angle to the surface, maintaining consistent pressure
- Apply a continuous bead of silicone, moving steadily around the perimeter
- Smooth the bead immediately using a damp finger or specialized caulk smoothing tool
- Remove painter’s tape carefully before the silicone skins over (5-10 minutes)
Pro Tip: Work in small sections (2-3 feet at a time) to maintain control. If you stop mid-application, cut the tube tip smaller for better precision on restarts.
How to Seal Kitchen Sink Drain Properly
Removing Old Sealant from Drain Assembly
The drain area requires special attention as it handles constant water flow:
- Place a bucket beneath the P-trap and disconnect the drain pipes
- Remove the strainer assembly from the sink bottom
- Scrape away all old putty or sealant from both the strainer and sink drain hole
- Clean both surfaces thoroughly with rubbing alcohol before proceeding
Installing a Watertight Drain Seal
Two methods work for sealing sink drains—choose based on your sink type:
For standard sinks:
1. Roll plumber’s putty into a ½-inch rope
2. Apply around the strainer flange underside
3. Insert strainer and tighten from below
4. Wipe away excess putty immediately
For porcelain or composite sinks:
1. Apply a thin bead of silicone sealant around the drain hole
2. Apply silicone to the strainer flange
3. Insert strainer and tighten
4. Allow 24 hours curing time before use
Common Mistakes That Cause Seal Failure
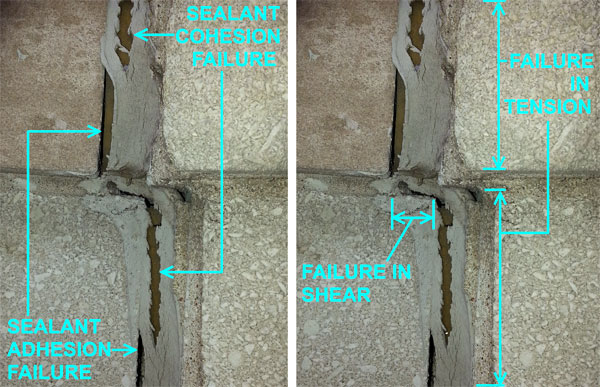
The 3 Most Costly Errors DIYers Make
Even with quality materials, these mistakes doom your sealing efforts:
- Applying too little sealant—creates gaps that allow water intrusion
- Not allowing proper curing time—using the sink too soon breaks the seal
- Skipping surface preparation—dirt, oil, or moisture prevents adhesion
How to Avoid the “Squeeze-Out” Problem
When you tighten sink components, excess sealant often squeezes out, creating messy lines and potential gaps. Prevent this by:
– Using the right amount (a thin, consistent bead)
– Wiping excess immediately with a damp cloth
– Applying sealant only where contact occurs (not the entire surface)
Troubleshooting Leaks After Sealing

Isolating the Leak Source Quickly
When water appears after sealing, follow this diagnostic process:
- Run water slowly while observing potential leak points
- Dry all surfaces completely then add food coloring to water
- Watch where colored water appears to pinpoint the exact leak location
- Mark the spot for targeted repair without redoing the entire seal
Fixing Small Gaps Without Starting Over
Minor leaks don’t always require complete resealing:
- Clean and dry the affected area thoroughly
- Apply a small amount of clear silicone over the gap
- Smooth with a damp finger
- Allow 48 hours to cure fully before testing
Maintenance Tips to Extend Your Sink Seal’s Lifespan
Simple Habits That Prevent Premature Failure
Your seal’s longevity depends on what happens after installation:
- Wipe up spills immediately—standing water degrades seals over time
- Avoid abrasive cleaners near seal lines—they wear down the silicone
- Check for gaps quarterly—catch small problems before they become big ones
- Never use caustic drain cleaners—they break down sealant materials
When to Reapply Sealant Proactively
Don’t wait for leaks to appear. Replace sink seals every 3-5 years as preventative maintenance, or immediately if you notice:
– Cracks or gaps in the sealant
– Discoloration (yellowing or black spots)
– Visible mold growth along seal lines
– Water stains beneath the sink
Final Checklist for a Perfect Kitchen Sink Seal
Before declaring your sink sealing project complete, verify these critical points:
- All surfaces were cleaned with alcohol, not water
- Sealant was applied in a continuous, unbroken bead
- No gaps exist at corners or connections
- Drain assembly was properly tightened (hand-tight plus 1/4 turn)
- Full curing time was allowed before sink use (24-48 hours)
- All excess sealant was removed before hardening
A properly sealed kitchen sink should remain completely watertight for years. By following these professional techniques for how to seal kitchen sink components, you’ll prevent water damage, save money on repairs, and enjoy peace of mind knowing your home is protected. Remember that the quality of your preparation determines the success of your seal—taking extra time to clean surfaces and apply sealant correctly pays off in long-term performance. When in doubt about any step, stop and reassess rather than risking a poor seal that will need redoing sooner than necessary.


