

Refinishing kitchen cabinets can transform the entire look of your kitchen without the cost of a full renovation. Sanding is the critical first step that determines whether your new paint or stain will adhere properly and look flawless. Whether you’re planning to paint your cabinets a modern navy blue or restore natural wood tones, learning how to sand kitchen cabinets correctly sets the foundation for professional-quality results. This comprehensive guide walks you through every step, from gathering the right supplies to achieving a smooth, primed surface ready for finishing. With patience and attention to detail, you can complete this project over a weekend and enjoy stunning results that last for years.
Gather Essential Sanding Supplies
Before touching a single cabinet, having the right tools on hand saves time and prevents frustrating mid-project trips to the hardware store. Sanding kitchen cabinets generates significant dust, so protecting yourself and your space requires proper equipment beyond just sandpaper.
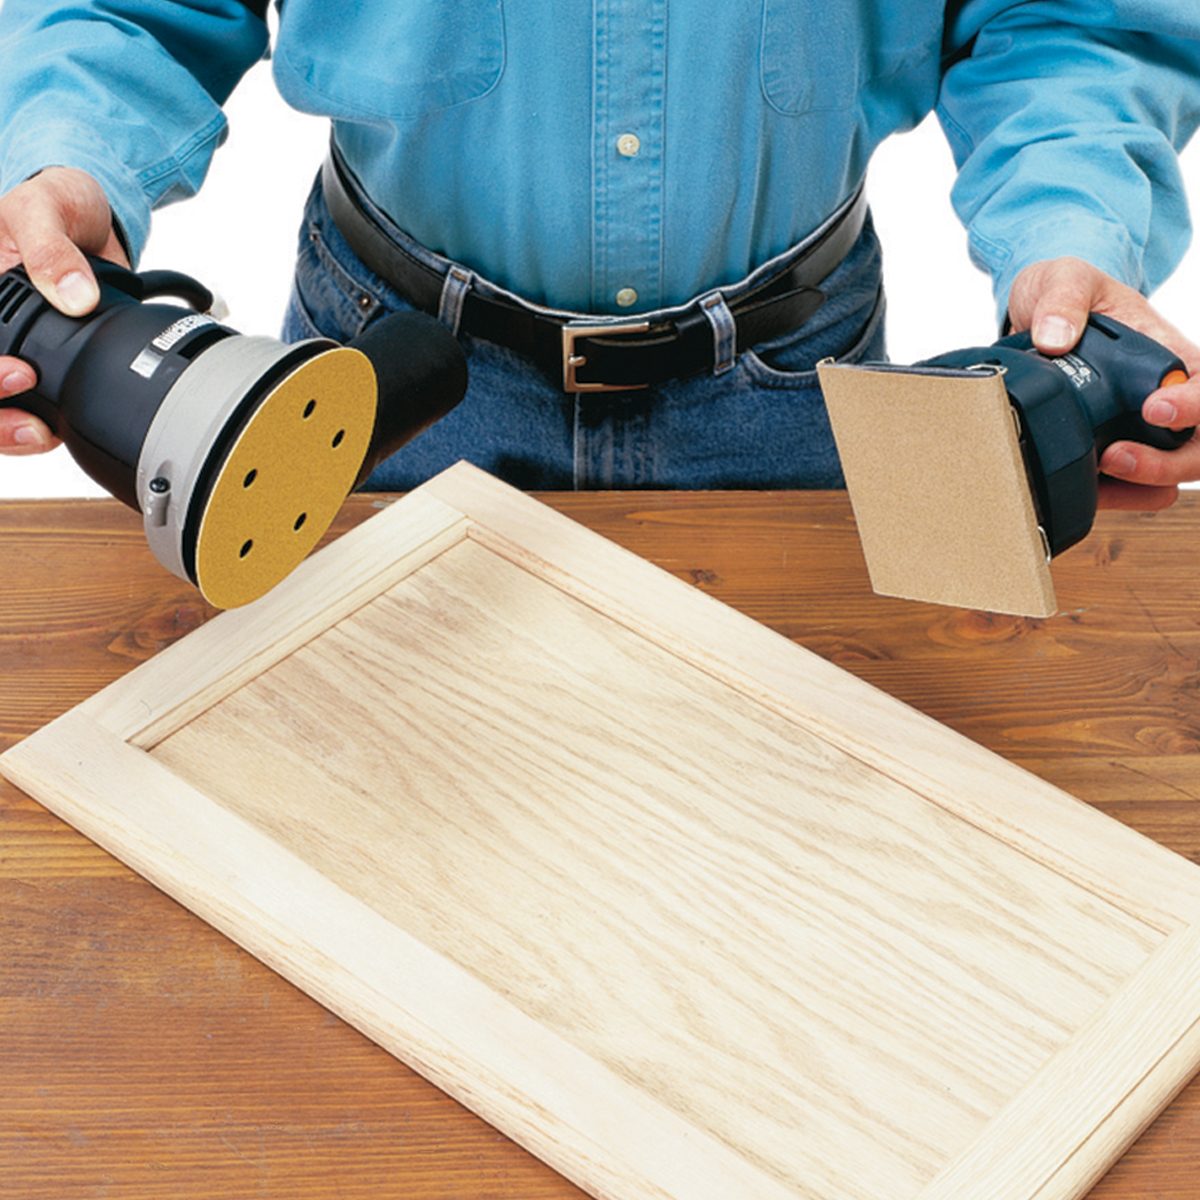
Start with a variety of sandpaper grits ranging from 80-grit to 220-grit. Coarser grits like 80 and 100 remove old finish and smooth major imperfections, while finer grits like 180 and 220 create the smooth surface needed for primer and paint to adhere. Consider purchasing pre-cut sandpaper sheets that fit your hand sander, or buy bulk rolls and cut them to size for cost savings. A random orbit sander produces the most consistent results and prevents swirl marks, though detail sanders reach tight corners and intricate millwork more effectively.
Equally important are dust collection and protection supplies. A shop vacuum with a HEPA filter captures fine particles more effectively than standard household vacuums. Attachments like crevice tools and brush heads help reach tight spaces between cabinet frames and walls. Disposable drop cloths protect your floors, while plastic sheeting seals off the kitchen from the rest of your home. N95 respirators or P100 masks shield your lungs from fine wood dust, and safety glasses prevent particles from irritating your eyes during sanding. Don’t forget to stock up on extra sandpaper—cabinets eat through it quickly as the abrasive surface becomes clogged with dust and finish residue.
Prepare Your Kitchen Workspace
Proper preparation transforms a dusty, chaotic project into an organized refinishing process. Taking time to protect your kitchen and create an efficient workspace pays dividends in both results and sanity throughout the project.
Clear everything from your countertops and remove items from inside cabinets. Cover appliances, sinks, and any remaining surfaces with plastic sheeting secured by painter’s tape. Remove light fixtures or cover them completely, as dust settles everywhere and finding its way into light sockets creates electrical hazards. Seal HVAC vents with plastic to prevent dust from circulating throughout your home.
Set up a temporary workspace in an adjacent room, garage, or outdoors if weather permits. This area serves as your sanding station where you can work on doors and drawers away from the installation area. Position your vacuum nearby and ensure good ventilation, especially if you’re sensitive to wood dust or plan to use chemical strippers. Lay down a tarp or drop cloth to catch falling debris and make cleanup easier at the end of each work session. Pro Tip: Place a box fan in a window blowing outward to create negative pressure that pulls dust away from your living space.
Remove Cabinet Doors and Hardware
Taking doors and hardware off before sanding makes the process infinitely more manageable and ensures you sand every surface evenly. This step also reveals areas hidden beneath hinges and handles that need attention.
Label everything as you remove it to simplify reassembly later. Use a piece of tape on each door and corresponding cabinet frame, marking them with numbers or letters. Take photos before disassembly as a visual reference for hinge placement and door alignment. Place removed hardware in labeled bags or containers, grouping screws by location if you have different types throughout your kitchen.
Remove doors by unscrewing hinges from the cabinet frame first, then from the door itself. This approach prevents the door from swinging unexpectedly and potentially causing damage or injury. Set doors flat on your protected work surface, removing knobs, pulls, hinges, and any other hardware completely. Fill any existing hardware holes with wood filler if you plan to change hardware placement, allowing filler to dry completely before sanding. Warning: Don’t toss old hardware immediately—keep it until your project is complete in case you need to reference it during reassembly.
Choose the Right Sandpaper Grit

Selecting appropriate sandpaper grits determines how efficiently you remove existing finish and how smooth your final surface becomes. Understanding grit numbers and their purposes prevents damaging your cabinets or creating unnecessary work.
Lower grit numbers indicate coarser sandpaper that removes material quickly. Start with 80-grit or 100-grit sandpaper when dealing with cabinets that have multiple layers of old paint, heavy varnish, or visible damage. This aggressive grit strips existing finish efficiently but leaves scratches that finer grits will remove subsequently. If your cabinets are in good condition with only minor wear, starting with 120-grit may suffice.
Progress through progressively finer grits in sequence. After initial stripping with coarse grit, move to 120-grit to smooth the surface and remove coarse scratches. Follow with 150-grit, then 180-grit for paint-grade cabinets, and finally 220-grit for the smoothest finish before priming. Each step removes the scratches from the previous grit, leaving increasingly fine marks invisible to the eye. Skipping grits creates scratch patterns that show through paint or stain. Key Insight: When sanding between primer coats, use 220-grit; for final sanding before topcoat, 320-grit creates an ultra-smooth finish.
Sand Cabinet Frames and Boxes
With doors removed, focus on the cabinet frames and boxes that remain attached to your walls. These surfaces require systematic sanding that ensures even coverage without damaging surrounding surfaces.
Begin with your coarsest grit and sand in the direction of the wood grain to minimize cross-grain scratches. Apply moderate, even pressure and let the sander do the work rather than pressing down aggressively. Move in overlapping passes, slightly overlapping each stroke to prevent uneven spots. Check your progress frequently by running your hand over the surface, feeling for smoothness rather than relying solely on visual inspection.
Pay special attention to areas with built-up grease or grime, as these spots resist sanding and may require a degreaser before proceeding. Corners, edges, and details around trim work require either a detail sander, sanding by hand with a folded piece of sandpaper, or creative use of foam sanding sponges that conform to profiles. After completing your coarse grit pass, vacuum thoroughly before moving to the next finer grit. Common Mistake: Rushing through cabinet box interiors—spend equal time on inside surfaces to prevent peeling when humidity changes.
Clean Sanding Dust Thoroughly
Proper dust removal is non-negotiable for achieving professional results. Even microscopic dust particles create texture problems under paint and prevent proper adhesion of primers and finishes.
Vacuum all surfaces systematically using a shop vacuum with a soft brush attachment. Start at the top of each cabinet frame and work downward, paying special attention to corners, crevices, and inside edges where dust accumulates. After vacuuming, wipe all surfaces with a tack cloth, which is a sticky cloth designed specifically to capture remaining fine particles. Tack cloths work best when slightly warm and pliable; knead them in your hands before use.
For final cleaning before priming, consider wiping surfaces with a slightly damp microfiber cloth to pick up any remaining dust. Allow surfaces to dry completely before proceeding. Inspect surfaces carefully under good lighting from multiple angles to ensure no dust remains. Pay special attention to horizontal surfaces where dust settles, and check inside cabinet boxes where vacuuming may miss accumulated particles. Critical Step: Never skip the tack cloth step—this final dust removal makes the difference between a smooth finish and one with visible texture.
Apply Primer for Paint Adhesion
Primer creates the foundation that determines how well your paint adheres and how evenly it covers. Skipping primer or applying it incorrectly leads to peeling, uneven coverage, and a finish that won’t withstand daily use.
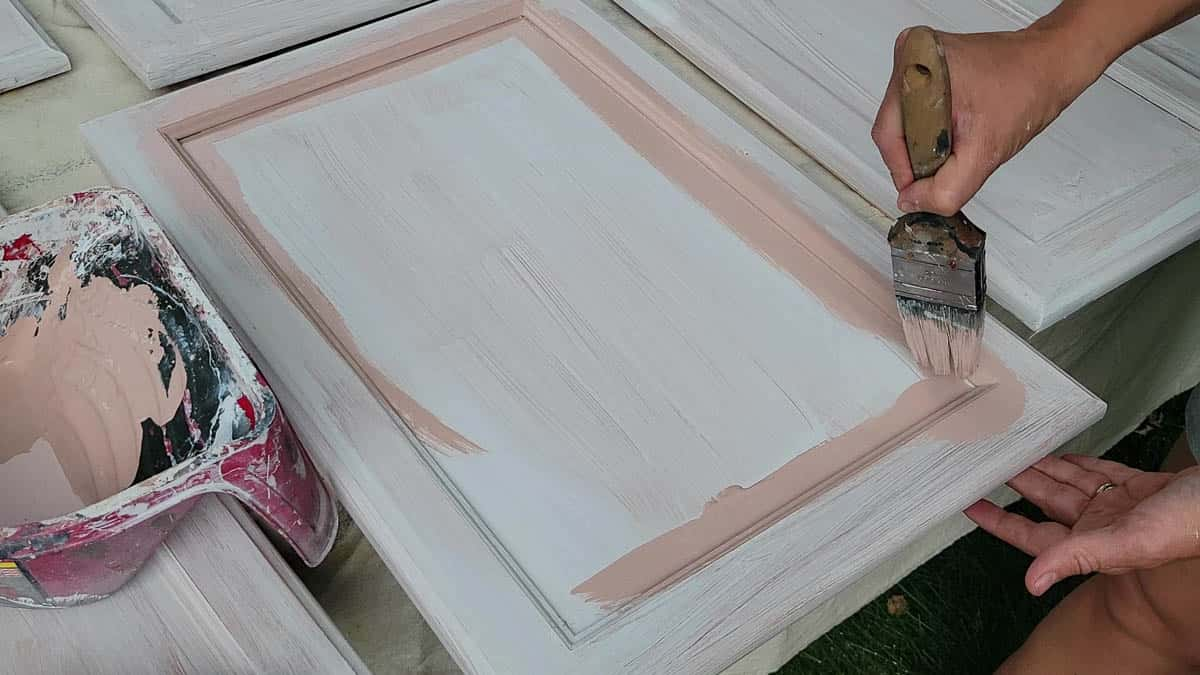
Choose a primer specifically designed for kitchen cabinets or heavily used surfaces. Oil-based primers penetrate wood more effectively and block stains from bleeding through, while water-based primers offer easier cleanup and lower odor. Shellac-based primers dry fastest and block the most stubborn stains but require denatured alcohol for cleanup. Whatever type you select, stir the primer thoroughly before application and periodically during use to maintain consistent coverage.
Apply thin, even coats using a high-quality brush or foam roller designed for your primer type. Brush in the direction of the wood grain, maintaining a wet edge to prevent lap marks. Allow each coat to dry completely according to manufacturer instructions before applying the next. Lightly sand between primer coats with 220-grit sandpaper to remove any imperfections or brush marks, then vacuum and tack cloth before the final coat. Pro Tip: For MDF cabinets, use an oil-based primer to prevent swelling—water-based primers can cause moisture damage to engineered wood.
Reinstall Hardware and Doors
With painting complete and fully cured, reinstalling hardware and doors requires patience and attention to alignment. Rushing this final step undermines all your previous work and results in doors that don’t close properly.
Reattach hardware to doors before hanging them, ensuring screws are tight and hardware is aligned correctly. Use your photos and labels from disassembly as references for hinge placement and door positioning. Adjust hinges as needed after hanging to ensure doors are level and gaps between doors are consistent. Most hinges have adjustment screws for height, depth, and side-to-side alignment.
Test each door operation multiple times, making incremental adjustments until all doors open and close smoothly without rubbing or binding. Check that latches engage properly and that doors stay closed when released. Tighten all screws fully once adjustments are complete, as loose hardware leads to doors drifting out of alignment over time. Warning: Don’t use the original screw holes if you’ve changed hardware placement—pre-drill new holes slightly smaller than your screws for the tightest hold.
Maintain Your Newly Refinished Cabinets
Protecting your investment ensures your freshly sanded and refinished cabinets maintain their beauty for years to come. Proper care prevents damage that requires another complete refinishing project.
Allow paint or stain to cure fully before regular use, which typically takes two to four weeks depending on the product. During this curing period, avoid cleaning cabinets with harsh chemicals or abrasive materials that can damage the finish. Use soft cloths and mild soap for routine cleaning, wiping up spills immediately to prevent moisture damage. Avoid hanging wet towels or cloths on cabinet doors, as moisture penetration leads to peeling and bubbling.
Inspect cabinets periodically for areas showing wear, particularly around handles and frequently touched surfaces. Address minor chips or scratches quickly before they expand, using matching touch-up paint or a small furniture repair marker. With proper care and maintenance, your professionally sanded and refinished cabinets will provide years of beauty and functionality, transforming your kitchen into a space you’ll love coming home to every day. Final Tip: Keep leftover paint in a sealed container for future touch-ups—label it with the date and cabinet location for easy reference.


