
Nothing transforms your kitchen’s appearance like a beautifully restored table—the centerpiece of family meals, homework sessions, and holiday gatherings. When your kitchen table shows signs of wear, restaining breathes new life into this essential piece without the expense of replacement. Whether dealing with water rings, faded finish, or simply wanting to update your decor, learning how to restain a kitchen table yourself puts professional results within reach. This guide delivers step-by-step instructions that ensure stunning, durable results even for first-time refinishers.
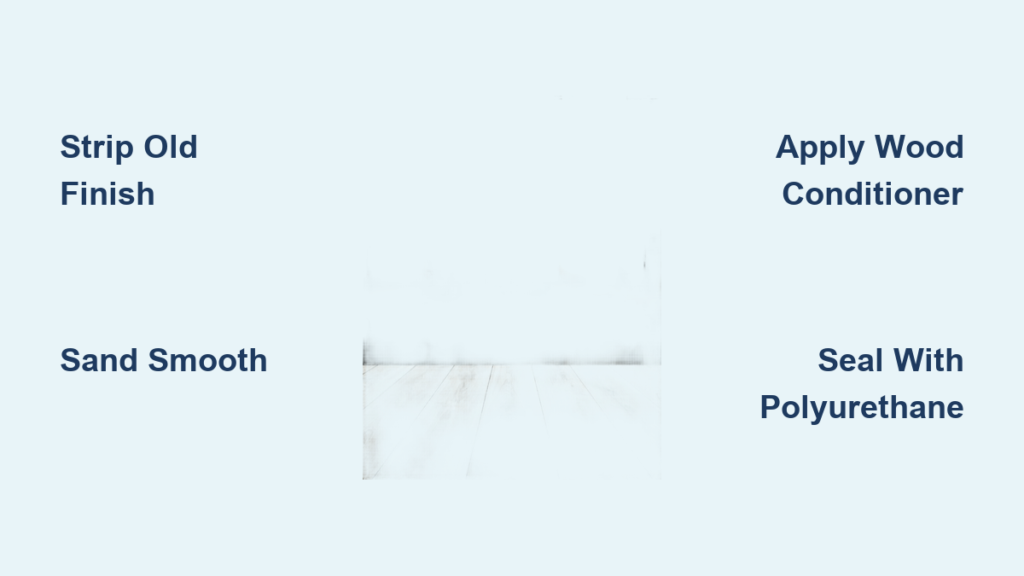
A successful restaining project requires understanding that preparation determines 80% of your outcome. Rushing through sanding or skipping proper sealing leads to disappointing results that peel within months. By dedicating proper time to each phase—from stripping old finish to applying protective topcoat—you’ll create a surface that withstands daily use while showcasing the wood’s natural beauty. Let’s transform your worn kitchen table into a stunning focal point with professional-quality results.
Identify When Your Table Needs Complete Restaining
Kitchen tables endure unique wear patterns that demand attention before they become irreversible. White water rings from condensation, heat damage from hot dishes, and deep scratches that expose raw wood all signal that surface cleaning won’t suffice. Sun-faded tables develop uneven coloration, particularly on surfaces near windows where UV rays break down both stain and sealant over time.
Assess your table’s condition before starting. If you can scratch through the finish with your fingernail or see raw wood in damaged areas, complete restaining becomes necessary. Tables with multiple layers of old finish, peeling varnish, or significant discoloration require stripping rather than simple touch-ups. Minor surface wear might need only light sanding and a fresh topcoat, but most kitchen tables benefit from complete restaining to ensure uniform protection against daily use.
Gather All Necessary Supplies Before Starting
Preventing mid-project interruptions requires assembling complete materials beforehand. For effective restaining, you’ll need:
Sanding essentials: 80-220 grit sandpaper (progressively finer), random orbital sander, detail sander for corners, plastic scrapers, steel wool (0000 grade), tack cloths, and shop vacuum with brush attachment.
Staining components: Your chosen stain (oil or water-based), wood conditioner for soft woods like pine, natural bristle brushes for oil-based products or synthetic for water-based, clean lint-free rags, and disposable gloves.
Sealing necessities: Polyurethane topcoat (oil or water-based), quality applicator brush matching your topcoat type, 320+ grit sandpaper for between coats, and additional steel wool for smoothing.
Organize these supplies in your workspace before moving the table. Having everything ready prevents frustration and maintains workflow momentum—critical when working with time-sensitive products like stain and topcoat.
Create an Ideal Workspace for Restaining Projects
Your environment directly impacts results. Choose a well-ventilated area like a garage, covered patio, or room with open windows and cross-ventilation fans. Maintain temperatures between 50-85°F with moderate humidity—extreme conditions cause uneven drying and application issues.
Protect floors with multiple layers of drop cloths or plastic sheeting. Stain penetrates fabrics permanently, so thorough coverage prevents costly accidents. Elevate your table on sawhorses to comfortable working height—bending over floor-level pieces leads to fatigue and uneven application.
Ensure excellent lighting from multiple angles to reveal surface imperfections invisible under standard overhead lighting. Position work lamps to cast light across the table surface rather than directly down, highlighting texture variations that affect stain absorption.
Complete Removal of Existing Finish
Stripping old finish properly creates the foundation for professional results. While light sanding might suffice for minor wear, complete removal ensures uniform stain absorption—critical for kitchen tables enduring daily use.
Apply wood stripper generously with a disposable brush, working in manageable sections (3×3 feet maximum). Allow stripper to work until finish bubbles or softens (follow product instructions, typically 15-30 minutes), but avoid letting it dry completely. Test a small hidden area first to determine how many layers you’re removing.
Scrape softened finish using plastic putty knives, working parallel to the wood grain to prevent gouging. Use steel wool for corners and detailed areas where scrapers won’t reach. Wipe residue with mineral spirits, then allow 24-48 hours drying time before sanding. Wear chemical-resistant gloves, safety glasses, and a respirator when working with strippers due to strong fumes.
Achieve Perfectly Smooth Surfaces Through Proper Sanding
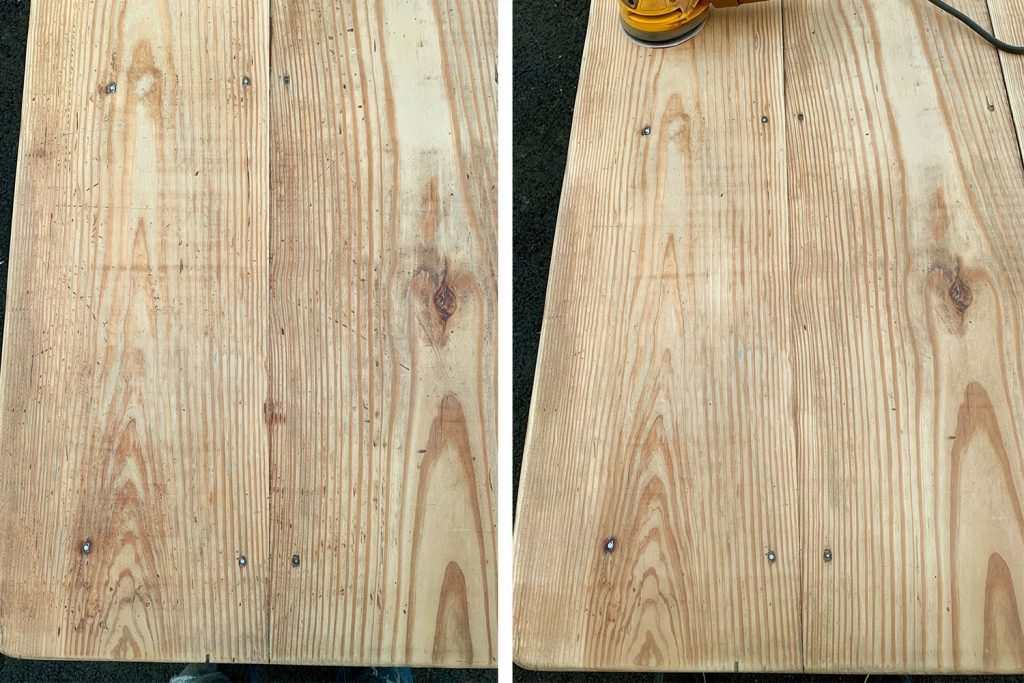
Sanding transforms stripped wood into a flawless canvas for stain. Start with 80-120 grit sandpaper to remove stubborn finish remnants and level the surface. Sand with consistent pressure along the wood grain using overlapping strokes.
Progress through finer grits—150, then 180-220—each stage removing scratches from the previous. Between grit changes, remove all dust with a tack cloth or vacuum with brush attachment. Dust particles left on the surface create visible imperfections in the final finish.
Check progress by running your hand across the surface with the grain—properly sanded wood feels uniformly smooth with no ridges or rough spots. Examine under your work lights from multiple angles to catch subtle imperfections before staining. This meticulous preparation separates amateur attempts from professional results.
Apply Stain for Rich, Even Color Results
Proper stain application transforms bare wood into a beautiful centerpiece. First, apply wood conditioner to soft or porous woods like pine—this critical step prevents blotching by creating uniform stain absorption. Wait 15-30 minutes until conditioner dries to the touch before proceeding.
Stir stain thoroughly before and during application—pigments settle at the bottom, causing color variations. Test on a hidden area first to confirm final color (stain appears darker wet, lighter dry). Apply stain with a brush or rag along the grain, covering completely before wiping excess after 2-5 minutes. Longer penetration time creates darker results.
Wipe thoroughly with clean rags, removing all pooling in corners or joints. Check from multiple angles to catch missed spots. Allow proper drying time between coats (6-8 hours oil-based, 2-4 hours water-based), lightly sanding and dusting between applications. Most tables achieve ideal color with 1-2 coats.
Protect Your Work with Professional-Quality Sealing

Sealant transforms stained wood into a durable kitchen surface. Apply after 24-48 hours stain curing time using thin, even coats—thick applications cause bubbles and extended drying. Choose water-based polyurethane for clear drying and faster application, or oil-based for warmer tones and longer working time.
Apply with appropriate brush (natural bristle for oil, synthetic for water-based), maintaining wet edges to prevent lap marks. Allow proper drying between coats (2-4 hours water-based, 4-8 hours oil-based), then lightly sand with 320+ grit paper and remove all dust before next coat.
Apply 3-4 thin coats for kitchen table durability, paying special attention to high-wear areas like edges and tabletop center. Allow 7-14 days full curing before heavy use—though light use may begin after 48 hours. This patience ensures maximum durability against daily kitchen demands.
Prevent Common Restaining Mistakes Before They Happen
Even experienced DIYers encounter issues that compromise results. Blotchy stain appears primarily on soft woods—prevent by always using wood conditioner first. If blotching occurs, sand lightly, reapply conditioner, and restain.
Lap marks form when stain dries before finishing an area—work in smaller sections and maintain wet edges. Dust nibs in topcoat result from inadequate dust removal—thoroughly clean surface between coats and work in dust-free environments.
Peeling topcoat typically stems from poor surface preparation—ensure complete stripping and proper sanding before staining. Address problems immediately rather than hoping they’ll disappear under additional coats, which usually magnifies imperfections.
Maintain Your Restained Table for Long-Term Beauty
Preserve your hard work with simple daily habits. Always use coasters under beverages and trivets for hot dishes—direct contact with liquids and heat gradually breaks down even quality topcoats. Clean spills immediately rather than allowing prolonged exposure.
Use only mild soap and water or dedicated wood cleaners—avoid harsh chemicals, ammonia, or abrasive cleaners that degrade the finish. Apply furniture polish designed for sealed wood periodically to enhance protection and shine. Keep the table away from direct sunlight when possible to prevent UV fading.
Inspect your table monthly for wear patterns, particularly in high-use areas. Address minor wear with light sanding and fresh topcoat before problems spread. Proper maintenance extends the life of your restaining project for many years of beautiful service.
Restaining a kitchen table delivers exceptional value—transforming worn furniture into a stunning centerpiece at a fraction of replacement cost. By following these systematic steps and dedicating proper attention to each phase, you’ll achieve professional results that withstand daily family use while showcasing your craftsmanship. Start with thorough preparation, maintain patience throughout the process, and enjoy your beautifully restored kitchen table for years to come.


