
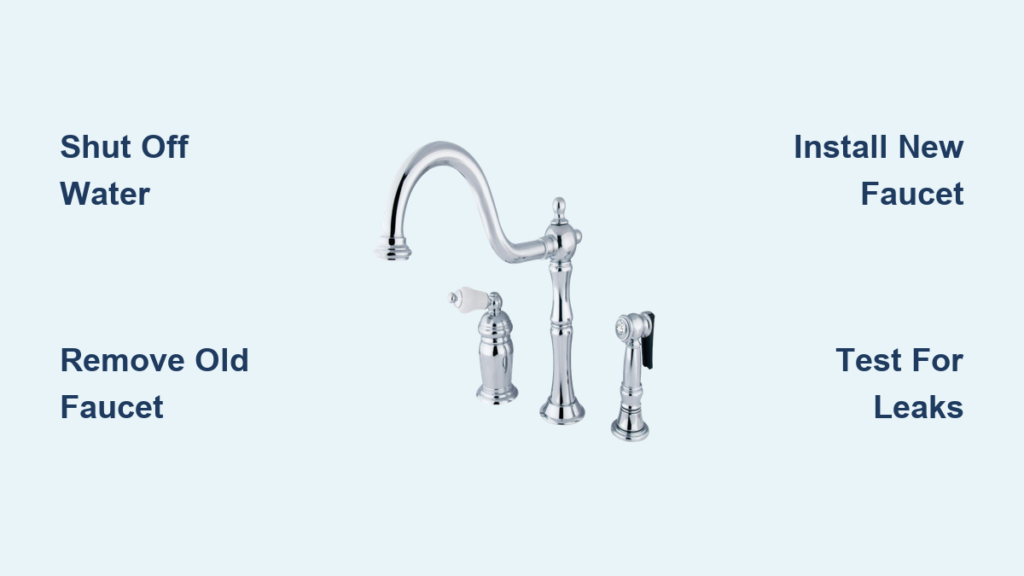
Nothing transforms a kitchen quite like a new faucet—it’s the centerpiece of your workspace that combines style with essential functionality. If you’re dealing with a worn-out 3-hole faucet with leaky handles or outdated styling, replacing it is one of the most satisfying DIY projects you can tackle. A 3-hole configuration typically features a center hole for the spout and two outer holes for separate hot and cold handles, though many modern installations use a deck plate to convert this setup for a single-handle faucet. With the right tools and about two hours of your time, you can complete this upgrade without calling a plumber, saving $150-$300 in labor costs while gaining the satisfaction of a professional-looking installation.
Before you begin, recognize that 3-hole faucet replacements require specific considerations compared to single-hole installations. You’ll need to address all three mounting holes, whether you’re installing a traditional two-handle setup or using a deck plate with a single-handle faucet. This comprehensive guide walks you through every critical step, from shutting off water properly to leak testing your new installation, with professional insights to help you avoid the most common pitfalls that turn a simple upgrade into a messy disaster.
Gather Essential Tools for 3-Hole Faucet Replacement
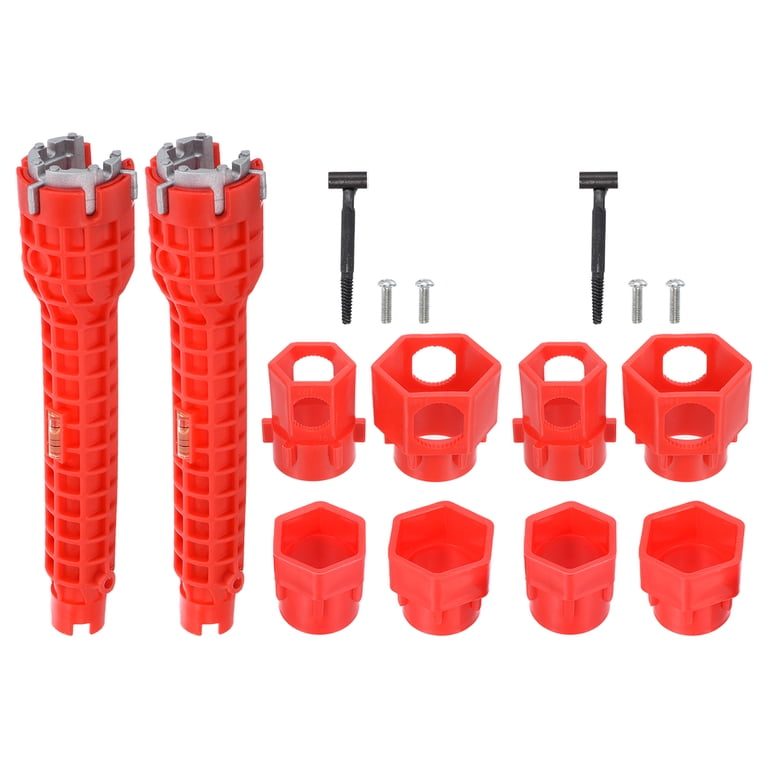
Skip the frustration of mid-project hardware store runs by assembling these specific tools before you begin. A basin wrench is non-negotiable for 3-hole faucet installations—its long handle and pivoting jaw reach mounting nuts in the tight space beneath your sink where standard wrenches can’t operate effectively. Pair this with an adjustable wrench (10-14 inch size works best) for supply line connections and a set of needle-nose pliers for gripping stubborn nuts in awkward positions.
Don’t overlook the importance of proper lighting—a headlamp or magnetic work light liberates both hands while illuminating connection points hidden in cabinet shadows. Prepare multiple absorbent rags and a 5-gallon bucket to catch residual water, plus a small container of plumber’s putty if your new faucet requires sealing around the base. Crucially, have several rolls of white PTFE tape (Teflon tape) on hand—this thin tape creates watertight seals on threaded connections without the mess of plumber’s putty. For 3-hole installations specifically, keep a plastic putty knife available to scrape old sealant from all three mounting holes without scratching your sink surface.
Properly Shut Off Water and Prepare Workspace
Begin by clearing everything from beneath your sink—this isn’t just about convenience but safety, as cramped spaces lead to dropped tools and accidental valve damage. Lay multiple thick towels across the cabinet floor to absorb inevitable drips and protect surfaces from tool scratches. Locate your shut-off valves (typically two small valves connected to copper pipes beneath the sink) and confirm they operate smoothly by turning them clockwise until fully closed. If valves stick or leak, replace them first using the same techniques described in this guide for faucet replacement.
With valves closed, open both hot and cold handles at your old faucet to drain residual water from the lines—this critical step prevents surprise gushes when disconnecting supply lines. Place your bucket directly beneath the supply line connections and keep rags ready for unexpected drips. For 3-hole faucets specifically, check if your setup includes a side sprayer or soap dispenser that requires additional shut-off consideration. If so, locate its dedicated shut-off valve (often hidden behind the dispenser) and close it before proceeding.
Disconnect Supply Lines Without Causing Damage
Most modern 3-hole faucets use flexible braided stainless steel supply lines connecting the shut-off valves to the faucet base. Position your bucket carefully beneath these connections, then use your adjustable wrench to grip the valve-side fitting while a second wrench holds the supply line nut—this prevents twisting stress that could crack the valve body. Turn counterclockwise to loosen, but apply steady pressure rather than jerking motions that damage fittings.
For stubborn connections, wrap a rubber jar opener around the nut for better grip before attempting removal. If your faucet includes a side sprayer in the third hole, disconnect its hose using the same technique, noting how the quick-connect fitting releases (typically by pressing a small collar inward while pulling the hose free). Before removing any lines completely, photograph their orientation—3-hole configurations often have specific routing requirements that differ from single-hole setups, and this visual reference prevents connection errors during reinstallation.
Remove Old Faucet Without Damaging Sink Surface
The mounting assembly for 3-hole faucets typically consists of multiple large nuts securing threaded rods through each mounting hole. Use penetrating oil on stubborn nuts and wait 5-10 minutes before attempting removal with your basin wrench. Work methodically from back to front, loosening each nut about a quarter-turn at a time to prevent binding—this sequential approach is crucial for 3-hole installations where uneven pressure can crack sink surfaces.
As mounting nuts come free, have a helper support the faucet from above while you guide threaded rods upward. For traditional two-handle 3-hole faucets, disconnect handle linkage components before full removal. If your old faucet used a deck plate covering all three holes, carefully pry it upward with your plastic putty knife to avoid scratching the sink finish. Once free, lift the entire assembly straight up—never twist or angle the faucet during removal, as this can damage sink mounting holes needed for your new installation.
Prepare All Three Mounting Holes for New Installation
With the old faucet removed, inspect all three mounting holes for mineral deposits, old putty, or corrosion that could compromise your new seal. Use your plastic putty knife to scrape each hole’s perimeter clean, then wipe with vinegar-soaked rags to dissolve hard water buildup. For stainless steel sinks, avoid steel wool or abrasive pads that create microscopic scratches where water can pool and cause corrosion.
If installing a single-handle faucet with deck plate on a traditional 3-hole sink, ensure the entire mounting surface is completely flat—any unevenness will prevent proper sealing. For two-handle installations, check that each mounting hole aligns precisely with your new faucet’s configuration, as mismatched spacing is a common issue with older sinks. Apply a thin bead of plumber’s putty around each hole’s underside (if recommended by your faucet manufacturer), but avoid over-application that could squeeze into visible areas when mounting your new fixture.
Install New Faucet with Proper Sealing Technique

Begin by assembling your new faucet according to manufacturer instructions—many single-handle models designed for 3-hole sinks require attaching the deck plate before mounting. Position the faucet assembly so the spout aligns with your sink’s front edge (typically 2-4 inches from the back wall), feeding supply lines through the center hole while guide rods pass through outer holes. From beneath the sink, hand-thread mounting nuts onto each rod, alternating between holes to maintain even pressure.
Tighten mounting nuts in a star pattern (like lug nuts on a car tire), completing 1/4-turn increments around all three points before fully securing. Stop when the deck plate or faucet base sits firmly against the sink with no visible gaps—over-tightening is the #1 cause of cracked sink surfaces in 3-hole installations. For single-handle faucets with deck plates, ensure the plate lies completely flat with no翘ing edges that would allow water seepage into cabinet spaces below.
Connect Supply Lines with Leak-Proof Technique
Wrap 3-4 clockwise turns of PTFE tape around each threaded connection point before attaching supply lines—this creates a watertight seal without the mess of plumber’s putty. Connect hot (red-marked) and cold (blue-marked) lines to corresponding faucet inlets, hand-tightening first before using wrenches for final 1/4-turn tightening. For 3-hole setups with side sprayers, connect the sprayer hose last according to manufacturer specifications, ensuring quick-connect fittings click firmly into place.
Crucially, leave both faucet handles in the ON position before restoring water—this prevents dangerous pressure buildup in closed lines. Double-check all connections for proper alignment and hand-tight security before proceeding to leak testing, as correcting errors now prevents water damage later.
Test for Leaks with Professional Inspection Method
Slowly open shut-off valves while watching connections for drips—start with cold water only to minimize potential damage if leaks occur. Check all three connection points: valve-to-supply line, supply-line-to-faucet, and any sprayer connections. Run water for 2 minutes at medium flow, then inspect connections again with a dry paper towel (damp spots reveal leaks invisible to the naked eye).
Test hot water separately, then both together at maximum flow. For pull-down sprayers, extend the hose fully and operate the spray function while checking for leaks at the hose connection point—a common failure spot in 3-hole installations. If you detect any leaks, shut off water immediately and tighten connections incrementally—most leaks resolve with just 1/8 additional turn on the offending connection.
Troubleshoot Common 3-Hole Faucet Installation Problems
When water trickles instead of flowing normally from your new faucet, check that shut-off valves are fully open and supply lines aren’t kinked beneath the deck plate. Low flow in only one handle typically indicates an aerator clog—unscrew the aerator from the spout tip and soak it in vinegar to dissolve mineral deposits.
Leaking around the deck plate edges usually means insufficient plumber’s putty or an uneven mounting surface—remove the faucet, clean thoroughly, and reapply putty before remounting. For two-handle 3-hole faucets where handles feel stiff or leak at the base, tighten the packing nuts beneath each handle cap by 1/4-turn using an adjustable wrench—over-tightening here causes handle binding.
Maintain Your New 3-Hole Faucet for Longevity
Extend your new faucet’s life with simple monthly maintenance: wipe surfaces with a soft cloth dampened with vinegar to prevent hard water buildup, and remove aerators every three months for thorough cleaning. Check supply line connections quarterly for signs of moisture or corrosion, especially at shut-off valve connections where leaks often start small.
For 3-hole installations specifically, periodically inspect the deck plate perimeter for water accumulation—this indicates developing seal failure that requires disassembly and resealing before cabinet damage occurs. With proper installation and maintenance, your new 3-hole faucet should deliver reliable service for 10-15 years, transforming both the function and appearance of your kitchen workspace.


