
Water pooling under your kitchen sink or a clogged drain that won’t clear can bring your meal prep to a screeching halt. The good news is that 90% of kitchen sink drain problems can be fixed with basic tools and some DIY know-how—no plumber required. Whether you’re dealing with a slow-draining sink after dinner cleanup or a leak that’s left your cabinet smelling musty, this guide shows you exactly how to repair kitchen sink drain issues using proven techniques that actually work. You’ll learn to diagnose problems like a pro, gather the right tools, and execute repairs that last, saving you hundreds in emergency plumbing fees.
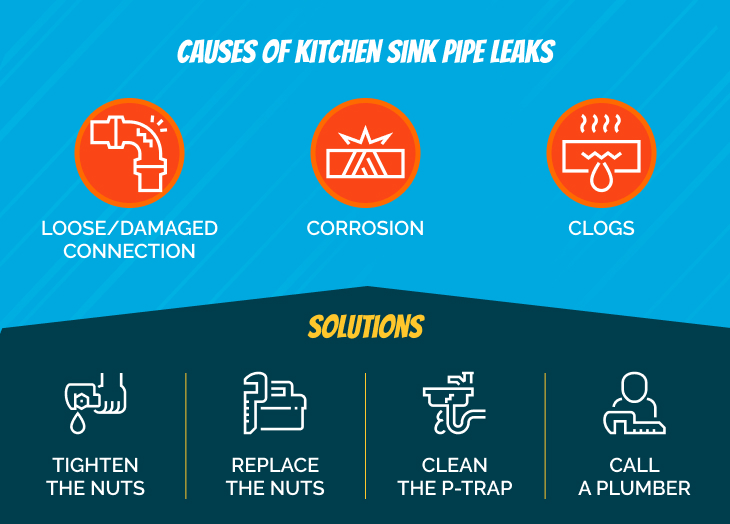
Kitchen sink drain failures typically stem from four main trouble spots: the drain base where the strainer meets the sink, the P-trap connections, the tailpiece-to-trap junction, and the wall stub-out connection. Each component serves a specific purpose in your drainage system, and when one fails, the entire system suffers. The P-trap’s U-shape holds water to block sewer gases, while the strainer assembly creates the critical seal between your sink and the plumbing. Most homeowners can complete these repairs in under an hour with just a few basic tools, preventing water damage and restoring full functionality to their kitchen workspace.
Diagnose Your Specific Drain Problem
Before grabbing tools, pinpoint exactly where your drain system is failing. This targeted approach prevents wasted effort and ensures you address the real issue rather than symptoms.
Identify Leak Locations Under Your Sink
Run water while kneeling beneath your sink with a flashlight. Press dry tissues against each connection point—where the strainer meets the sink, between the tailpiece and P-trap, at the P-trap joints, and where pipes meet the wall. Moisture on the tissue reveals the leak source. If no visible leaks appear during normal flow, plug the sink, fill it with water, and wait ten minutes. Many strainer base leaks only show up under pressure. Check for water stains on cabinet walls or mold growth—these indicate chronic leaks that need immediate attention before they cause structural damage.
Determine Clog Severity and Location
A completely blocked drain usually means a clog in the P-trap or immediate drain line, which you can often clear by removing and cleaning the trap. Slow drainage suggests a partial clog deeper in the system. Foul odors indicate either a dry P-trap (run water to refill it) or decomposing debris in the pipes. Gurgling sounds during drainage signal venting issues that may require professional assessment. If your dishwasher backs up into the sink during cycles, you likely have an improper connection or blockage in the shared drain line.
Gather Essential Repair Tools Before Starting
Having the right tools ready prevents mid-repair frustration and ensures you complete the job properly the first time.
Basic Toolkit for Drain Repairs
Keep an adjustable wrench, slip-joint pliers with taped jaws (to protect finishes), and screwdrivers within reach. A bucket and old towels catch water during disassembly. For PVC pipes, a dedicated PVC pipe cutter makes clean, straight cuts without crushing the pipe. If working with older metal pipes, a pipe wrench handles stubborn, corroded fittings. Plumber’s putty creates watertight seals around drain flanges, while pipe thread tape prevents leaks at threaded connections. Have replacement washers, gaskets, and any suspected damaged parts ready before disassembly begins.
Fix Leaky Drain Connections That Cause Cabinet Damage
Most kitchen sink leaks originate at predictable connection points and can be repaired without replacing entire components.
Stop Leaks at the Drain Strainer Base
Leaks where the strainer meets the sink surface typically stem from degraded plumber’s putty. Place a bucket beneath the sink, then locate the large mounting nut securing the drain assembly. Loosen this nut with pliers, pushing the drain assembly upward from below. Remove all old putty and debris from both the drain assembly and sink surface using a wire brush—rust must be completely eliminated for a proper seal. Roll fresh plumber’s putty into a ½-inch rope and apply it around the underside of the drain flange. Insert the assembly from above, pressing firmly to seat the flange, then secure with the mounting washer and nut from beneath. Hand-tighten first, then give a quarter-turn with pliers—overtightening cracks porcelain sinks.
Seal Leaky Pipe Connections Without Replacing Pipes
Loose PVC connections often just need hand-tightening, as these fittings seal through compression. For persistent leaks, disconnect the fitting, inspect the washer for cracks, and replace if damaged. Threaded metal connections require fresh pipe thread tape wrapped clockwise around the male threads before reassembly. The tailpiece-to-P-trap connection frequently leaks due to misaligned tapered washers—disassemble, ensure the washer’s narrow end faces down into the trap, then reassemble. Never ignore minor leaks; a single drip wastes over 3,000 gallons annually and can destroy cabinet flooring.
Replace Faulty Drain Assemblies in Under 30 Minutes

When corrosion or cracks make component repair impossible, complete drain replacement solves multiple potential failure points simultaneously.
Remove Old Drain Assembly Safely
Shut off water supply valves beneath the sink and open the faucet to drain residual water. Disconnect water supply lines using a wrench, then disconnect all drain pipe connections—the strainer connection at the sink and the drain pipe at the wall. If your setup includes a garbage disposal, disconnect it according to manufacturer instructions. Loosen the mounting nut securing the drain assembly and remove the drain from above. Clean the drain hole thoroughly, removing all old putty and debris that could compromise the new seal.
Install New Drain Components Correctly
Apply fresh plumber’s putty around the new drain flange, insert it through the sink opening, and press firmly to seat the flange. From beneath, slide the mounting washer onto the tailpiece and thread the mounting nut hand-tight, then secure with a quarter-turn of pliers. Reconnect all drain pipes in proper sequence, ensuring the P-trap maintains its U-shape (flattening impairs function). Apply pipe thread tape to all threaded connections and reconnect the garbage disposal if applicable. Test immediately by running water while checking beneath the cabinet for leaks—address any issues before final tightening.
Clear Stubborn Clogs That Resist Plunging
When basic plunging fails, these advanced techniques tackle clogs that chemical cleaners can’t handle.
Use a Plumber’s Snake Effectively
Disconnect the P-trap and place a bucket beneath to catch water. Feed the auger cable into the wall pipe opening, following product instructions for advancing and retracting. Rotate the handle as you feed the cable—the spinning action breaks up clogs and allows the cable to advance. When resistance decreases, continue feeding until the cable reaches the main drain line. Retract the cable slowly, pulling out dislodged debris. Reattach all drain pipes securely and test drainage. For persistent clogs, repeat the process or try a drain auger with a longer cable reach.
Natural Unclogging Method That Beats Chemicals
Pour one cup of baking soda down the drain, using a rubber spatula to push it into the opening. Follow with one cup of white vinegar—the foaming reaction breaks up grease and debris. Insert the sink stopper to contain the reaction, then heat four cups of water to boiling. After five minutes, remove the stopper and pour the boiling water quickly to flush loosened debris. Repeat if necessary. This method safely clears minor clogs without damaging pipes like harsh chemical cleaners can.
Test Repairs Before Calling It Done
Rushing to finish without proper testing guarantees callbacks to fix leaks you should have caught initially.
Verify No Leaks Remain After Repair
Run water continuously while examining every connection beneath the sink. Wipe each joint with a dry tissue—any moisture indicates a leak that needs immediate attention. Listen for unusual sounds; whistling suggests restricted flow while rattling indicates loose components. If your system includes a garbage disposal, test its operation thoroughly. For dishwasher connections, run a cycle while watching the connection point for leaks or backflow. Address any issues immediately by tightening connections or reapplying sealant before water damage occurs.
Prevent Future Drain Failures With Simple Maintenance
Proactive care extends your drain system’s life and prevents emergency repairs during dinner preparation.
Implement Monthly Preventative Measures
Never pour grease down the sink—collect it in a container for trash disposal. Run hot water after each use to flush light debris. Monthly, pour a baking soda and vinegar mixture followed by boiling water to break up minor buildup. Quarterly, remove and clean the P-trap to eliminate accumulated debris before it causes clogs. Inspect visible pipes for corrosion or leaks—catching problems early prevents cabinet damage. For rarely used sinks, run water weekly to maintain the P-trap’s water seal against sewer gases. Address minor drips immediately; a small leak today becomes major water damage tomorrow.
When faced with a malfunctioning kitchen sink drain, remember that most issues stem from just a few common failure points that you can diagnose and repair with basic tools. By following these targeted repair techniques, you’ll restore proper drainage, eliminate leaks, and prevent future problems through simple maintenance habits. The key to successful kitchen sink drain repair lies in accurate diagnosis—knowing exactly where the problem originates—followed by methodical execution of the appropriate fix. Keep this guide handy for your next drain emergency, and you’ll never need to pay for a simple repair again. With these skills, you’ll transform kitchen sink drain problems from stressful emergencies into manageable maintenance tasks that take less time than preparing dinner.


