
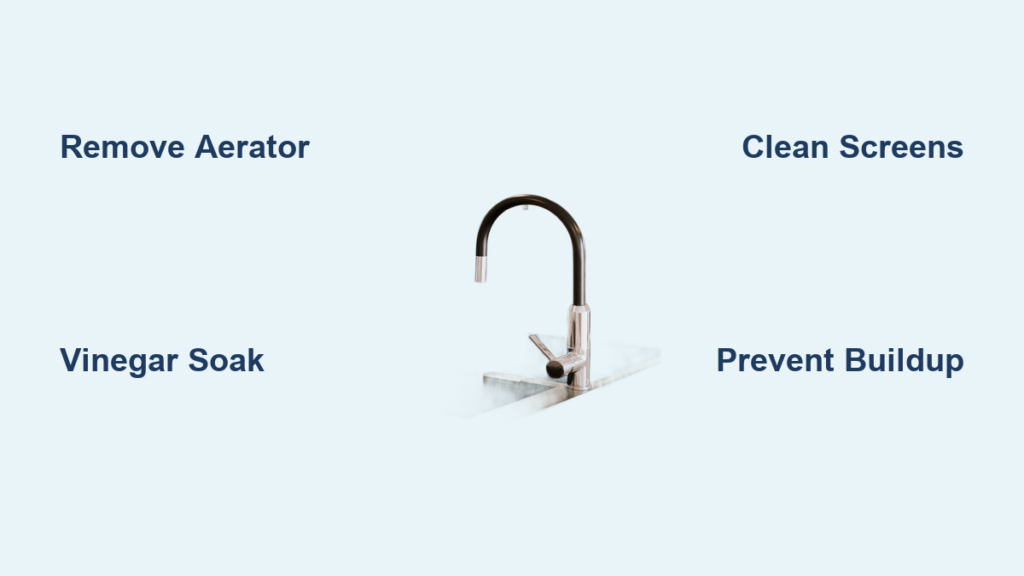
Kitchen faucet sediment buildup causes frustrating issues like reduced water flow, uneven spraying, and strange-tasting water. Over time, mineral deposits from hard water accumulate inside the faucet aerator and internal components, restricting performance and potentially damaging your plumbing. Learning how to remove sediment from kitchen faucet fixtures restores proper water pressure, extends faucet lifespan, and improves your daily kitchen experience. This comprehensive guide covers proven methods ranging from simple vinegar soaks to complete disassembly and deep cleaning, helping you choose the right approach for your specific situation.
Spot Sediment Buildup Before It Worsens
Identifying sediment issues early prevents minor problems from becoming major plumbing headaches. Sediment accumulation presents several distinct warning signs that help you diagnose the issue quickly and choose the appropriate solution.
Noticeably weaker water pressure immediately signals sediment blockage. If your once-powerful kitchen stream has dwindled to barely a trickle, mineral deposits have likely restricted water passage through the aerator or internal valves. This decline typically happens gradually, so you might not realize how severe the problem has become until your faucet barely functions during meal prep or dishwashing.
Erratic water spray patterns develop when sediment partially blocks the aerator openings, causing unpredictable water flow. You’ll experience frustrating bursts of strong flow followed by weak trickles, or notice your pull-down spray head suddenly switching between stream and spray modes. This symptom often appears first and worsens progressively over weeks or months, making kitchen tasks more time-consuming.
Visible discoloration in your water stream confirms significant mineral accumulation inside your faucet. While occasional cloudiness from air bubbles is normal, persistent brown, yellow, or rusty tones indicates sediment breaking loose or bacterial growth in stagnant water pockets created by deposits. Run your faucet for 30 seconds—if discoloration persists, you’ve got a sediment problem requiring immediate attention.
Metallic or musty odors from tap water develop when stagnant water sits behind mineral blockages. This unpleasant smell becomes especially noticeable when you first turn on the faucet after several hours of non-use. If your drinking water suddenly tastes “off” or metallic, sediment buildup might be creating a breeding ground for bacteria in otherwise clean plumbing.
Gather Your Sediment Removal Toolkit

Successful sediment removal requires proper tools before you begin. Having everything ready prevents mid-process interruptions and ensures thorough cleaning results.
White distilled vinegar serves as your primary cleaning solution for most sediment removal tasks. Its acetic acid content effectively dissolves calcium, lime, and mineral deposits without damaging most faucet finishes. For tough buildup, you’ll need undiluted vinegar; for regular maintenance, a 50/50 mixture with water works well. Keep a full bottle on hand as you may need multiple applications.
Baking soda provides gentle abrasive action for stubborn deposits and creates a paste that clings to vertical surfaces. Combined with vinegar, it creates a fizzing reaction that helps dislodge loosened sediment from hard-to-reach areas. A small box of standard baking soda from your pantry works perfectly for this purpose.
Small containers and zip-top bags ensure complete soaking coverage. Use a small bowl large enough to submerge the faucet aerator or removable parts. Zip-top plastic bags work excellently for soaking aerators in place without full disassembly—simply fill the bag with vinegar, secure it around the faucet tip with a rubber band, and let it work overnight.
Specialized cleaning brushes prevent scratching delicate surfaces while effectively scrubbing away loosened deposits. An old toothbrush with soft bristles, a dedicated pipe cleaning brush, or a small nylon brush serves this purpose well. Keep these tools in your plumbing kit for regular maintenance.
Essential hand tools include needle-nose pliers for gripping small parts during reassembly and clearing aerator openings, plus rubber gloves to protect your hands from prolonged vinegar exposure. Safety glasses provide crucial eye protection if you use compressed air or work with pressurized components.
Execute the Vinegar Soak Technique
The vinegar soak method works effectively for mild to moderate sediment accumulation and requires no faucet disassembly. This approach suits regular maintenance and prevents major blockages from developing.
Shut off water supply valves beneath your sink before beginning. Turn both hot and cold handles to the open position to release any pressure and allow residual water to drain. This critical step prevents unexpected water spray when you remove the aerator, avoiding messy cleanups and potential water damage.
Remove the faucet aerator by locating it at the tip of your faucet spout. Most aerators screw on clockwise and unscrew counterclockwise. If your aerator hasn’t been removed in years, wrap a cloth around the aerator jaws to protect the finish, then use adjustable pliers with steady, even pressure to avoid damaging the faucet. Check for manufacturer-specific removal instructions if you encounter resistance.
Soak the aerator in vinegar by placing it in a small bowl and covering completely with white vinegar. For best results, allow at least two hours of soaking time, or overnight for severely clogged aerators. The acetic acid gradually dissolves mineral bonds, loosening deposits from internal screens and flow channels. Check progress periodically by holding the aerator up to light—you’ll see deposits breaking loose.
Reassemble and test after soaking by rinsing the aerator thoroughly with clean water. Use a soft brush to scrub away loosened debris from each screen and opening. Verify all openings are clear before screwing it back on clockwise, hand-tightening only to avoid damaging the threads. Restore water supply and test for proper flow—your faucet should feel noticeably improved.
Deep Clean Internal Components
For severely clogged faucets or persistent flow issues, complete disassembly provides deeper cleaning access to internal components beyond the aerator.
Inspect the faucet opening after removing the aerator for any visible debris. Use a flashlight to examine inside the spout where sediment often accumulates before reaching the aerator. Carefully extract larger debris with needle-nose pliers, then use a small brush to remove loose particles from the threads and openings.
Address pull-down spray heads by unscrewing the spray head from the hose (consult your owner’s manual for specific instructions). Inspect both components for mineral deposits, especially around the connection point. Soak spray heads in vinegar for several hours, then use a thin brush to clean inside the connection threads where sediment loves to hide.
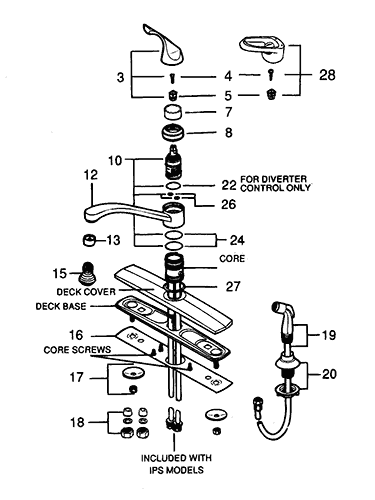
Clean cartridge-style internals for single-handle faucets by removing the handle set screw and handle cap. Carefully pull out the cartridge and inspect for mineral buildup on both the cartridge and housing. Soak both components in vinegar, rinse thoroughly, and apply plumber’s grease before reassembly. Take photos during disassembly to ensure correct part placement during reassembly.
Replace worn components as you work by laying parts on a towel in removal order. Check washers and O-rings for wear—they degrade over time and contribute to future sediment issues. Keep replacement parts on hand for your specific faucet model to avoid being caught without critical components during reassembly.
Tackle Extreme Mineral Deposits

Some sediment deposits resist standard vinegar treatment and require additional techniques to fully remove. Stubborn blockages often occur in areas with exceptionally hard water or in faucets neglected for years.
Apply baking soda paste for mechanical scrubbing of persistent deposits. Mix three parts baking soda with one part water to form a thick paste. Apply this paste to affected areas using an old toothbrush, focusing on aerator screens and internal surfaces. The mild abrasive action physically removes mineral deposits while the slight alkalinity complements the acid treatment.
Warm your vinegar solution for extremely calcified components. Heat vinegar to approximately 120°F (not boiling) before soaking—it penetrates mineral deposits more effectively than cold solution. Always test a small area first and use heat-resistant containers. This method works particularly well for brass or chrome components that can tolerate mild heat.
Use commercial lime-scale removers when DIY methods fail. Choose products specifically designed for faucet and fixture cleaning, as industrial-strength descalers may damage certain finishes. Follow manufacturer instructions carefully, including adequate ventilation and thorough rinse procedures. These products typically work faster than vinegar but require more careful handling.
Mechanically clear blockages for completely resistant deposits. Carefully use a very small wire or thin needle to clear individual aerator openings, though this risks damaging screens if done carelessly. Alternatively, compressed air blown through the aerator in reverse direction dislodges stubborn particles. Tapping the aerator gently against a hard surface can also loosen cemented deposits.
Prevent Future Sediment Problems
Regular maintenance prevents sediment from accumulating to problematic levels and extends your faucet’s operational life. Implementing simple habits now saves costly repairs or premature replacement later.
Establish a cleaning schedule with monthly aerator inspection and light cleaning. Remove the aerator monthly, rinse under running water, and scrub with a soft brush. A quick vinegar soak every three months maintains clarity in hard water areas. This five-minute maintenance task prevents the severe blockages that require extensive cleaning.
Install a water softener for comprehensive sediment prevention. By removing calcium and magnesium ions before water enters your plumbing, softeners eliminate the source of mineral deposits throughout your entire water system. While significant in cost, softeners protect not just faucets but also water heaters, dishwashers, and other appliances prone to scale damage.
Add point-of-use filters that attach directly to faucets and capture sediment before it enters your water stream. These filters require periodic replacement (typically every two to three months) but provide immediate protection for heavily used kitchen faucets. Verify compatibility with your faucet’s threading before purchasing.
Flush stagnant water regularly by running hot water briefly before use. This practice proves especially valuable for faucets used infrequently, as stagnant water sitting behind sediment deposits develops bacteria and unpleasant tastes that regular flushing prevents.
Make Smart Repair or Replace Decisions
Understanding when sediment damage requires component replacement versus continued cleaning helps you make cost-effective decisions about faucet maintenance.
Replace the aerator immediately if cleaning fails to restore proper flow after multiple attempts. Aerators cost only a few dollars and represent the most common replacement part for sediment-related issues. Keep a spare on hand for quick swaps during cleaning sessions to minimize kitchen disruption.
Consider complete faucet replacement when internal components show significant corrosion or damage beyond sediment. If the valve body, cartridge housing, or internal seals show pitting, rust, or deterioration, cleaning provides only temporary relief. Modern faucets often include improved sediment resistance features that reduce future maintenance needs.
Call a professional plumber when sediment has caused internal damage that you’re not comfortable addressing yourself. Plumbers have specialized tools for removing stripped or cemented parts and can assess whether repair or replacement makes more economic sense for your specific situation.
Document your faucet’s maintenance history by noting each cleaning session and any parts replaced. Faucets approaching ten years of age often show declining performance regardless of cleaning, as internal components simply wear out. In these cases, investing in a new, efficient faucet often provides better value than continued repairs of an aging fixture.
Regular sediment removal from your kitchen faucet maintains optimal water flow, prevents bacterial growth, and extends your fixture’s lifespan. By performing monthly inspections, quarterly deep cleans, and addressing symptoms promptly, you avoid the severe blockages that require extensive intervention. The vinegar soak method handles most buildup effectively, while disassembly provides deeper cleaning when needed. Combined with preventive measures like water softeners or regular flushing, these techniques keep your kitchen faucet performing reliably for years to come.


