
Kitchen plinths—the base panels that hide the space beneath your cabinets—occasionally need removal for cleaning, renovation, or appliance access. Whether you’re dealing with a clipped, screwed, or glued installation, understanding the correct technique prevents damage to your cabinets and saves considerable frustration. This guide walks you through identifying your plinth type, gathering the right tools, and executing a clean removal regardless of your cabinet system’s configuration. Knowing how to remove kitchen plinth properly ensures you won’t accidentally crack panels or strip mounting hardware during what should be a straightforward process.
Identify Your Plinth Fixing Method Before Starting
Before attempting any removal, you must determine how your kitchen plinth is attached. Manufacturers use three primary attachment methods, and each requires a different approach. Clip-on plinths feature spring-loaded clips that snap into corresponding brackets on the cabinet legs—this is the most common method in modern modular kitchens. Screw-mounted plinths use small screws, often painted to match the panel, driven through the plinth into the cabinet frame. Adhesive-mounted plinths rely on construction adhesive or double-sided tape, typically found in older installations or budget cabinetry.
Examine the bottom edge of your plinth where it meets the floor. Run your fingers along the seams to feel for clips or brackets. For screw-mounted panels, you’ll often see small filled holes where screws were concealed with matching filler. If your plinth sits flush against the cabinet legs with no visible fasteners, it’s likely clipped or glued. Knowing this distinction before you begin prevents unnecessary force that could crack or warp your plinth.
What to Look For When Identifying Clip Types
Most clip systems fall into two categories: spring clips and push-fit connectors. Spring clips have a visible metal tab that protrudes slightly from the cabinet leg bracket—you’ll hear a distinct “click” when engaging or disengaging. Push-fit connectors sit completely flush and require specific insertion angles. European cabinet systems like IKEA often use proprietary clip designs that only release with precise downward pressure. If you’re unsure, take a photo of the mounting mechanism and compare it to manufacturer diagrams online before proceeding.
Gather Essential Removal Tools for Your Specific Plinth Type

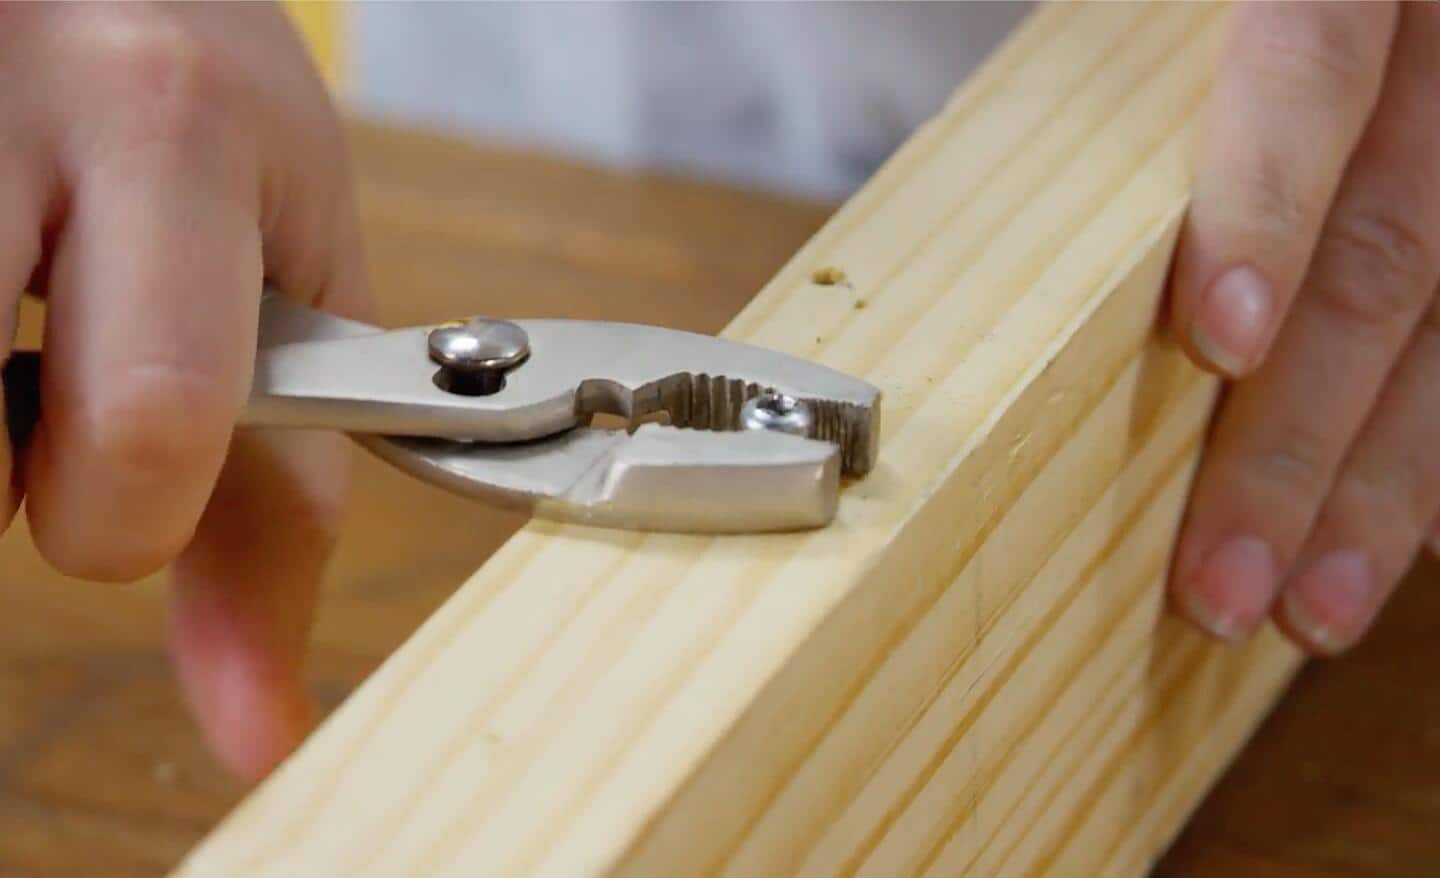
Having the right tools within reach makes the difference between a five-minute job and a frustrating hour-long struggle. For clip-on plinths, a flat-blade screwdriver or a specialized plinth removal tool (available at most hardware stores) allows you to release the spring clips without leaving marks. A rubber mallet helps loosen stubborn panels without damaging surfaces. Needle-nose pliers prove invaluable for gripping and releasing tight clips or extracting broken fastener pieces.
Tool Checklist for Each Plinth Type
- Clip-mounted plinths: Flat-head screwdriver (1/4″ width), plinth removal tool, rubber mallet, work gloves
- Screw-mounted plinths: Precision screwdriver set (Phillips #1 and #2), flashlight, small container for hardware storage, penetrating oil
- Adhesive-mounted plinths: Utility knife with extra blades, thin putty knife (1.5″), heat gun or hair dryer, adhesive remover, protective eyewear
For all types, keep a smartphone nearby to take reference photos during disassembly. These images will be crucial when reinstalling panels, especially if your kitchen has multiple plinth sections or custom corner configurations.
Prepare Your Kitchen Workspace Before Removal Begins
Proper preparation protects both your kitchen and yourself during the removal process. Clear the floor area in front of the cabinets, moving any furniture, rugs, or obstacles that might interfere with your work. Lay down a soft cloth or cardboard piece to catch any debris and prevent floor scratches if the plinth falls. If you’re working in an active kitchen, consider removing items from lower cabinets first—you may need to access them during the process.
Critical Safety Preparations You Shouldn’t Skip
Turn off power to any under-cabinet lighting or electrical outlets near your work area. If removing plinths around appliances, unplug devices and allow them to cool completely—especially ovens and dishwashers. Place “Work in Progress” signs if others use the kitchen to prevent accidental disturbances. Wear safety glasses when prying panels, as small plastic or metal fragments can break off unexpectedly. For taller cabinets, use a stable step stool rather than overreaching, which could cause you to lose balance when the plinth suddenly releases.
Release Clip-On Plinths Without Damaging Cabinet Legs
Clip-on plinths disengage from the bottom up, starting at one end and working methodically toward the other. Begin at a corner section or end piece where you have better access and visibility. Insert your flat-blade screwdriver or plinth tool behind the plinth at the clip location—typically positioned at the cabinet leg points. Apply steady, firm pressure outward while pushing downward simultaneously; the clip mechanism releases as you overcome the spring tension.
Step-by-Step Clip Release Technique
- Locate the first clip by running your finger along the bottom edge where plinth meets cabinet leg
- Insert tool at a 45-degree angle behind the plinth panel
- Apply downward pressure while simultaneously pushing outward
- Hold the released section with your free hand to control panel movement
- Move to the next clip 12-18 inches away and repeat
If a particular clip resists release, don’t force it—wiggle the plinth slightly to redistribute tension before attempting again. Some clips require an upward rather than outward motion; observe how neighboring clips function before forcing a stubborn one. Once all clips disengage, pull the plinth away from the cabinet with controlled movement to prevent sudden release that could cause the panel to fall.
Remove Screw-Mounted Plinths Without Stripping Hardware
Screw-mounted plinths demand patient attention to avoid damaging the cabinet frame or losing hardware. Locate all visible screws—these typically sit near the cabinet legs and along the bottom edge where the plinth meets the floor. Many manufacturers conceal screws beneath small plastic caps that pop out with gentle prying; others fill screw holes with color-matched filler that requires careful scraping to expose the screw head.
How to Handle Problematic Screws During Removal
Start by gently scraping away any paint or filler covering screw heads using a utility knife blade held at a shallow angle. For stripped screws, apply a rubber band over the screw head before inserting your driver—this often provides enough extra grip to break the screw loose. If a screw refuses to turn, apply a few drops of penetrating oil and wait five minutes before attempting again. When reinstalling, replace any damaged screws with identical replacements to maintain proper tension and alignment.
Tackle Adhesive-Bonded Plinths Without Panel Damage
Adhesive-mounted plinths test your patience, as rushing causes damage to either the plinth or the cabinet frame. Begin by cutting through any existing sealant along the top edge of the plinth where it meets the cabinet base. Insert a thin putty knife or palette knife behind the plinth at a corner, creating a small gap that allows air to penetrate the adhesive bond. Apply low heat from a heat gun or hair dryer to soften the adhesive—keep the heat source moving to prevent scorching or warping the plinth material.
Heat Application Technique for Adhesive Removal
Set your heat gun to low (around 200°F) and work in 6-inch sections, applying heat for 30-60 seconds before attempting to widen the gap with your putty knife. Never concentrate heat in one spot for more than 15 seconds. As you progress along the plinth, maintain the gap you’ve created with small wooden wedges to prevent the adhesive from re-bonding. For stubborn areas, apply adhesive remover sparingly along the seam and allow it to penetrate for 5-10 minutes before continuing.
Address Stuck or Damaged Plinth Scenarios Safely
Warped or swollen plinths, often caused by moisture exposure in kitchen environments, resist clean removal and may require strategic breaking to free. Start from the least visible section if possible, creating controlled cracks that allow access to underlying fasteners. Remove broken pieces systematically, checking for hidden screws or clips as you expose new areas.
Emergency Removal for Severe Cases
When faced with a plinth that won’t budge after standard techniques, create strategic break points using a utility knife to score straight lines across the panel. Work from top to bottom, removing sections incrementally rather than trying to free the entire panel at once. For sections near appliances, prioritize creating access points that won’t interfere with plumbing or electrical connections. Always wear cut-resistant gloves when breaking panels to protect against sharp edges.
Clean and Prepare Surfaces After Successful Plinth Removal
Once your plinth is successfully removed, proper surface preparation ensures smooth reinstallation or new panel fitting. Inspect the cabinet leg surfaces and bottom frame for accumulated debris, adhesive residue, or damaged mounting points. Clean adhesive remnants with appropriate solvents, scraping carefully to avoid scratching painted or laminate surfaces. Wipe all mounting surfaces with a damp cloth followed by a dry pass to ensure clean, dry bonding surfaces.
Repairing Damaged Mounting Points
For stripped screw holes, insert wooden toothpicks dipped in wood glue, allowing them to dry completely before re-drilling pilot holes. This preparation work prevents future installation headaches and extends the life of your cabinet system. Replace any damaged or missing clips—hardware stores stock universal plinth clip kits that match most manufacturer specifications. Check alignment of cabinet legs after plinth removal; uneven legs cause installation difficulties and should be adjusted before reattaching panels.
Reinstall or Fit New Plinth Panels Perfectly
Reinstallation reverses your removal process, but a few techniques ensure professional results. For clip-on plinths, align the panel with the mounting brackets and apply firm, even pressure along the clip points until you hear distinct snapping sounds indicating secure engagement. Start at one end and work methodically across the panel, checking engagement at each clip point before moving to the next.
Pro Tips for Flawless Reinstallation
Screw-mounted plinths benefit from pre-drilling pilot holes to prevent wood splitting, especially if reusing original screw locations. Hand-tighten screws first before using power tools to ensure proper alignment, then finish with a powered driver set to low torque. Apply thin beads of silicone sealant along the top edge where the plinth meets the cabinet base for moisture protection, smoothing the sealant with a wet finger for clean lines. Allow sealant to cure for 24 hours before wet cleaning the plinth surface.
Maintain Your Kitchen Plinths to Prevent Future Removal Issues
Preventive maintenance extends plinth lifespan and simplifies future removal cycles. Address moisture issues promptly—kitchen plinths sit in one of the most humidity-exposed areas of your cabinet system. Wipe up spills immediately and ensure proper kitchen ventilation to prevent moisture accumulation beneath cabinets. Inspect sealants annually, reapplying as needed to maintain the moisture barrier between plinth and floor.
Quarterly Maintenance Routine That Saves Hassle
Remove plinths quarterly for thorough cleaning of both the panel and the cabinet surfaces beneath. This routine inspection catches small problems—loose clips, developing warping, or early adhesive failure—before they become major removal challenges. Keep a record of your plinth’s mounting hardware type and any specialized tools required saves time during future maintenance cycles. Lightly lubricate clip mechanisms with silicone spray every six months to prevent seizing while maintaining secure engagement.


