

Tired of outdated or worn kitchen cabinets but dreading the cost of replacement? Refinishing your existing wood cabinets delivers dramatic results for a fraction of the price of new ones. Most homeowners can achieve professional-looking results with proper preparation and technique. This guide reveals the exact process cabinet refinishers use to transform dated wood cabinets into stunning focal points, saving you thousands compared to full replacement. You’ll discover time-tested methods for surface preparation, stain application, and protective finishing that make your kitchen look completely new.
Remove Cabinet Doors Without Damage
Begin by creating a foolproof system for door removal and reinstallation. Take photos of each cabinet section before touching any hardware—this visual reference prevents installation headaches later. Label each door and drawer front with painter’s tape marked with corresponding cabinet locations (e.g., “U2” for upper cabinet 2, “L3” for lower cabinet 3). Keep all hardware organized in separate labeled containers—small ziplock bags work perfectly for screws and hinges.
Use the right tools to avoid stripping screw heads: a quality screwdriver set with multiple tip sizes or a cordless drill with adjustable torque on the lowest setting. Support each door from underneath as you remove the final hinge screw to prevent swinging and potential damage. Store doors flat on sawhorses or a worktable padded with cardboard to prevent warping during the refinishing process. This systematic approach saves hours when reinstalling and ensures perfect alignment every time.
Proper Hardware Storage Techniques
Never toss hardware into a single container. Group items by cabinet section—upper cabinets in one bag, lower in another, island cabinets in a third. For complex kitchens with multiple hardware styles, take photos of each handle or knob in place before removal. Wrap delicate hardware in soft cloth to prevent scratches. Consider replacing worn hinges with new soft-close versions during this process—they’re affordable and significantly improve cabinet functionality.
Strip Old Finish Completely
Chemical stripping remains the most effective method for removing multiple layers of old finish from intricate cabinet details. Apply a thick, even coat of methylene chloride-based stripper with a disposable brush, working on one cabinet door at a time. Allow 15-20 minutes for the product to activate—the finish will bubble and lift from the wood surface. Use a flexible plastic scraper held at a 30-degree angle to remove the softened finish, working with the wood grain to avoid gouging.
For detailed moldings and corners, switch to steel wool or a nylon brush dipped in stripper. Multiple applications may be necessary for exceptionally thick finish buildup. After stripping, wipe surfaces with mineral spirits on clean rags to remove any residual stripper and prepare the wood for sanding. This critical step ensures your new finish adheres properly and prevents future peeling.
When to Use Heat Guns Instead
Heat guns work well for flat cabinet surfaces but require caution around detailed areas. Hold the gun 6-8 inches from the surface and keep it moving constantly to prevent scorching the wood. As the finish softens, scrape immediately with a sharp cabinet scraper. Heat guns excel at removing stubborn paint layers but struggle with varnish and polyurethane finishes. Always wear safety glasses and work in well-ventilated areas—overheated finishes release toxic fumes.
Perfect Sanding Technique for Flawless Results
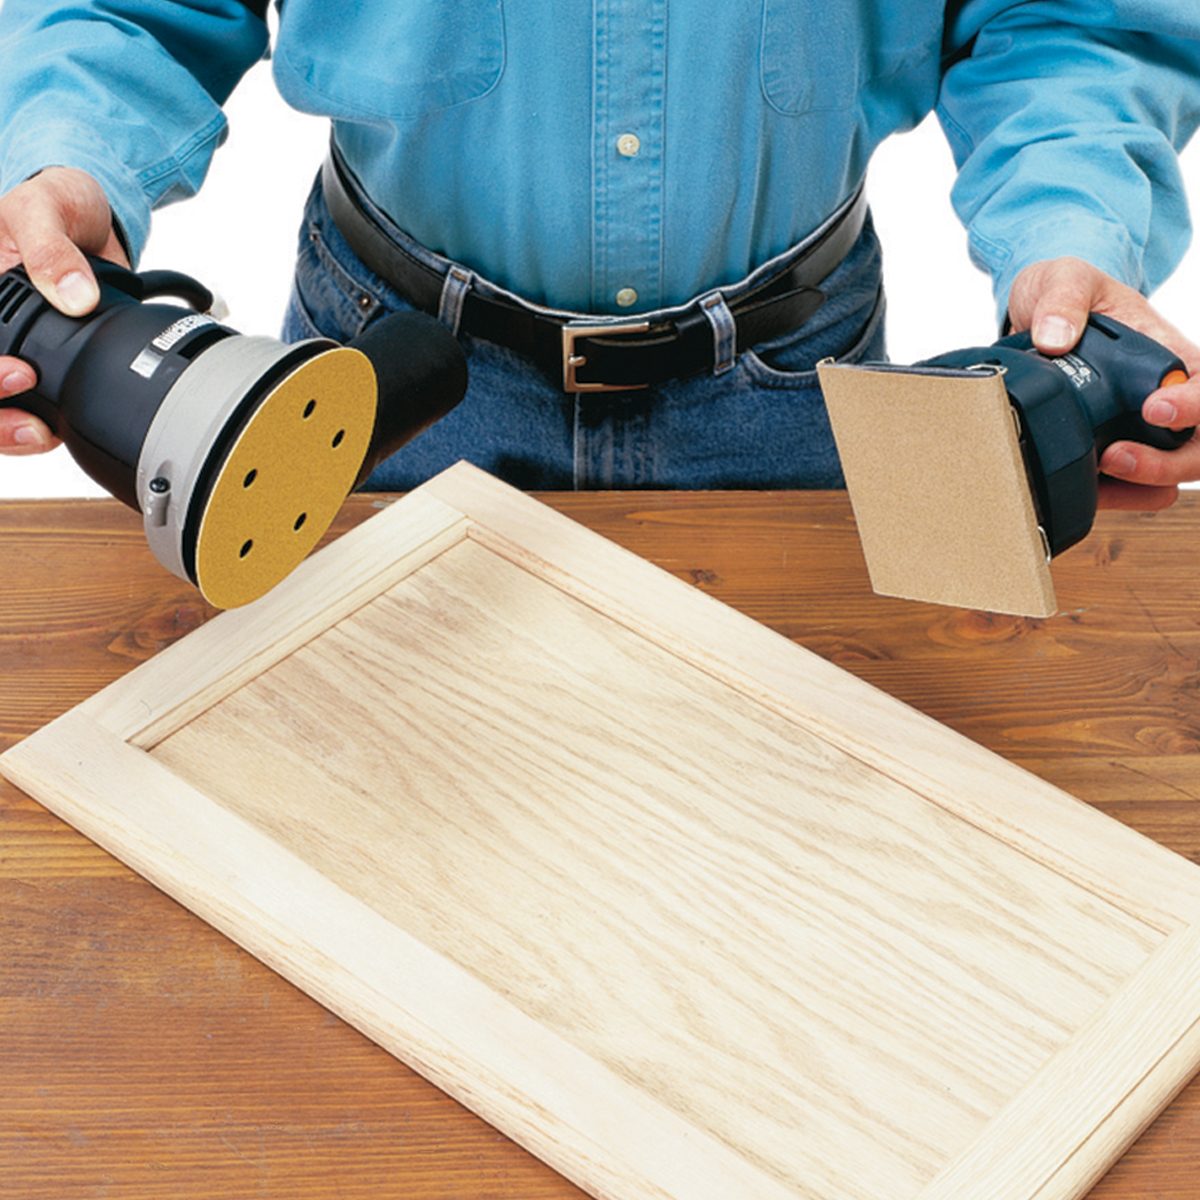
Sanding transforms stripped cabinets into smooth canvases ready for finishing. Start with 120-grit sandpaper on an orbital sander for flat surfaces, applying light, even pressure while moving with the wood grain. Power sanding alone creates swirl marks, so finish with hand-sanding using 180-grit paper wrapped around a sanding block. For intricate details and moldings, fold sandpaper into small sections and sand by hand.
Progress to 220-grit for the final smoothing pass, which opens the wood pores for optimal stain absorption. Vacuum thoroughly between grit changes and finish with a tack cloth to remove every dust particle. Proper sanding creates surfaces that feel silky smooth to the touch—any remaining roughness will magnify once stain and finish are applied. Rushing this stage guarantees visible imperfections in your final result.
Critical Sanding Mistakes to Avoid
Never skip grits in your sanding progression—jumping from 120 to 220 leaves deep scratches visible through the finish. Avoid sanding against the grain direction, which creates crosshatch scratches impossible to remove later. Don’t apply excessive pressure with power sanders, which creates uneven surfaces and rounded edges. Most importantly, never skip the final hand-sanding step—power sanders alone leave swirl marks that ruin an otherwise perfect finish.
Apply Stain for Professional Color Results
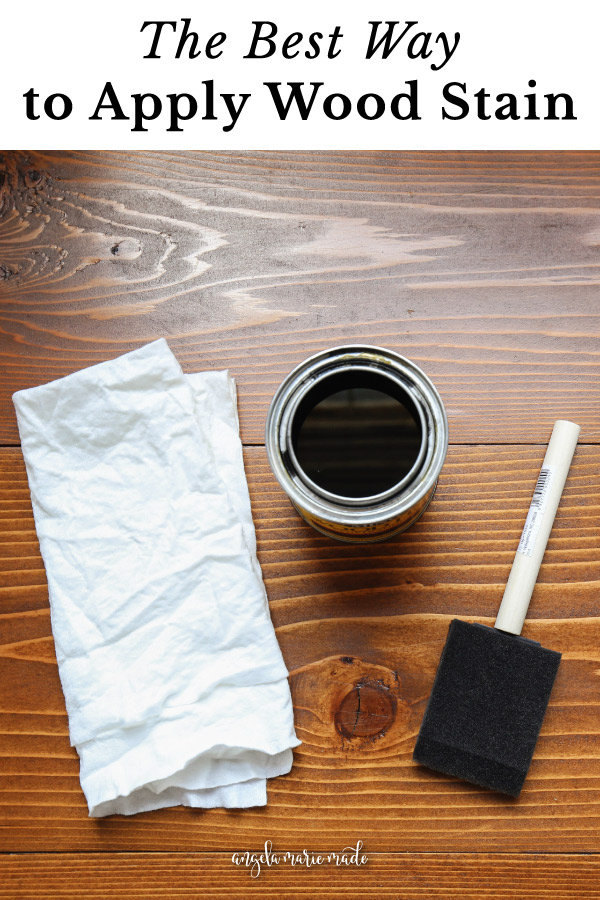
Stain selection dramatically impacts your kitchen’s transformation. Test your chosen stain on a hidden cabinet area or scrap wood piece—stain appears darker when wet but lightens as it dries. Apply stain with a clean cloth or foam brush, working with the grain and covering the entire surface. Allow 3-5 minutes of penetration time for deeper color, then wipe off excess with clean rags using long, continuous strokes.
For consistent results, maintain a wet edge and work on one cabinet section at a time—don’t allow stain to dry between sections. Gel stains offer more forgiveness for beginners, while liquid stains provide deeper grain enhancement. Apply a second coat only after complete drying (8-12 hours) if darker color is desired. Rushing the drying process between coats creates hazy, uneven results that require complete stripping to fix.
Choosing Between Stain and Paint
Solid wood cabinets typically showcase best with stain that enhances natural grain patterns, while particleboard or MDF cabinets often benefit from paint. Paint completely transforms cabinet color but hides wood character—choose high-quality cabinet paint with built-in primer for best results. Stain preserves wood texture while changing color, ideal for quality hardwood cabinets. Consider your cabinet material and desired aesthetic carefully before committing to either option.
Apply Protective Topcoat Like a Professional
Water-based polyurethane has become the top choice for most DIYers due to faster drying times and lower odor. Apply with a high-quality 2-inch synthetic brush, working with the grain in smooth, even strokes. Maintain a wet edge and avoid over-brushing, which creates bubbles and lap marks. Allow 4-6 hours drying time between coats, then lightly sand with 220-grit paper and wipe clean before applying the next coat.
Three thin coats consistently outperform two thick ones—thick applications lead to drips, bubbles, and extended drying times. For ultra-smooth results, use a foam roller for flat cabinet surfaces and a brush for details. Allow 72 hours of cure time before reinstalling hardware and heavy use—though the surface may feel dry, full chemical curing takes weeks for maximum durability.
Troubleshooting Common Topcoat Problems
Bubbles form from over-brushing, shaking the finish container, or applying in high temperatures—stir rather than shake containers and apply in 70-75°F conditions. Lap marks occur when you lose the wet edge—work systematically from top to bottom on each door. Dust nibs happen in unclean environments—cover floors and nearby surfaces with plastic sheeting during application. If problems occur, sand lightly with 320-grit paper once fully dry and apply an additional thin coat.
Reinstall Doors with Perfect Alignment
Cabinet door alignment separates amateur from professional results. Start with upper cabinets, which are easier to access without lower doors in the way. Install hinges first, checking for stripped screw holes—fill problematic holes with wooden matchsticks and wood glue, allowing 24 hours to cure before reinstalling screws.
Adjust hinges methodically: most modern hinges offer three-way adjustment. First, set the door depth (how far it protrudes from the cabinet), then adjust height alignment, and finally fine-tune side-to-side positioning. Check gaps between doors—they should be consistent (typically 1/8 inch). Test door operation multiple times, making minor adjustments until smooth closing and perfect alignment are achieved.
Hardware Installation Pro Tips
Use a template to ensure consistent handle placement across all doors. Mark positions with a pencil, then verify with a level before drilling. For knobs, position them 2.5-3 inches from the corner on standard doors. When reinstalling, slightly overtighten screws then back off 1/8 turn for optimal hinge tension. Apply a small amount of beeswax to screw threads for easier future removal without stripping.
Refinishing wood kitchen cabinets delivers remarkable transformation without the disruption and expense of full replacement. By following these professional techniques—meticulous preparation, proper stripping, systematic sanding, careful staining, and patient topcoating—you’ll achieve results that rival custom cabinetry. The key is respecting each stage’s required drying time and never skipping critical steps like thorough cleaning or complete sanding. With quality materials and attention to detail, your refinished cabinets will maintain their beauty for years while adding significant value to your home. Start planning your cabinet transformation today and enjoy a dramatically improved kitchen tomorrow.


