
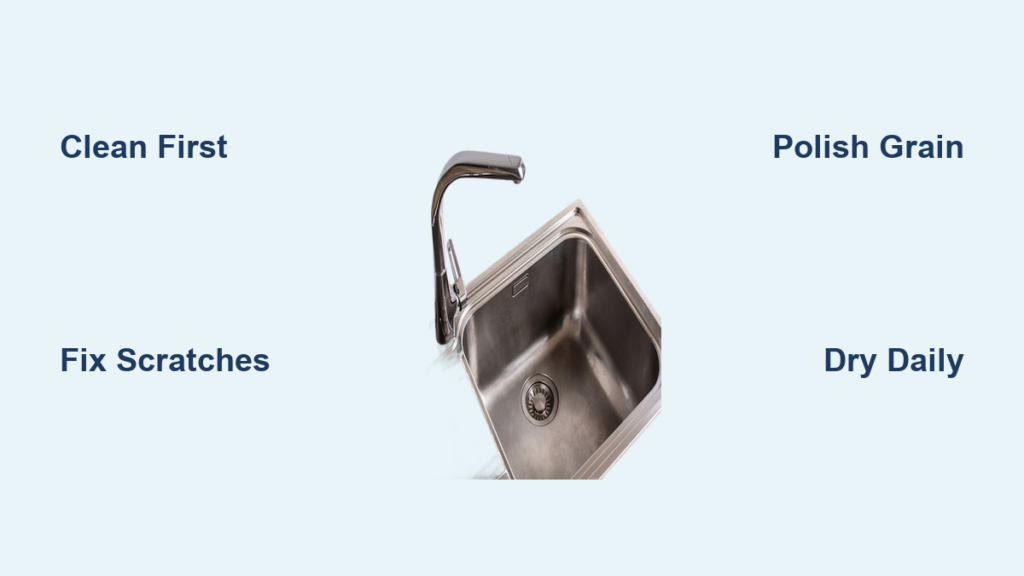
A dull, spotted kitchen sink can make your entire kitchen feel unclean—even when it’s not. Water spots, soap scum, and everyday wear gradually rob your sink of its original luster, creating a tired appearance that drags down your whole space. Learning how to polish a kitchen sink properly doesn’t just restore visual appeal; it creates a protective barrier against future stains and damage while extending your fixture’s lifespan. Whether you have stainless steel, porcelain, composite, or copper, the right polishing technique transforms a dingy workhorse into a kitchen showpiece.
This guide delivers precise, material-specific methods that deliver professional results without professional costs. You’ll discover exactly which products work for your sink type, how to address stubborn stains and scratches, and simple maintenance habits that keep your sink looking freshly polished for weeks. By the end, you’ll have everything needed to revive your sink’s brilliance in under an hour—no special skills required.
Gather Essential Supplies for Effective Polishing
Having the right tools on hand makes the difference between a frustrating attempt and a stunning result. Rushing this step with inappropriate products can cause irreversible damage to your sink surface.
Select Material-Specific Cleaning Solutions
For stainless steel sinks, you need a dedicated stainless steel cleaner that follows the grain pattern without scratching. Porcelain benefits from non-abrasive cleaners like baking soda paste or specialized porcelain polishers. Composite sinks require pH-neutral cleaners to avoid discoloring the resin, while copper demands copper-specific polishes that remove tarnish without stripping the metal.
Microfiber cloths are non-negotiable for all sink types—paper towels leave lint and fibers that embed in the surface. You’ll need at least three: one for cleaning, one for rinsing, and one for the final polish. Rubber gloves protect your hands from chemicals and prevent skin oils from transferring to the polished surface during buffing.
Avoid These Common Tool Mistakes
Never use steel wool, abrasive scrub pads, or bleach-based cleaners on any sink type—they create permanent scratches and discoloration. Vinegar works well for stainless steel and porcelain but damages copper and some composite materials. Sprays force you to work against gravity, causing streaks; opt for creams or pastes that stay where you apply them.
Deep Clean Before Polishing for Lasting Results
Polishing over dirt or residue creates a hazy film that disappears in days—not the long-lasting shine you want. Proper cleaning removes the obstacles that prevent polish from bonding with the sink surface.
Remove All Debris and Buildup
Start by clearing dishes and accessories, then pull the drain plug to eliminate standing water. Spray the entire sink with warm water to loosen food particles and grease. Focus on trouble spots: the drain flange, faucet base, and corners where gunk accumulates. Use an old toothbrush to dislodge debris from crevices without scratching.
Apply Proper Cleaning Technique
For stainless steel, rub baking soda paste along the grain direction with a microfiber cloth—never circular motions that create visible swirls. Porcelain responds to a vinegar-water solution (1:1 ratio) sprayed on and left for five minutes before wiping. Composite sinks need gentle circular motions with a soft sponge and mild dish soap. Copper requires immediate rinsing after cleaning to prevent water spots.
Rinse thoroughly until water runs clear, then dry completely with a clean microfiber cloth. Any moisture left behind dilutes your polish and creates streaks that require redoing the entire process.
Fix Stainless Steel Scratches Before Polishing
Stainless steel shows scratches more prominently than other materials, but most can be removed with proper technique before applying polish.
Address Light Surface Scratches
Mix baking soda with water to form a thick paste. Apply to scratches using a microfiber cloth, working strictly along the grain direction (visible as faint lines in the metal). Apply firm but controlled pressure for 30-60 seconds per section. Rinse and dry—most light scratches disappear with this simple treatment.
Tackle Deeper Scratches Methodically
For noticeable scratches, use progressively finer abrasive pads in a stainless steel repair kit. Start with the coarsest grit needed to barely reach the scratch depth, always working along the grain. After each pad, clean the area to assess progress. Finish with the finest grit pad to blend the repaired area with surrounding metal. Overworking creates visible patches that stand out more than the original scratch.
Apply Polish Correctly for Mirror-Like Shine
The application technique matters as much as the product you choose—improper methods create streaks and uneven coverage that ruin your effort.
Stainless Steel Polish Application
Apply a dime-sized amount of stainless steel polish to a microfiber cloth. Working in the direction of the grain, spread the product in overlapping strokes across one section at a time. Allow the polish to haze (1-3 minutes), then buff with a clean cloth using long, even strokes. The surface should reflect light evenly without visible patches.
Porcelain and Composite Finishing
Porcelain benefits from a vinegar-olive oil mixture (2:1 ratio) sprayed on and immediately wiped with a microfiber cloth. Composite sinks need a dedicated composite polish applied in circular motions, allowed to dry completely, then buffed with a clean cloth. Both materials require immediate drying—any moisture left creates water spots that undermine your work.
Maintain Copper Sink Brilliance with Protective Wax
Copper requires different care than other materials since it naturally develops patina, but proper polishing keeps it brilliantly shiny when that’s your goal.
Polish Without Damaging the Metal
Use copper-specific polish applied with a soft cloth in the direction of any visible grain. Work in small sections, rinsing thoroughly after each area to prevent chemical residue buildup. Dry immediately with a microfiber cloth—copper shows water spots more dramatically than other materials.
Apply Protective Barrier
After polishing, apply carnauba wax with a foam applicator in thin, even layers. Allow to haze completely (5-10 minutes), then buff to a deep shine. This wax layer creates a barrier against water and oxygen, slowing tarnish development. Reapply every 2-3 weeks for daily-use sinks to maintain that just-polished look.
Implement Daily Habits to Extend Polish Longevity
Your polishing work lasts significantly longer when you adopt simple maintenance habits that prevent rapid dulling.
Dry After Every Use
Wipe your sink dry with a dedicated towel after each use—this single habit prevents 90% of water spots and mineral deposits. Keep the towel within arm’s reach of the sink to make this habit effortless. For copper sinks, dry immediately after contact with acidic foods like citrus or tomatoes.
Weekly Refresh Routine
Once weekly, spray sink with appropriate cleaner, wipe clean, and give a light buff with a dry microfiber cloth. This 3-minute routine prevents the gradual dulling that accumulates from daily use. Monthly, reapply protective product (wax for copper/composite, polish for stainless steel) to reinforce the barrier.
Avoid These Costly Polishing Mistakes
Certain common errors not only waste your time but can actually damage your sink surface permanently.
Wrong Product Selection
Using abrasive cleaners on stainless steel creates visible swirls that require professional refinishing to correct. Bleach discolors porcelain and damages copper patina. Even “all-purpose” cleaners often contain ammonia that etches composite surfaces. Always verify product compatibility with your specific sink material.
Skipping the Dry Step
Leaving a polished sink wet creates immediate water spots that require re-polishing. Worse, moisture prevents protective products from bonding properly, reducing effectiveness by up to 70%. Make drying the final, non-negotiable step of every polishing session.
Over-Polishing Frequency
Polishing more than once monthly removes microscopic material layers that eventually cause visible wear. Composite and porcelain sinks develop uneven surfaces with excessive polishing. Stainless steel loses its directional grain pattern, making scratches more visible. Monthly maintenance suffices for normal household use.
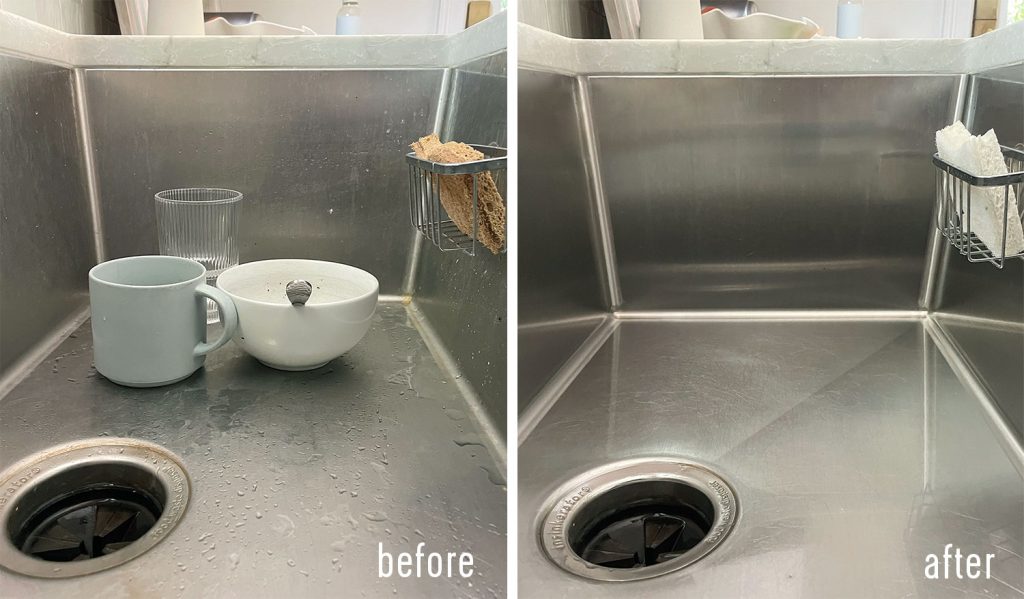
Restore Severely Neglected Sinks with Patience
:max_bytes(150000):strip_icc()/Dirty-Sink-Before-and-After-79c01cc57bb346d6bf8e0028168634bf.jpeg)
Sinks ignored for months require extra effort, but even heavily stained fixtures respond well to proper restoration techniques.
Deep Clean Before Polishing
Create a thick baking soda paste for stainless steel or a vinegar soak for porcelain. Apply generously, let sit 15 minutes, then scrub with a soft-bristled brush. For composite sinks, use multiple applications of dedicated cleaner to lift years of buildup. Rinse thoroughly until water runs clear.
Multiple Polish Applications
Heavily dulled sinks often need two polishing sessions. Apply first polish normally, then reassess—dull spots indicate areas needing extra attention. Apply second polish with more product and longer drying time before final buffing. The difference between first and second application is often dramatic.
Recognize When Professional Help Is Needed
Some damage exceeds what DIY polishing can fix—knowing these limits prevents wasted effort and further damage.
Structural Damage Indicators
Deep scratches that catch your fingernail, chips in porcelain enamel, or cracks in any material require professional repair. Rust stains that have penetrated porcelain or severe oxidation beneath copper’s surface won’t respond to surface polishing. Attempting to polish these issues often makes them more visible.
Refinishing Options Worth Considering
Porcelain and composite sinks can often be professionally refinished for 30-50% less than replacement cost. This process applies a new surface coating that bonds to existing material, creating a like-new finish. For stainless steel, severe pitting typically requires replacement, but minor dents can sometimes be professionally repaired.
A brilliantly polished kitchen sink transforms your entire kitchen’s appearance with minimal investment. By following these material-specific techniques—proper cleaning, targeted scratch repair, correct polish application, and simple maintenance habits—you’ll keep your sink looking professionally restored for months. Start with your sink’s specific material requirements, avoid common mistakes that cause damage, and implement the daily drying habit that extends your results dramatically. Within an hour of focused effort, you’ll enjoy a sink that reflects light beautifully and makes every kitchen task feel more satisfying. The key isn’t frequent polishing—it’s polishing correctly once and protecting that finish with smart daily habits. Your beautifully restored sink will become the unexpected focal point that elevates your entire kitchen space.


