
Peeling paint, water stains, and outdated finishes plague many kitchen cabinets as they age, but replacing them entirely costs thousands of dollars. Painting your old kitchen cabinet doors offers a budget-friendly solution that transforms your kitchen’s appearance without the mess and expense of a full remodel. With proper technique, you can achieve a smooth, durable finish that withstands daily use and looks professionally done. Many homeowners report saving $3,000-$7,000 by painting instead of replacing their cabinets, making this one of the highest-impact, lowest-cost kitchen upgrades available. This guide reveals the exact process professionals use to deliver long-lasting results, helping you avoid common pitfalls that lead to peeling, chipping, and uneven finishes.
The secret to successful cabinet painting lies in meticulous preparation rather than the painting itself. Skipping proper cleaning, sanding, or priming guarantees disappointment when your new paint begins flaking within months. By investing time in these critical steps and using products specifically designed for cabinetry, your painted doors will maintain their beauty for a decade or more. Whether your cabinets feature solid wood, laminate, or MDF construction, the techniques outlined below adapt to your specific situation while delivering consistent, professional results.
Gather Essential Materials and Tools for Success
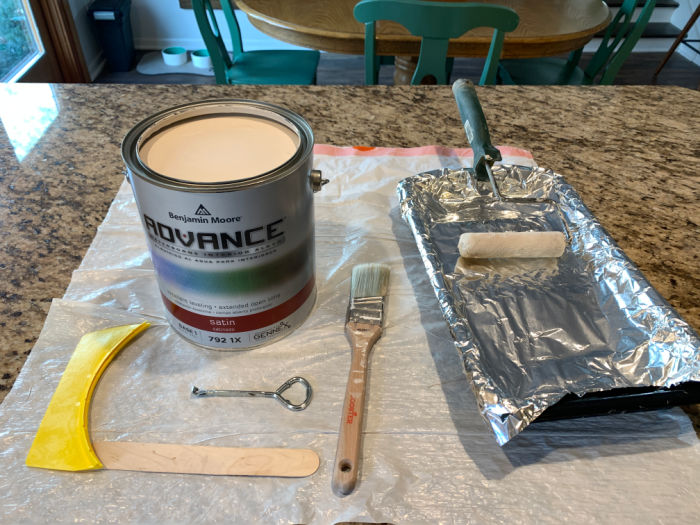
Assembling the right materials before starting prevents mid-project delays and ensures proper adhesion and durability. Professional painters emphasize that 80% of your success depends on using appropriate products for each stage of the process.
Paint Selection and Supplies:
Choose semi-gloss or high-gloss paint specifically formulated for cabinets, as these finishes resist moisture, grease, and frequent cleaning better than flat or eggshell options. Water-based alkyd paints like Benjamin Moore Advance or Sherwin-Williams ProClassic provide the smooth finish of oil-based paints with easier cleanup and lower odor. For problematic surfaces with existing finishes that won’t accept regular primer, consider bonding primers like Zinsser Bulls Eye 1-2-3 or BIN shellac-based primer for superior adhesion. Calculate your paint needs carefully—most cabinet painting requires two coats of primer and two coats of paint, with one gallon typically covering 15-20 cabinet doors depending on size and material.
Tools for Preparation and Painting:
Invest in a random orbital sander with 80, 120, and 220-grit sandpaper discs for efficient, scratch-free sanding. High-quality 2-inch angled brushes with synthetic bristles work best for detailed areas, while microfiber mini-rollers minimize texture on flat surfaces. Don’t overlook specialized supplies like liquid deglosser for cabinets that can’t be extensively sanded, painter’s pyramids for hardware-free drying, and magnetic catch cups to prevent hardware from rolling away during removal. Having a dedicated cabinet painting kit organized in labeled containers will streamline your workflow and prevent cross-contamination between cleaning, priming, and painting stages.
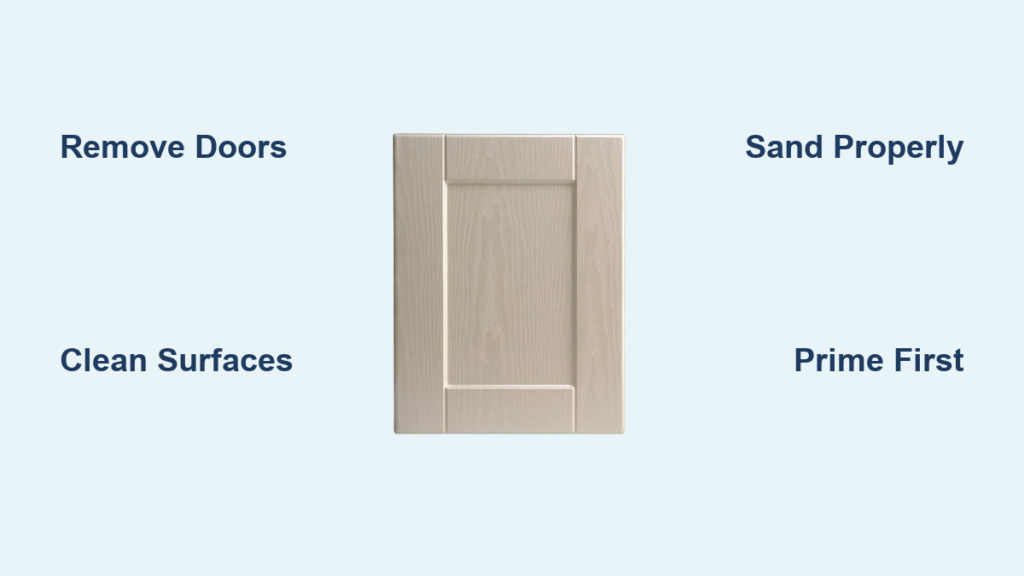
Remove Doors and Hardware Systematically to Avoid Mistakes
Professional painters never skip the labeling step when removing cabinet doors, as mixing up doors during reinstallation creates frustrating alignment issues. This systematic approach prevents costly errors that compromise your finished project.
Create a detailed labeling system using masking tape and a permanent marker—number each door’s hinge side and corresponding cabinet frame location. Take photographs from multiple angles showing door placement, hardware positioning, and any unique alignment characteristics. When removing hardware, place screws in labeled baggies taped to each door to ensure perfect reinstallation. For complex cabinet systems with soft-close mechanisms or specialized hinges, take close-up photos before disassembly to reference during reinstallation. Store doors flat on sawhorses or a dedicated painting rack with adequate space between them to prevent paint transfer during drying.
Clean and Degrease Surfaces Thoroughly to Prevent Adhesion Failure
Kitchen cabinet surfaces accumulate years of invisible grease that repels paint if not properly addressed. This critical step separates professional results from DIY disasters where paint begins peeling within weeks.
Mix trisodium phosphate (TSP) with warm water according to package directions in a dedicated bucket—you’ll need multiple buckets for rinsing. Use microfiber cloths that don’t shed lint, working from top to bottom to prevent recontamination. Focus extra attention on areas near cooking surfaces and around handles where grease concentrates. For stubborn buildup, apply a commercial degreaser like Krud Kutter, allowing it to dwell for 5-10 minutes before scrubbing. Rinse surfaces three times with clean water to remove all cleaning residue, as TSP left on the surface creates a film that prevents proper adhesion. Allow cabinets to dry completely in a well-ventilated area for at least 24 hours before proceeding—rushing this step traps moisture that causes future peeling.
Sand Surfaces for Optimal Paint Adhesion Without Damage
Sanding creates microscopic texture for paint to grip, but improper technique damages cabinet surfaces and creates more work. Professional painters follow a precise sanding progression for flawless results.
Start with 120-grit sandpaper on a random orbital sander for most surfaces, using light pressure and moving constantly to avoid creating low spots. For heavily glazed or high-gloss finishes, begin with 80-grit to break the surface sheen. Hand-sand intricate details and edges with sanding sponges that conform to contours without creating flat spots. Progress to 180-grit for final smoothing, always sanding in the direction of the wood grain. Check your work by running your hand across the surface—it should feel uniformly smooth with slight toothiness, not rough or slick. Wipe all surfaces with a tack cloth immediately after sanding, followed by a final wipe with mineral spirits to reveal any remaining contaminants before priming.
Apply Primer for a Flawless Base That Prevents Future Problems

Skipping primer or using the wrong type causes most cabinet painting failures. Professional painters apply two coats of specialized primer to ensure lasting results.
Apply a thin, even coat of bonding primer using a high-quality brush for details and a foam roller for flat surfaces. Work quickly to maintain a wet edge, brushing out roller marks while the primer is still wet. Pay special attention to edges and end grains that absorb more primer. Allow the first coat to dry completely (typically 4-6 hours), then lightly sand with 220-grit paper to remove any raised grain or imperfections. Apply a second coat of primer, checking for coverage over dark colors or problem areas. Let the final primer coat cure overnight before painting—this critical step allows the primer to harden fully, creating the optimal surface for paint adhesion.
Paint with Professional-Level Techniques for Smooth Results
Achieving a smooth, brush-free finish requires specific techniques that differ from wall painting. Professionals use a combination of tools and methods to deliver flawless results.
Stir paint gently without creating bubbles, then pour a small amount into a clean container for application. Start with cabinet frames and detailed areas using a high-quality 2-inch angled brush, cutting in carefully along edges. For flat door panels, use a microfiber mini-roller with a “W” pattern, then smooth in one direction without lifting. Immediately tip off with a lightly loaded brush to eliminate roller texture. Apply paint in thin, even coats—thick applications cause drips and extended drying times. Allow proper drying time between coats (typically 4-6 hours for water-based paints), and lightly sand with 320-grit paper between coats for perfect adhesion. Most cabinets require two thin topcoats for optimal coverage and durability.
Reinstall Hardware and Doors Without Damaging Your Work
Reinstalling doors too soon or improperly creates unsightly damage that ruins your hard work. Follow this professional sequence to protect your newly painted surfaces.
Wait at least 72 hours before reinstalling doors to ensure paint has adequately hardened—oil-based paints may require up to 14 days. Use painter’s pyramids to position doors during reinstallation, avoiding direct contact with painted surfaces. Start with upper cabinets first, installing doors using your labeling system to ensure proper alignment. Adjust hinges incrementally using the manufacturer’s adjustment screws until doors hang perfectly aligned with consistent gaps. Install hardware using the original screw holes, applying gentle pressure to avoid cracking the paint. If screw holes have become stripped during removal, use toothpicks and wood glue to reinforce them before reinserting screws.
Maintain Your Newly Painted Cabinets for Long-Term Beauty
Proper maintenance extends the life of your painted cabinets by preventing common issues that lead to premature wear. Follow these professional care guidelines to protect your investment.
Allow paint to fully cure for 30 days before regular cleaning—during this period, use only a dry microfiber cloth for dusting. For routine cleaning, use mild dish soap diluted in warm water and a soft sponge, avoiding abrasive cleaners that scratch the finish. Wipe up spills immediately, especially acidic substances like vinegar or citrus that can damage paint over time. Install cabinet bumpers to prevent doors from slamming, which causes chips at the corners. Every six months, inspect for chips or wear spots and touch up immediately before moisture penetrates the substrate. With proper care, your painted cabinets will maintain their fresh appearance for 10+ years, delivering exceptional value from your renovation investment.


