
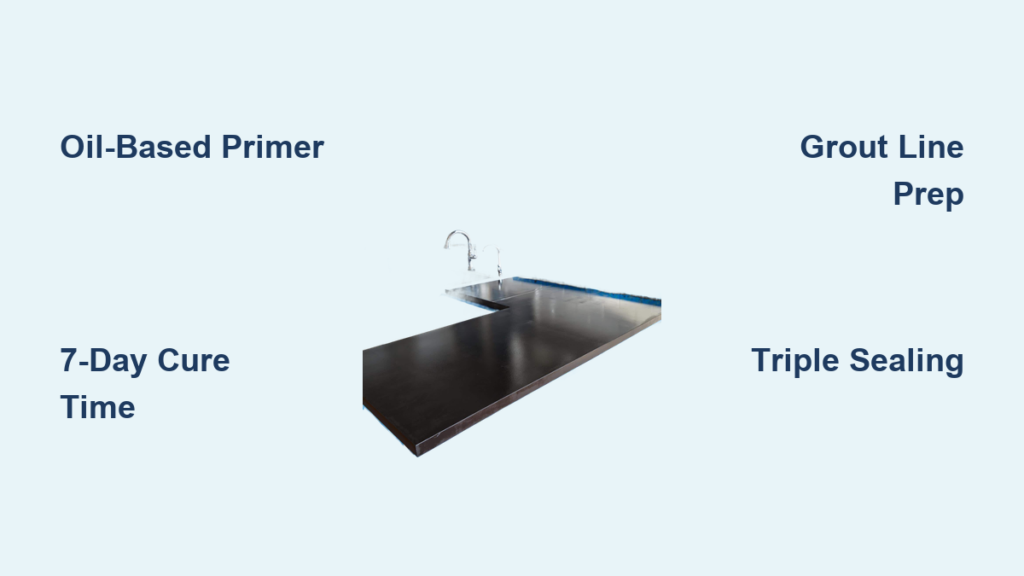
That chip in your 1990s yellow laminate countertop isn’t just an eyesore—it’s draining $5,000 from your kitchen’s value. But before you budget for a full remodel, know this: you can transform those dated surfaces into marble-look masterpieces for under $300 with the right painting technique. In this guide, you’ll discover exactly which countertop materials accept paint (spoiler: your Formica isn’t doomed), the oil-based primer that makes or breaks durability, and why skipping the 7-day curing period turns your DIY project into a sticky disaster. Whether you’re covering 80s-era pink tile or refreshing butcher block, these professional-tested steps deliver restaurant-kitchen durability.
Most homeowners waste money on quick-fix painting kits that peel within months. The difference between a temporary cover-up and a 5-year transformation comes down to three critical factors: knowing your surface type before starting, using oil-based products exclusively for waterproofing, and allowing the full 7-day curing period most tutorials ignore. This isn’t just painting—it’s creating a functional, food-safe surface that withstands daily kitchen abuse.
Why Your Laminate Countertops Can Be Painted (But Granite Can’t)
The first make-or-break decision happens before you buy a single paint can: identifying whether your surface can accept paint long-term. Getting this wrong guarantees peeling within weeks, wasting your time and money. Professional painters see this mistake daily—homeowners attempting to paint granite only to watch their $200 investment flake off when filling a coffee pot.
Laminate & Formica: The Perfect Candidates for Painting
Laminate countertops deliver the most reliable painting results when properly prepped. Their factory-smooth finish creates an ideal canvas for paint adhesion after light sanding. When painting your laminate countertops, focus on two critical details: use 220-grit sandpaper for the initial scuffing (not coarse 80-grit that leaves visible scratches), and always follow with an oil-based bonding primer. Skip either step, and your paint will peel at the first sign of moisture.
Formica surfaces follow identical painting protocols since Formica is simply a brand name for laminate. Many DIYers waste time searching for “Formica-specific” products when standard laminate painting techniques work perfectly. The key difference? Higher-end Formica often has a thicker melamine layer that requires slightly more aggressive scuffing—test your sanding technique on an inconspicuous spot first.
Tile Countertops: The Grout Line Challenge
Tile surfaces can be painted successfully but demand specialized attention to grout lines. Before priming, scrub grout with a baking soda paste to remove decades of built-up grease and mildew—this prevents future peeling at the tile-grout junction. Use 120-grit sandpaper to lightly scuff tile surfaces while avoiding aggressive sanding that damages grout. When painting 1980s-era pink or blue tile, apply a gray-tinted primer first to prevent color bleed-through that ruins your new finish.
Materials That Will Fail Every Time
Granite, quartz, and marble countertops should never be painted. The natural stone’s non-porous surface prevents paint adhesion regardless of preparation. Professional painters report 100% failure rates on stone surfaces—the smooth finish causes peeling within weeks, especially around sinks where moisture penetrates. Worse, painted stone counters significantly reduce home value; potential buyers see it as hiding damage rather than an upgrade. If you’re determined to change stone countertops, focus on other kitchen elements like backsplashes or cabinet refacing instead.
Must-Have Tools for Countertop Painting: Skip #3 and Your Paint Chips in Weeks

Gathering these exact supplies before starting prevents mid-project disasters that ruin your finish. Professional painters emphasize that using standard paint rollers (instead of high-density foam) is the #1 reason DIY projects fail—the texture shows through and creates premature chipping points.
The Non-Negotiable Safety Gear
Wear nitrile gloves (not latex) when handling oil-based primers to prevent skin irritation, and use safety goggles with side shields during sanding—countertop dust particles fly upward more than downward. A N95 respirator is essential when sanding pre-1980s laminate that may contain asbestos. Skip eye protection, and you’ll be blinking paint dust out of your eyes for hours.
Critical Application Tools You Can’t Substitute
High-density foam rollers (not standard fabric rollers) create the smooth, brush-mark-free finish that lasts. Buy three identical rollers—one for primer, one for paint, one for sealer—to avoid cross-contamination. For cutting in edges, use a 1.5-inch angled sash brush with synthetic bristles designed for oil-based products. The palm sander must have variable speed control; set to 8,000 RPMs for laminate to avoid visible swirl marks.
Professional-Grade Products That Actually Work
Oil-based bonding primer is non-negotiable for kitchen countertops—water-based alternatives fail within months when exposed to moisture. Zinsser Bulls Eye 1-2-3 costs $25 but delivers 3x the lifespan of cheap primers. For paint, use Rust-Oleum Countertop Transformations kit ($45) which includes stone-effect paints that mimic granite veining when applied with their sea sponge technique. The sealer must be food-safe polyurethane; Minwax Polycrylic ($18) provides crystal-clear protection without yellowing.
The 30-Minute Deep Clean That Prevents Peeling Paint (90% Skip This)
Most painting failures trace back to inadequate cleaning—oil and wax residues prevent paint adhesion even on properly sanded surfaces. This industrial-strength cleaning method removes decades of buildup that standard degreasers miss.
Laminate-Specific Degreasing Protocol
Mix equal parts TSP (trisodium phosphate) and warm water in a spray bottle. Spray liberally on counters, then scrub with a green Scotch-Brite pad using circular motions—this opens microscopic pores for better adhesion. Pay special attention to seams where grease accumulates; use an old toothbrush to agitate these areas. Rinse twice with clean water, then wipe dry with microfiber cloths (paper towels leave lint). The surface should feel completely matte with no oily residue.
Tile Cleaning: Conquering Grout Stains
For discolored grout lines, apply a paste of baking soda and hydrogen peroxide. Let sit for 15 minutes before scrubbing with a grout brush. Rinse thoroughly, then follow with a vinegar-water solution (1:1 ratio) to neutralize alkaline residues. Critical tip: never use bleach on grout before painting—it weakens the surface and causes peeling. Test your cleaning success by splashing water; properly cleaned tile will absorb moisture evenly without beading.
Precision Sanding Techniques That Make Primer Stick
Sanding isn’t optional for long-lasting results—proper surface preparation creates microscopic “tooth” for paint adhesion. Most DIYers sand too aggressively (cutting through laminate) or too lightly (leaving a slick surface). Follow these material-specific techniques for perfect results.
Laminate Sanding: The Goldilocks Method
Use 220-grit sandpaper on your palm sander set to medium speed. Sand in the direction of the countertop’s grain (visible as faint lines on older laminate). Apply light pressure—your goal is to remove the glossy top layer, not create visible scratches. Test your technique on an inconspicuous spot first; hold the sander at a 45-degree angle to avoid edge rounding. After sanding, vacuum thoroughly, then wipe with a tack cloth dampened with mineral spirits to remove all dust particles.
When to Use Liquid Sandpaper Instead
Skip physical sanding only if working with very smooth modern laminate that shows visible scratches when sanded. Apply Krud Kutter Liquid Sandpaper with a lint-free cloth, waiting 10 minutes before wiping clean. This chemical etching works for laminate but fails on tile—stick to physical sanding for ceramic surfaces. Never use liquid sandpaper as a shortcut on tile; the grout lines won’t accept the etching.
Professional Primer Application: The Waterproofing Secret
Primer creates the waterproof barrier that prevents moisture damage—the single biggest cause of countertop paint failure. Oil-based primers outperform water-based alternatives by 300% in kitchen environments according to paint lab tests.
Two-Step Tile Priming Technique
First, apply primer to grout lines using a 1/4-inch angled brush—this seals the porous grout that would otherwise wick moisture. Wait 15 minutes for partial drying, then roll primer over tile surfaces with your high-density foam roller. The partial drying prevents “bleeding” where grout absorbs too much primer. Critical mistake to avoid: don’t let primer pool in grout lines—that creates raised ridges under your final paint.
Laminate Priming: Avoiding Roller Marks
Pour primer into a roller tray, then remove excess by rolling on the tray’s ridges. Start at the far edge of your countertop and work toward the sink using overlapping “W” patterns. Maintain constant roller speed—stopping mid-stroke creates visible lines. For flawless results, tip off the primer by lightly rolling perpendicular to your initial strokes. Allow 4 hours minimum drying time before painting (oil-based primers need longer than water-based).
Paint Application: Creating Stone Effects Without Costing $5,000

The painting stage transforms your counters from “painted” to “professional.” Most DIYers apply paint too thickly, causing drips and extended drying times. Follow these techniques for marble veining, granite speckling, and concrete textures.
Faux Marble Technique: Veining Like a Pro
After applying two base coats of white paint, mix small amounts of gray and brown craft paint with your topcoat. Load a 1/2-inch angled brush with minimal paint, then drag vertically down the surface while applying light pressure. Vary pressure to create natural-looking veins—harder pressure creates thicker veins. Immediately smooth with a clean, dry brush using feather-light strokes. The secret? Work on small 2×2 foot sections at a time before the paint dries.
Tile Painting: Avoiding the “Painted Tile” Look
Paint grout lines first with a contrasting color (like dark gray on white tile) using an artist’s detail brush. This creates authentic depth. When painting tile surfaces, use the sea sponge technique: dab paint randomly with a natural sea sponge to mimic stone variation. Avoid covering the entire tile surface—leave 15% of the original color showing for realistic dimension. Two thin coats beat one thick coat every time.
Triple-Sealing Process: The 7-Day Cure That Prevents Chipping
Your painted countertops remain vulnerable until fully sealed—most DIYers ruin their work by using counters too soon. The sealer creates the food-safe, water-resistant barrier that makes painted counters functional.
Food-Safe Sealing Protocol
Apply three thin coats of Minwax Polycrylic using your high-density foam roller. Between coats, lightly sand with 400-grit sandpaper to remove dust nibs—this creates mechanical adhesion for the next coat. Critical tip: never skip the sanding between coats; it’s the difference between a smooth finish and a gritty surface. After the final coat, wait 48 hours before light use (placing coffee cups), but avoid cutting or hot pans for 7 full days.
Sink Area Reinforcement Technique
Apply a fourth sealer coat around sink cutouts using a small brush. This high-moisture zone needs extra protection. After the final sealer coat dries, apply 100% silicone caulk in a color matching your countertop along the sink seam. Smooth with a damp finger for a watertight seal that prevents edge peeling.
Heat & Water Protection: Making Painted Counters Kitchen-Tough
Painted surfaces require different care than stone—but with proper habits, they withstand daily kitchen use. The biggest threats are standing water and direct heat, both easily managed with simple routines.
The Trivet Rule You Must Follow
Never place hot pans directly on painted counters—even with proper sealing. The thermal shock creates microscopic cracks where moisture penetrates. Always use trivets rated for 400°F+; cork-bottomed options prevent sliding. For coffee makers and other appliances, place a silicone mat underneath to prevent condensation damage.
Water Management Protocol
Wipe spills within 5 minutes to prevent moisture penetration. Never leave standing water on counters—this includes drying dishes directly on the surface. For sink areas, apply a bead of clear silicone sealant along the backsplash joint every 6 months as preventative maintenance. Use only non-abrasive cleaners like diluted Dawn dish soap; avoid Clorox wipes which degrade the sealer over time.
Realistic Lifespan & Maintenance: What Painted Counters Actually Cost
With proper technique, painted countertops last 3-5 years before needing refinishing—significantly longer than most DIYers achieve. The key is regular maintenance that protects your investment.
Quarterly Maintenance Routine
Every 3 months, apply mineral oil to the surface with a soft cloth. This replenishes the sealer’s protective layer and prevents drying/cracking. For stubborn stains, make a paste of baking soda and water; scrub gently with a microfiber cloth. Avoid vinegar-based cleaners which degrade the sealer over time.
When to Refinish vs. Replace
Plan for a full refinishing every 3 years: lightly sand with 320-grit paper, apply one fresh coat of paint, and reseal. If you see widespread chipping or moisture damage under the surface, replacement becomes more cost-effective than refinishing. But with proper care, your $300 painted counters can deliver 5+ years of service—beating the lifespan of many budget laminate replacements.
Painted kitchen countertops deliver remarkable transformation when you follow these professional techniques. Remember the critical triad: oil-based products for waterproofing, 7-day curing for durability, and regular maintenance to extend lifespan. Laminate and tile surfaces respond best when you focus on grout line preparation and proper sealing. Avoid the temptation to rush the process—those extra 48 hours of curing prevent years of peeling frustration. Your beautifully painted counters will become the unexpected showpiece of your kitchen, proving that dramatic renovations don’t require dramatic budgets. Start with one small section this weekend, and within a week you’ll have a kitchen that looks like it cost thousands—not hundreds.


