
Nothing disrupts your kitchen remodeling dreams faster than realizing your gas stove needs to move but the gas line is stuck in the wrong place. Whether you’re shifting your cooking station across the room, upgrading to a professional range cooker, or completely reconfiguring your kitchen layout, relocating a gas line is one of the most critical yet misunderstood aspects of the process. Gas line relocation isn’t just about moving pipes—it’s about ensuring safety, maintaining code compliance, and creating a functional kitchen that serves your needs for years. This guide reveals exactly how to move gas line in kitchen environments safely and efficiently, with professional insights that most homeowners never consider until it’s too late.
Attempting to relocate your kitchen’s gas supply without proper expertise risks catastrophic consequences including gas leaks, explosions, and voided insurance policies. The good news? When handled correctly by qualified professionals using the right techniques, gas line relocation becomes a straightforward part of your kitchen remodel. By understanding the process, requirements, and hidden pitfalls, you’ll be equipped to coordinate this essential task seamlessly with your other remodeling work.
Hire Gas Safe Registered Professionals Only
Moving a gas line in your kitchen demands expertise that only licensed professionals possess. In the UK, work must be performed exclusively by Gas Safe registered engineers who undergo rigorous training and certification. In the US and most other regions, only licensed plumbers with specific gas-fitting certifications can legally perform this work. These specialists understand pipe sizing requirements, pressure testing protocols, and local building codes that keep your household safe.
The consequences of unlicensed gas work extend far beyond legal violations. Improper connections can create undetectable leaks—natural gas is colorless and odorless; utilities only add mercaptan (the rotten egg smell) as a safety measure, but small leaks may not produce noticeable odor. A qualified professional conducts thorough pressure testing using specialized equipment to verify system integrity, something no DIY enthusiast can replicate safely. Always verify credentials before hiring, request references from similar projects, and confirm they’ll obtain necessary permits and schedule required inspections.
Evaluate Your Specific Relocation Needs
Before any pipe moves, you need a precise understanding of what your relocation entails. Start by documenting your current gas infrastructure: where the supply enters your kitchen, what size pipe is installed, and what appliances connect to it. This assessment determines whether your existing system can support the new configuration or requires upgrades—particularly important if you’re switching from a standard stove to a high-BTU range cooker that demands larger diameter supply lines.
Measure the distance between your current gas outlet and the planned new appliance location. Consider obstacles like structural walls, concrete floors, or existing plumbing that might complicate routing. The complexity of your relocation directly impacts cost and timeline, so thorough evaluation at this stage prevents costly changes later. For optimal results, involve your kitchen designer early—they can help identify whether your planned layout is feasible or whether minor adjustments would create a simpler, more cost-effective gas line installation.
Select the Optimal Routing Method for Your Home

The best approach for how to move gas line in kitchen depends on your home’s construction and the distance involved. When the new location is near your existing supply, direct routing from the boiler feed minimizes new piping and keeps costs down. This method simply taps into the existing line and extends it to the new location using approved materials like copper or flexible stainless steel tubing.
For routes along walls, routing behind kitchen units conceals pipes while avoiding major structural work. The pipe runs along the wall surface or within shallow channels before disappearing behind cabinetry. This works well for same-wall or adjacent-wall relocations with minimal disruption to finishes. When crossing floor areas with wooden subfloors, routing beneath floorboards offers complete concealment—though it requires adequate clearance beneath the floorboards and may not work in all constructions.
Homes with concrete slab floors present the greatest challenge. Routing through concrete requires “chasing”—cutting channels into the concrete with specialized equipment. After pipe installation, these channels are filled with patching material. While more expensive, this method becomes necessary when other routing options aren’t practical.
Coordinate Precision Timing with Flooring Installation

Poor coordination between gas line work and flooring installation creates one of the most common—and preventable—remodeling headaches. When installing new flooring, leave an access area where the gas line will connect rather than attempting to drill through finished flooring later. This is critical with tile installations, where drilling through completed tiles risks cracking—especially with brittle porcelain varieties.
For tile floors, professional plumbers wrap pipes with vinyl electrician’s tape before installation to create a barrier between the pipe and cement-based grout, which can corrode pipes over time. If drilling through existing tile becomes unavoidable, use a diamond-tipped drill bit with water cooling to prevent thermal shock cracking. Coordinate with your flooring contractor to complete all work that would interfere with pipe installation before the plumber arrives, allowing them to finish the job in a single visit rather than making multiple service calls.
Implement Essential Pipe Protection Measures
Gas pipes require specific protection where they contact potentially corrosive materials. At every penetration point through floors or walls, use flexible, gas-rated sealants—not standard caulk—which maintain integrity when exposed to gas vapors. These sealants accommodate minor building movement without cracking or separating.
Where pipes contact cement-based materials like tile grout or concrete, wrap them with protective material before installation. Vinyl electrician’s tape creates a simple barrier, while foam insulation provides more substantial protection for pipes buried in floor chases. This protection should extend beyond contact areas since building movement could bring previously separated materials into contact with the pipe over time. Always document concealed pipe routes with photographs showing reference points to simplify future maintenance.
Address Range Cooker Ventilation Requirements
Moving a gas line for a range cooker isn’t complete without considering ventilation needs. These high-output appliances generate significant heat, steam, and cooking vapors requiring proper extraction. The new location must accommodate a range hood with adequate extraction rate positioned at the correct distance from the cooking surface.
Range cookers also require specific clearances from surrounding surfaces as specified by the manufacturer. These clearances allow for proper air circulation and reduce fire hazards from heat accumulation. Check your appliance manual carefully—different models have different requirements, and a cooker that fit perfectly in one location may need more space in another. High-BTU models often require larger diameter supply lines or pressure modifications beyond simple relocation.
Plan Your Gas Line Relocation Budget Strategically
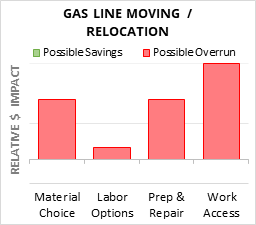
Understanding cost factors helps you budget realistically for how to move gas line in kitchen. Distance is the most significant factor—longer runs require more materials and labor. Structural modifications like routing through concrete floors dramatically increase costs compared to routing beneath wooden floorboards.
Flooring type affects pricing—tile floors require more careful handling than vinyl or carpet, while porcelain tile adds complexity due to its brittleness. Accessibility constraints also impact price; pipes routed in confined spaces require additional labor time. When obtaining quotes, ensure professionals understand all accessibility challenges to provide accurate estimates. Remember that the cheapest option may cut corners on safety—invest in quality installation to avoid dangerous leaks or failed inspections.
Schedule Efficient Single-Visit Installations
Minimize disruption by planning for a single service visit that includes installation, testing, and appliance connection. Complete all preparatory work before the plumber arrives: remove obstructing furniture, leave flooring access areas clear, and finalize your planned route. Have your flooring contractor complete all work that would interfere with pipe installation beforehand—this coordination requires communication between trades but eliminates return visits.
Prepare the new appliance location before the plumber’s visit. Have the range cooker in place or at least have exact dimensions and positioning finalized. This allows the plumber to make the final connection and conduct testing with the actual appliance rather than estimating requirements, ensuring proper operation before they leave.
Ensure Long-Term Reliability and Safety
Thoughtful installation now prevents problems decades later. Install accessible shutoff valves that allow emergency disconnection without shutting off gas to the entire house—they must remain reachable even when concealed behind cabinets. Consider installing 22mm pipe where 15mm would suffice if you anticipate future modifications; this small initial investment accommodates future appliances without requiring pipe replacement.
Document the complete gas line routing, especially concealed portions. Photographs showing the pipe’s path relative to fixed reference points help future technicians locate lines without destructive investigation. Schedule periodic professional inspections to verify system integrity, catching developing issues before they become dangerous. The investment in proper planning and professional execution protects your household from gas leaks, ensures code compliance, and provides the foundation for a kitchen that serves your family safely for years to come.


