

Your pie crust anxiety ends right here. Forget wrestling with pastry cutters or warming butter between your palms—your Cuisinart food processor transforms pie crust from a dreaded chore into a foolproof 10-minute miracle. This method delivers shatteringly flaky layers that rival professional bakers, with zero hand fatigue or guesswork. Whether you’re prepping for Thanksgiving or whipping up a spontaneous berry galette, you’ll achieve perfect golden-brown results every single time.
The secret? Your food processor’s lightning speed keeps butter cold while creating the pea-sized fat pockets essential for flakiness. No more overworked gluten or greasy disasters. In this guide, you’ll master precise temperature control, water ratios, and processing times that guarantee success. Say goodbye to cracked dough and soggy bottoms—you’re about to unlock bakery-quality crusts with minimal effort.
Cuisinart Processor Setup for Flawless Results
Minimum Capacity Requirements
Your Cuisinart must have at least an 8-cup bowl, though 10-cup models prevent overcrowding for optimal blending. The standard S-blade (not the dough hook) is your secret weapon—its sharp edges cut butter faster than hands ever could. Crucially, never use a bowl larger than necessary; too much empty space prevents proper fat distribution. If your model has a smaller work bowl attachment, skip it—this recipe needs full capacity.
Non-Negotiable Temperature Protocol
Warm ingredients sabotage flakiness before you start. Execute this checklist religiously:
– Butter: Cube 1-inch pieces, freeze 15 minutes minimum
– Water: Fill measuring cup with ice cubes, then add water (discard melted ice before measuring)
– Bowl & Blade: Chill in freezer 10 minutes if kitchen exceeds 75°F
– Work Surface: Use marble or refrigerate rolling mat 30 minutes ahead
Pro Tip: On hot days, place a bag of frozen peas atop your wrapped dough disks during chilling—this maintains sub-40°F temps even in crowded fridges.
Precision Ingredients for Foolproof Crust
Exact Measurements (No Guesswork)
- Flour: 2½ cups (300g) all-purpose, measured by spooning into cup then leveling (scooping adds 20% extra flour = tough crust)
- Salt: 1 tsp fine sea salt (use 1¼ tsp kosher salt if substituting)
- Sugar: 1 tbsp granulated (omitted for savory quiches)
- Butter: 1 cup (226g) unsalted, cubed and frozen
- Water: Start with ⅓ cup (75ml) ice water, add 1 tbsp increments as needed
Critical Ingredient Swaps
Salted butter? Reduce added salt to ½ tsp. Want extra tenderness? Replace half the butter with vegetable shortening—it won’t melt as fast during processing. Never use bread flour (too much gluten) or cake flour (too tender). For gluten-free crusts, use a 1:1 blend but add 1 extra tbsp ice water.
Your 10-Minute Cuisinart Processing Sequence
Dry Ingredient Blending (30 Seconds Total)
Pulse flour, salt, and sugar 3-5 times until no white streaks remain. Stop immediately—over-pulsing develops gluten. The mixture should resemble beach sand. If your processor has a “pulse” button, use it; never run continuously at this stage.
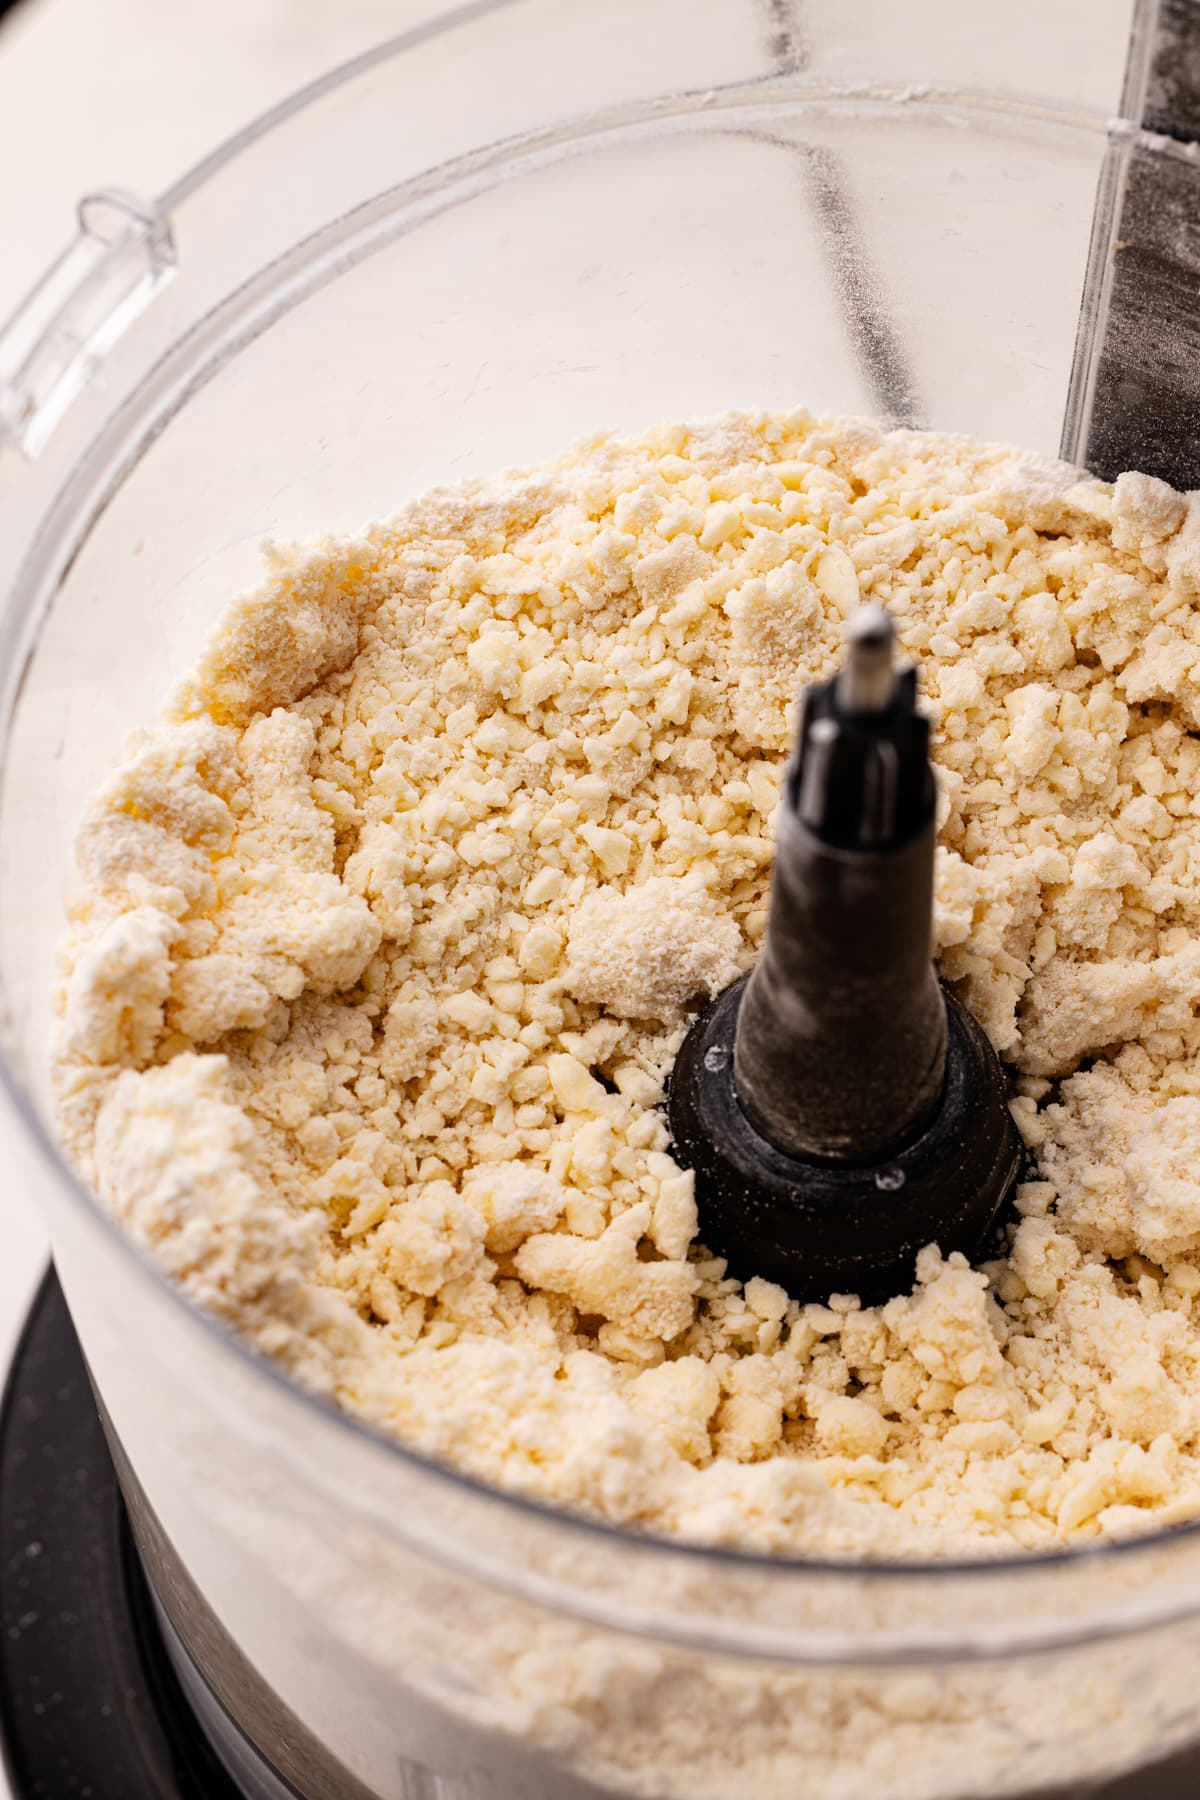
Butter Cutting Technique That Creates Flakiness
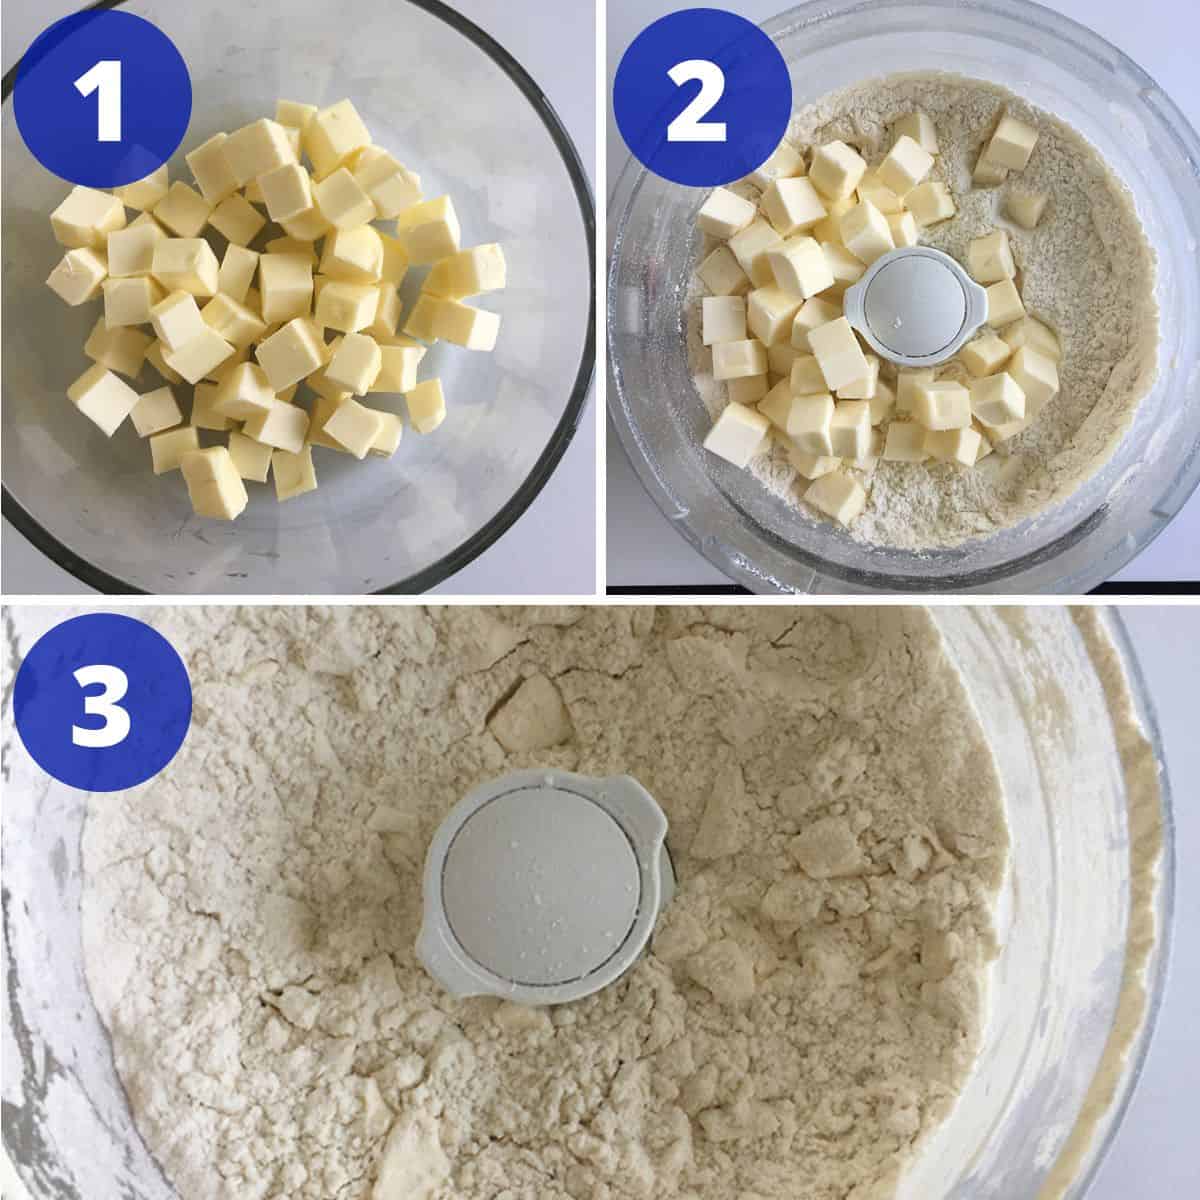
Add frozen butter cubes. Pulse 6-8 times until pieces are pea-sized (1/4-inch). Critical visual cue: You must see distinct yellow flecks throughout the mixture. Stop when 30% of butter chunks remain visible—this creates steam pockets during baking. If you hear the motor laboring, butter is too warm; freeze bowl 5 minutes and restart.
Water Addition: The Make-or-Break Step
With processor running, pour ⅓ cup ice water through the feed tube in 3 seconds flat. If mixture looks dry, add 1 tbsp water and pulse once. Stop when:
– Dough clumps when pinched
– Processor sounds heavier (but dough hasn’t formed a ball!)
– 30-40% of mixture holds together in clusters
Warning: Over-hydration causes sticky dough that won’t roll. Total water processing time must stay under 10 seconds—any longer and butter melts.
Post-Processing Handling Secrets
Forming Crack-Free Dough Disks
Dump shaggy mixture onto a floured surface. Do not knead—use the “press-and-fold” method:
1. Squeeze handfuls firmly to form a mass
2. If crumbly, sprinkle ½ tsp water over dry spots
3. Divide into two equal balls, flatten into 1-inch thick disks
4. Wrap immediately in plastic wrap (air exposure = cracks)
Chilling Times That Prevent Shrinkage
Refrigerate disks minimum 1 hour before rolling. For best results:
– <24 hours storage: Roll straight from fridge
– >24 hours storage: Rest at room temp 8 minutes first
– Frozen dough: Thaw overnight in fridge (never microwave!)
Pro Tip: Press your thumb into the disk edge—if it leaves a clean dent without cracking, it’s ready to roll.
Fixing Common Cuisinart Crust Disasters
:max_bytes(150000):strip_icc()/12360-flaky-food-processor-pie-crust-DDMFS-4x3-14662-24750323c18143dc85d1bbcc9d427ae8.jpg)
Crumbly Dough Won’t Hold Together
Cause: Under-hydrated or warm flour. Fix: During hand-forming, sprinkle 1 tsp ice water over dry areas. Press gently—never add water in the processor! Test by pinching: if it holds for 5 seconds, stop.
Sticky Dough Sticking to Everything
Cause: Butter too warm or excess water. Fix: Chill dough 15 minutes, then roll between two sheets of parchment paper. If still sticky, lightly flour rolling pin but never add flour to dough—it dilutes flavor.
Tough, Leathery Texture After Baking
Cause: Over-processing or room-temp butter. Prevention: Pulse butter only until pea-sized. If dough feels smooth in processor, freeze 10 minutes immediately—don’t wait!
Advanced Temperature Hacks for Perfect Flakiness
The Butter Visibility Rule
Resist the urge to fully incorporate butter. Ideal texture: 1/8-inch to 1/4-inch butter pieces visible throughout dough. These melt in the oven, creating steam layers that separate into distinct flakes. If your processor has a viewing window, check after each pulse.
Spray Bottle Hydration Control
Ditch measuring cups—use a water bottle to mist dough with 3-5 sprays between pulses. This prevents over-watering and gives millisecond-level control. Stop when the mixture makes a “thwup” sound when tossed in a bowl.
Summer Baking Survival Guide
When kitchens hit 80°F+:
– Freeze butter cubes 30 minutes
– Chill bowl/blade 20 minutes
– Run AC during prep
– Roll dough on chilled marble slab
– Bake immediately after filling (no waiting!)
Make-Ahead Storage That Preserves Freshness
Refrigerator Strategy (3-5 Days)
Wrap disks in plastic, then place in airtight container. Critical: Press plastic wrap directly against dough surface to prevent drying. Before rolling, thump the disk—if it sounds hollow, it’s too cold; rest 5 minutes.
Freezer Method (2-3 Months)
Double-wrap each disk in plastic, then vacuum-seal. Label with date and “THAW IN FRIDGE.” Never thaw at room temperature—condensation creates soggy spots. Frozen dough needs 24 hours to thaw fully.
Rolling & Baking Like a Pro
Blind Baking for Soggy-Bottom Prevention
For custard or cream pies:
1. Roll crust 2 inches larger than pie plate
2. Chill in plate 15 minutes
3. Line with parchment, fill with weights
4. Bake at 400°F: 12 min weighted + 6 min uncovered
5. Brush with egg wash (1 egg + 1 tbsp water) before final bake
Rolling Thickness Guide
Aim for 1/8-inch thickness—too thin = tearing, too thick = doughy. Roll from center outward, rotating dough 90° every 3 rolls. If cracks appear, patch with dough scraps (no extra flour!).
Your Cuisinart food processor isn’t just a time-saver—it’s the key to consistently flaky, golden-brown crusts that impress. The non-negotiables? Ice-cold ingredients, visible butter pieces, and under 10 seconds of water processing. Master these three elements, and you’ll never fear pie season again. For next-level results, freeze your double-crust dough disks for 48 hours—they develop richer flavor while staying perfectly pliable. Now go rescue that pumpkin filling from store-bought crust shame!


