
Floating kitchen shelves offer a sleek, modern storage solution that transforms any kitchen walls into functional display space. Unlike traditional shelving supported by visible brackets, floating shelves attach directly to the wall through a hidden mounting system, creating a clean, streamlined look that makes small kitchens feel more spacious and showcases your favorite dishes, cookbooks, or decorative items beautifully. Whether you’re a seasoned woodworker tackling your first wall-mounted project or a DIY beginner looking to upgrade your kitchen without a full renovation, building custom floating shelves allows you to customize dimensions, wood species, and finish to perfectly match your vision and budget.
This comprehensive guide walks you through every stage of creating stunning floating kitchen shelves, from selecting the right materials and tools to proper installation techniques that ensure your shelves stay securely mounted for years to come. We’ll cover essential safety considerations, common mistakes to avoid, and professional tips that will help you achieve results comparable to high-end custom cabinetry at a fraction of the cost.
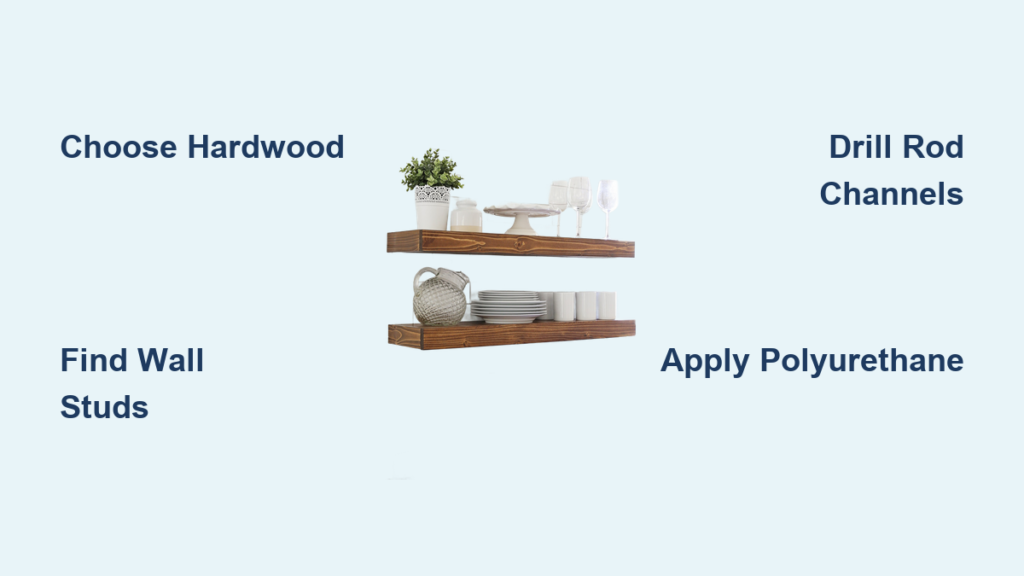
Choose the Right Wood and Essential Tools for Floating Shelves
Your floating shelf project’s success begins with selecting appropriate materials and gathering the necessary tools. Hardwoods like maple, walnut, oak, and cherry deliver exceptional durability and beautiful grain patterns that enhance any kitchen aesthetic. These premium woods resist dents and scratches better than alternatives, making them ideal for high-traffic kitchen areas. If budget constraints exist, softwoods like pine provide a more affordable option that still yields attractive results when properly finished with multiple protective coats.
For most standard kitchen installations spanning 16 to 24 inches between wall studs, hardwood boards between 3/4 and 1 inch thick offer optimal strength without excessive weight. Longer spans or heavy storage needs may require thicker stock—up to 1.5 inches—or reinforced construction techniques. Your tool requirements depend on project complexity but several essentials make the process significantly more manageable. A reliable circular saw or table saw enables precise cuts to your desired shelf length, while a drill with various bits handles pilot holes, counterboring, and screw placement. Don’t underestimate the value of a quality stud finder for locating wall framing members, and always use a level to ensure perfect horizontal alignment during installation.
What Tools You Absolutely Need for Successful Shelf Construction
Gather these critical tools before starting your project: a tape measure for accurate dimensions, wood clamps for securing pieces during assembly, and sandpaper in various grits (120, 180, and 220) for smoothing surfaces. If you’re edge-joining multiple boards to create wider shelves, pipe clamps or bar clamps become essential for maintaining even pressure across the joint. For the hidden mounting system, you’ll need a hole saw or Forstner bit matching your floating bracket diameter, along with the floating shelf hardware kits themselves. These kits typically include metal rods and wall anchors rated for specific weight capacities—choose hardware appropriate for your expected load. Keep a shop vacuum and compressed air nearby for cleaning out wood chips after drilling mounting channels.
Design Floating Shelves with Optimal Dimensions and Weight Capacity
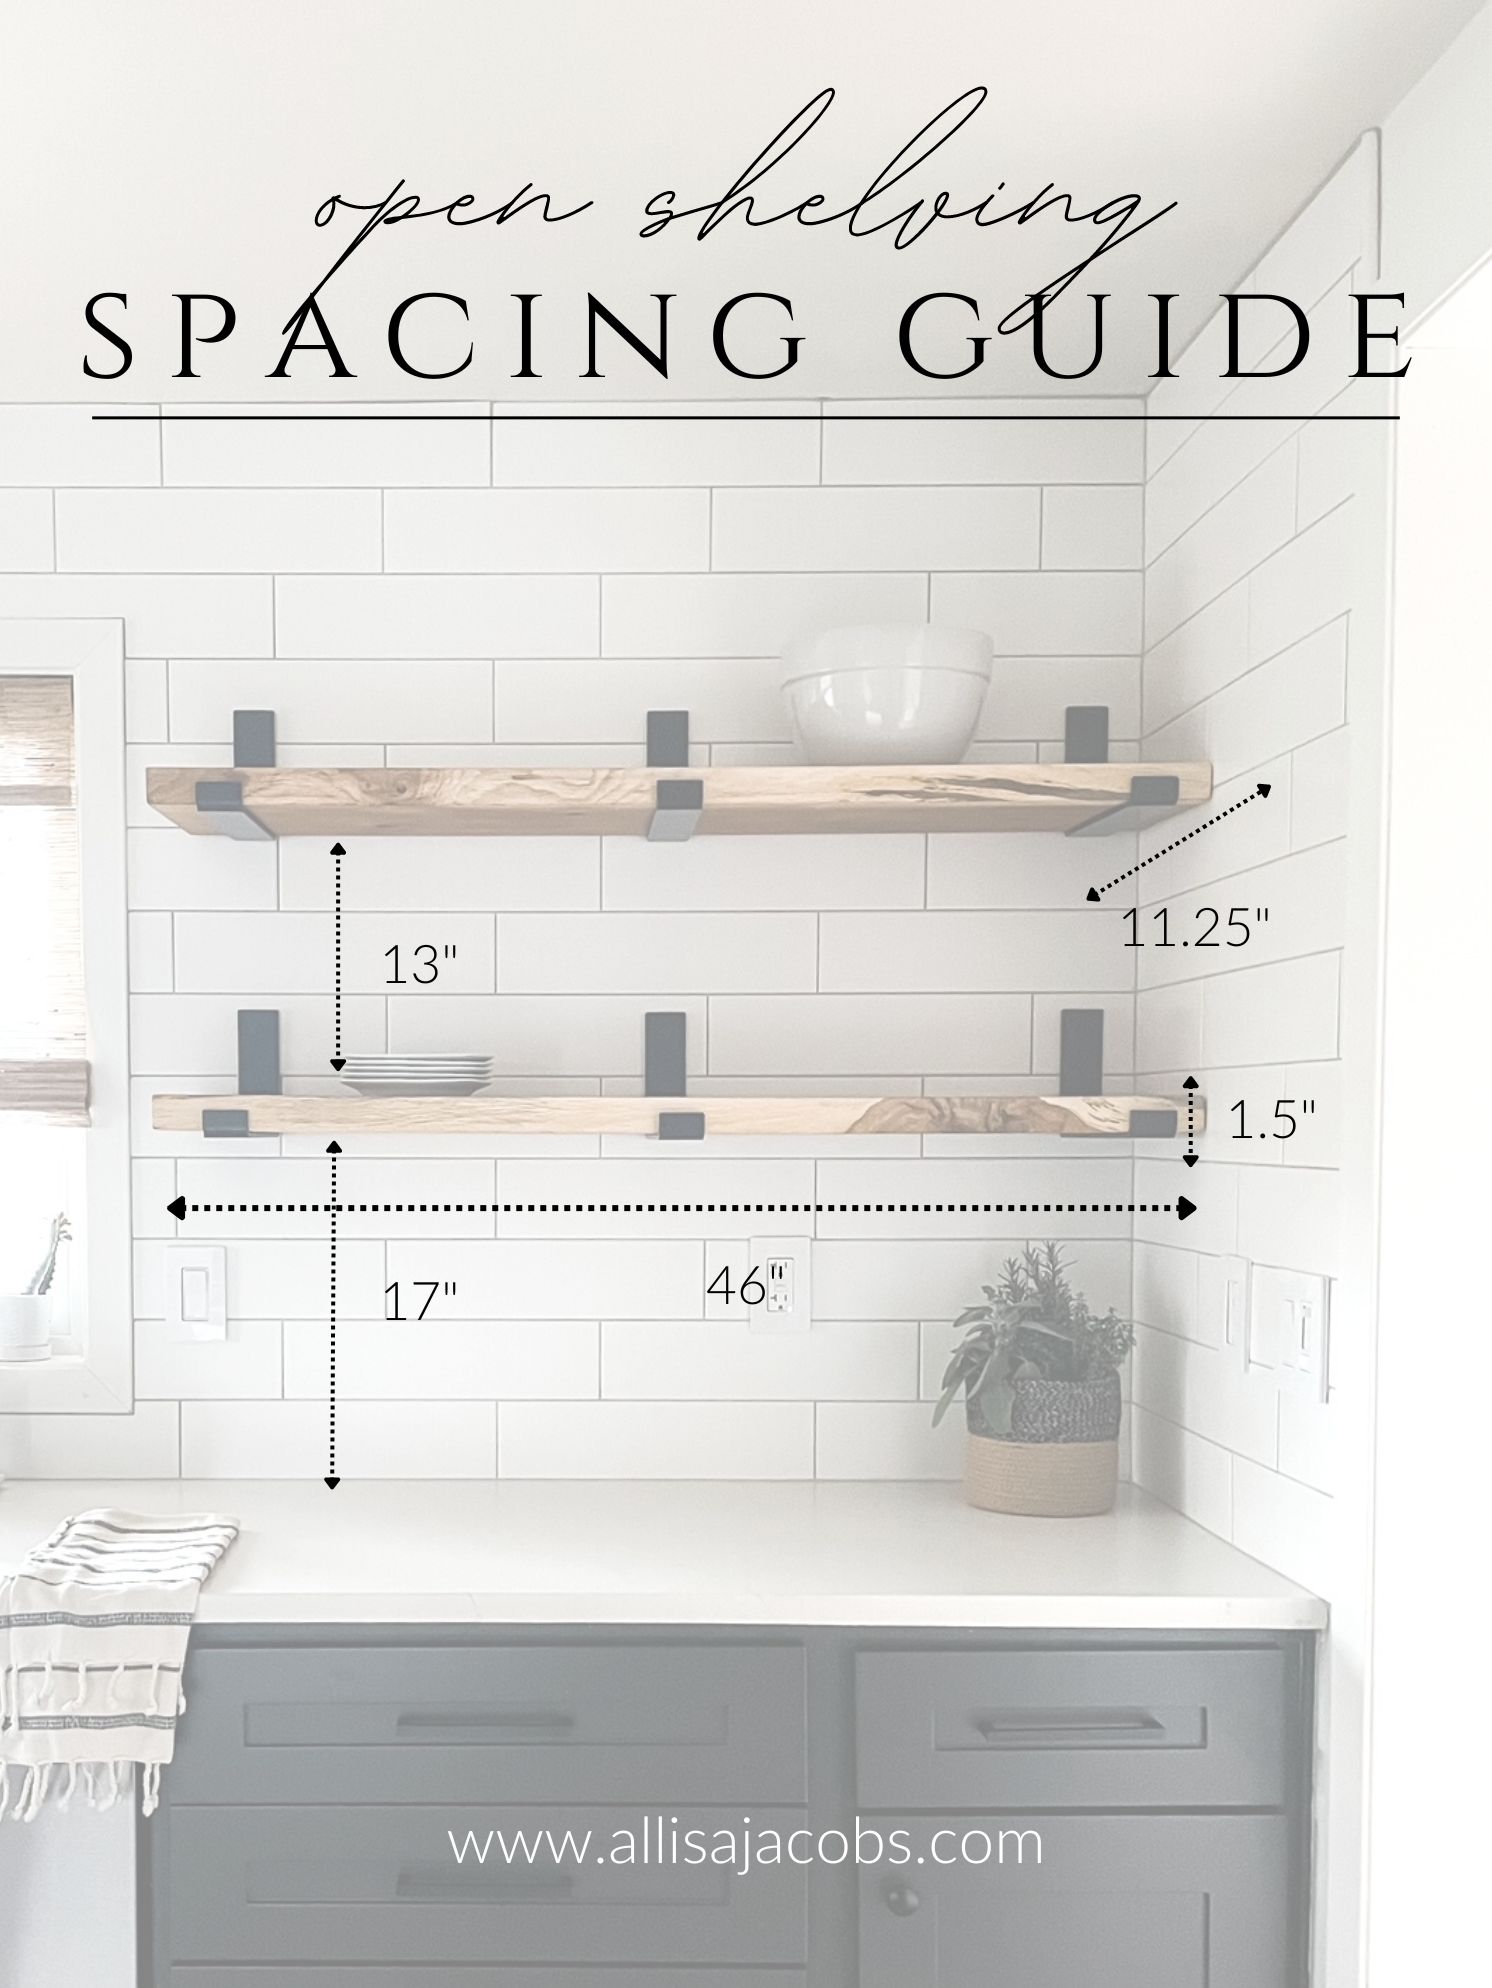
Effective floating shelf design balances aesthetic appeal with functional storage requirements. Standard kitchen shelf depth ranges from 8 to 12 inches, with 10 inches offering versatile accommodation for most dinner plates, bowls, and small appliances while maintaining comfortable reach distances. Shelf length depends entirely on your wall space and storage needs, but most kitchen installations range from 18 to 36 inches per shelf. Longer spans require additional support brackets or thicker material to prevent sagging over time—never exceed 48 inches without intermediate support.
How Much Weight Can Your Floating Shelves Hold?
Weight capacity deserves careful planning during the design phase. A well-constructed floating shelf properly installed into wall studs can safely support 25 to 50 pounds per linear foot. This capacity decreases significantly for shelves mounted into drywall alone, even with appropriate anchors. Calculate your expected load by considering the weight of items plus a 25% safety margin, and design your mounting system accordingly. For heavy storage needs like cast iron cookware, reduce shelf length to maximize stud engagement, increase material thickness to 1.5 inches, or add extra support brackets every 12 inches. Visual proportion matters too—shelves that appear too thin for their length look flimsy regardless of actual strength, so aim for a thickness-to-length ratio of roughly 1:10 to 1:12 for balanced, substantial results.
Build Your Floating Shelf Structure with Precision
Construction begins with cutting your shelf boards to final length using precise measurements and a sharp saw blade that minimizes tear-out on visible edges. For shelves wider than standard board widths, edge-join multiple boards using wood glue and either pocket screws, dowels, or biscuits to create a solid, stable surface. Apply wood glue to mating edges, join the boards together, and secure with clamps until the glue dries completely—typically 24 hours for full strength. Once joined, sand the entire surface progressively through 120, 180, and 220 grit sandpaper, creating a smooth foundation that eliminates mill marks.
Create Proper Mounting Rod Channels for True Floating Effect
:max_bytes(150000):strip_icc()/290-install-a-floating-shelf-1-a017f7021b1248f58576827bcda78d3c.jpg)
The next critical step involves creating the mounting rod cavities that accept your floating bracket system. Measure and mark the center line along the back of each shelf, then use a hole saw or Forstner bit to drill a series of holes deep enough to fully accommodate the bracket rods while leaving approximately 1/2 inch of wood thickness at the back surface. Space these holes according to your bracket manufacturer’s recommendations, typically every 16 to 24 inches along the shelf length. After drilling, thoroughly clean out all wood chips and dust using a shop vacuum and compressed air, then sand the inside edges of the holes smooth to prevent binding. This hidden channel allows the mounting rods to slide through the shelf while remaining completely invisible once installed.
Apply Professional-Quality Finish to Kitchen Shelves
Finishing transforms raw wood into a durable, beautiful surface that withstands kitchen demands. Begin by applying a pre-stain wood conditioner if using stain, which helps achieve uniform color penetration and prevents blotching on softwoods. After the conditioner dries, apply your chosen stain with a clean brush or rag, working with the grain direction and wiping away excess after the appropriate penetration time. For natural wood appearance, consider penetrating oil finishes like tung oil or Danish oil, which enhance character while providing reasonable water resistance.
Seal Shelves Against Kitchen Moisture and Wear
Sealing protects your finished shelf from moisture, food spills, and daily wear. Polyurethane finishes offer excellent protection in varying sheen levels from matte to high gloss, with oil-based versions providing superior durability though requiring longer drying times. Water-based polyurethanes dry faster but may raise wood grain slightly, requiring light sanding between coats. Apply thin, even coats using a quality brush, allowing each coat to dry completely before lightly sanding with 220 grit. Two to three coats typically provide adequate protection for kitchen environments, with additional coats recommended for heavy-use areas. Allow final coats to cure fully—24 to 72 hours—before installation.
Locate Wall Studs and Prepare Perfect Mounting Points
Proper wall preparation ensures your floating shelves mount securely. Begin by locating all studs using a quality stud finder, which detects the denser wood framing behind drywall. Mark stud locations with painter’s tape rather than pencil, as tape remains visible without requiring hole filling. For standard kitchens, studs typically run vertically at 16-inch intervals, though older homes may use 24-inch spacing. Verify stud locations by driving small test nails—you’ll feel definite resistance when hitting solid wood versus drywall.
How to Position Floating Shelves for Maximum Strength
Once studs are located, determine your shelf height and mark mounting hole positions accordingly. Hold a level at your desired height and draw a light reference line across the installation area. Transfer stud locations to this reference line, marking where mounting brackets will anchor. For shelves longer than stud spacing, plan bracket positions to hit as many studs as possible while maintaining even distribution—typically mounting brackets at each end plus additional supports every 16 to 24 inches. Pre-drill pilot holes into studs using a bit slightly smaller than your mounting screw diameter, then install the wall portion of your floating bracket system according to manufacturer specifications.
Install Floating Shelves with Professional Precision
Installation requires patience and precise alignment. Begin by sliding the floating brackets fully into the mounting rod channels, ensuring they seat completely and distribute evenly along the shelf length. With a helper holding the shelf level at your reference height, gently press the shelf against the wall, allowing the bracket rods to find their corresponding wall anchors. Some bracket systems require rotating or locking mechanisms to secure the shelf—consult your hardware manufacturer’s instructions. Once the shelf feels firmly attached, verify levelness across the entire length, making minor adjustments by loosening mounting screws slightly before re-tightening.
How to Test Floating Shelf Stability Before Loading
After confirming secure installation, test load capacity by gradually applying weight starting at approximately 25% of your expected maximum load, watching for any movement or concerning sounds. Allow 24 hours before loading fully, checking bracket tightness one final time before arranging your kitchen items. The completed installation should appear to float effortlessly while providing rock-solid support for everything from everyday dishes to decorative accents.
Avoid These Common Floating Shelf Installation Mistakes
Insufficient stud engagement ranks among the most frequent mistakes—drywall alone cannot safely support loaded shelves. Always prioritize stud attachment, and if your shelf design requires mounting away from studs, install additional support brackets or reconsider shelf placement. Another common error involves underestimating pilot holes, which prevent wood splitting near board edges. Material selection errors lead to durability problems: avoid particleboard or MDF for kitchen shelves as they lack moisture resistance. Finishing mistakes often involve inadequate preparation—skipping proper sanding or rushing through drying times compromises results. Most frustratingly, measurement errors compound throughout a project, so always measure twice, cut once, and double-check dimensions.
Maintain Your Floating Shelves for Decades of Service
Regular cleaning using a soft, dry microfiber cloth removes dust without scratching finishes, while occasional damp wiping with mild soap addresses cooking residue. Avoid harsh cleaners or excessive moisture that can damage finishes over time. For painted shelves, touch up chips promptly to prevent moisture infiltration. Periodically check mounting security by gently testing shelf stability at bracket locations—any movement warrants immediate attention. Tighten mounting screws as needed, and if brackets have loosened within the wall material, consider installing larger screws. Avoid exceeding recommended weight capacities, which strain both the mounting system and shelf material. Reapply protective finish coats every few years as wear patterns indicate, focusing on edges and frequently-touched areas. With proper care, your handmade floating kitchen shelves become lasting features that enhance your home’s functionality and style for years to come.


