
Grease buildup transforms even the cleanest kitchen into a sticky, grimy mess that repels both cooks and guests. That stubborn film on your stovetop, the tacky residue on cabinet fronts, and the invisible layer on your range hood all demand effective cleaning solutions. Commercial degreasers work, but they often contain harsh chemicals like ammonia and butyl that expose your family to unnecessary toxins. The good news? You can make highly effective kitchen degreaser using simple pantry staples that outperform store-bought options without the chemical risks. This guide reveals exactly how to make degreaser for kitchen surfaces that cuts through grease faster and safer than commercial alternatives.
Kitchen grease isn’t just unsightly—it creates a breeding ground for bacteria and makes future cleaning exponentially harder. Animal fats from cooking solidify at room temperature, while vegetable oils polymerize into tough residues that resist standard cleaning. When you learn how to make degreaser for kitchen use with natural ingredients, you gain complete control over what touches your food preparation surfaces while saving significant money compared to store-bought options.
Vinegar’s Grease-Cutting Science Explained
White vinegar works as the foundation of effective homemade degreasers due to its acetic acid content, which breaks the molecular bonds holding grease to surfaces. Unlike commercial cleaners that merely move grease around, vinegar actually dissolves the lipid compounds making up kitchen grease. This acid-based action begins working the moment vinegar contacts grease, loosening its grip on countertops, stovetops, and appliances within seconds.
Maximize Vinegar’s Cleaning Power Instantly
For immediate results, spray undiluted vinegar directly on greasy surfaces and let it sit for 3-5 minutes before wiping. The longer vinegar stays wet on the surface, the more grease it breaks down—never wipe vinegar away immediately after application. To eliminate the strong vinegar smell that bothers some users, add 10-15 drops of citrus essential oil per 32-ounce spray bottle. Lemon, orange, or grapefruit oils not only mask the vinegar scent but contain limonene, a natural solvent that enhances grease-cutting power.
Baking Soda Deep-Cleaning Technique for Stubborn Grease
Baking soda delivers dual cleaning action that makes it indispensable when you learn how to make degreaser for kitchen use. Its alkaline nature creates a chemical reaction when combined with vinegar that helps dislodge stuck-on grease, while its mild abrasive quality provides gentle scrubbing power without scratching most surfaces. This combination makes baking soda perfect for tackling the toughest kitchen grease without damaging finishes.
Create the Ultimate Baking Soda Paste
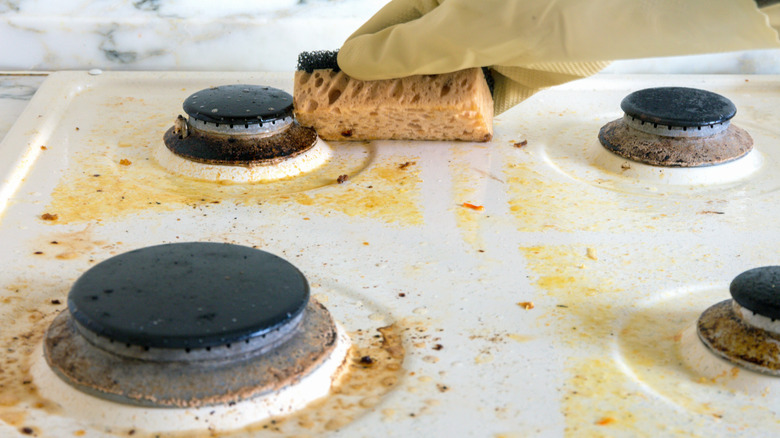
For severe grease buildup on stovetops or range hoods, mix baking soda with just enough water to form a thick paste. Apply this paste directly to the greasy area using a sponge, ensuring complete coverage. Let it dry completely—this drying process draws grease out of porous surfaces. Once dry, wipe away with a damp cloth to reveal dramatically cleaner surfaces underneath. For stainless steel appliances, use a baking soda paste with circular motions following the grain to avoid scratching while removing stubborn grease deposits.
Standard 3-Ingredient Degreaser Recipe (Ready in 5 Minutes)

This versatile formula creates approximately 32 ounces of powerful degreaser using ingredients you likely already have. The combination of vinegar, soap, and baking soda creates a cleaning solution that tackles everyday kitchen grease on all common surfaces without harsh chemicals.
Exact Measurements for Maximum Effectiveness
Gather a clean 32-ounce spray bottle, 1 cup distilled white vinegar, 2 drops natural liquid soap (Dr. Bronner’s works best), and 1 teaspoon baking soda. Fill the remainder with warm water, leaving space at the top for shaking. Avoid using more than 2 drops of soap—excess soap creates suds that leave residue requiring additional rinsing. The warm water helps dissolve ingredients faster and improves grease-cutting performance.
Step-by-Step Mixing Without Common Mistakes
- Rinse your spray bottle thoroughly with warm water first
- Add vinegar to the bottle before other ingredients
- Sprinkle in baking soda (expect a slight fizzing reaction)
- Add soap drops last to minimize sudsing
- Fill with warm water to just below the neck
- Secure the cap and shake vigorously for 30 seconds
Shake before each use as baking soda settles over time. Spray liberally on greasy surfaces, wait 5-10 minutes for the solution to penetrate, then wipe clean with a damp microfiber cloth. For extremely tough spots, apply baking soda paste directly after spraying.
Citrus-Boosted Degreaser for Tough Grease and Odors

This enhanced formula leverages citrus essential oils’ natural grease-fighting properties for superior results on stubborn kitchen grease while eliminating unpleasant cooking odors that linger in cabinets and appliances.
Best Essential Oils for Maximum Grease Removal
While lemon oil works well, grapefruit and orange oils contain higher concentrations of limonene, the natural solvent that dissolves grease most effectively. Combine 2 cups warm water, 1 tablespoon baking soda, and 20 drops of your chosen citrus oil in a spray bottle. Shake well before each application and allow the solution to sit for 5 minutes before wiping. The citrus oils not only cut grease but neutralize odors at their source rather than merely masking them.
Gentle Degreaser Formula for Wood Cabinets and Stone
Wood finishes and natural stone surfaces require special care when addressing kitchen grease. Vinegar’s acidity can damage these surfaces over time, making this gentle alternative essential for maintaining your kitchen’s appearance while keeping it clean.
Safe Cleaning Protocol for Delicate Surfaces
Mix 8 cups warm water with just 3 drops of castile soap in a large container. Apply using a soft cloth rather than spraying directly onto surfaces. Wipe in the direction of wood grain for cabinets, using minimal pressure. Immediately follow with a clean, damp cloth to remove any residue, then dry thoroughly with a soft towel. This formula effectively removes grease without dulling wood finishes or etching stone surfaces with repeated use.
How to Apply Homemade Degreaser to Stainless Steel Without Streaks
Stainless steel appliances require specific techniques to maintain their appearance while removing grease effectively. Spray your degreaser onto a microfiber cloth first rather than directly onto the appliance surface. Wipe in the direction of the metal grain—never side-to-side—which prevents visible streaks and maintains the finish. For fingerprint-prone areas like refrigerator handles, implement a daily wipe-down with a light degreaser solution to prevent heavy buildup that requires intensive cleaning.
Fixing Set-In Grease: Overnight Method for Extreme Buildup
When standard degreaser won’t cut through years of accumulated grease, this intensive method delivers professional results without harsh chemicals. Spray your degreaser liberally on the affected area, then cover completely with plastic wrap to prevent drying. The plastic creates a sealed environment that allows the degreaser to penetrate deeply for 8-12 hours. Remove the plastic and wipe away the dissolved grease with a clean cloth—most stubborn buildup will wipe away effortlessly after this treatment. For particularly difficult areas, apply heat by placing a warm, damp towel over the plastic-wrapped area to further soften the grease.
Prevent Kitchen Grease Before It Happens: 3 Simple Habits
The most effective way to handle kitchen grease is to prevent heavy accumulation in the first place. Keep a spray bottle of your homemade degreaser on the counter while cooking and wipe spills immediately—fresh grease removes 10x easier than dried grease. Use a splatter screen during frying to reduce airborne grease by up to 70%. Run your exhaust fan for 15 minutes during and 15 minutes after cooking to capture grease particles before they settle on surfaces throughout your kitchen.
Making your own kitchen degreaser saves money, reduces chemical exposure, and gives you complete control over what touches your food preparation surfaces. Start with the standard 3-ingredient formula for daily cleaning needs, keep the citrus-boosted version handy for tough jobs, and use the gentle formula for wood and stone surfaces. With consistent application and these proven techniques, you’ll maintain a genuinely clean kitchen without relying on harsh commercial chemicals. The next time grease threatens your kitchen’s cleanliness, you’ll know exactly how to make degreaser for kitchen surfaces that delivers professional results using simple, safe ingredients.


