
Your dark kitchen doesn’t have to feel like a cave every time you step inside. If your cooking space absorbs light instead of reflecting it, you’re not alone—nearly 60% of homeowners struggle with poorly lit kitchens that feel cramped and uninviting. The good news? You don’t need expensive renovations or structural changes to transform your dim kitchen into a bright, functional space. By implementing strategic lighting solutions, reflective surfaces, and smart color choices, you can dramatically improve your kitchen’s brightness without breaking the bank. This guide reveals exactly how to make a dark kitchen brighter using proven techniques that deliver immediate results.
Install Targeted Under-Cabinet Lighting
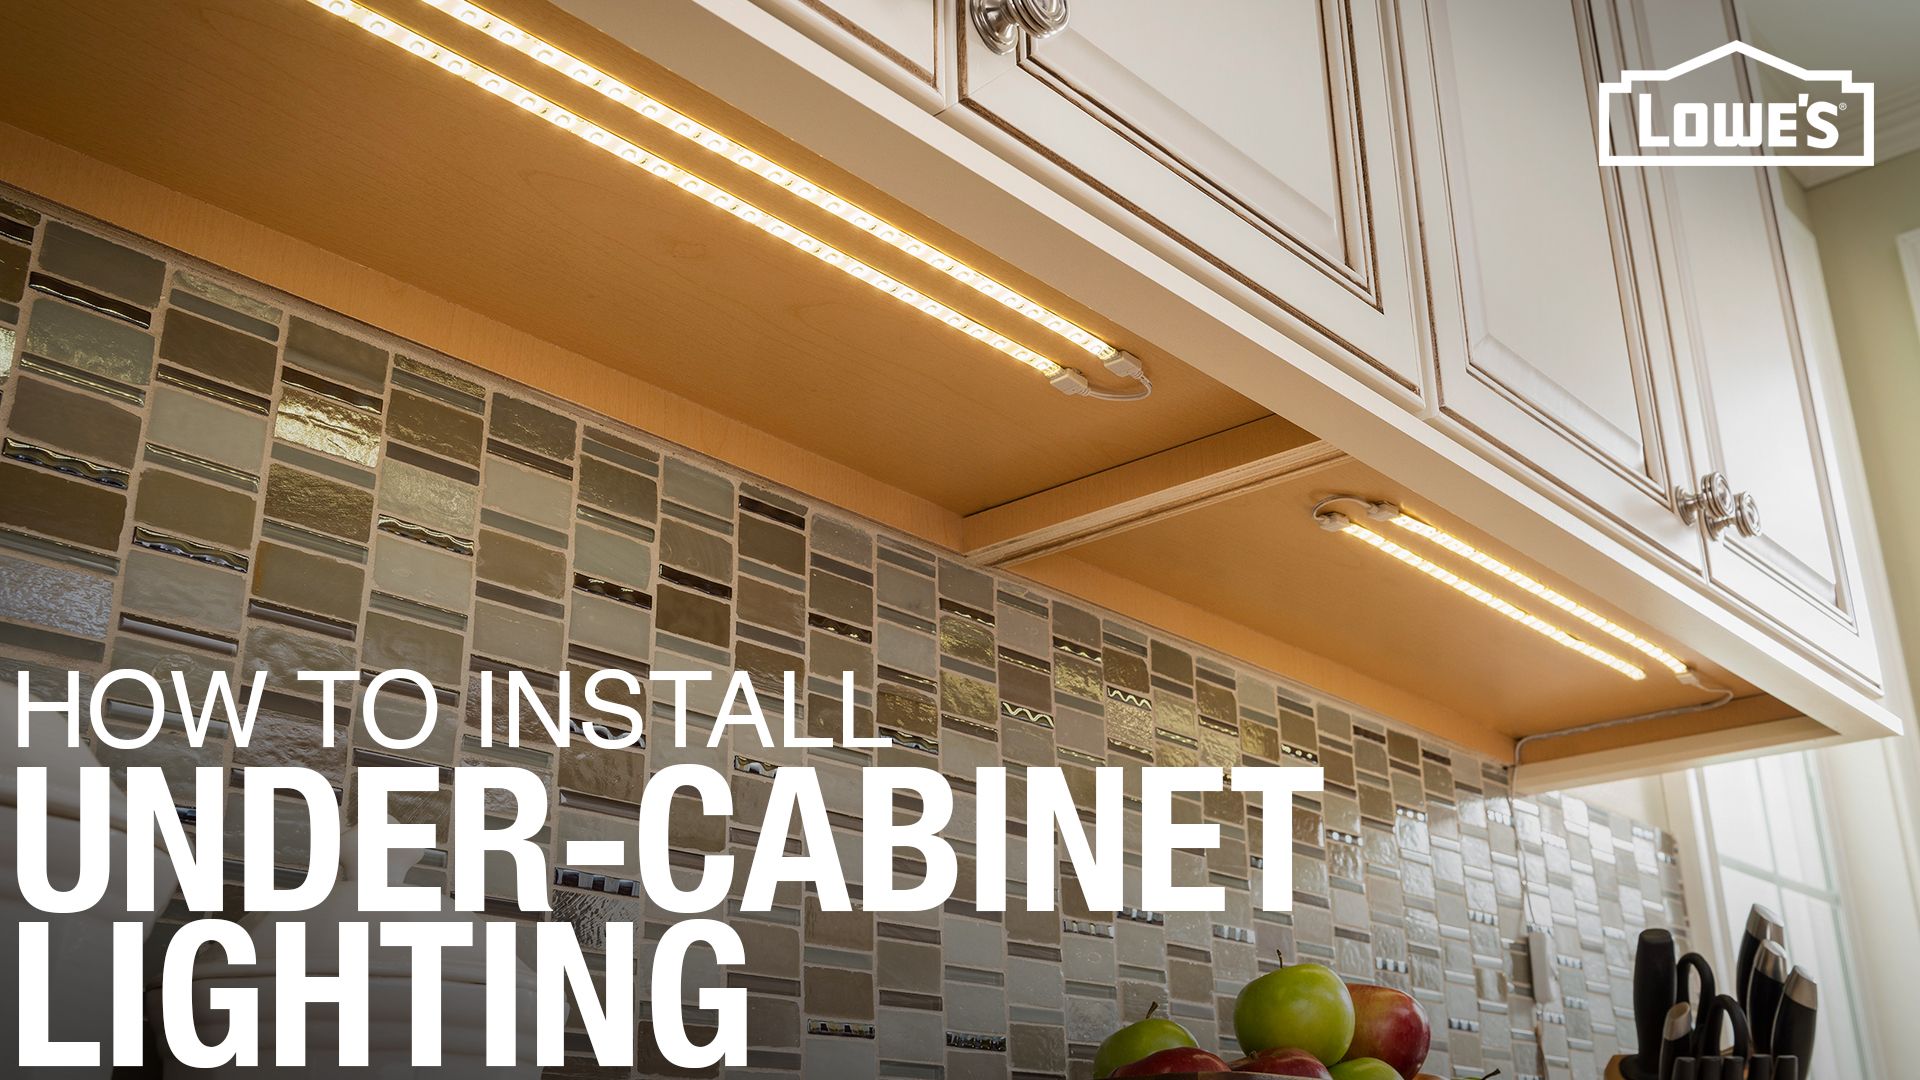
Under-cabinet lighting is your most powerful weapon against kitchen darkness, especially when your primary ceiling fixtures cast shadows across work surfaces. LED strip lighting installed beneath upper cabinets eliminates the shadow problem that plagues most traditional kitchen layouts, creating consistent illumination where you actually need it—on your countertops. Unlike overhead lighting alone, under-cabinet fixtures shine directly on your cutting boards, stovetop, and sink areas, making food preparation safer and more enjoyable.
Choose the Right LED Configuration
When selecting under-cabinet lighting, opt for high-lumen LED strips with a color temperature between 4000K-5000K for crisp, daylight-like illumination that makes colors appear true and vibrant. Look for models with a minimum of 800 lumens per foot and a high CRI (Color Rendering Index) of 90+ to ensure accurate color perception while cooking. For maximum flexibility, install dimmable strips controlled by touch sensors or smart home systems that allow you to adjust brightness based on task and time of day.
Avoid Common Installation Mistakes
Many homeowners make the critical error of installing under-cabinet lighting too far back on the cabinet, causing light to shine directly onto the backsplash rather than across the countertop. Position your lighting 1-2 inches from the front edge of the cabinet to ensure proper light distribution across your entire work surface. Additionally, avoid using single, long strips that create uneven lighting—install multiple shorter segments with consistent spacing for uniform brightness without dark spots.
Transform Walls with Strategic Paint Choices

The color you choose for your kitchen walls dramatically impacts how much light bounces around the space. Dark colors absorb up to 90% of available light, while light colors can reflect 80% or more back into the room. When you’re trying to make a dark kitchen brighter, your paint selection becomes one of the most cost-effective improvements you can make.
Select the Perfect White Undertone
Not all whites work equally well for dark kitchens—some can make your space feel cold and sterile rather than bright and inviting. Warm whites with subtle yellow or beige undertones (like Benjamin Moore’s “Chantilly Lace” or Sherwin-Williams’ “Pure White”) create the illusion of natural light even when none exists. These warmer shades reflect light beautifully while maintaining a welcoming atmosphere that stark, cool whites often lack. For maximum effect, paint both walls and cabinets in coordinating light shades to create a seamless, expansive feel.
Apply High-Reflectance Finishes
The sheen of your paint matters just as much as the color. Choose eggshell or satin finishes for walls—they reflect more light than matte while still hiding imperfections better than high-gloss options. For cabinets, consider a semi-gloss finish that actively bounces light around the room. The slight sheen catches and redistributes both natural and artificial light, making your entire kitchen feel noticeably brighter without appearing overly shiny or clinical.
Maximize Light with Strategic Mirror Placement
Mirrors instantly double your available light by reflecting both natural and artificial sources throughout your kitchen. Unlike complex renovations, mirror installations deliver immediate brightness improvements with minimal investment or permanent changes to your space.
Install Backsplash Mirrors for Functional Brightening
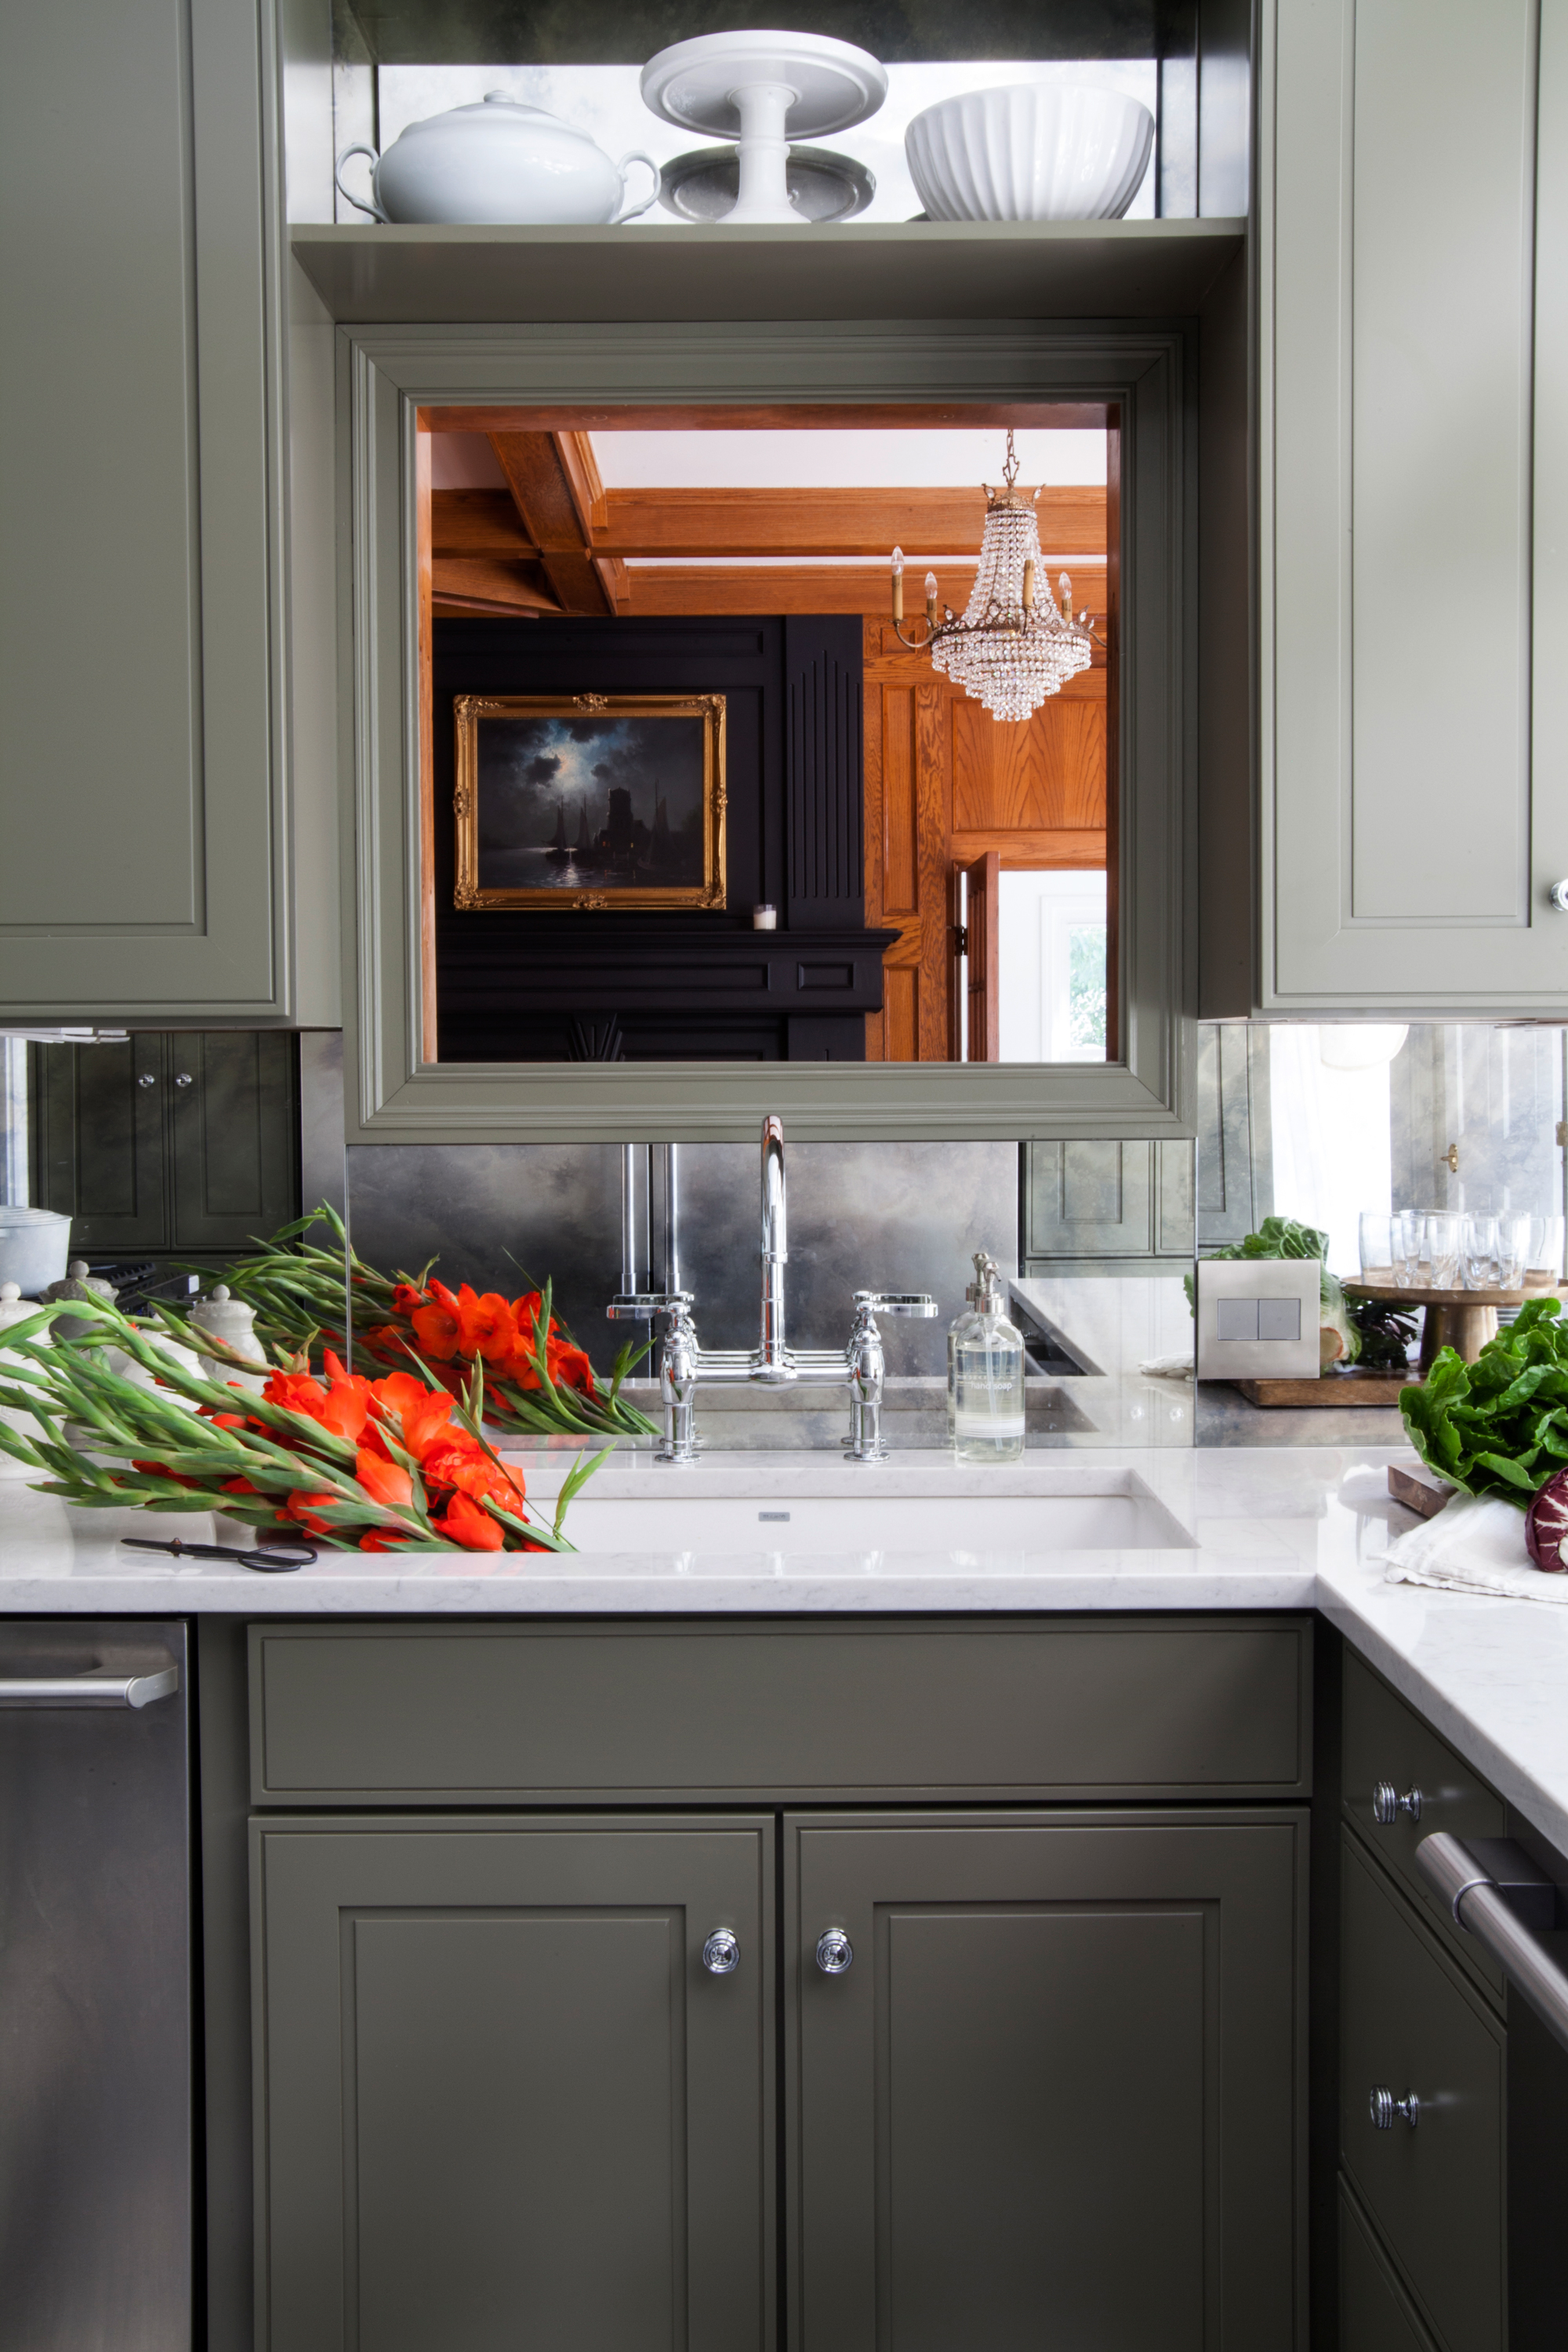
A mirrored backsplash behind your stove or sink creates the illusion of additional depth while reflecting task lighting directly onto your work surfaces. Modern options like beveled mirror tiles or antiqued mirrored glass provide visual interest without the dated appearance of full-sheet mirrors. For rental-friendly solutions, apply mirror film to existing tile backsplashes—this temporary option still delivers significant light-reflecting benefits without permanent installation.
Position Mirrors Opposite Light Sources
Identify your strongest light source (whether a window or your brightest fixture) and place a substantial mirror directly across from it. A 24″x36″ mirror positioned strategically on the wall opposite your kitchen window can effectively double the natural light entering your space. For kitchens with limited wall space, consider mirrored cabinet inserts or mirrored panels mounted on the sides of upper cabinets—these smaller reflective surfaces still contribute meaningfully to overall brightness.
Optimize Countertops and Surfaces for Light Reflection
Your kitchen surfaces play a crucial role in how light moves through the space. Dark countertops absorb light, while lighter, reflective surfaces actively distribute it throughout your kitchen, creating a brighter overall environment.
Choose Light-Colored, Polished Countertops
White or light gray quartz countertops with a polished finish reflect significantly more light than matte or darker surfaces. While granite and marble offer beautiful options, their natural variations often include darker veins that absorb light—opt for consistent light tones when brightness is your priority. If replacing countertops isn’t feasible, use light-colored cutting boards and trivets strategically placed around your kitchen to create additional reflective points on darker surfaces.
Incorporate Glass and Metallic Elements
Replace solid cabinet knobs with polished metallic hardware that catches and reflects light from multiple angles. Stainless steel, chrome, or brass fixtures on cabinets and appliances create numerous small light sources throughout your kitchen. Similarly, display glassware and white dishes in open shelving or glass-front cabinets—these items catch and scatter light in ways that solid surfaces cannot, adding depth and brightness to your space.
Enhance Natural Light Entry Immediately
Even small amounts of natural light dramatically improve how bright your kitchen feels. The quality of daylight cannot be fully replicated by artificial sources, making maximizing available natural light essential for transforming dark kitchens.
Remove Light-Blocking Window Treatments
Heavy curtains, valances, and layered window treatments absorb valuable natural light before it even enters your kitchen. Replace them with sheer roller shades or simple bamboo blinds that can be fully raised during daylight hours. If privacy is a concern, opt for top-down shades that allow you to admit light from above while maintaining coverage below eye level.
Trim External Obstructions
Overgrown trees, shrubs, or vines directly outside your kitchen windows can block up to 50% of available natural light. Schedule regular pruning of exterior vegetation to maintain maximum light entry. Even small adjustments like trimming a single branch that casts shadows across your main window can make a noticeable difference in your kitchen’s brightness during daylight hours.
Implement Quick Brightness Boosts Under $50
You don’t need to invest thousands to see meaningful improvements in your kitchen’s brightness. Several budget-friendly solutions deliver immediate results with minimal effort.
Replace Bulbs with Higher-Lumen LEDs
Swap your existing bulbs for higher-lumen LED alternatives—this simple change can increase light output by 50% or more without any electrical work. Look for 100W-equivalent LED bulbs (about 1600 lumens) with 4000K-5000K color temperature for your main fixtures. In under-cabinet lighting, choose LED strips rated at 1200+ lumens per meter for optimal task illumination.
Declutter Countertops Strategically
Clutter absorbs light and creates visual chaos that makes spaces feel darker. Clear countertops of all non-essential items, leaving only frequently used appliances and utensils visible. Store everything else in cabinets to reduce visual noise and allow light to travel freely across your work surfaces. This simple step alone can make your kitchen feel 20-30% brighter by eliminating shadow-casting obstacles.
Maintain Your Bright Kitchen Daily
Creating a brighter kitchen requires ongoing attention to ensure your improvements continue delivering results. Dust, grime, and wear all reduce light reflection over time, gradually diminishing the brightness you’ve worked to achieve.
Clean light fixtures and bulbs weekly to maintain maximum output—dust accumulation can reduce illumination by 20% or more in kitchens where cooking residue builds up quickly. Wipe down windows inside and out monthly for optimal natural light transmission. Touch up paint on high-traffic areas as needed to preserve light-reflective properties and keep your kitchen looking fresh.
Transforming a dark kitchen into a bright, inviting space doesn’t require massive renovations or unlimited budgets. By implementing these strategic lighting solutions, reflective surfaces, and color choices, you can dramatically improve your kitchen’s brightness with targeted, cost-effective changes. Start with the quick wins that fit your immediate situation, then gradually incorporate more substantial improvements as your budget allows. The transformation from gloomy to glorious is entirely achievable when you know exactly how to make a dark kitchen brighter—the light-filled kitchen you’ve been dreaming of is closer than you think.


