
Ever opened your refrigerator to find mysterious leftovers with no idea how old they are, or reached for what you thought was flour only to grab powdered sugar instead? Properly learning how to label kitchen containers transforms these daily frustrations into organized efficiency. The right labeling system saves you time during meal prep, prevents food waste by tracking expiration dates, and makes your kitchen accessible to everyone in your household. In just a few minutes of setup, you’ll create a system that keeps your food visible, accessible, and consumed before it spoils. This guide reveals exactly which markers work best on different surfaces, how to apply labels that last through dishwasher cycles, and the specific techniques that make your labeling system stick—literally and figuratively.
Choose the Right Markers for Labeling
Selecting appropriate markers forms the foundation of successful container labeling, and each type serves distinct purposes in your kitchen organization system. Understanding these differences prevents the frustration of labels that smudge, fade, or refuse to erase when contents change.
Dry Erase Markers for Quick, Temporary Labeling
Dry erase markers provide the fastest approach to temporary kitchen labeling, writing smoothly on non-porous surfaces and wiping away with a damp cloth. Keep one tucked upside down in your spice rack so ink always remains at the tip for immediate use during food prep. Warning: These labels smudge easily with normal handling, making them less ideal for containers that get moved frequently or handled by children with sticky fingers. Reserve them for containers you access daily but rarely move, like your coffee canister or frequently used spice jars.
Wet Erase Markers for Dishwasher-Safe Durability
Wet erase markers (like Vis-à-vis) offer significantly more durability while maintaining erasability. These create markings that won’t smudge off accidentally but wash away completely during a dishwasher cycle—no manual erasing required. This makes them perfect for busy households where parents prep food weekly. Write both the date and planned consumption day on containers so hungry children can immediately identify which leftovers are ready to eat. Wet erase works effectively on both glass and plastic containers, bridging the gap between temporary and permanent solutions.
Permanent Markers for Long-Term Storage
Permanent markers like Sharpies serve essential purposes for labeling homemade seasoning mixes and pantry staples. Apply directly to glass jars for long-term storage items whose contents won’t change. When labeling homemade mixes, write dry ingredients on the back of the jar while the front displays wet ingredients needed to complete the recipe—eliminating recipe searches during cooking. Pro tip: Never use permanent markers on plastic containers as the ink penetrates the material and becomes impossible to remove completely.
Ultra Fine Point Retractable Sharpies for Precision Labeling
These innovative markers combine fine-tip precision with retractable convenience. The design eliminates cap-losing frustration when marking containers with wet hands. More importantly, writing from these markers washes off completely in the dishwasher without manual erasing—perfect for detailed labeling on small containers. They’re ideal for date-stamping meal prep containers where you need both precision and the ability to reset labels weekly.
Select Labels for Every Kitchen Zone

Different kitchen areas demand different label solutions based on moisture levels and temperature variations. Matching labels to environments ensures your how to label kitchen containers system remains functional without constant replacement.
Erasable Labels for Frequent Content Changes
Avery #5429 shiny erasable labels offer game-changing flexibility for households that repurpose containers often. These laminated labels accept any Sharpie marker and erase completely with sturdy art erasers. The laminated surface withstands repeated erase-write cycles and dishwasher exposure—users report nearly a year of use without deterioration. Apply to clean, dry containers with firm pressure, and pair with retractable markers to eliminate cap management entirely.
Waterproof Labels for Refrigerator and Freezer
Freezer storage requires specific attention as standard adhesives fail at sub-zero temperatures. Freezer-grade labels use specialized adhesives rated for -20°F or colder, maintaining adhesion through condensation cycles when moving containers between freezer and room temperatures. For refrigerator use, laminated or polypropylene film labels resist moisture damage better than paper. Time-saving tip: Write on freezer labels before application—some markers won’t write well on extremely cold surfaces.
Chalkboard Labels for Stylish Pantry Organization
Chalkboard labels provide reusable labeling with modern aesthetic appeal, creating stylish looks on glass jars in pantry settings. These accept chalk markers that write smoothly and erase completely, allowing unlimited content changes. However, they work best in dry storage environments rather than humid refrigerator conditions. For pantry organization where contents rotate but conditions remain stable, chalkboard labels offer excellent functionality combined with design flexibility.
Adhesive Labels for Universal Application
Adhesive labels function as versatile workhorses across virtually any container material. For optimal adhesion, apply to clean, dry surfaces prepared with rubbing alcohol to remove oils. Premium brands offer removable adhesive formulations that peel away cleanly, though standard adhesives provide stronger initial bonds. Common mistake: Skipping surface preparation causes premature label failure—always clean and dry containers before applying labels.
Apply Labels for Maximum Durability
Proper application techniques dramatically affect how long your labels remain readable. Taking extra seconds during application prevents the frustration of constant replacement.
Surface Preparation Techniques
Clean containers thoroughly and dry completely before label application. Use rubbing alcohol or white vinegar to remove oils and residue that compromise adhesive bonding. Allow cleaned containers to air dry for at least five minutes to ensure no trapped moisture interferes with adhesion. Critical factor: Labels adhere best at room temperature (65-75°F), so containers fresh from refrigerators or dishwashers should temper before labeling.
Strategic Label Placement for Visibility
Place labels where they’re visible without requiring container manipulation. Front-facing labels on the main container body enable quick identification without opening containers. For round containers, position labels at eye level when containers sit on shelves—no need to pick up or rotate for reading. Smooth labels from center to edges to eliminate air bubbles that create moisture intrusion points accelerating label degradation.
Long-Term Label Maintenance
Inspect labels every few months to ensure continued accuracy and readability. Faded, peeling, or inaccurate labels create confusion that undermines your entire organizational system. When replacing labels, completely remove old adhesive to prevent buildup that creates uneven surfaces. Soak stubborn residue with cooking oil for ten minutes followed by scrubbing with baking soda paste to remove sticky residue without damaging containers.
Build Consistent Labeling Systems

Standardized labeling across all kitchen zones creates intuitive organization that speeds item location. Consistent naming conventions eliminate confusion from variations like “Brown Rice” versus “Rice – Brown” for the same item.
Essential Information to Include on Every Label
Every kitchen label should include identifying information appropriate to its contents and location. Must-haves:
– Clear item identification
– Storage date for perishables
– Opening date for pantry staples
– Allergen warnings in bold text for households with dietary restrictions
– Reheating instructions on meal prep containers
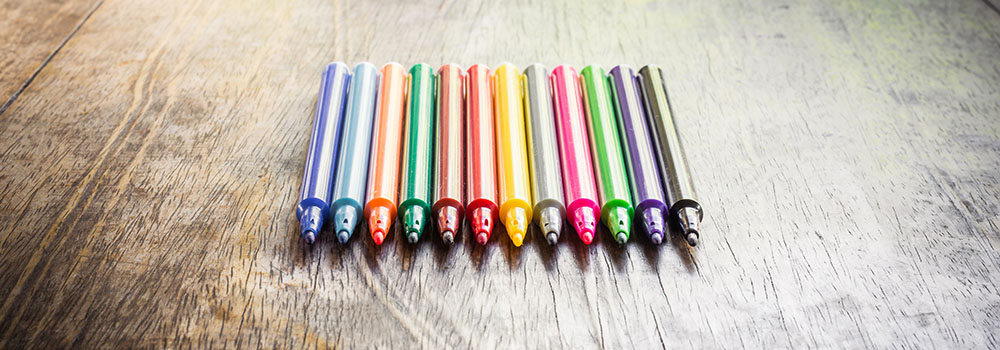
Color Coding for Quick Visual Identification
Assign specific colors to food categories for automatic identification:
– Green: fresh produce and herbs
– Blue: dairy and eggs
– Red: proteins and meats
– Yellow: grains and pasta
– Orange: baking supplies
This visual system proves especially valuable during busy mornings or when household members other than the primary cook need to locate items. Color-coded labels complement text labels, adding a quick-glance layer to detailed information.
Maintain Your Labeling System Long-Term
Successful kitchen labeling requires regular attention to prevent gradual degradation that undermines your organizational efforts.
Quarterly Label Audit Process
Conduct quarterly reviews of all kitchen labels to catch deterioration before labels become unreadable. During audits:
– Verify label information remains accurate
– Check dates on perishable items
– Confirm ingredient lists on homemade mixes
– Inventory supplies to ensure replacement labels and markers are available
This minimal maintenance prevents the “out of labels” situations that lead to unlabeled containers and system abandonment.
Minimal Daily Maintenance for Maximum Benefits
The daily time investment in writing and updating labels—typically just a few seconds per container—pays significant dividends through reduced food waste, improved meal preparation efficiency, and distributed household management responsibilities. With proper marker selection, appropriate labels for each zone, consistent application techniques, and regular maintenance, your how to label kitchen containers system will remain functional for years, keeping your kitchen organized and food visible, accessible, and consumed before waste occurs.
Final Tip: Start small with just your refrigerator containers for one week, then expand to your pantry and freezer. This incremental approach builds habits that last while delivering immediate benefits—you’ll wonder how you ever managed without proper container labeling.


