
Your wall mounted kitchen cabinets should provide secure, level storage that enhances both functionality and aesthetics—but a single measurement error can cause wobbling doors, uneven gaps, or worse, dangerous detachment from the wall. Installing cabinets that safely support 150+ pounds of dishes and kitchen supplies demands precise planning, proper anchoring, and systematic execution. This guide reveals exactly how to mount kitchen cabinets securely on your first attempt, avoiding the common pitfalls that force homeowners to call professionals for corrections. You’ll learn professional techniques for finding solid anchors, creating perfect alignment, and connecting multiple cabinets into a seamless run that stays level for decades.
Before touching a drill bit, verify your installation kit contains every component by laying out all brackets, screws, and hardware on a clean surface. Cross-reference each piece against the manufacturer’s checklist—missing mounting brackets or specialized screws will halt your progress mid-installation. Store tiny hardware in labeled containers to prevent loss, and gather your complete toolkit within arm’s reach. Rushing through preparation guarantees frustrating interruptions when your helper is holding a 50-pound cabinet and you realize you’re missing the critical 2-inch mounting screws.
Identify Your Wall Construction Type Before Drilling
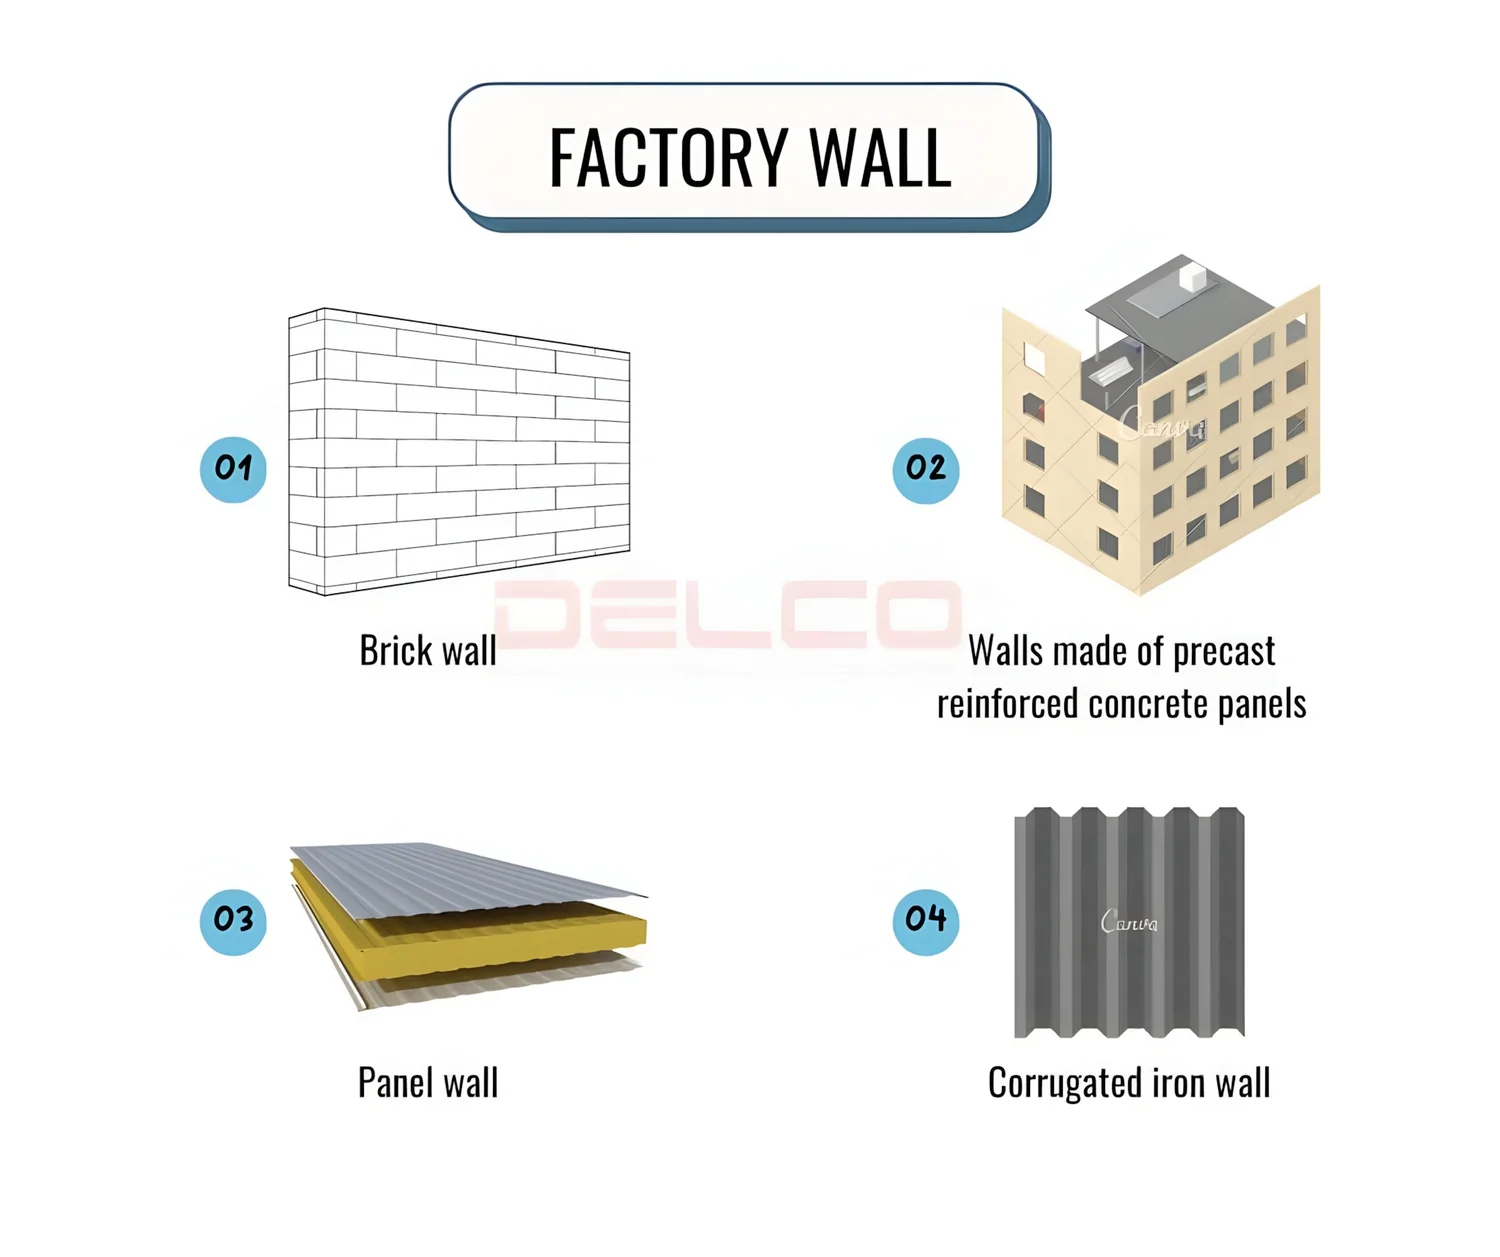
Your wall’s composition directly determines which anchors will securely hold fully loaded cabinets, so confirm what’s behind your drywall before making the first mark. Tap your wall—solid, consistent resistance indicates wood studs, while hollow spots signal drywall alone. For concrete or masonry walls common in basements or older homes, you’ll need specialized masonry anchors and hammer drill techniques. Standard drywall anchors fail under cabinet weight over time, so never rely on them without confirming your wall structure.
Locate Structural Studs with Precision
Run a stud finder horizontally across your planned cabinet area, marking each stud center with a light pencil line. Verify findings by drilling a tiny test hole at low-visibility spots—you should feel increased resistance when the bit hits solid wood. Most residential walls have studs spaced 16 inches apart, but never assume spacing; measure between each stud since renovations sometimes alter framing. Mark stud edges clearly with vertical lines, as mounting screws must penetrate at least 1.5 inches into solid wood for maximum holding power.
Detect Hidden Hazards Behind Walls
Scan your installation zone with a pipe and cable detector before drilling any holes—electrical wires often run vertically from outlets, while plumbing lines follow predictable paths near sinks. A single drill bit through a live wire causes dangerous sparks and costly repairs. If your detector identifies obstacles where studs should be, plan to distribute cabinet weight across multiple anchor points rather than relying on single-stud mounting. Never drill blindly based on assumed stud spacing; hidden ducts or pipes could be lurking where you expect solid framing.
Position Level Reference Lines at 18-24 Inches Above Countertop
The bottom edge of your wall mounted kitchen cabinets must maintain consistent height above countertops for functional clearance and visual harmony—typically 18-24 inches depending on user height and appliance needs. Measure up from your counter surface at multiple points along the wall, accounting for any unevenness in your countertop installation. Mark these points with small pencil ticks, then connect them using a 4-foot level to create your primary horizontal reference line.
Transfer Critical Cabinet Measurements to Wall
With your baseline established, measure the exact distance from your cabinet’s mounting hooks to its top edge and side panels. These dimensions determine where wall brackets must sit for proper engagement. Transfer these measurements upward from your reference line to mark bracket positions—most cabinets require brackets positioned 1-2 inches below the cabinet top. Use a carpenter’s square to ensure vertical marks remain perfectly perpendicular to your horizontal line, preventing cabinets from hanging at an angle.
Mark Complete Cabinet Outlines for Visual Guidance
Trace the full footprint of each cabinet on your wall using light pencil lines, including corner positions and end points. This visual roadmap helps identify potential conflicts with outlets, windows, or architectural features before mounting begins. Check that your planned cabinet run accommodates appliances like microwaves or vent hoods—forcing cabinets too close to heat sources damages finishes over time. Verify all outlines maintain consistent height from your reference line, correcting any discrepancies before drilling begins.
Install Heavy-Duty Wall Brackets into Solid Studs

Mounting brackets must anchor into structural wood framing to safely support cabinet weight—drywall alone cannot handle long-term stress. Position each bracket according to your wall markings, ensuring the top edge aligns precisely with your bracket height line. Drill pilot holes slightly smaller than your mounting screws using a bit matched to your wall type: standard wood bits for stud installations, masonry bits with hammer setting for concrete walls.
Choose Anchors Based on Wall Composition
- Solid wood studs: Use #8 or #10 coarse-thread screws at least 2.5 inches long for maximum penetration
- Concrete/masonry walls: Insert sleeve anchors rated for 200+ pounds per mounting point
- Drywall without studs: Install toggle bolts rated for cabinet weight plus safety margin
Drive each screw until firmly seated but avoid over-tightening, which strips threads and reduces holding power. After installing all brackets, place your level across multiple brackets to confirm identical height—adjust any misaligned brackets before proceeding, as 1/8-inch error compounds across multiple cabinets.
Hang Cabinets Using the Lift-Then-Lower Technique
Position your first cabinet slightly above the mounting brackets, then carefully lower it straight down to engage all hooks simultaneously. This technique prevents partial engagement that causes cabinets to slip off brackets under load. Have a helper steady the cabinet while you verify each mounting hook has fully seated into its bracket slot—listen for the distinct “click” as metal hooks lock into place.
Level Cabinets Before Securing Adjacent Units
Place your level across the cabinet top immediately after hanging. Adjust leveling mechanisms inside the cabinet (usually hex bolts near the top corners) until perfectly horizontal. Most cabinets allow 1/4-inch vertical adjustment—use this to compensate for minor wall irregularities. Never proceed to adjacent cabinets until the first unit is perfectly level, as errors propagate through the entire run.
Connect Cabinets with Internal Clamping System
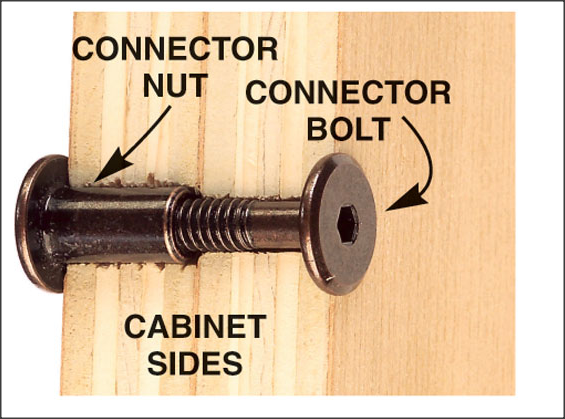
Clamp adjacent cabinets together at top and bottom edges before driving connecting screws. This maintains alignment while you work through hinge plate access points. Drill pilot holes through connecting panels using manufacturer-supplied screws—typically 1.5-inch coarse-thread screws for solid wood connections. Drive screws until snug but avoid overtightening, which can warp cabinet sides and create visible gaps.
Install End Panels and Final Trim Components
Cut decorative end panels to size using a circular saw with a fine-tooth blade for clean edges. Support the full panel during cutting to prevent splintering—clamp a straightedge guide to ensure precise 90-degree cuts. When trimming around electrical outlets, disconnect power at the breaker box before removing cover plates and measuring cutouts.
Secure Panels from Inside Cabinet
Attach end panels by driving screws through the cabinet interior into the panel edge. Use 1-inch screws to avoid penetrating the panel face—countersink holes slightly for a seamless finish. Reinstall hinge plates and verify the panel sits flush with adjacent cabinet surfaces. Check for consistent reveal (the small gap between cabinet and wall) along the entire edge.
Perform Critical Two-Week Verification Check
Cabinet installations require time for hardware to settle before final verification. Approximately 14 days after mounting, check all bracket screws and inter-cabinet connections for tightness—normal compression may require slight retightening. Recheck levelness across the entire run, as minor structural settling can cause alignment shifts. Address any issues immediately before contents add weight that exacerbates problems.
Maintain Proper Cabinet Loading Patterns
Prevent future sagging by distributing weight evenly—store heavy pots and appliances in lower cabinets rather than upper wall units. Never exceed 50 pounds per linear foot of cabinet space, as concentrated weight strains mounting points. Periodically inspect hinge screws and adjust door alignment using manufacturer-provided mechanisms to compensate for minor settling.
By following these precise steps for how to install wall mounted kitchen cabinets, you’ll create a professional-quality installation that remains secure and level for decades. The key to success lies in meticulous preparation, proper anchoring into structural elements, and systematic verification at each stage—never skip the stud detection or reference line marking phases. When cabinets are properly mounted, you’ll enjoy seamless doors, even gaps, and the peace of mind knowing your investment remains safely secured to the wall. For ongoing maintenance, simply follow manufacturer cleaning recommendations and perform annual hardware checks to catch minor issues before they become major problems.


