

Nothing transforms a kitchen’s appearance quite like an undermount sink installation. This sleek design creates a seamless transition between your countertop and sink basin, eliminating the visible rim that traps crumbs and grime in traditional drop-in sinks. When water pools on your counter after wiping down, it simply flows toward the edge and disappears into the basin below. If you’ve ever struggled to wipe debris into a top-mount sink with its obstructive lip, you understand why homeowners increasingly choose undermount installations for their clean, modern aesthetic and practical benefits.
Installing an undermount sink requires careful planning and precision, as it involves mounting the sink beneath your countertop rather than resting it on top. This method exposes the beautiful edge of your countertop material while creating a smooth, continuous surface. While many homeowners tackle this project themselves, it demands intermediate to advanced DIY skills—particularly in carpentry and plumbing—to ensure a watertight, secure installation that will withstand daily use. In this guide, you’ll discover the step-by-step process to successfully install your undermount kitchen sink, avoiding common pitfalls that lead to leaks, structural issues, and costly repairs down the road.
Gather Essential Tools and Materials Before Starting
Assembling the right tools and materials before beginning prevents frustrating mid-project interruptions and ensures professional results. Many DIYers underestimate how critical proper equipment is for undermount sink installation, leading to mistakes that compromise the finished project.
Must-Have Tools for Installation
You’ll need a drill with various bits for screw driving and hole creation, a jigsaw or rotary tool for cutting the sink opening (if not pre-cut), a precision level to ensure even sink placement, and a tape measure for accurate measurements. Don’t forget a quality caulking gun for adhesive and sealant application, a complete screwdriver set including both Phillips and flathead options, and adjustable wrenches for plumbing connections. A helper to assist with holding the heavy sink during mounting is practically essential—undermount sinks can weigh 20-50 pounds and become extremely awkward to position alone beneath your countertop.
Critical Materials Checklist
Your materials list must include the undermount sink itself, mounting clips or brackets designed specifically for your sink model, high-quality silicone caulk rated for kitchen use (not bathroom-only formulas), plumber’s putty for faucet connections, and thread seal tape (PTFE tape) for threaded plumbing fittings. If replacing an old sink, you’ll likely need a new garbage disposal unit and updated supply lines. Smart installers also grab a bucket for potential water spills, several clean rags for wiping excess sealant, and a bright flashlight for working in the dark cabinet space beneath your sink.
Prepare Your Cabinet and Workspace Thoroughly
Proper preparation of your workspace sets the foundation for a successful undermount sink installation. The cabinet area must be clean, dry, and structurally reinforced to support the significant weight of a fully-loaded sink plus water and dishes.
Begin by removing all items from under-sink storage and cleaning the cabinet interior thoroughly with a mild detergent solution. Allow it to dry completely before proceeding. Inspect for signs of previous water damage, mold, or pest activity—these issues require remediation before installing your new sink. Check that the cabinet floor is solid with no flexing when pressed; reinforce weak areas with plywood backing to prevent future sagging.
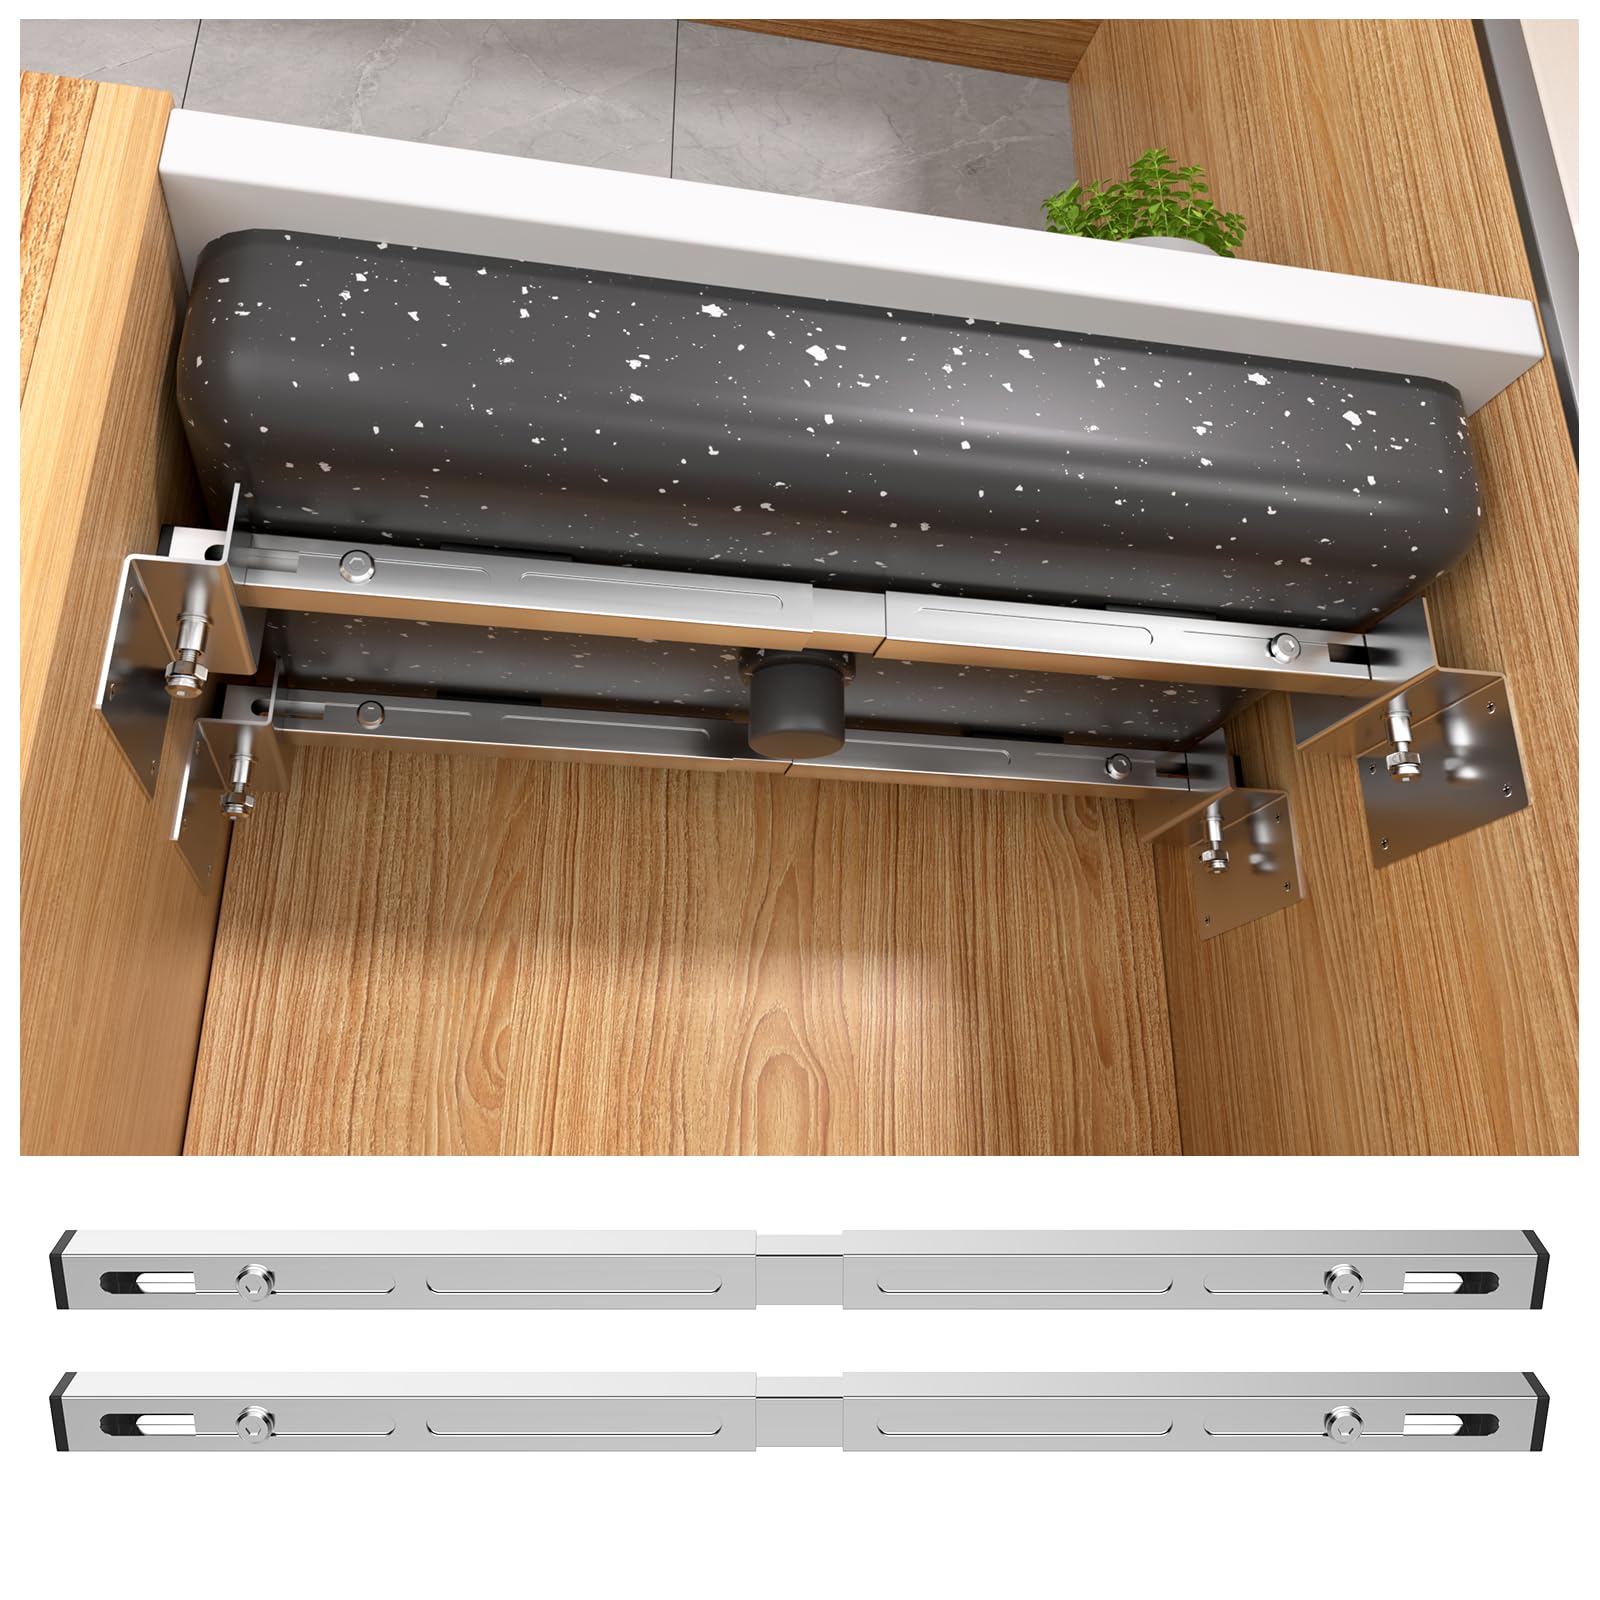
Undermount sinks place concentrated weight around their mounting edges, which standard cabinet construction often can’t adequately support. Examine your cabinet’s particleboard or MDF construction carefully—these materials compress under sustained sink weight. Create a support system using 2×4 lumber or adjustable support legs beneath the sink area, or install a full wooden platform inside the cabinet that the sink bottom can rest upon. This distributes weight evenly and provides emergency support if mounting clips ever fail.
Measure and Cut Your Countertop Opening Precisely

Accurate measurements prevent costly mistakes that could damage your countertop or sink. Whether working with granite, quartz, laminate, or solid surface material, the cutout process requires precision and the right approach for your specific countertop type.
Most quality undermount sinks include a cardboard template showing the exact cutout dimensions. If yours didn’t, create your own by placing the sink upside down on cardboard, tracing carefully around the outer edge, then measuring in from that line by the sink’s specified reveal amount—the portion of sink rim visible beneath the countertop edge. The reveal style significantly impacts your kitchen’s appearance: a partial reveal shows a narrow strip of sink rim, while a zero reveal creates the appearance of the sink floating just beneath the counter with no visible rim.
Position your template on the countertop, ensuring it’s centered over the cabinet and aligned with any backsplash considerations. Trace the outline clearly with a pencil and verify measurements multiple times—this is your last chance to correct errors without costly consequences. For laminate countertops, apply painter’s tape along the cut line to prevent chipping. When cutting laminate, use a jigsaw with a fine-toothed blade designed for laminate, drill starter holes at corners, and follow your marked line carefully while supporting the cutout section to prevent it falling and damaging cabinets.
Mount Your Undermount Sink with Proper Support
With your opening prepared, it’s time for the critical mounting phase. This step requires attention to proper clip placement, adhesive application, and achieving even support around the entire sink perimeter.
Clean the mounting surfaces of the sink thoroughly, removing any manufacturing oils or protective coatings. Apply a thin, continuous bead of high-quality silicone sealant along the entire sink rim—this creates the primary seal between sink and countertop underside. Install mounting clips at manufacturer-specified intervals (typically every 8-12 inches), with additional clips at corners. Hand-tighten clips initially—they’ll be fully secured after sink positioning.
With your assistant supporting the sink, carefully lower it into the cutout opening. Ensure proper alignment and even reveal all around the perimeter. Engage the mounting clips by following your specific clip system’s instructions, working gradually around the sink in an alternating pattern (like lug nuts on a wheel) to maintain even pressure. Avoid over-tightening, which can crack sink or countertop materials.
Place a level across the sink rim in multiple directions to confirm perfect leveling front-to-back and side-to-side. The sink should feel solid with no rocking or movement. Make any necessary adjustments before the sealant cures—once set, corrections become extremely difficult.
Create a Watertight Seal Around the Entire Perimeter
Sealing properly prevents water damage to your cabinets and maintains the integrity of your installation. This step deserves extra attention, as seal failures cause the most common problems with undermount sink installations.
Apply a continuous bead of 100% silicone sealant along the entire seam between sink rim and countertop underside. Use a damp finger or caulk smoothing tool to create a smooth, concave seal profile that effectively sheds water. Ensure no gaps or thin spots exist in the sealant line—these become leak points. Some professionals apply two beads: one directly at the seam and a second bead slightly offset to create a backup seal.
Allow 24-48 hours for the silicone sealant to fully cure before using the sink. During this period, avoid any stress on the sink, including heavy objects in the basin or vigorous cleaning. Check manufacturer recommendations for specific cure times, as cooler temperatures and higher humidity can extend curing periods.
Connect Plumbing Fixtures and Test for Leaks
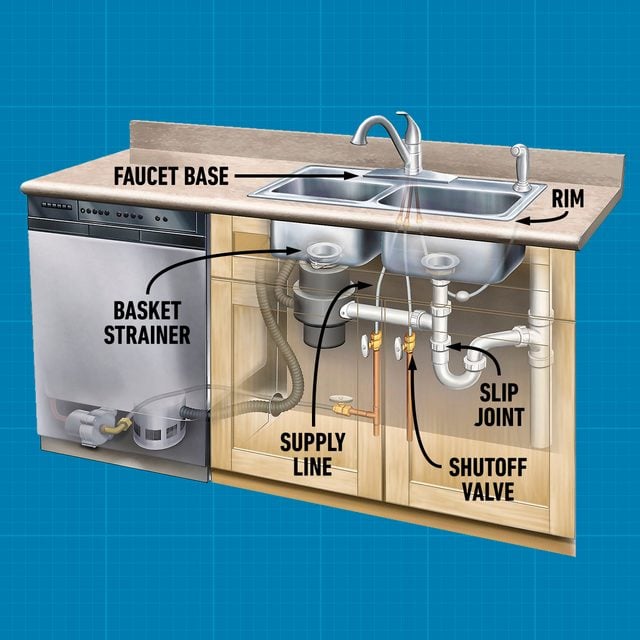
With the sink securely mounted and sealed, connect your plumbing fixtures carefully. Start by installing the faucet through pre-drilled holes, using plumber’s putty or silicone sealant as recommended for base gasket sealing. Apply plumber’s putty to the underside of the drain flange and insert it into the drain opening, then secure from below with the rubber gasket and mounting nut.
Attach flexible supply lines from shutoff valves to faucet inlet connections, using thread seal tape on all threaded connections. Turn on water supply slowly and observe all connections from beneath the sink while water flows. Check faucet connections, supply line connections, drain connections, and the sink rim seal for any drips or moisture. Fill the sink basin with water, then release the drain to test water flow through the P-trap assembly.
Maintain Your Undermount Sink for Long-Term Performance
Proper maintenance extends the life of your installation and prevents common problems. Periodically inspect the sink-to-countertop seal for any signs of deterioration or water infiltration, paying special attention to areas near the front of the sink where cleaning activities put stress on the seal. Reapply silicone sealant at first sign of any seal failure to prevent water damage.
Avoid disposing of grease, fibrous foods, and non-food items that can cause drain clogs. Use drain guards to catch debris and clean P-trap connections if slow drainage develops. Address any leaks immediately—dripping water indicates loose fittings that will worsen over time. Use care when handling heavy or sharp objects near sink edges to avoid damaging the sink rim or countertop cutout.
Installing an undermount kitchen sink requires careful planning and methodical attention to each step, but the results—a beautiful, modern kitchen with seamless sink-to-countertop transition—make the effort worthwhile for homeowners willing to invest the time and care needed for professional-quality results. By following these detailed steps, you’ll create an installation that functions flawlessly and enhances your kitchen’s appearance for years to come.


