
Installing a kitchen backsplash transforms your cooking space while protecting walls from water damage and grease splatters. This practical upgrade delivers impressive visual impact without requiring extensive construction—making it one of the most accessible DIY kitchen renovations. Whether you’re choosing ceramic tiles for their affordability or glass for contemporary flair, knowing how to install kitchen backsplash properly ensures professional-looking results that last for years. In this guide, you’ll discover the exact steps needed to complete your project successfully while avoiding the most common pitfalls that turn dream renovations into costly mistakes.
The complexity of backsplash installation varies dramatically based on your material choice. Standard ceramic tiles offer straightforward installation perfect for beginners, while glass mosaics or natural stone require specialized cutting techniques and greater precision. Before grabbing your trowel, understand that successful installation hinges on meticulous preparation—not just the tiling process itself. This comprehensive guide walks you through every critical phase, from calculating your precise material needs to applying the final grout sealer, ensuring you achieve stunning results regardless of your experience level.
Determine Your $900-$3,000 Backsplash Budget Before Starting
Understanding your financial investment prevents mid-project surprises and helps you make informed material choices. DIY installations typically cost $900 for quality materials and essential tools, while professional installation ranges from $2,500-$3,000 depending on complexity and regional labor rates. This significant cost difference makes DIY attractive, but be realistic about your skills—rushing a backsplash installation often leads to expensive corrections.
Break Down Costs by Tile Material Type
Ceramic tiles remain the most popular choice for kitchen backsplashes due to their versatility and durability, costing $200-$3,000 based on quality and design. Glass tiles offer a sleek contemporary look at $650-$1,500, while natural stone or metal options carry premium price tags and installation challenges. Always purchase 10-15% extra material to account for cuts and breakage—running out of matching tiles mid-project creates costly delays. Measure your space by multiplying height by width, then divide by 144 to convert to square feet before adding your overage percentage.
Collect These 10 Must-Have Tools for Backsplash Installation

Gathering all necessary tools before starting prevents frustrating interruptions during critical installation phases. Having everything within reach maintains your momentum and ensures proper technique throughout the process.
Essential Tools Checklist
- Notched trowel (1/4″ notch recommended for most backsplashes)
- Tile spacers (1/8″ or 1/4″ depending on your design)
- Grout float for even application
- Level to check alignment every few tiles
- Tile cutter or wet saw (depending on material)
- Sponge and clean rags for cleanup
- Painter’s tape for layout planning
- Bucket for mixing mortar
- Grout sealer for final protection
- Caulk gun for finishing edges
Remove Outlets and Clean Walls Before Tile Installation
Proper wall preparation establishes the foundation for long-term backsplash durability—skipping this step causes the most frequent DIY failures. Begin by turning off electrical power at the circuit breaker and removing all outlet covers to expose the bare wall surface. Take photos of your outlet positions before removal to simplify reinstallation later.
Prepare Walls for Optimal Tile Adhesion
Thoroughly clean the wall with a sponge and water to remove grease and dirt, then allow it to dry completely—contaminated surfaces compromise mortar adhesion. Inspect for damage, moisture issues, or unevenness requiring repair. Glossy painted walls need light sanding to create a proper bonding surface. Apply a quality primer to ensure maximum mortar adhesion and prevent future tile failures. This preparation phase takes time but prevents costly problems months or years after installation.
Use Painter’s Tape to Perfect Your Backsplash Tile Pattern
Strategic layout planning transforms an ordinary installation into a professional-looking feature. The dry-run approach with painter’s tape reveals potential issues before you commit adhesive to your wall.
Position Tiles for Visual Harmony
Start by finding your center point and working outward to ensure symmetrical placement. Use painter’s tape to temporarily secure full tiles, then mark where cuts will occur near edges and obstacles. Pay special attention to how the pattern interacts with cabinets and windows—awkward cuts near prominent features ruin an otherwise beautiful installation. For diagonal patterns, begin in the center and work outward to maintain alignment. This planning phase may take an hour but prevents days of frustration correcting misaligned tiles.
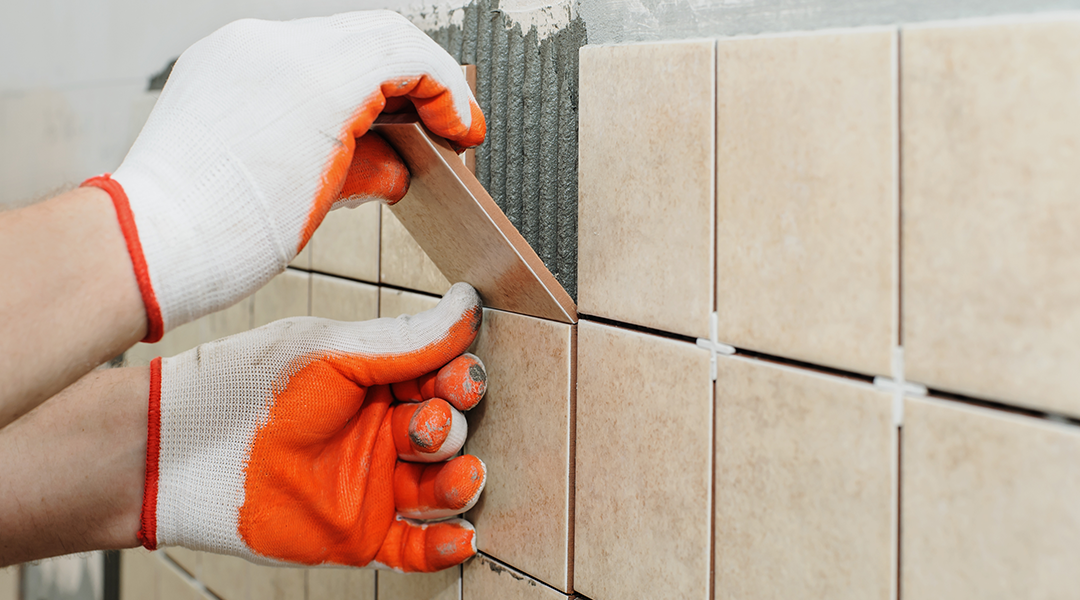
Spread Thin-Set Mortar and Position Tiles Correctly
Applying mortar properly creates the strong bond needed for lasting results. The technique matters more than speed—rushing this phase causes uneven adhesion and future tile failures.
Master the Mortar Application Technique
Mix thin-set mortar to a peanut butter consistency and apply only as much as you can tile in 15-20 minutes—mortar begins to skin over and lose adhesion when exposed to air. Hold your notched trowel at a consistent 45-degree angle to create uniform ridges in the adhesive. Press each tile firmly into place with a slight twisting motion to collapse the ridges and ensure full contact. Insert spacers immediately to maintain consistent joint widths. Check alignment with your level after every few tiles—correcting minor deviations early prevents major problems later.
Apply Grout for Perfect 1/4-Inch Joints in Your Backsplash
Grouting transforms individual tiles into a cohesive, professional-looking installation. Proper technique creates clean, uniform joints that enhance your design rather than distracting from it.
Complete Grout Application in One Session
After 12 hours of mortar curing, mix grout to a smooth, peanut butter-like consistency. Apply it diagonally across the tile surface using a grout float held at a 45-degree angle, pressing firmly to eliminate air pockets. Work in small sections to maintain control, then wait 15-30 minutes before cleaning excess with a damp sponge using light circular motions. Never rinse your sponge in the same water twice—frequent water changes prevent reapplying grout to cleaned surfaces. Allow 24-72 hours for complete curing before sealing.
Fix Crooked Tiles: Prevent These 5 Backsplash Installation Errors
Learning from common mistakes saves time, money, and frustration during your installation. These errors account for 80% of DIY backsplash failures.
Top Installation Mistakes to Avoid
- Skipping the dry-run layout—leads to awkward cuts and misaligned patterns
- Inconsistent mortar application—causes uneven tile heights and weak spots
- Ignoring expansion gaps—results in cracked tiles from temperature changes
- Rushing grout cleanup—creates hazy residue that’s difficult to remove later
- Neglecting to seal grout—allows stains and moisture penetration immediately
Seal Grout Yearly to Keep Your Backsplash Looking New
Proper maintenance preserves your backsplash’s beauty and functionality for decades. The simple act of sealing grout dramatically extends its lifespan and reduces cleaning effort.
Create a Simple Maintenance Routine
- Apply grout sealer immediately after installation and reapply annually
- Clean regularly with pH-neutral cleaners appropriate for your tile type
- Avoid abrasive scrubbers that scratch tile surfaces over time
- Address chips or cracks immediately before moisture penetrates
- Use caulk at transition points to prevent water infiltration behind tiles
For glass tiles, use streak-free cleaners to maintain clarity. Natural stone requires specialized pH-balanced products to prevent etching. Pay special attention to areas near sinks and stoves where grease and moisture exposure is highest—these zones need more frequent cleaning and sealing.
Hire a Pro If You’re Installing Glass or Stone Backsplash Tiles
Knowing when to call a professional prevents costly mistakes and ensures optimal results for complex installations. Certain materials and situations significantly increase the difficulty level beyond typical DIY capabilities.
Glass tiles require specialized cutting techniques that often frustrate beginners, while natural stone demands precise handling to avoid chipping. Complex patterns with multiple tile types or intricate designs benefit from professional experience. If your walls require significant repair before installation or you’re uncomfortable with any phase of the process, investing in professional installation creates peace of mind and guarantees results that enhance your kitchen’s value. For straightforward ceramic tile installations on well-prepared walls, however, most homeowners can achieve excellent results by following these detailed steps.
Installing your kitchen backsplash as a DIY project delivers immense satisfaction when approached with proper preparation and realistic expectations. By carefully following these eight critical steps—from accurate budgeting through final sealing—you’ll transform your kitchen space with professional-quality results that withstand daily cooking demands. Whether you choose classic ceramic, contemporary glass, or elegant stone tiles, the skills you develop through this project prepare you for future home improvements while adding lasting value to your home. Start with a small test area if you’re new to tiling, and remember that patience during preparation pays dividends in your final installation—your beautiful new backsplash will be the kitchen feature everyone notices.


