
Porcelain kitchen sinks deliver the perfect blend of classic beauty and practical durability for your home’s most-used space. When you learn how to install a porcelain kitchen sink properly, you ensure years of reliable service while protecting your cabinetry from water damage. A correctly installed porcelain sink won’t chip, crack, or leak prematurely, maintaining its glossy finish despite daily exposure to hot pans, acidic foods, and heavy cookware. This guide provides the precise steps needed to handle the weight and fragility of porcelain while creating watertight connections that stand up to constant use.
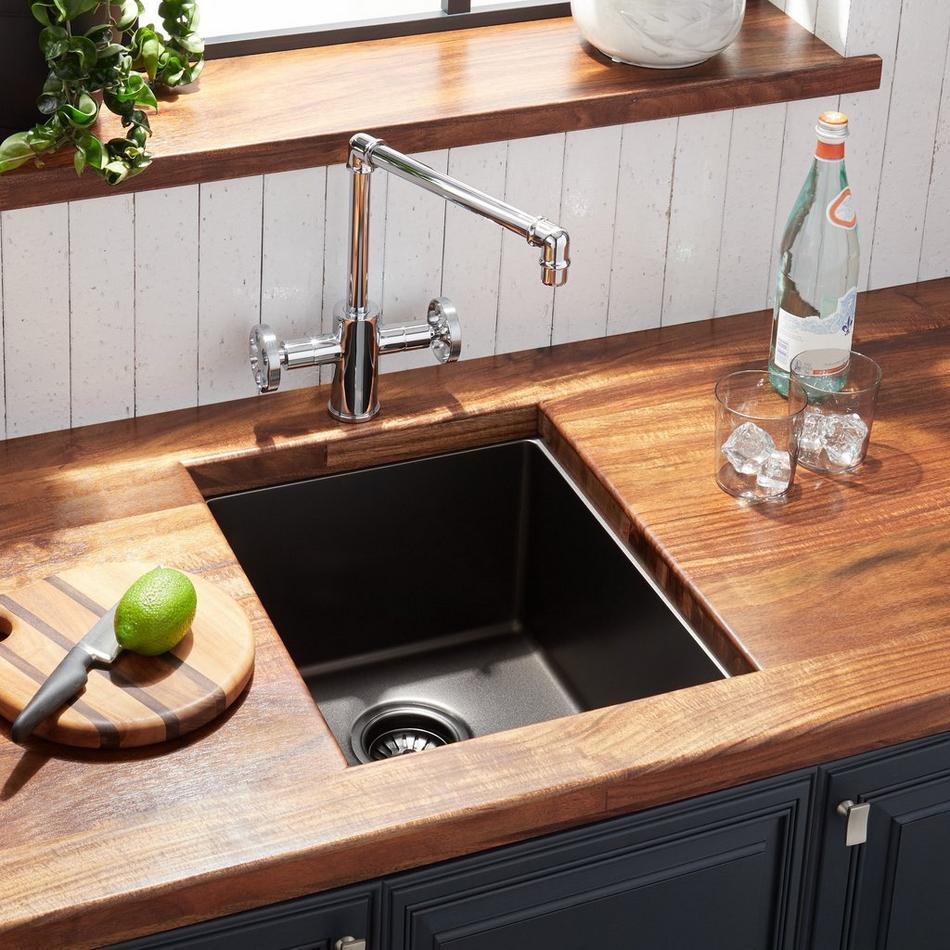
The installation process varies significantly based on your sink’s mounting style, which directly impacts your preparation requirements. Drop-in sinks offer the most straightforward installation for DIYers, with their visible rim resting on the countertop surface. Undermount sinks create a seamless transition from counter to basin but demand specialized support hardware and precise mounting. Farmhouse (apron-front) sinks require cabinet modifications since their distinctive front panel extends beyond the cabinet face. Understanding these differences before purchasing your sink prevents costly mistakes and ensures you have the right tools and materials for your specific installation.
Plan Your Porcelain Sink Installation
Accurate measurements prevent the most common installation disaster: discovering your new sink doesn’t fit your cabinet. Begin by measuring your existing cabinet opening width and depth before removing your old sink. Standard cabinet openings accommodate sinks up to 36 inches long, but verify your specific dimensions since older homes often feature non-standard sizes. Your porcelain sink should leave at least 1.5 inches of cabinet material surrounding the cutout on all sides to maintain structural integrity—less than this risks cabinet failure under the sink’s considerable weight.
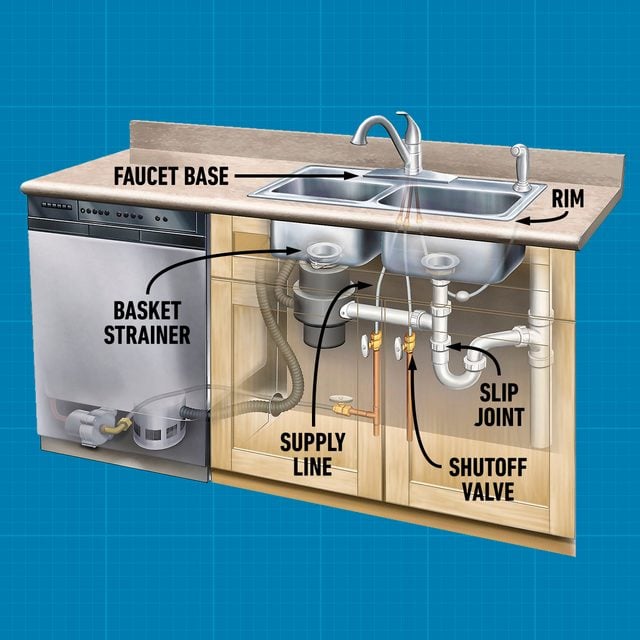
Map your plumbing layout to identify potential conflicts with your new sink design. Porcelain sinks often feature pre-drilled faucet holes, but their placement must align with your existing supply lines. Measure the distance between your current shutoff valves and the center of your sink basin, then compare this to your new sink’s specifications. If installing a garbage disposal, ensure the sink’s drain configuration includes a disposal flange or can accommodate one. This planning phase might reveal the need for extended supply lines or repositioned plumbing, which is far easier to address before sink installation begins.
Assess your cabinet’s structural capacity to support porcelain’s substantial weight—typically 80-150 pounds when filled with water and dishes. Empty the cabinet completely and inspect the floor for sagging, warping, or previous water damage. Reinforce weak cabinet floors by securing 3/4-inch plywood to the existing bottom using 2-inch wood screws spaced every 6 inches. This reinforcement takes minimal time but creates a solid foundation that prevents catastrophic failure when your sink is fully loaded. For undermount installations, also check your countertop material; stone or solid surface countertops provide adequate support, while laminate may require additional bracing beneath the cutout.
Gather Essential Tools and Materials
Prepare a comprehensive toolkit before starting to avoid frustrating interruptions. Essential hand tools include a tape measure, spirit level, adjustable wrench, screwdriver set, caulk gun, utility knife, and drill with assorted bits. A hole saw kit becomes necessary if your porcelain sink requires custom faucet holes—use diamond-tipped bits for clean cuts through porcelain surfaces. Keep multiple clean rags handy for wiping excess sealant and managing water during testing phases.
Your materials list must include high-quality sealants designed specifically for kitchen environments. Select 100% silicone caulk rated for kitchen use, as these formulations resist mold, mildew, and temperature extremes better than standard caulks. Plumber’s putty remains essential for creating watertight seals around drain assemblies, though some modern installations use rubber gaskets instead. Purchase mounting clips appropriate for your sink style—undermount sinks require specialized brackets while drop-in models need standard mounting hardware. Have replacement PVC pipes and fittings on hand in case your existing plumbing configuration needs modification.
For undermount installations specifically, prepare heavy-duty support hardware since these sinks hang entirely from the countertop. Metal L-brackets installed every 6-8 inches provide point support, while wooden cleats (2×4 boards cut to fit inside the cabinet) create continuous support along the sink perimeter. Farmhouse sink installations require additional materials including a jigsaw for modifying the cabinet front opening and decorative panels to cover exposed cabinet sides. Always purchase slightly more sealant and hardware than you think you’ll need—running out during critical installation phases creates unnecessary stress.
Remove Your Old Kitchen Sink

Begin sink removal by completely shutting off both hot and cold water supply valves beneath the sink. Turn handles clockwise until they stop, then open the faucet to release pressure and drain remaining water from the lines. Position a bucket beneath the supply line connections to catch residual water, then use an adjustable wrench to disconnect the flexible supply tubes from the shutoff valves. Move the bucket beneath the P-trap next, as additional water will drain when you disconnect the drain assembly.
Carefully disconnect the drain plumbing by loosening slip nuts connecting the P-trap to both the sink strainer and wall drain pipe. Work methodically to avoid damaging existing pipes, as replacement adds significant time to your project. If your sink includes a garbage disposal, disconnect it from the power source first (either by unplugging or turning off the circuit breaker), then disconnect the drain connections following the same procedure. Keep all disconnected hardware organized in a container for potential reuse.
Remove any mounting hardware securing the old sink to the countertop, typically accessible from beneath the cabinet. Apply masking tape to the countertop surface around the sink edge to prevent scratches during removal. Score through old caulk with a utility knife to break the seal between sink and countertop. Enlist a helper to support the sink from above while you lift it out—porcelain sinks are both heavy and brittle, making two-person handling essential for safety. Immediately set the old sink aside in a protected area and thoroughly clean the countertop surface, removing all old caulk residue and debris before proceeding.
Prepare the Countertop and Cabinet
Inspect your countertop cutout for damage that could compromise your new sink’s seal. Laminate countertops with swollen or delaminated edges around the cutout require repair before proceeding, as these weaknesses allow water penetration. Stone countertops may need edge reinforcement if the cutout is too close to the countertop edge. Verify that the cutout dimensions match your new sink specifications—sinks typically require a cutout approximately 1/4 inch larger than the sink rim to accommodate sealant application and minor adjustments.
Clean the cabinet interior thoroughly, removing all stored items, dust, and debris. Vacuum corners and wipe down surfaces with a damp cloth to eliminate particles that could interfere with mounting. For undermount installations, line the cabinet floor with a waterproof barrier such as plastic sheeting or a dedicated sink mat to protect against condensation that forms on the underside of cold porcelain sinks. Install any required support systems for undermount or farmhouse sinks at this stage, ensuring they can bear the full weight of a loaded sink without flexing.
Dry-fit your new porcelain sink to verify the fit before applying any sealants. Place the sink in the cutout and check that it sits level and that the rim rests evenly on all sides. Make minor adjustments to the cutout if necessary, but remember that porcelain sinks cannot be trimmed—significant fit issues require returning the sink. Verify that the sink doesn’t interfere with cabinet doors, drawers, or existing plumbing. This critical verification step prevents discovering problems after you’ve committed to sealant application and plumbing connections.
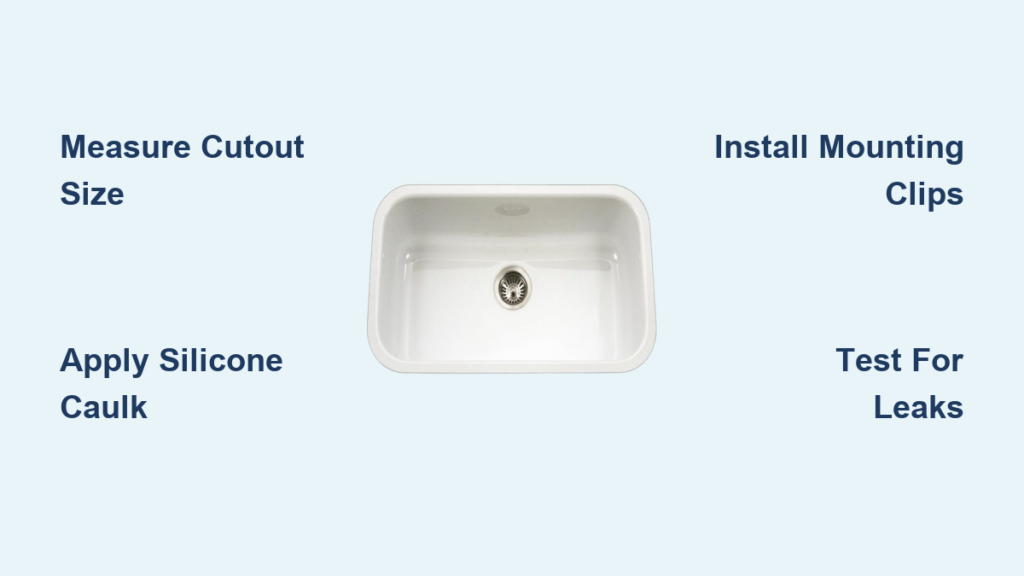
Install Drop-In Porcelain Sink
Apply a continuous bead of kitchen-grade silicone caulk around the underside lip of the sink rim, staying approximately 1/2 inch from the edge to prevent excess squeeze-out. For enhanced protection, add a thin bead of plumber’s putty beneath the caulk line, creating a dual-seal system that handles both water penetration and mechanical stress. Work methodically around the entire perimeter to ensure complete coverage without gaps.
Carefully lower the sink into the cutout with a helper’s assistance, centering it precisely within the opening. Press down firmly around the entire perimeter to ensure good contact between the caulk and both sink rim and countertop. The weight of the sink helps spread the caulk, but strategic pressing ensures complete coverage without voids. Maintain even pressure to prevent the sink from shifting during this critical phase.
Install mounting clips beneath the countertop, typically four to eight clips spaced evenly around the sink perimeter. Tighten clips gradually in a star pattern (alternating between opposite clips) to distribute pressure evenly and prevent shifting. Wipe away excess caulk that squeezes out using a damp cloth, working quickly before the caulk skins over. Allow the caulk to cure according to manufacturer recommendations—typically 24 to 48 hours—before filling the sink with water or connecting plumbing fixtures to ensure the seal reaches full strength.
Test for Leaks and Functionality
Fill the sink slowly with water while monitoring beneath the cabinet for any drips or moisture. Continue filling until the sink is completely full, then let it sit for 15-20 minutes while inspecting all connections. Pay special attention to the drain strainer, P-trap joints, supply line connections, and faucet base. Address even small leaks immediately, as they often worsen with use and can cause extensive cabinet damage.
Test water flow at various temperatures by opening the faucet and running water for several minutes. Verify proper drainage with no standing water remaining and check that the P-trap maintains its water seal without gurgling or slow drainage that indicates venting problems. Run water against the front edge of the sink to confirm water doesn’t penetrate beneath the rim, particularly important for undermount installations.
Check the caulk seal around the sink perimeter by pressing gently to verify complete adhesion. If leaks appear, drain the sink completely and address the problem immediately. Small supply line leaks typically require additional tightening, while drain leaks often need disassembly, cleaning of old putty, and reassembly with fresh materials. Never ignore even minor leaks, as porcelain sink installations require absolute watertight integrity for long-term success.
Maintenance Tips for Porcelain Sinks
Protect your investment by avoiding harsh abrasive cleaners that can scratch the glossy porcelain surface. Use mild dish soap and warm water for daily cleaning with a soft cloth or non-abrasive sponge. For stubborn stains, create a gentle cleaning paste using baking soda and water, applying it with a soft cloth in circular motions. Rinse thoroughly and dry with a soft towel to prevent water spots and mineral deposits that can dull the finish over time.
Prevent chips and cracks by using a protective grid or mat in the bottom of the sink, especially when washing heavy pots and cast iron cookware. Avoid dropping heavy objects into the sink, as porcelain’s strength lies in compression rather than impact resistance. While small chips can be temporarily repaired with porcelain repair kits, these fixes are typically visible and should be considered stopgap solutions until professional refinishing can be performed.
Maintain the integrity of your sink installation by regularly inspecting caulk seals around the perimeter. Keep seals clean and dry, addressing any mold or mildew growth immediately with appropriate cleaners. Replace caulk when it shows signs of cracking, shrinking, or persistent mold—typically every two to three years in high-use kitchens. Consistent maintenance of both the sink surface and its installation seals ensures years of beautiful, functional service from your porcelain kitchen sink.


