
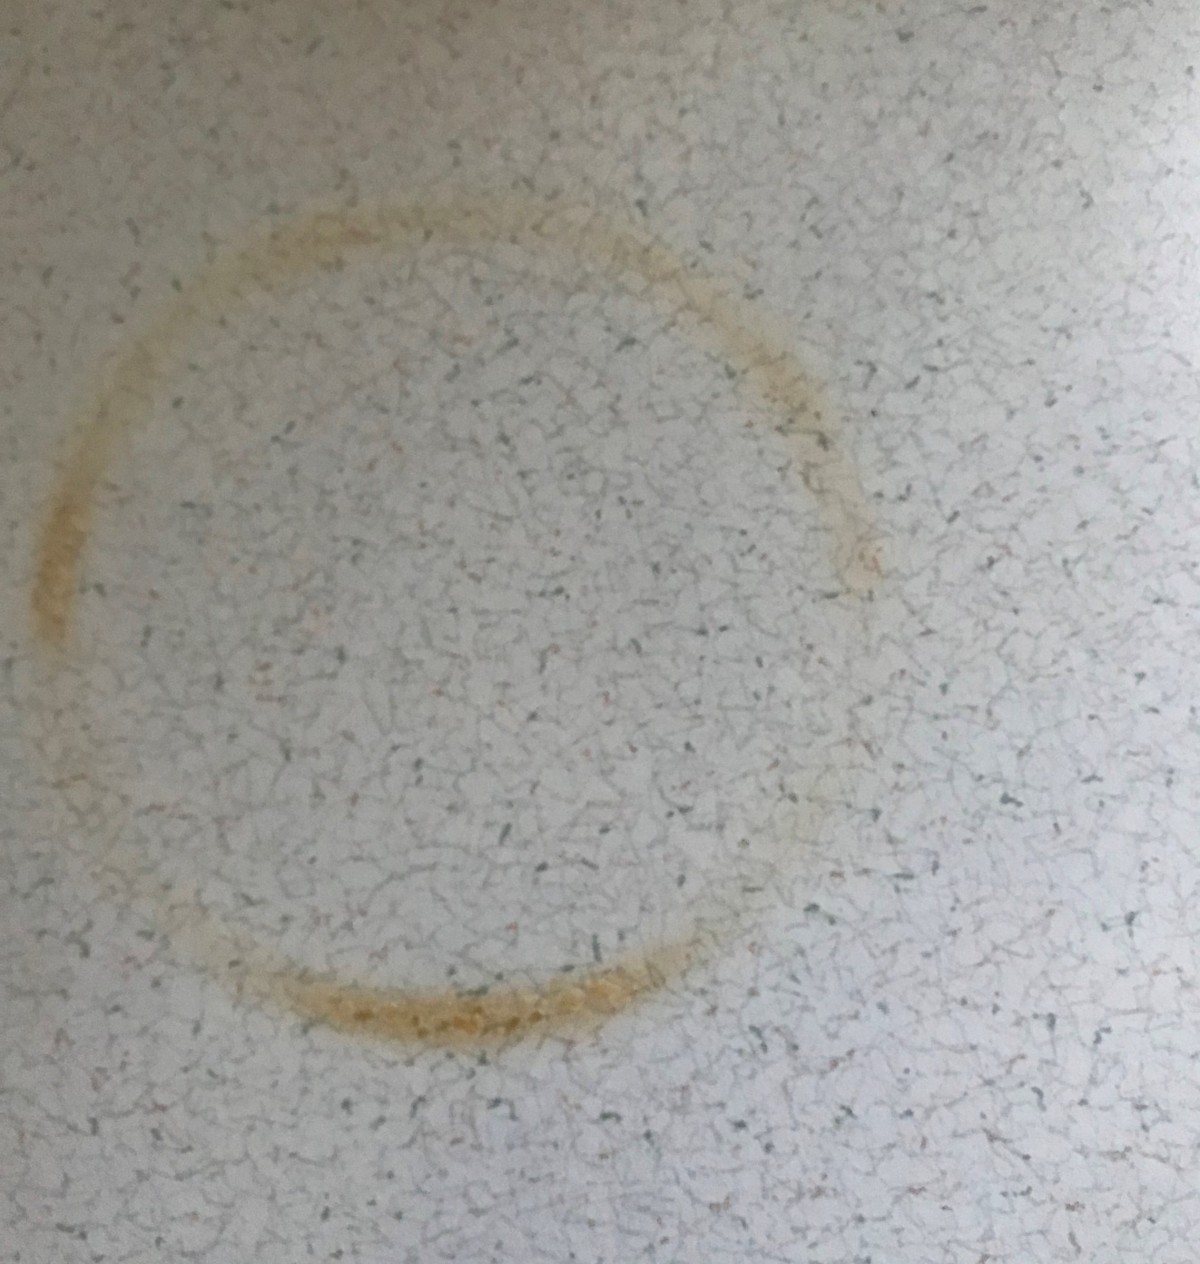
That moment when you set a hot pan directly on your countertop and instantly see a dark burn mark form is enough to make any homeowner’s heart sink. Burn marks on kitchen countertops typically appear when hot cookware, appliances, or utensils make direct contact with your surface without protection. Depending on how long the hot item sat there and how high the temperature climbed, you might see anything from light surface discoloration to deep scorching that actually alters the countertop material itself. Knowing how to get rid of burn marks on kitchen countertop surfaces starts with understanding one critical fact: the removal method that works beautifully on laminate might damage your granite, and vice versa.
This guide walks you through proven methods for removing burn marks from every major countertop material, from budget-friendly laminate to premium stone surfaces. You’ll learn to identify the extent of your damage, select the appropriate removal technique, and implement prevention strategies that protect your investment going forward. Whether you’re facing a minor scorch mark or a deep burn that has you wondering if replacement is your only option, the solutions below will help you restore your countertop’s appearance and extend its useful life.
Identify Your Countertop Material Before Treatment
Before attempting any burn mark removal, you must positively identify your countertop material, because methods effective for one surface may cause permanent damage to another. This initial assessment saves you from making a small burn mark much more visible through an unsuitable treatment approach.
Quick Material Identification Guide
Laminate countertops consist of a thin plastic layer bonded to particleboard or MDF. Burns on laminate typically appear as white or brown discoloration where the heat has compromised the glue and decorative layer. You can identify laminate by looking for visible seams where sheets meet and noting that the surface feels hard and non-porous. Granite countertops are natural stone slabs that feel textured with unique veining patterns. While granite handles heat well, thermal shock can cause fractures that appear as whitish marks radiating from the contact point.
Quartz countertops are engineered stone containing approximately ninety percent ground quartz combined with resins. These offer good heat resistance but can develop scorch marks at high temperatures. Unlike granite, quartz typically has a more uniform appearance with visible aggregate particles throughout. Solid surface materials like Corian are made from acrylic polymers and minerals, allowing them to be sanded and reformed when damaged. These countertops feature inconspicuous seams and a consistent feel throughout.
Remove Burns from Laminate Countertop Surfaces

Laminate countertops respond well to various treatments, but the approach depends on burn depth. Surface burns affecting only the finish can often be addressed with gentle abrasion and refinishing, while deeper burns that have penetrated into the substrate may require filling or professional attention.
Treating Minor Surface Burns on Laminate
Minor burn marks on laminate that appear as light brown or white discoloration without penetrating through the decorative layer can often be removed with simple household products. Clean the surface with warm water and mild dish soap first, then apply non-gel white toothpaste mixed with baking soda. Work it in using gentle circular motions with a damp microfiber cloth for two to three minutes. After working the paste into the surface, wipe clean with a damp cloth and dry thoroughly. For stubborn marks, allow the toothpaste to sit for fifteen to twenty minutes before wiping away. This simple method works because the mild abrasives in toothpaste act as fine sandpaper, removing the damaged surface layer without affecting surrounding areas.
Addressing Deep Burn Damage on Laminate
When burns have penetrated completely through the laminate layer to reveal the underlying particleboard, repair becomes significantly more challenging. These deep burns show dark charring and often create an actual depression where the material has melted or burned away. Small areas of damage, typically less than one square inch, can sometimes be repaired using automotive body filler or specialized laminate repair compounds.
Remove any loose or charred material carefully with a plastic scraper, being careful not to spread damage to surrounding areas. Clean the damaged area thoroughly with isopropyl alcohol to remove oils and residues, then allow it to dry completely. Apply the filler in thin layers, building up slightly proud of the surrounding surface since some shrinkage occurs as it cures. After full curing, sand the repaired area with progressively finer grits of sandpaper (400 to 800-grit) to match the surrounding finish. Finally, apply a thin layer of matching laminate paint. For large burn areas, professional repair may be more cost-effective than DIY restoration.
Fix Burn Marks on Stone Countertops
Stone countertops can develop burn marks through two distinct mechanisms, each requiring different restoration approaches. Understanding which type of damage you’re dealing with determines whether you can address it yourself or need professional help.
Restoring Granite Heat Marks Effectively
Granite heat marks that appear as white fractures require a restoration process that essentially repolishes the damaged area. Clean the surface with a granite-safe cleaner first, then assess the damage by viewing it from multiple angles under good lighting. For superficial marks, apply granite polishing powder with tin oxide or cerium oxide to the damaged area with a few drops of water to create a paste. Work it in with a felt pad using firm, circular motions for three to five minutes. The friction and abrasion from polishing generates heat that smooths the fractured surface and restores reflectivity. After polishing, clean the area thoroughly and apply a fresh coat of granite sealer to protect the restored surface.
Treating Quartz Scorch Marks Successfully
Quartz countertop burns present unique challenges because the damage often affects the resin binding the stone particles together. Superficial scorch marks can sometimes be removed by wet sanding with fine-grit sandpaper, starting with 800-grit and progressing to 1500-grit, 2000-grit, and finally 3000-grit for a polished finish. Sand in one direction with overlapping strokes, keeping the surface lubricated with water to reduce heat from friction. Check your progress frequently by wiping the area clean and viewing it from different angles.
For burns that have discolored the resin rather than just scorching the surface, carefully cut or scrape out the damaged resin using a sharp razor blade at a shallow angle. Once the damaged resin is removed, fill the area with two-part epoxy color-matched to your countertop. Mix according to package directions, apply to the prepared area, and allow it to cure completely before sanding and polishing to match the surrounding finish.
Restore Solid Surface Countertops After Burns

Solid surface countertops like Corian offer a significant advantage for burn repair: the material is homogeneous throughout its thickness, meaning you can sand away damage and refinish the surface without creating visible differences. This characteristic makes them uniquely suitable for DIY restoration.
Sanding Out Burn Damage on Solid Surfaces
Begin solid surface burn removal by cleaning the affected area with a mild cleaner. Start with 120-grit sandpaper if the burn mark is deeply discolored, working in a circular motion with moderate pressure while keeping the sandpaper wet. Sand just enough to remove the visible burn damage, checking progress every thirty seconds. Progress through grits systematically (220, 400, 600, 800, 1200, and 2000-grit), with each step removing the scratches from the previous, coarser grit. Between each grit change, wipe the area completely clean and ensure all scratches from the previous grit have been removed before proceeding.
Polishing for Professional-Like Finish
After sanding through 2000-grit, restore the shine by applying an automotive polishing compound with a soft cloth using moderate pressure and slow circular motions. Continue until visible improvement in gloss is achieved, then wipe away residue. For the final mirror-like finish, use a dedicated solid surface polish or automotive clear coat finishing product. Apply according to product directions, typically working in small sections with a clean, soft applicator pad. Allow the polish to haze if specified, then buff vigorously with a clean microfiber cloth. The completed repair should be nearly indistinguishable from surrounding areas.
Natural DIY Solutions for Countertop Burn Marks
Several household products effectively remove burn marks without requiring specialized cleaners. These natural solutions work across multiple countertop materials and provide a good starting point before moving to more aggressive treatments.
Baking Soda Paste Applications for Burn Removal
Baking soda ranks among the most versatile solutions for burn mark removal. Its mild alkaline properties help break down burned residues while providing gentle abrasion. Mix baking soda with water to create a thick paste, then spread it generously over the burn mark. Allow it to sit for fifteen to thirty minutes, then scrub with a soft-bristled brush using moderate pressure. Rinse thoroughly with clean water and dry completely. For stubborn burns, the paste can be left to work overnight, covered with plastic wrap to prevent drying.
Hydrogen Peroxide for Stubborn Burn Stains
Hydrogen peroxide serves as a powerful bleaching agent for stubborn burn marks that resist other treatments, particularly on light-colored surfaces. Apply three percent hydrogen peroxide directly to the burn mark using a cotton ball, allowing it to work for ten to fifteen minutes without drying. Reapply if necessary to maintain moisture during treatment. After the dwell time, blot the area with a clean cloth rather than rubbing, which can spread the peroxide and create uneven bleaching. Rinse thoroughly with clean water and dry completely.
Prevent Future Countertop Burn Damage
Implementing protective measures after burn removal prevents future damage and maintains your restored countertop appearance for years to come. The most effective prevention strategy is always to use protective barriers between hot cookware and your countertop surface.
Essential Protective Practices for Countertops
Trivets, hot pads, and cooling racks provide essential protection and should become a non-negotiable habit whenever moving hot items from stove, oven, or microwave to the countertop. Choose trivets with heat-resistant feet that elevate the cookware above the countertop surface, allowing air circulation that helps dissipate heat more quickly. Training all household members to automatically use protective surfaces whenever handling hot items significantly reduces the risk of burn damage.
Be particularly cautious with cast iron cookware, which retains heat for extended periods and can cause burns even when it appears to have cooled. Never place hot items directly on the countertop, even “just for a moment,” as the damage occurs instantly. Develop habits around hot item placement by identifying safe zones on your countertops where hot items can always be placed, such as areas with trivets permanently positioned.


