
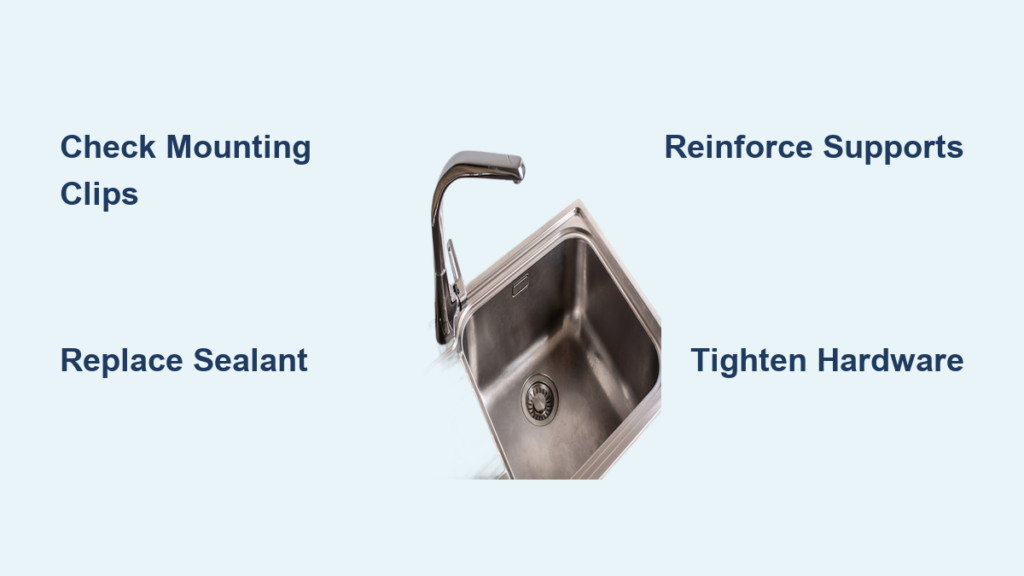
That annoying wobble when you fill your kitchen sink isn’t just irritating—it’s a warning sign of potential water damage and structural problems. When your sink shifts under pressure or separates from the countertop, moisture seeps into cabinet structures, creating perfect conditions for mold growth and costly repairs. The good news is that most loose sink issues can be fixed with basic tools and a few hours of your time. Whether you have a standard drop-in sink, sleek undermount model, or rustic farmhouse basin, this guide provides the specific solutions you need to restore stability and prevent further damage.
Understanding why your sink loosened helps you choose the right repair approach and prevents recurrence. Kitchen sinks loosen due to multiple interconnected factors: mounting clips corrode from constant moisture exposure, vibration from daily use gradually works fasteners loose, adhesive bonds fail after years of stress, and seasonal temperature changes cause expansion and contraction cycles. Inadequate initial installation accelerates this deterioration, leaving you with a sink that rattles, shifts, or allows water to pool around its edges.
Why Your Kitchen Sink Loosens
Mounting systems fail predictably when exposed to the harsh kitchen environment. Metal mounting clips and brackets rust when constantly exposed to humidity, weakening the metal and creating expansion that works fasteners loose. Even stainless steel components corrode at joint points where different metals meet, setting up electrochemical reactions that degrade hardware.
Continuous vibration from faucet use, garbage disposal operation, or dropping dishes accelerates loosening. Each impact transmits stress through the mounting system, progressively working connections loose—similar to how lug nuts need periodic tightening after driving on rough roads. This constant jostling compounds with moisture exposure, creating a destructive cycle where each problem worsens the others.
Undermount sinks face additional challenges as adhesive bonds degrade when moisture penetrates the seal or when the sink experiences shock loads. Once the adhesive bond fails at any point, stress concentrates on remaining attachment points, causing rapid progressive failure. Water infiltration compounds every other problem by creating ideal conditions for mold growth and material rot beneath your sink.
Identify Your Sink Installation Type
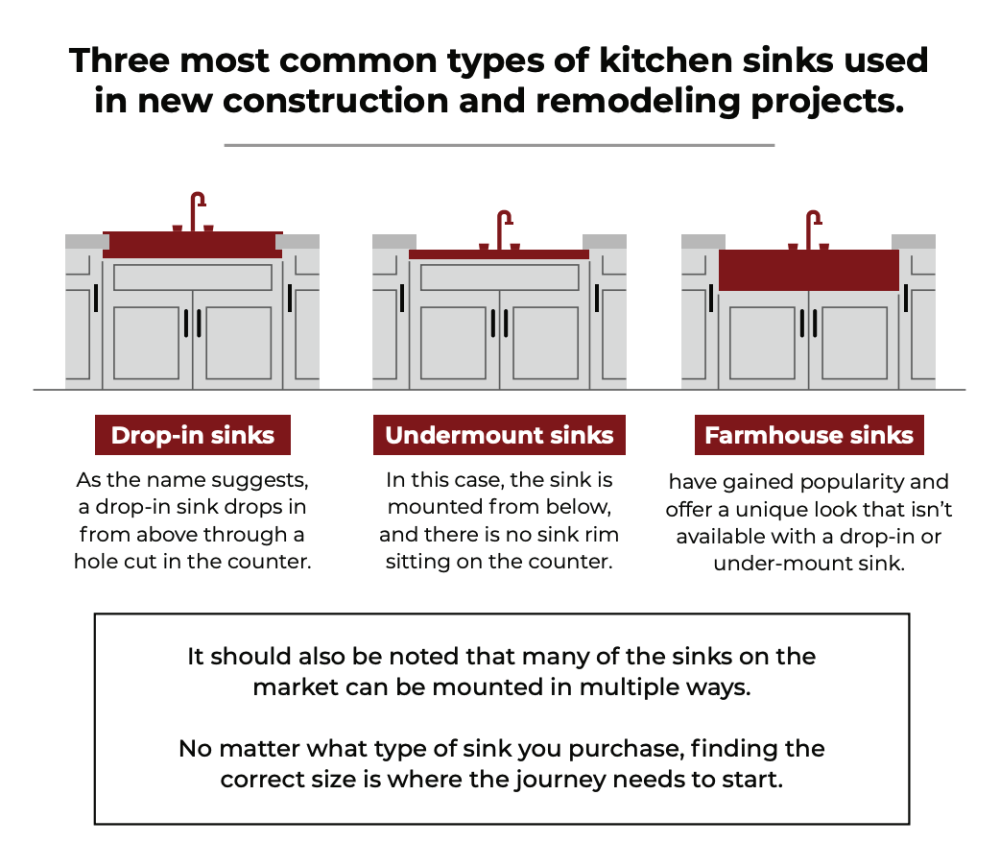
Before selecting repair methods, correctly identify your sink type as each installation requires different approaches and materials. The three primary sink styles—drop-in, undermount, and farmhouse—each present unique challenges and failure modes.
Drop-in sinks feature a visible lip that rests directly on the countertop, with mounting clips securing the sink from underneath. If you can see a raised edge around your sink basin sitting on top of the counter, you have this common residential design. The mounting clips attach to the sink rim from below and secure to the countertop substrate.
Undermount sinks attach beneath the countertop with no visible rim above the counter surface. If you look under your sink and see the basin edge directly against the countertop bottom, you have this installation. These repairs require stronger adhesives and more careful preparation because the mounting system is hidden.
Farmhouse sinks feature a prominent front panel extending below cabinet door level. These substantial sinks weigh significantly more than standard designs, placing greater stress on mounting systems. If your sink has an exposed front panel reaching below cabinet doors, you have this style requiring specialized repair approaches.
Gather Essential Tools and Materials
:max_bytes(150000):strip_icc()/top-plumbing-tools-1824860-hero-867cc1e34408463dbab86838f89e7762.jpg)
Successful repair depends on having the right tools assembled before starting work. Rushing to the hardware store mid-repair interrupts the process and allows adhesive to begin curing.
Essential tools include: a cordless drill with Phillips and flathead bits, an adjustable wrench, needle-nose pliers, complete screwdriver set, utility knife with sharp blades, putty knives, tape measure, level, and flashlight. Materials needed: mounting hardware replacement kits with corrosion-resistant clips, premium silicone sealant formulated for kitchen use, replacement foam gaskets, degreaser, isopropyl alcohol, and lint-free cloths. Safety equipment like work gloves and safety glasses protects you from sharp edges and chemical exposure.
Prepare for Sink Repair
Thorough preparation prevents unnecessary work and ensures complete resolution. Begin by emptying the cabinet beneath the sink completely—remove all stored items that might obstruct your access.
Shut off water supply valves and disconnect supply lines from the faucet, placing a bucket beneath to catch residual water. Disconnect the drain assembly by loosening slip nuts and removing the P-trap. Perform a systematic movement test by applying firm downward pressure to each corner and edge of the sink basin. Note exactly which locations show movement to identify failed mounting points.
Examine visible portions of the mounting system from below, noting corroded or missing clips. Probe the sink rim perimeter to assess sealant condition and identify gaps between sink and countertop. Photograph the original hardware configuration before removal for accurate reassembly reference.
Fix a Drop-In Kitchen Sink
Drop-in sinks offer the most straightforward repair path because the mounting system remains visible and accessible.
Step 1: Remove Old Mounting Hardware and Sealant
From within the cabinet, locate all mounting clips around the sink perimeter. Loosen and remove each clip using appropriate tools. Remove all old sealant and adhesive residue using a utility knife and putty scraper.
Step 2: Prepare Bonding Surfaces
Clean all mating surfaces with isopropyl alcohol to remove oils and residue. Ensure surfaces are completely dry before proceeding. Lightly sand rough areas to create optimal bonding substrate.
Step 3: Apply New Sealant and Gasket
Cut the foam gasket to match the sink perimeter or apply a continuous bead of silicone sealant approximately 1/4 inch from the sink edge. For maximum protection, install the gasket first for cushioning, then apply sealant over it.
Step 4: Reposition and Secure the Sink
With a helper supporting the sink, lower it carefully onto the prepared countertop. From below, install new mounting clips by hooking them over the sink edge and securing to the countertop substrate. Tighten clips progressively in a crisscross pattern.
Step 5: Allow Cure Time and Test
Allow adhesive and sealant to cure 24-48 hours before heavy use. Test stability by applying pressure to all sink edges and check for leaks around the perimeter.
Fix an Undermount Kitchen Sink
Undermount sink repairs demand greater attention to surface preparation and adhesive selection.
Step 1: Create Temporary Support
Provide temporary support for the sink basin using adjustable supports positioned beneath the sink. Verify support stability before proceeding.
Step 2: Remove Damaged Mounting Components
Carefully remove all visible mounting hardware and old adhesive using a putty knife and heat gun. Clean surfaces thoroughly with mineral spirits.
Step 3: Prepare Surfaces for Bonding
Sand sink edge and countertop bottom surfaces with 80-100 grit sandpaper. Wipe away all dust with tack cloth, ensuring surfaces are dry and contaminant-free.
Step 4: Apply Industrial-Strength Adhesive
Use a caulking gun to apply polyurethane construction adhesive in a continuous bead along the sink edge. For heavy sinks, apply adhesive in a zig-zag pattern to increase bond surface area.
Step 5: Reinstall Mounting Hardware
Position mounting brackets according to original configuration. Secure brackets with provided screws, avoiding overtightening. Install all clips and support bars to distribute holding force evenly.
Step 6: Maintain Pressure During Cure
Apply clamping pressure to critical bond areas using C-clamps with protective wood blocks. Maintain pressure throughout the 48-72 hour cure period.
Repair Farmhouse Sink Supports
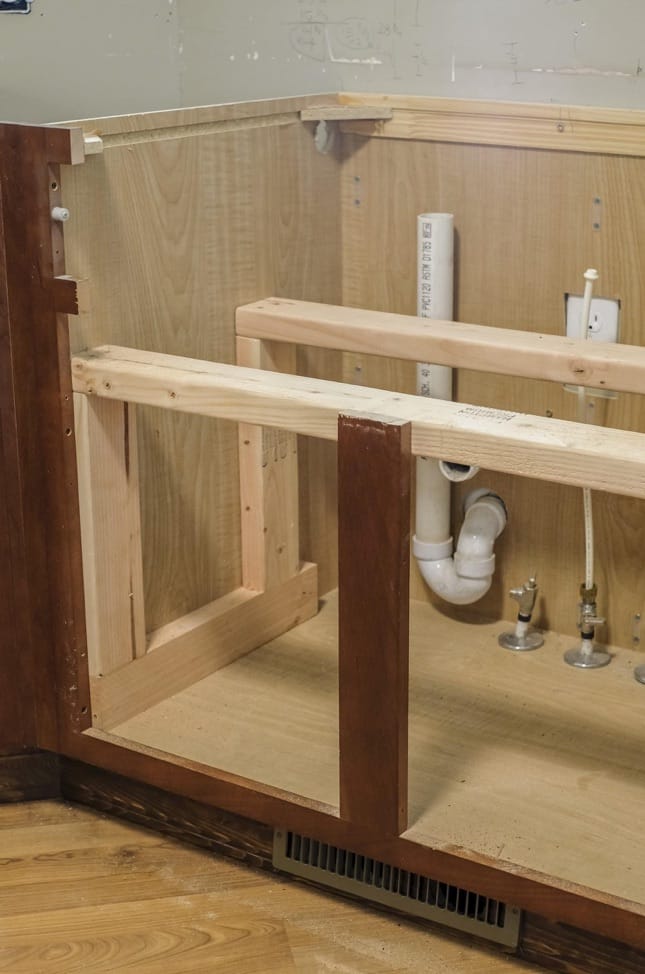
Farmhouse sinks require specialized support systems due to their substantial weight.
Step 1: Access and Inspect Support Framework
Remove cabinet doors and shelves to fully access the support area. Examine support rails, cross-bracing, and mounting blocks for cracked wood or corroded brackets.
Step 2: Reinforce or Replace Support Components
Replace damaged wood components with pressure-treated lumber. Install additional support rails if the original design appears inadequate. Use 2×4 lumber minimum for support members.
Step 3: Install Additional Mounting Points
Add mounting clips along sink sides where they contact the cabinet interior. Use silicone sealant at all contact points to prevent moisture damage.
Troubleshoot Persistent Problems
Persistent movement after repair indicates insufficient mounting hardware density or inadequate mounting substrate. Add additional clips at 4-inch intervals or locate and secure hardware to wall studs.
Water leakage at the perimeter despite proper mounting indicates sealant failure. Remove old sealant completely and apply fresh silicone in a continuous bead, paying special attention to corners.
Corroded or stripped mounting holes require enlarging the hole and inserting wooden dowels coated with wood glue, allowing cure time before installing screws in fresh wood.
When to Call a Professional
Certain situations warrant professional intervention: undermount sink reinstallation requires specialized tools and expertise; farmhouse sinks need structural assessment; or if your sink basin itself is cracked. Basic drop-in sink repairs typically cost $150-$300, undermount repairs $300-$600, and farmhouse sink support repairs $200-$500.
Prevent Future Sink Loosening
Implement quarterly inspections to catch developing issues early. Visually examine mounting hardware for corrosion and test sink stability by applying downward pressure at each corner. Address minor issues immediately—tighten loose clips and reapply sealant at first sign of cracking.
Upgrade to stainless steel mounting hardware during repairs for superior corrosion resistance. Apply petroleum jelly or silicone spray to hardware annually in humid environments. Maintain consistent kitchen humidity levels to minimize expansion and contraction cycles that stress mounting systems. Avoid dropping heavy items into the sink that transmit shock loads to mounting hardware.
A stable kitchen sink restores functionality to one of your kitchen’s most-used features while protecting your cabinetry from water damage. With proper diagnosis, quality materials, and careful attention to technique, your repair will provide years of reliable service.


