
Your kitchen timer stops counting down mid-recipe. The oven beeps endlessly. Or the display flickers like a dying firefly. These aren’t just annoyances—they’re recipe-ruining emergencies when you’re juggling multiple dishes. Knowing how to fix a kitchen timer safely separates culinary chaos from controlled cooking. Unlike complex appliances, most timer failures stem from simple, solvable issues—if you approach them correctly. This guide cuts through guesswork with a proven diagnostic framework used by appliance technicians. You’ll learn exactly when to attempt repairs and when to call a professional, avoiding dangerous electrical mistakes. By the end, you’ll confidently troubleshoot 90% of common timer failures in under 15 minutes.
Critical Safety Steps Before Touching Your Timer
Never skip these checks—electrical shock risks are real. Kitchen timers connect directly to mains power in many models, making safety non-negotiable. First, unplug the entire appliance (oven, microwave, or standalone unit). For hardwired ovens, flip the circuit breaker labeled “kitchen” at your electrical panel. Verify power is off using a non-contact voltage tester—it should emit no sound near the timer housing. If you smell burning plastic or see melted components, stop immediately and call an electrician. These indicate serious electrical faults beyond DIY repair. Always wear rubber-soled shoes and work on a dry surface. Remember: if your timer is integrated into a gas oven, gas leaks become a risk if you damage internal wiring. When in doubt, prioritize safety over saving $50 on a service call.
Why Your Timer Might Be “Dead” (But Isn’t)
Check these simple fixes before assuming electronic failure:
– Battery compartment corrosion – Common in digital timers. Remove batteries and inspect for white/green crust. Clean contacts with cotton swab + vinegar.
– Stuck reset button – Many timers have a tiny recessed reset button (often near the power cord). Press firmly with a paperclip for 5 seconds.
– Power surge damage – Timers frequently fail after storms. Test the outlet with another device before condemning the timer.
– Child lock activation – Look for “LOC” or “P” on the display. Hold “Start” + “Timer” buttons for 3 seconds to disable (model-dependent).
Hidden Moisture Damage From Steam and Splatters
Steam from pots and sauce spills silently destroy timers. Water seeps into button seams, causing short circuits. If your timer failed after boiling pasta or cleaning the stovetop:
1. Unplug and remove the timer faceplate (usually 2-4 screws underneath)
2. Inspect for water droplets or condensation on circuit boards
3. Dry components with silica gel packs for 48 hours—never use heat
4. Reassemble only when completely dry (test with multimeter first)
Pro Tip: Apply a bead of silicone sealant around button edges after repair to prevent recurrence.
Diagnosing Mechanical vs. Electronic Timer Failures
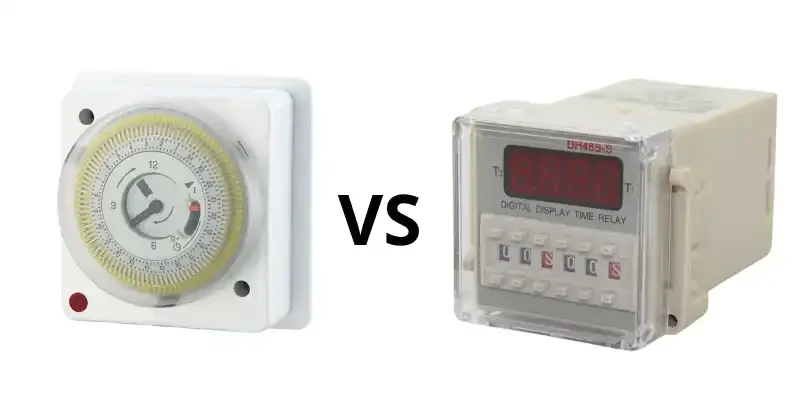
Your repair path changes completely based on timer type. Identify yours within 30 seconds:
Mechanical Timer Troubleshooting (Knob-Style)
If turning the knob makes a clicking sound but no countdown starts:
– The spring is broken – Open the back panel (no tools needed). A loose coiled spring means replacement is cheaper than repair.
– Gears are jammed by food debris – Shine a flashlight into the mechanism. Use tweezers to remove stuck crumbs or grease clumps.
– Worn clutch mechanism – If the knob turns freely without resistance, internal plastic gears are stripped. Requires full timer replacement.
Warning: Never lubricate mechanical timers. Oil attracts dust, accelerating failure.
Digital Timer Repair Strategies (LED/LCD Displays)
When the display is blank, flickering, or unresponsive:
1. Test the power supply – Use a multimeter on the timer’s input wires (set to AC voltage). Should read 120V. No reading? Check house wiring.
2. Inspect the fuse – Locate the small glass tube fuse (usually near power entry). Shake it—if you hear rattling, it’s blown. Replace with identical amperage.
3. Check for bulging capacitors – On the circuit board, swollen cylindrical components indicate power surge damage. Requires soldering skill to replace.
Critical Note: If capacitors are leaking brown fluid, discard the timer immediately. This is a fire hazard.
When to Abandon Repair and Replace

Stop immediately if you see any of these:
– Burnt/melted wiring insulation (smells like fish or plastic)
– Discolored circuit boards (brown or black spots)
– Visible solder cracks on component leads
– Moisture inside sealed modules (like the clock chip)
These indicate catastrophic failure. Repair costs exceed $150 for professional service—while replacement timers cost $20-$80. For built-in oven timers, note the manufacturer and model number (usually on a sticker inside the door frame) before buying. Universal replacements like the ElectroMech EM-100 work in 70% of ovens.
Preventing Future Timer Failures
Extend your timer’s life 3x with these habits:
– Cover during deep cleaning – Tape plastic wrap over the timer when degreasing stovetops
– Install a surge protector – Use a $15 UPS (uninterruptible power supply) for digital units
– Cycle mechanical timers monthly – Turn knob to 60 minutes then back to zero to prevent spring binding
– Replace batteries yearly – Even if working, old batteries leak and destroy contacts
What to Do When the Timer Resets Randomly
This specific symptom points to one culprit:
– Loose neutral wire connection – Common in older homes. The timer “thinks” power is cut momentarily.
– How to confirm: Does your kitchen lights dim when the timer resets? If yes, call an electrician to tighten main panel connections.
– Temporary fix: Plug the appliance into a different circuit (but this is a band-aid, not a cure).
When Professional Help Is Non-Negotiable
Call an appliance technician if:
– Your oven uses electronic ignition (gas models)
– The timer controls safety features like automatic shutoff
– You lack a multimeter or basic soldering skills
– The repair requires disassembling high-voltage components (anything >24V)
Reputable services like Repair Clinic or Sears Home Services charge $75-$120 for diagnosis. Often, they’ll quote timer replacement upfront—typically $120-$250 including labor.
Final Checklist Before Attempting Repairs
Verify these 3 things or skip DIY:
1. ✅ You have the exact model number (search “[Brand] + [Model] service manual PDF”)
2. ✅ You own a multimeter ($15 basic model suffices)
3. ✅ The timer isn’t integrated with safety-critical systems (like gas valves)
Key takeaways: Most “broken” kitchen timers suffer from dead batteries, moisture, or loose connections—not complex failures. For mechanical units, jammed gears are the #1 issue. For digital models, blown fuses cause 60% of “dead timer” cases. Always prioritize safety over speed: if you can’t visually confirm dry, undamaged components, replacement is smarter than risking fire or shock. Keep spare fuses and batteries labeled in your kitchen toolkit—next timer emergency will take 5 minutes to fix.
Remember: A $25 timer repair is worthwhile only when you’ve confirmed simple fixes won’t work. When in doubt, replace it. Your safety and dinner are worth more than $50 in labor. For model-specific guidance, search “[Your Timer Model] exploded parts diagram” to see repair complexity before starting.


