
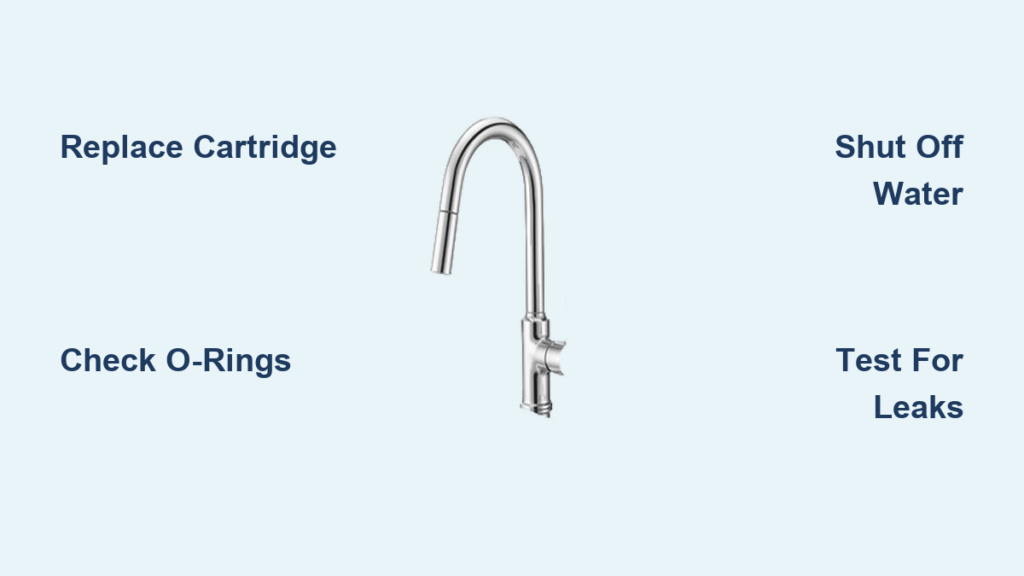
That persistent drip, drip, drip from your kitchen faucet isn’t just an annoying soundtrack to your daily routine—it’s silently wasting hundreds of gallons of water each month. A single handle kitchen faucet that won’t stop dripping typically points to worn internal components that you can replace yourself with basic tools and about an hour of your time. The good news is most dripping faucet issues stem from predictable problems with the cartridge or sealing components, making them straightforward DIY repairs. Understanding precisely why your faucet leaks and following a systematic approach will not only stop the annoying sound but also prevent water damage and save you money on utility bills.
The core issue behind most single handle faucet drips involves the cartridge assembly—the internal mechanism that controls both water flow and temperature. Every time you turn your faucet handle, this component opens or closes the water pathways under constant pressure. Over time, the rubber seals, O-rings, and internal surfaces degrade from regular use, mineral deposits, and exposure to water. When these components wear out, they create tiny gaps that allow water to escape even when your handle is in the fully closed position. The beauty of this repair is that replacing these internal parts costs just a few dollars compared to professional plumbing services.
Before grabbing your tools, know this guide will walk you through diagnosing your specific drip problem, gathering the right replacement parts for your faucet model, and executing a complete repair that stops the leak for good. You’ll also learn maintenance practices to extend your faucet’s life and recognize when professional help becomes the smarter choice.
Gather Essential Repair Tools Before Starting

Your faucet repair success depends entirely on having the right tools ready before you begin disassembly. Rushing mid-repair to find a missing tool often leads to mistakes, damaged components, or water damage from accidentally reopening supply valves.
Critical tools you’ll need:
– Adjustable basin wrench (specifically designed for tight spaces under sinks)
– Both flathead and Phillips screwdrivers (for handle and trim removal)
– Needle-nose pliers (for cartridge extraction)
– Small container (to keep screws organized)
– Soft cloth (to protect your faucet’s finish)
– Bucket or container (to catch residual water)
Beyond tools, you’ll need the correct replacement cartridge specific to your faucet brand and model. Unlike generic plumbing parts, faucet cartridges vary significantly between manufacturers. Take your old cartridge to a hardware store for exact matching, or note your faucet’s model number before purchasing online. Don’t forget replacement O-rings and plumber’s grease—these small components often show wear alongside the cartridge and applying grease during reassembly extends the life of new rubber parts.
Shut Off Water Supply Before Disassembly
Skipping this critical safety step guarantees an unexpected water geyser when you remove components, potentially causing significant cabinet damage. Properly securing the water supply prevents this messy scenario and keeps your repair on track.
Locate the shut-off valves beneath your sink—typically two small valves connected to flexible supply lines. Turn both the hot and cold valves clockwise until they stop completely. Then verify the water is truly off by turning on your faucet to drain remaining water from the lines. If water continues flowing, the shut-off valve may be faulty and require replacement before proceeding. Keep your bucket positioned beneath the faucet throughout the repair to catch residual moisture.
Remove the Faucet Handle Correctly
With water safely secured, begin disassembly by removing the handle to access the internal components causing your drip. Most single handle faucets hide the securing screw beneath a decorative cap on top of the handle.
Gently pry off this cap using a flathead screwdriver, being careful not to scratch the finish. Once exposed, remove the Phillips or flathead screw completely and set it aside in your container. The handle should lift away easily—some may require slight wiggling if mineral deposits have bonded it to the stem. Avoid excessive force that could crack plastic components. After handle removal, note any additional trim pieces or retaining nuts covering the cartridge assembly, taking photos as you remove each component to ensure proper reassembly.
Extract the Old Cartridge Without Damage
The cartridge is your faucet’s central component controlling water flow, and removing the worn unit properly prevents damage to the valve body. With trim pieces removed, you’ll see the cartridge stem extending from the valve body, featuring notches or ears designed for extraction.
Position needle-nose pliers around these notches, gripping firmly without crushing the cartridge. Pull straight out with steady pressure—some cartridges release easily while others require slight twisting to break free from mineral buildup. If resistance is significant, apply penetrating oil around the base and wait 5-10 minutes before trying again. Never force a stuck cartridge as this can damage the valve body. Before discarding the old cartridge, inspect it for cracks, worn sealing surfaces, or mineral deposits that caused your drip.
Install the New Cartridge Properly

Proper cartridge installation determines whether your repair succeeds or you continue dealing with a drip. Begin by thoroughly cleaning the valve body cavity with a soft cloth or old toothbrush to remove debris and mineral deposits.
Examine your new cartridge for alignment features—most have notches or tabs that must match corresponding slots in the valve body. Position the cartridge above the valve, aligning these features before sliding it in smoothly. The cartridge should seat fully with minimal resistance—never force it into place as this indicates incorrect orientation or debris blocking proper seating. Push firmly until you feel or hear a slight click as positioning features engage completely.
Reassemble Your Faucet Systematically
Reverse your disassembly process carefully to rebuild the faucet without creating new problems. Replace trim pieces in the exact order and orientation you documented during removal, engaging threads by hand first before tightening with tools.
Reattach the handle with its securing screw, ensuring it moves freely through its complete range without binding. Test handle movement in both hot and cold directions to confirm it reaches full open and closed positions smoothly. If resistance occurs, remove the handle and verify proper cartridge alignment before proceeding.
Test for Leaks Before Calling It Done
Never skip this critical verification step—many DIY repairs fail because homeowners rush to reassemble without proper testing. Slowly open both water supply valves fully, then run the faucet for 60 seconds to flush air from the lines.
Check methodically for leaks: first at the handle base, then at the spout in fully closed position, and finally at supply line connections beneath the sink. Move the handle through all temperature positions to verify proper operation. Continue running water for several minutes while periodically checking for any moisture you might not initially see. Only when everything remains completely dry should you consider your repair successful.
Handle Leaks from the Base Immediately
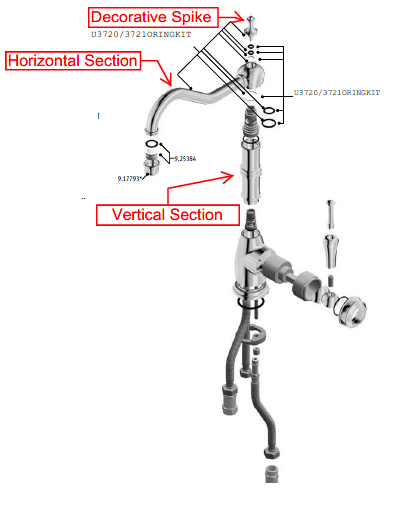
When water escapes from where the handle attaches to the faucet body (rather than dripping from the spout), worn O-rings or a damaged valve seat are likely culprits. Remove the handle again to access these components, inspecting all O-rings for cracks, flattening, or loss of rounded shape.
Replace any compromised O-rings with exact size matches for your faucet model—using incorrect sizes prevents proper sealing. Apply plumber’s grease to new O-rings before installation to ensure smooth operation and extended life. If the valve seat shows damage, some faucets allow replacement while others require complete valve body replacement.
Prevent Future Drips with Regular Maintenance
Stopping current leaks is only half the solution—implementing simple maintenance practices prevents most future dripping issues. Clean your faucet’s aerator every six months by unscrewing it from the spout tip, disassembling carefully, and rinsing components to remove sediment.
For homes with hard water, mineral deposits accelerate internal wear. Consider installing a water softener or periodically descaling your faucet by running undiluted white vinegar through the lines for an hour, then flushing thoroughly with clean water. Regularly inspect your faucet for early warning signs like unusual operation sounds or minor moisture around the base—addressing these immediately prevents major leaks later.
Know When to Call a Professional Plumber
While most dripping faucet repairs are DIY-friendly, certain situations warrant professional help. Call a plumber when your faucet model requires specialized tools not available to consumers, or if multiple repair attempts haven’t resolved the drip.
Signs of water damage beneath the sink—including mold growth, wood rot, or corrosion—indicate leaks have been occurring longer than realized and may have caused hidden damage requiring expert assessment. If you’re uncomfortable performing the repair or lack basic tools, professional service (typically $150-$300) provides peace of mind compared to the risk of causing additional damage through unsuccessful DIY attempts.
Final Thoughts on Faucet Repair Success
Fixing a dripping single handle kitchen faucet typically costs under $50 in parts and takes just an hour of your time—far less than professional service calls. The key to lasting results lies in proper diagnosis, using correct replacement parts for your specific model, and thorough testing before considering the job complete. With proper maintenance and prompt attention to any future drips, your repaired faucet should provide years of reliable service without further intervention. Most importantly, you’ll eliminate that annoying drip while saving hundreds of gallons of water each month—making this simple repair both economically and environmentally smart.


