
Water dripping from your Delta kitchen faucet creates more than just an annoying sound—it wastes gallons of water daily, hikes up your utility bills, and risks damaging your cabinets with persistent moisture. Whether you’re dealing with a constant drip from the spout, water pooling around the base, or leaks from the pull-down sprayer, most Delta faucet leaks can be resolved with basic tools and replacement parts. This guide shows you exactly how to identify the leak source and perform the precise repair needed—saving you hundreds in plumber fees while restoring your faucet’s performance in under an hour.
Delta faucets rely on precision components like cartridges, O-rings, and stem seals working together to control water flow. When any of these parts wear out, water finds escape routes through the spout, base, or sprayer connection. By diagnosing exactly where your leak originates—the three most common failure points—you’ll avoid unnecessary disassembly and target your repair efforts efficiently. Follow these steps to permanently stop your Delta kitchen faucet leak and prevent future water damage.
Pinpoint Your Exact Leak Source Before Repairing
Before grabbing tools, you must identify which component causes your specific leak—spout drips require different fixes than base leaks or sprayer issues. Turn off the water supply valves under the sink, dry the faucet completely, then run water while observing where moisture appears. Water dripping from the spout with the handle fully closed points directly to cartridge failure, while leaks around the base indicate worn O-rings or loose mounting hardware. Sprayer connection leaks only occur when using the pull-down feature and require seal replacement at the hose junction.
Test each handle through its full range of motion while watching for resistance, grinding, or unusual sounds. Binding handles often signal mineral deposits inside the valve assembly, while whistling noises indicate partial blockages affecting water flow. Take photos of the leak location with your phone—they’ll help when ordering replacement parts and provide reference during reassembly. This diagnostic step prevents wasted time replacing the wrong components and ensures you purchase the correct Delta repair kit for your specific model.
Spout Drip: Cartridge Failure Signs
When water continues dripping from the spout after turning off the handle, your Delta faucet’s cartridge has lost its sealing ability. The rubber seals inside the cartridge degrade from constant water exposure and temperature fluctuations, creating gaps that allow water to bypass the closed position. Hard water accelerates this failure by depositing minerals that stiffen the rubber seals, preventing proper closure even in relatively new faucets. If you notice reduced water pressure alongside the drip, debris trapped in the valve housing may be damaging the cartridge during normal operation.
Base and Handle Leaks: O-Ring and Mounting Issues
Water pooling at the faucet base or streaming down the body indicates deteriorated O-rings or loose mounting hardware rather than cartridge problems. The mounting nut securing the faucet to the sink loosens over time from regular use and vibration, creating gaps where water escapes during operation. Stem seals beneath the handle wear out from constant exposure, cracking until they can no longer contain water pressure. These leaks often worsen when using hot water, as thermal expansion creates additional stress on compromised seals.
Gather These Essential Tools Before Starting
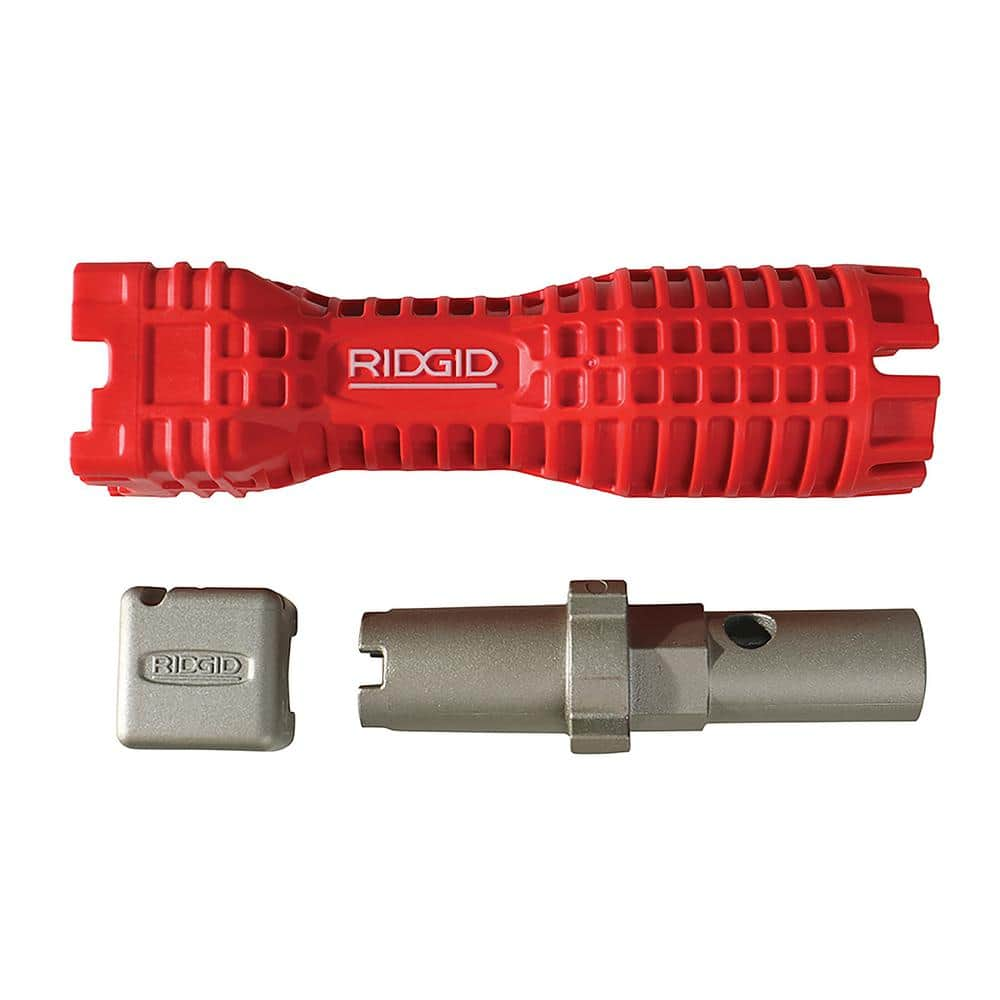
Having the right tools ready prevents mid-repair frustration and ensures a smooth process. An adjustable wrench or basin wrench handles mounting nuts and supply line connections in tight spaces under your sink. A complete screwdriver set (both Phillips and flathead) removes handle screws and decorative caps without scratching the finish. Needle-nose pliers extract small components and the cartridge itself during disassembly. Don’t forget a bucket and towels to catch residual water during disassembly.
Critical replacement parts you’ll need:
– Delta RP50569 cartridge (for single-handle models) or RP1740 (for dual-handle)
– O-ring kit with multiple sizes (3/8″ to 1″ diameters)
– Plumber’s grease for seal lubrication
– Model-specific stem seals if base leaks persist after O-ring replacement
Write down your Delta faucet’s model number—found on the underside of the spout or original packaging—before purchasing parts. Delta has produced multiple faucet generations with varying internal designs, and using incorrect components creates new problems. Most hardware stores carry Delta-specific repair kits that include all necessary O-rings and seals for common models.
Fix Spout Drips by Replacing the Cartridge

Start by turning off the hot and cold water supply valves under the sink, then open the faucet to drain residual water. Remove the decorative handle cap using a flathead screwdriver wrapped in tape to prevent scratching, then unscrew the handle screw beneath it. For models with side-mounted setscrews, use an Allen wrench to loosen the screw before lifting the handle off.
With the handle removed, locate the retaining clip securing the cartridge—often requiring needle-nose pliers for removal. Pull the old cartridge straight out using pliers, noting its orientation before removal. Inspect the cartridge for cracks, mineral deposits, or worn seals that confirm it as the leak source. Clean the valve housing thoroughly with a soft brush and vinegar solution to remove mineral buildup before installing the new part.
Proper cartridge installation steps:
1. Apply plumber’s grease to all O-rings on the new cartridge
2. Align indexing marks on cartridge with valve housing indicators
3. Press cartridge firmly into place until fully seated
4. Reinstall retaining clip and handle assembly
5. Restore water supply and test for drips
Repair Base Leaks with O-Ring Replacement
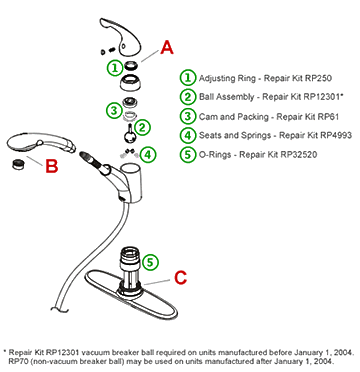
Base leaks require replacing the stem O-rings that create the watertight seal between the valve stem and faucet body. After removing the handle as described above, expose the valve stem by removing any additional covers or retaining hardware. Locate the worn O-rings—small rubber rings surrounding the stem—and carefully remove them using a pick tool, taking care not to scratch metal surfaces.
Measure the old O-rings against your repair kit selections to confirm the correct replacement sizes. Clean the stem surface thoroughly with a soft cloth to remove debris and mineral deposits. Apply generous plumber’s grease to each new O-ring before installation—this lubrication prevents pinching and extends seal life. Slide each O-ring into its groove, ensuring it sits flat without twisting or bunching.
Tighten mounting hardware correctly:
– Access the mounting nut under the sink using a basin wrench
– Tighten clockwise just until snug (overtightening cracks the base plate)
– Test with water running to confirm leak elimination
– If leaks persist, replace the mounting washer beneath the base plate
Fix Sprayer Connection Leaks in Minutes
Pull-down sprayer leaks typically originate from the hose-to-faucet connection seal. Disconnect the sprayer hose by unscrewing the connection fitting—use adjustable pliers if hand-tightening won’t release it. Inspect the washer inside the connection for cracks or deterioration, the most common cause of this leak type.
Replace the washer with a new one from your Delta repair kit, applying plumber’s grease to the sealing surface before reinstallation. Reconnect the hose fitting by hand first, then tighten slightly with pliers—overtightening strips threads and creates new leaks. If water still drips from the spray head itself, remove the entire spray head by unscrewing it from the hose end and replace its internal seals.
Prevent future sprayer leaks:
– Avoid pulling the hose at sharp angles during use
– Clean the spray head inlet screen monthly with vinegar
– Lubricate connection points annually with plumber’s grease
– Replace spray head seals every 2 years as preventive maintenance
Maintain Your Delta Faucet to Prevent Future Leaks
Extending your faucet’s lifespan requires simple regular maintenance. Wipe the exterior daily with mild soap and water to prevent mineral buildup, avoiding abrasive cleaners that damage the finish. Every three months, inspect visible seals for early signs of wear and apply plumber’s grease to moving components to maintain flexibility.
In hard water areas, soak aerators and spray heads in white vinegar for 30 minutes every six months to dissolve mineral deposits. Operate handles through their full range of motion weekly to prevent stiffness and binding. If you notice reduced water pressure or unusual sounds, address these early warning signs before they develop into full leaks.
When repairs become frequent or your faucet shows multiple simultaneous failures, consider replacement—Delta’s limited lifetime finish warranty and 5-year mechanical warranty cover defects in materials and workmanship. Register your product online at DeltaFaucet.com to activate warranty coverage and keep your purchase receipt for future claims.
Fixing a leaking Delta kitchen faucet saves significant money compared to professional plumbing services while giving you control over the repair quality. By diagnosing your specific leak type, using the correct replacement parts, and following these precise steps, you’ll eliminate annoying drips and protect your kitchen from water damage. Regular maintenance after repair ensures your Delta faucet operates smoothly for years to come—proving that most faucet leaks are manageable DIY projects with the right knowledge and tools.


