
That unsightly gap between your kitchen cabinets and ceiling can make even the most beautiful kitchen look unfinished. If you’ve ever wondered how to fill gap between kitchen cabinets and ceiling properly, you’re not alone—this is one of the most common kitchen design challenges homeowners face. Most standard cabinets come in fixed heights (typically 84-96 inches), while ceiling heights vary, creating gaps that range from barely noticeable to several inches wide. Left unaddressed, these gaps collect dust, disrupt visual flow, and diminish your kitchen’s professional appearance. In this guide, you’ll discover five proven methods to eliminate cabinet-to-ceiling gaps, complete with step-by-step instructions, material recommendations, and cost considerations for each approach.
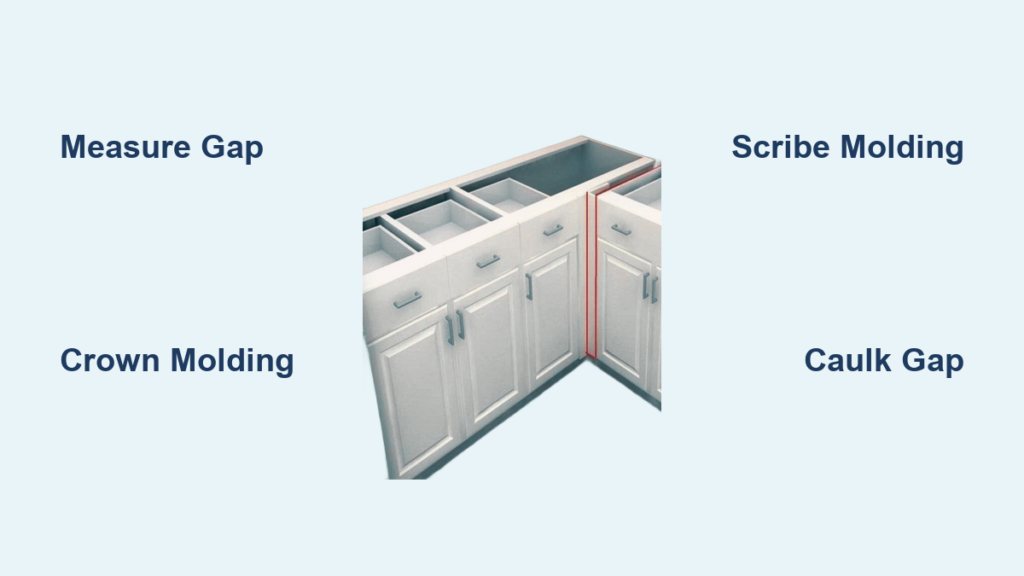
Measure Your Cabinet-to-Ceiling Gap Before Starting
Before selecting a solution, you must accurately measure your gap’s dimensions and consistency. Grab a measuring tape and check the gap width at multiple points along each cabinet run—starting at corners and every 2-3 feet. Most gaps range from 1/8 inch to 6 inches, but the critical factor is whether your ceiling is level. Uneven ceilings create varying gap widths, making some solutions impractical. Use a 4-foot level to check ceiling flatness; if the gap varies more than 1/4 inch across the run, you’ll need a flexible solution like scribe molding rather than standard crown molding. Document your maximum gap measurement, as this determines which methods will work for your specific situation.
Install Crown Molding for a Professional Finished Look
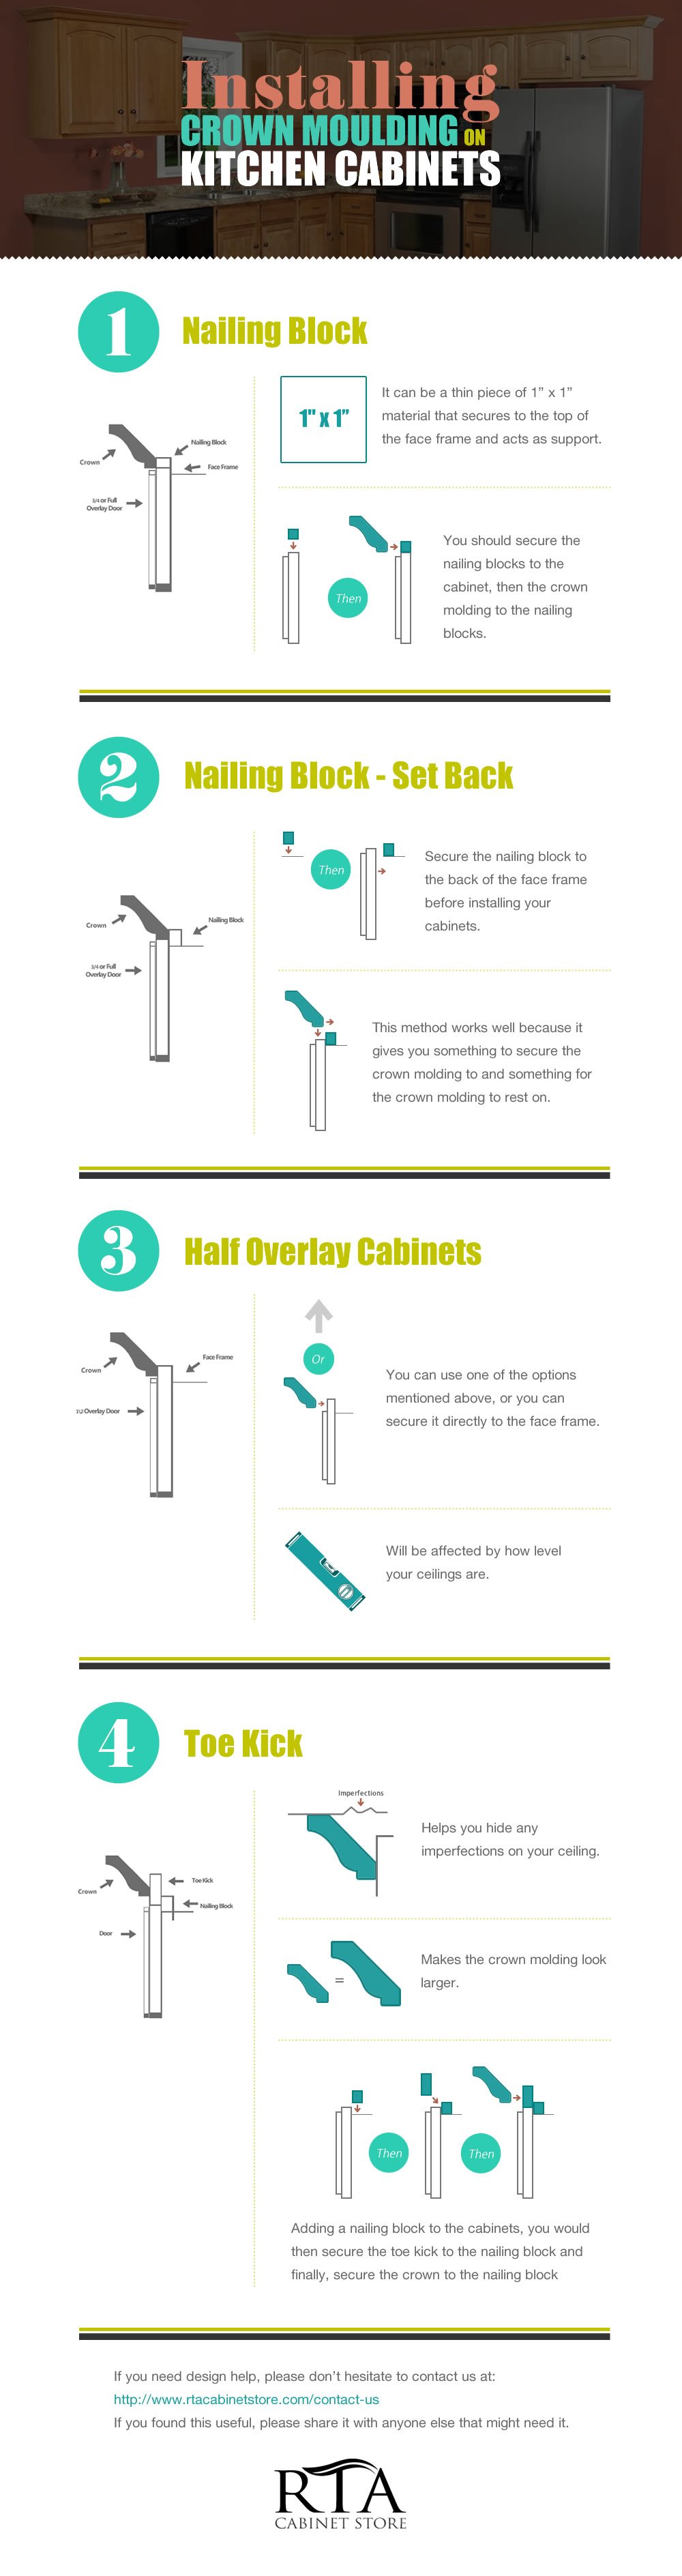
Crown molding remains the gold standard for filling cabinet-to-ceiling gaps, creating an elegant transition that adds architectural interest to your kitchen.
Choose the Right Crown Molding Profile
Select molding with a “cabinet crown” profile (typically 3-6 inches tall) rather than standard wall crown. Cabinet crown has a shallower spring angle (38-45 degrees instead of 52 degrees), making installation simpler without specialized tools. For gaps under 3 inches, choose a smaller profile (3-4 inches); for larger gaps, opt for 5-6 inch molding. Match the wood species to your cabinets—poplar works well for painted cabinets while oak suits stained wood.
Cutting and Installing Crown Molding Correctly
Unlike wall crown, cabinet crown installs upside down with the bottom edge against the ceiling and top edge against the cabinet. Set your miter saw to 45-degree angles for inside corners and 135 degrees for outside corners. Always dry-fit pieces before nailing—crown molding mistakes are costly. Secure with 2-inch finish nails every 12 inches, pre-drilling to prevent splits. For heavy molding, add construction adhesive to the back surface. Fill nail holes with matching wood filler, sand smooth, and paint before installation for best results.
Create Custom Scribe Molding for Uneven Ceilings
When your ceiling isn’t level (common in older homes), standard crown molding leaves gaps at the ceiling line. Scribe molding solves this problem with a custom-fit solution.
Transfer Ceiling Contours to Molding Stock
Cut a straight piece of 1×3 pine slightly longer than your gap. Hold a compass against the ceiling with the pencil end touching the molding edge, then slide it along the entire length to transfer the ceiling’s contour onto the molding. For dramatic unevenness, use a scriber tool specifically designed for this purpose. Mark the waste side clearly before cutting.
Cut and Install Perfectly Fitted Scribe Molding
Following your scribed line, cut the molding with a jigsaw for smooth curves or handsaw for minor variations. Sand the cut edge smooth, then position the molding against the cabinet top with the scribed edge against the ceiling. Secure with 1-1/2 inch finish nails every 8 inches. The tight fit eliminates visible gaps while maintaining a clean transition from cabinet to ceiling.
Use Filler Strips for Small, Consistent Gaps Under 2 Inches

For narrow, uniform gaps (common with 96-inch tall cabinets on 9-foot ceilings), simple filler strips provide the quickest solution.
Select and Prepare Appropriate Filler Material
Purchase pre-primed pine filler strips in 1/2″ to 1-1/2″ widths from your home center. Cut strips to length with a miter saw for clean ends. For a seamless look, choose strips matching your cabinet depth. Sand edges lightly before installation to ensure smooth transitions.
Install and Finish Filler Strips Properly
Apply construction adhesive to the back of each strip, then press firmly into the gap. Hold in place with blue painter’s tape until dry. Don’t use nails—they can split thin filler strips. After 24 hours, fill any minor gaps with paintable caulk, sand smooth, and paint to match your cabinets. This method takes under an hour per cabinet run and costs less than $20 for materials.
Apply Caulking Technique for Tiny Gaps Under 1/2 Inch
For minimal gaps that still catch dust and look unfinished, quality caulk provides the fastest solution.
Prepare the Gap Surface for Maximum Adhesion
Thoroughly clean the gap with TSP cleaner to remove grease and dust—caulk won’t adhere to dirty surfaces. Mask both cabinet top and ceiling with painter’s tape, leaving a gap slightly wider than your actual space. Cut the caulk tube nozzle at a 45-degree angle for precise control.
Apply Paintable Caulk for Seamless Results
Apply a steady bead of paintable latex caulk, maintaining consistent pressure on the trigger. Smooth immediately with a wet finger or caulk tool, removing excess as you go. Peel off masking tape before caulk skins over (within 5 minutes) for clean edges. Allow 24 hours to cure before painting. This method costs under $5 and takes minutes per gap but works only for gaps less than 1/2 inch.
Compare Time and Cost of Each Gap-Filling Method
| Method | Time Required | Material Cost | Skill Level | Best For |
|---|---|---|---|---|
| Crown Molding | 2-4 hours | $30-$80 | Intermediate | Gaps 2-6 inches, level ceilings |
| Scribe Molding | 3-5 hours | $20-$50 | Advanced | Uneven ceilings, gaps 1-4 inches |
| Filler Strips | 30-60 minutes | $10-$25 | Beginner | Small consistent gaps (1/2-2 inches) |
| Caulking | 10-20 minutes | $3-$8 | Beginner | Gaps under 1/2 inch |
| Foam Backer Rod | 20-40 minutes | $5-$15 | Beginner | Large gaps with uneven surfaces |
Avoid Common Cabinet Gap-Filling Mistakes
Skipping gap preparation is the most frequent error—dust and grease prevent proper adhesion for any solution. Another critical mistake is painting molding after installation; always finish pieces completely before mounting. When using caulk, many homeowners apply too much pressure, causing unsightly bulges that are difficult to smooth. For crown molding installations, neglecting to account for the spring angle leads to frustrating gaps at the ceiling line. Measure twice, cut once—molding and filler strips can’t be stretched to cover measurement errors.
Maintain Your Cabinet-to-Ceiling Gap Fix Long-Term
Even the best installation requires occasional maintenance. Check caulked gaps annually for cracks, especially in kitchens with significant temperature fluctuations. Touch up paint on filler strips and molding as needed using an artist’s brush for precision. If your home settles significantly, you may need to address new gaps that appear—this is most common with caulked solutions in newer construction. For crown molding, occasional tightening of loose nails prevents sagging over time.
Filling the gap between kitchen cabinets and ceiling transforms your kitchen from “almost finished” to professionally detailed. For most homeowners, crown molding delivers the best balance of aesthetics and durability for gaps over 2 inches, while scribe molding solves the headache of uneven ceilings. Small gaps respond beautifully to simple filler strips or quality caulk. Remember that proper measurement determines your solution—don’t guess when uneven ceilings are involved. With these techniques, you’ll eliminate that distracting space and create a kitchen that looks intentionally designed rather than hastily assembled. The investment of a few hours and minimal materials pays off in dramatically improved kitchen aesthetics that stand the test of time.


