
Your kitchen walls shouldn’t be an afterthought in your home design—they’re prime real estate for both style and function. Knowing how to decorate kitchen walls properly transforms this high-traffic space from purely utilitarian to visually engaging while maintaining practicality. Unlike living rooms where decoration can take precedence, kitchen walls face unique challenges: heat from cooking, humidity from boiling water, grease particles, and frequent cleaning needs. The right wall decor solution balances aesthetic appeal with durability, ensuring your investment withstands daily kitchen demands while enhancing the space where families gather, meals are prepared, and memories are made. This guide delivers actionable strategies you can implement immediately to create kitchen walls that are both beautiful and genuinely useful.
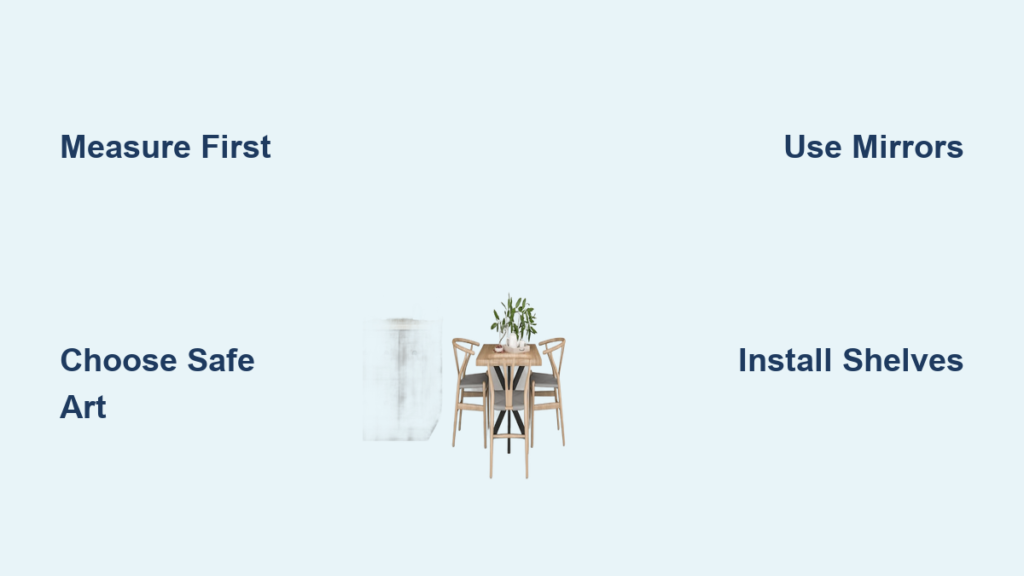
Measure Your Kitchen Walls Before Hanging Decor: Avoid Costly Mistakes
Before installing a single decorative element, take precise measurements of your available wall space and note existing features that impact your design. Your kitchen’s layout determines what will work—compact galley kitchens require different solutions than spacious open-concept layouts with multiple wall sections. Identify “work walls” near cooking and prep areas where functionality must take priority over pure decoration, and “display walls” visible from adjacent rooms where aesthetics can dominate.
Consider these critical measurements before purchasing anything:
– Height from countertops to bottom of upper cabinets (typically 18 inches)
– Total vertical space available on each wall section
– Distance between windows, doors, and other interruptions
– Proximity to heat sources like stovetops and ovens
Wall scale directly impacts your choices: oversized decor overwhelms small spaces while tiny pieces disappear on large walls. For kitchens under 150 square feet, limit wall decor to one or two focal points; larger kitchens can support multiple decorative zones. Sketch your wall dimensions on paper and cut out paper templates of potential decor items to visualize placement before making purchases or drilling holes.
Select Kitchen-Safe Artwork That Won’t Fade from Heat and Steam
Kitchen environments expose artwork to conditions other rooms don’t—heat, humidity, and grease that can damage or discolor pieces over time. When choosing how to decorate kitchen walls with art, prioritize framed pieces with glass protection that can be easily wiped clean. Avoid delicate watercolors, pastels, or unframed canvas that absorb cooking odors and become difficult to maintain.
For lasting appeal, choose these kitchen-appropriate art styles:
– Botanical prints of herbs and vegetables that connect to kitchen activities
– Vintage food advertisements with nostalgic charm
– Black and white photography that won’t fade from light exposure
– Ceramic or metal wall art that withstands humidity better than paper
Create visual interest with a small gallery wall over your dining area using uniform frames in matching finishes. Arrange three to five pieces in a cohesive grid pattern, keeping the outer edges aligned for professional results. Leave 2-3 inches between frames and position the center of the arrangement at eye level (approximately 57-60 inches from the floor). This approach adds personality without overwhelming your kitchen’s functionality.
Strategic Mirror Placement to Double Your Kitchen’s Visual Space

Mirrors offer unique dual benefits for kitchen walls: they enhance aesthetics while solving common spatial problems. Unlike artwork, mirrors actively improve your kitchen by reflecting light and creating visual depth—critical in windowless or narrow kitchens where space feels constrained. The psychological impact of a brighter, more open kitchen encourages gathering and makes cooking more enjoyable.
For maximum impact, position mirrors:
– Opposite windows to capture and amplify natural light
– Above your main work area (sink or prep zone) for functional viewing
– On narrow walls to create the illusion of expanded width
– In corners to reflect multiple angles of the room
Select frame styles that complement your kitchen’s design aesthetic: sleek metal frames for contemporary spaces, reclaimed wood for farmhouse kitchens, or ornate gilded frames for traditional designs. Round mirrors introduce organic curves that balance kitchen geometry, while rectangular mirrors create clean lines that match cabinetry. Avoid placing mirrors directly above stovetops where heat exposure could damage backing materials.
Install Floating Shelves for Display and Daily Function
:max_bytes(150000):strip_icc()/calimiahomeopenshelving-f3c999b049d94064ae7d29477b505288.jpeg)
Wall shelves solve the universal kitchen challenge of limited storage while adding visual interest—perfect for knowing how to decorate kitchen walls with purpose. Unlike upper cabinets that create visual weight, open shelves make small kitchens feel more spacious while keeping frequently used items accessible. The key is strategic placement: install shelves away from cooking zones where grease buildup would require constant cleaning.
For practical yet beautiful results:
– Position shelves 12-18 inches above countertops for easy access
– Leave 15-18 inches of vertical space between shelves
– Extend shelves no more than 12 inches from the wall to prevent obstruction
– Use sturdy brackets that support at least 50 pounds per linear foot
Style shelves with purpose by grouping items both beautiful and functional:
– Display your three favorite cookbooks standing upright
– Rotate fresh herbs in small pots for cooking convenience
– Showcase colorful dishware you actually use regularly
– Add a small vase with fresh flowers for organic warmth
Avoid overcrowding—leave 30-40% of shelf space empty for visual breathing room. In compact kitchens, limit shelves to one wall section to prevent visual clutter. For rental-friendly installations, consider removable adhesive shelves that won’t damage walls when removed.
Mount Magnetic Knife Strips for Professional Kitchen Function
Magnetic knife storage solves multiple kitchen wall decoration challenges simultaneously: it keeps essential tools accessible, frees drawer space, and adds professional kitchen appeal. Unlike drawer storage where knives get jumbled, wall-mounted strips keep blades organized, visible, and safe while contributing to your kitchen’s aesthetic.
For optimal placement and safety:
– Install strips on a wall section at least 4 feet from your stove
– Position at eye level (48-54 inches from floor) for easy viewing
– Ensure 18-24 inches of clearance above the strip for safe access
– Choose wood or metal strips that complement your countertop material
Magnetic strips work best with high-carbon steel knives (most quality kitchen knives). Test your knives with a refrigerator magnet first—those that stick strongly will work well on wall strips. Arrange knives by size with longest blades on the left, creating a visually pleasing gradient. Add space between knives for safe handling—never cram blades together. This functional decor solution keeps your most used tools within arm’s reach while adding industrial-chic appeal.
Create a Chalkboard Message Center for Family Communication
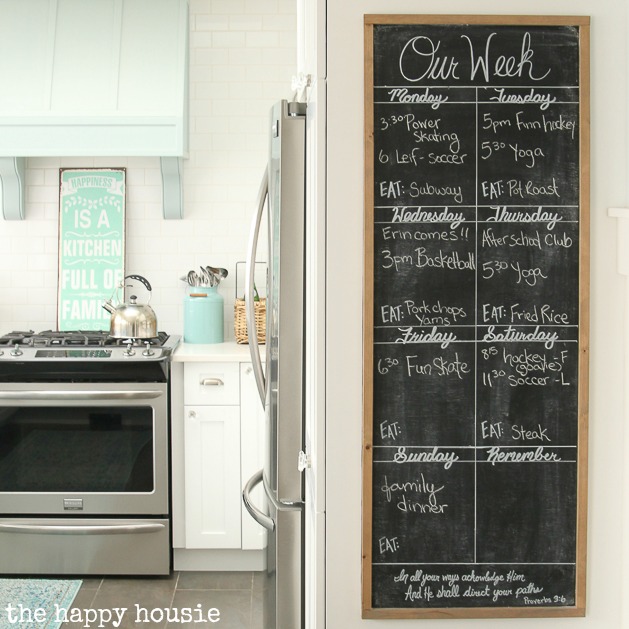
Transform a blank kitchen wall section into a practical communication hub with a chalkboard or marker board panel. This solution addresses the universal kitchen challenge of coordinating family schedules while adding distinctive character. Unlike digital solutions that get ignored, physical message centers in high-traffic areas ensure important information gets seen.
For maximum utility:
– Position the board where family naturally gathers (near breakfast nook or main entrance)
– Select a size that accommodates weekly menus and shopping lists (minimum 24″x36″)
– Choose framed options that coordinate with your kitchen’s finish (wood, metal, etc.)
– Install at seated eye level (42-48 inches from floor) for comfortable writing
Create zones on your board for different purposes:
– Left section: Weekly meal plan with dinner menu
– Center: Family calendar with color-coded events
– Right: Current shopping list with check-off boxes
– Bottom edge: Daily inspirational quote or family message
Use high-quality chalk markers that won’t ghost on the surface, and keep a dedicated eraser and cleaning spray nearby. This functional wall element becomes the kitchen’s organizational heart while adding vintage charm that digital alternatives can’t match.
Rotate Seasonal Wall Displays Without Remodeling Costs

The beauty of kitchen wall decor is its flexibility—you can refresh your space with seasonal changes without expensive renovations. Unlike permanent features like cabinets or countertops, wall elements can transform with the seasons, keeping your kitchen feeling current and connected to nature’s rhythms.
Implement these low-cost seasonal rotation strategies:
– Spring: Hang botanical prints and fresh herb arrangements
– Summer: Display bright coastal artwork and citrus-themed decor
– Autumn: Feature warm-toned harvest imagery and woven textures
– Winter: Showcase monochromatic photography and metallic accents
Store off-season items in labeled bins under beds or in closets to protect them from dust and damage. Rotate decor during seasonal transitions—make it a family ritual when changing clocks or during holiday preparations. Focus on changing just 2-3 key pieces per season for noticeable impact without overwhelming effort. This approach keeps your kitchen feeling fresh while protecting your investment in quality pieces.
Clean Kitchen Wall Decor Without Damaging Your Investment
Kitchen-specific conditions demand tailored cleaning approaches for wall decor longevity. Unlike living rooms where dusting suffices, kitchen walls face grease, humidity, and cooking residues that require specific maintenance strategies based on material type.
Follow these material-specific cleaning protocols:
– Framed art: Wipe glass with ammonia-free cleaner, avoid spraying directly on frames
– Mirrors: Use vinegar-water solution (1:1) for streak-free shine without chemical fumes
– Wood shelves: Dust weekly, treat with mineral oil monthly to prevent drying
– Textile hangings: Vacuum gently with brush attachment, spot clean only
Schedule cleaning during natural lulls in kitchen activity—early morning or after evening cleanup. Never clean wall decor while cooking to avoid inhaling cleaning fumes mixed with cooking vapors. Place a towel on countertops below decor items to catch drips during cleaning. This maintenance routine preserves your investment while ensuring your kitchen walls continue enhancing both function and beauty.
Balance Color Schemes to Prevent Visual Overload
Kitchen wall decor requires thoughtful color integration with existing elements—cabinetry, countertops, and backsplashes—to avoid visual chaos. The most successful designs use wall decor to enhance rather than compete with your kitchen’s established palette.
Apply these color coordination principles:
– In neutral kitchens: Add 1-2 bold accent colors through art and textiles
– With bold cabinetry: Use wall decor in complementary neutrals for balance
– For patterned backsplashes: Select solid-color decor that picks up one accent hue
– In monochromatic spaces: Introduce texture through woven pieces rather than color
Limit your dominant wall decor colors to three maximum: one neutral base, one primary accent, and one secondary accent. Test color choices by holding potential pieces against your walls at different times of day to see how lighting affects appearance. This strategic approach ensures your how to decorate kitchen walls efforts create harmony rather than visual competition.
Transform Your Kitchen Walls in Under $200
You don’t need a major renovation to create beautiful, functional kitchen walls. Focus your budget on 2-3 high-impact elements that deliver both style and utility. Start with one wall section to test your approach before expanding to the entire kitchen.
Create maximum impact with this budget-friendly plan:
– $50: Quality framed botanical prints (3 pieces)
– $75: Wood magnetic knife strip with installation hardware
– $50: Chalkboard panel with decorative frame
– $25: Removable adhesive shelves for herbs and cookbooks
Install these elements strategically over 2-3 weekends, focusing on one project at a time. This phased approach prevents overwhelm while delivering noticeable transformation. The result? A kitchen that feels personalized, organized, and visually engaging—proving that knowing how to decorate kitchen walls doesn’t require breaking the bank. Your walls will reflect your personality while supporting daily kitchen activities, creating a space that’s as functional as it is beautiful.


