
That empty hole staring back at you from your kitchen sink deck can ruin an otherwise sleek, modern look. Whether you’ve upgraded to a single-handle faucet that doesn’t use all the predrilled holes or you’ve removed a side sprayer that’s seen better days, those unused openings create more than just an aesthetic problem—they become traps for water, soap scum, and food debris that are difficult to clean properly. The good news is that covering these holes is one of the simplest DIY plumbing projects you can tackle, requiring minimal tools and taking less than an hour to complete. This guide reveals every practical solution for concealing those unsightly openings while maintaining a professional, watertight seal that prevents future problems.
Unused sink holes aren’t just eyesores—they create practical issues that many homeowners overlook until problems develop. Water pooling in these openings can seep beneath your sink deck, damaging cabinetry and promoting mold growth over time. Food particles and cleaning residue accumulate in these hard-to-reach spaces, creating stubborn stains and potential odor sources. Most kitchen sinks come predrilled with multiple holes (typically three or four) to accommodate various faucet configurations, but when you install a faucet that uses fewer holes than your sink provides, you’re left with these problematic gaps. Understanding why these holes exist helps you select the right covering method that solves both the visual and functional issues they create.
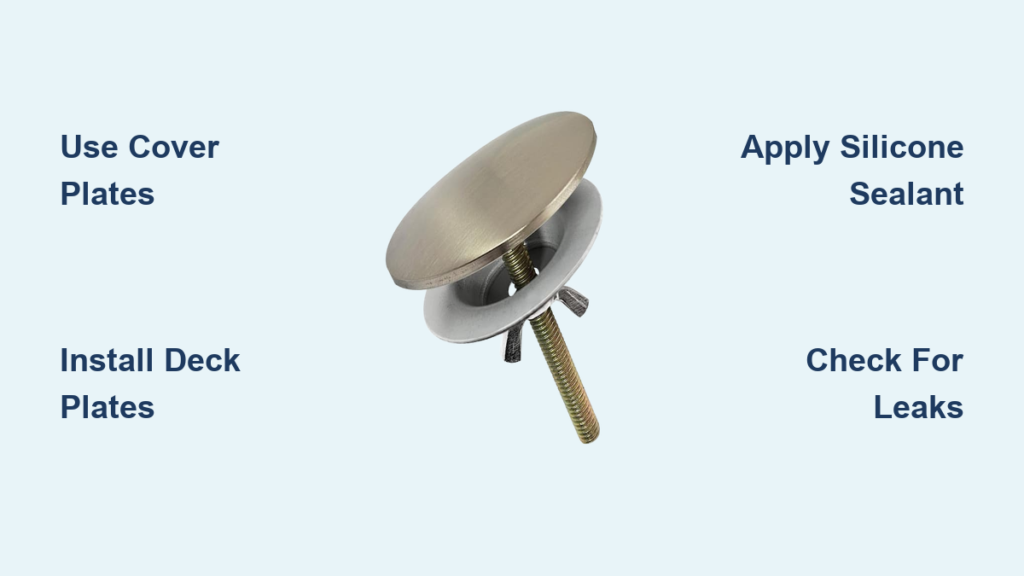
Select Your Covering Method Based on Sink Configuration

Choosing the right approach depends on how many unused holes you have, your sink material, and whether you want a temporary or permanent solution. The wrong choice can lead to water damage, an unprofessional appearance, or wasted money on products that don’t work with your specific sink.
Match Cover Plates to Your Sink’s Hole Pattern
Hole cover plates (also called escutcheons) provide the quickest, most professional-looking solution for individual unused holes. These circular plates typically measure 3 inches in diameter—large enough to cover the standard 1⅜-inch faucet hole while blending seamlessly with your sink deck. Available in finishes including chrome, brushed nickel, oil-rubbed bronze, and matte black, they’re designed to match virtually any faucet hardware. Installation takes minutes: simply place the plate over the hole, secure it with the included mounting hardware from beneath the sink, and wipe away any excess sealant. For sinks with limited access underneath, opt for adhesive-backed plates that require no tools—just peel and stick for an instant fix.
Use Deck Plates for Multiple Hole Coverage
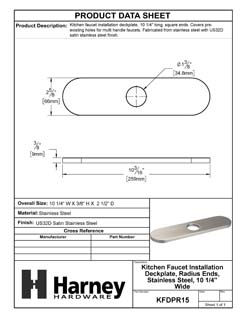
When you need to conceal three or four holes while accommodating a single-hole faucet, deck plates create a unified, professional appearance that individual cover plates can’t match. These rectangular plates (typically 6-10 inches long) span the entire faucet mounting area, providing a solid base that covers all unused holes while supporting your faucet installation. Measure the distance between your sink’s predrilled holes before purchasing—most deck plates accommodate standard 4-inch, 8-inch, or 16-inch faucet spreads. The installation process integrates with your faucet setup: apply sealant to the plate’s underside, position it over the holes, then secure both the plate and faucet simultaneously with shared mounting hardware. This approach transforms what could be a patchwork appearance into a clean, intentional design feature.
Try Silicone Plugs for Temporary Solutions
Silicone hole plugs offer an affordable, tool-free option when you need to cover holes quickly or want to test how your sink looks before committing to permanent fixtures. These flexible rubber plugs simply press into the holes, creating a watertight seal that prevents debris accumulation. While not as visually appealing as metal cover plates, they’re ideal for holes at the back of the sink deck where they’ll be partially concealed by your faucet base. Installation requires no tools—just press each plug firmly into place until seated. The biggest advantage? You can easily remove them later if you decide to install a soap dispenser or other accessory. Keep in mind that cheaper silicone plugs may discolor over time when exposed to harsh cleaners.
Gather Materials Before Starting Your Project
Assembling all necessary tools and materials before beginning prevents mid-project delays and ensures professional results. Most covering methods require similar basic supplies, but specific needs vary based on your chosen solution.
Select the Right Sealant for Your Sink Material
Choosing between plumber’s putty and silicone sealant depends on your sink material and how permanent you want the installation to be. Traditional plumber’s putty works well for most porcelain, stainless steel, and solid surface sinks but can dry out and crack over time. Modern silicone sealants create more durable, watertight seals but require careful selection—some formulations can damage granite composite or fireclay sinks. For most installations, a kitchen-safe silicone rated for wet environments provides the best balance of durability and ease of use. Apply a thin bead (about ¼ inch wide) around the perimeter of your cover plate or deck plate for optimal sealing without messy squeeze-out.
Verify You Have Proper Tools for Installation
Most hole covering projects require minimal tools: a Phillips-head screwdriver for tightening mounting hardware, an adjustable wrench for reaching beneath the sink, and a flashlight for illuminating tight spaces. If you’re working with an older sink that has corroded hardware, include penetrating oil and needle-nose pliers for removing stubborn parts. For deck plate installations, add a level to ensure your plate sits evenly—any tilt will cause water to pool on one side. Keep a clean microfiber cloth and paper towels nearby for wiping away excess sealant before it cures. Having everything within reach prevents frustration and ensures a smoother installation process.
Prepare Your Sink Surface for Professional Results
Proper preparation prevents common installation problems like uneven plates, water seepage, and premature sealant failure. Taking time to clean and access the work area pays dividends in the final appearance and longevity of your repair.
Clean the Sink Deck Thoroughly Before Installation
Remove all items from your sink surface and clear the cabinet beneath to create adequate workspace. Clean the entire sink deck with a non-abrasive cleaner, paying special attention to areas around the holes you’ll be covering. Use a plastic putty knife to gently scrape away old sealant residue without scratching the sink surface. Rinse thoroughly with clean water and dry completely with a soft cloth—any moisture left on the surface will compromise your new sealant’s adhesion. For stubborn mineral deposits around faucet holes, soak a paper towel in white vinegar, press it against the area for 15 minutes, then scrub gently with a soft brush.
Ensure Proper Access to Sink Underside
Adequate access beneath your sink makes installation significantly easier and more precise. Remove all items from the cabinet, including cleaning supplies and trash cans. Position a small LED work light to illuminate the mounting area—many modern sinks have complex plumbing that creates shadowed areas. If your sink has a garbage disposal mounted beneath, you may need to temporarily disconnect it to access mounting hardware (remember to turn off power at the circuit breaker first). For deep cabinets, place a small stool or kneeling pad inside to maintain a comfortable working position. Proper access prevents rushed installations that lead to misaligned plates or inadequate sealant application.
Install Cover Plates with Professional Precision
With preparation complete, the actual installation process moves quickly. Following these steps ensures your cover plates sit flush, create watertight seals, and maintain a professional appearance.
Apply Sealant Correctly to Prevent Water Damage
Roll a thin rope of plumber’s putty (about ⅛ inch thick) around the entire perimeter of the cover plate’s underside, or apply a continuous bead of silicone sealant approximately ¼ inch from the edge. Avoid applying too much sealant, which creates messy squeeze-out that’s difficult to clean. Some professionals prefer applying sealant directly to the sink surface instead of the plate for better control. Press the plate firmly into position, then check from below to ensure even pressure around the entire circumference. Proper sealant application prevents water from seeping beneath the plate and causing hidden damage to your sink cabinet.
Secure Hardware Without Over-Tightening
Hand-tighten mounting hardware first to avoid cross-threading, then use your screwdriver to secure it firmly—but stop before you feel significant resistance. Over-tightening can crack ceramic sink decks, strip plastic mounting posts, or distort metal plates. For sinks with limited access beneath, use a magnetic screwdriver to hold hardware in place while you position the plate from above. After securing all hardware, press firmly around the plate’s entire perimeter to ensure complete contact with the sink surface and proper sealant distribution. Wipe away any excess sealant immediately with a damp cloth before it cures.
Troubleshoot Common Installation Problems
Even careful installations can encounter issues. Knowing how to address these problems saves time and prevents costly mistakes.
Fix Mismatched Finishes with Strategic Placement
If your cover plate doesn’t perfectly match your faucet finish, position it where lighting minimizes the difference—typically toward the back of the sink where shadows naturally occur. Brushed finishes hide minor color variations better than high-polish surfaces. For significant mismatches, purchase multiple plates from the same manufacturer batch to increase color consistency. Some homeowners intentionally select a complementary (rather than matching) finish for visual interest—like pairing matte black plates with chrome faucets in modern kitchens.
Repair Water Leaks Beneath Cover Plates
Water leaking beneath your cover plate indicates sealant failure that requires immediate attention. Remove the plate, clean both surfaces thoroughly, and allow them to dry completely. Apply fresh silicone sealant in a continuous bead, then reinstall the plate while pressing firmly around the entire perimeter. Allow 24-48 hours for full cure time before exposing the area to regular water use. If leaks persist, check for cracks in the sink deck around the hole that may require professional repair.
Maintain Your Covered Holes for Long-Term Results
Proper maintenance prevents common issues like discoloration, sealant failure, and water damage that can develop over time.
Inspect and Clean Cover Plates Monthly
During your regular sink cleaning, press around the edges of each cover plate to check for movement or gaps that indicate sealant failure. Clean plates with non-abrasive cleaners appropriate for their finish—avoid vinegar-based cleaners on nickel finishes and abrasive pads on matte surfaces. Dry plates thoroughly after cleaning to prevent water spots and mineral buildup around the edges. For stubborn deposits, use a soft toothbrush with baking soda paste rather than harsh chemicals that can damage finishes.
Replace Failed Seals Before Damage Occurs
Most sealants last 3-5 years before showing signs of deterioration. If you notice darkening around plate edges or occasional moisture beneath the sink, replace the seal immediately. Remove the cover plate, scrape away old sealant completely, clean the area with isopropyl alcohol, and apply fresh silicone before reinstalling. This simple maintenance task prevents costly water damage to cabinetry and countertops that often goes unnoticed until significant harm has occurred.
Covering extra holes in your kitchen sink transforms an eyesore into a polished design element while preventing practical problems like water damage and mold growth. By selecting the right covering method for your sink configuration, preparing surfaces properly, and applying sealant correctly, you’ll achieve professional results that last for years. Remember that proper maintenance—not just installation—ensures your covered holes remain watertight and attractive. When in doubt about complex installations or specialty sink materials, consult a professional plumber whose expertise costs far less than repairing water damage from an improper DIY job. With these techniques, that once-problematic hole becomes just another seamless part of your beautiful kitchen.


