

Your stainless steel kitchen hood battles grease, smoke, and cooking odors daily, but without proper care, that sleek surface quickly transforms into a sticky, streaky eyesore that compromises both your kitchen’s appearance and ventilation efficiency. When grease builds up on your stainless steel hood, not only does it create a fire hazard, but it also forces your ventilation system to work harder while trapping odors that permeate your entire home. Learning how to clean stainless steel kitchen hood surfaces properly ensures years of reliable performance without damaging that professional-grade finish you love.
Most homeowners make the critical mistake of treating stainless steel like ordinary metal or glass, using the wrong cleaners and techniques that actually accelerate damage rather than prevent it. This comprehensive guide reveals the exact methods professional kitchen technicians use to maintain stainless steel hoods—methods that preserve the finish while eliminating even the toughest grease buildup. You’ll discover why grain direction matters more than you think, which “harmless” household cleaners are secretly destroying your investment, and how to establish a cleaning routine that takes just minutes yet prevents hours of intensive scrubbing later.
Identify Your Stainless Steel Grain Direction First
Before touching your kitchen hood with any cleaner, spend 30 seconds identifying the grain direction under good lighting. Stainless steel surfaces feature microscopic linear patterns running horizontally, vertically, or diagonally—never circular. Cleaning against this grain creates permanent micro-scratches that catch grease faster and create an uneven, dull appearance that ruins the professional look.
Run your fingertip gently across the surface to feel the direction of the grain, which typically follows the longest edge of your hood but varies by manufacturer. Once confirmed, commit to all wiping, scrubbing, and polishing motions moving exclusively in this direction. This simple step prevents 90% of visible damage during cleaning and makes grease removal significantly more effective since you’re working with rather than against the metal’s structure.
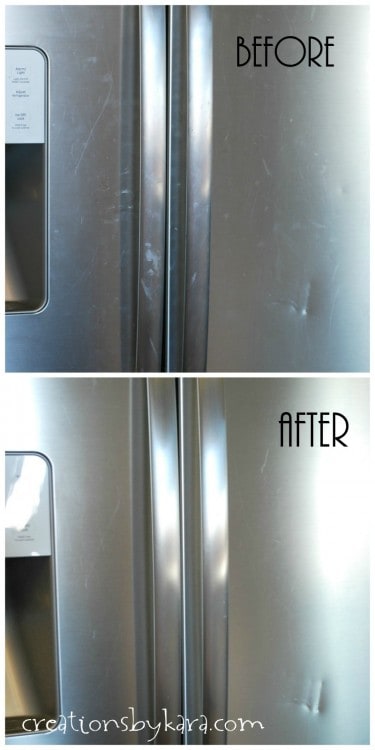
Wash Stainless Steel Surface With Proper Technique
Begin cleaning with a simple solution of mild dish soap and warm water—no harsh chemicals needed for routine maintenance. Dip a soft microfiber cloth into the solution and wring it thoroughly until damp (not dripping). Wipe the entire surface using long, smooth strokes following the grain direction you identified, applying gentle pressure that lets the soap lift contaminants without scratching.
After washing, immediately rinse your cloth with clean water and make a second pass to remove all soap residue that would otherwise dry into spots. Finish by drying completely with a separate soft cloth, as water left on stainless steel evaporates and leaves behind mineral deposits that create cloudy streaks. For weekly maintenance, this process should take no more than five minutes but prevents the heavy buildup requiring intensive cleaning later.
Remove Stubborn Grease With Targeted Degreasing
When soap and water fail against baked-on grease, reach for a stainless steel-specific degreaser rather than generic cleaners. These specialized formulas break down stubborn oils without harming the protective oxide layer that prevents corrosion. Spray the degreaser directly onto problem areas and let it sit for 30-60 seconds—the exact time specified on the product label—to penetrate the grease without risking surface damage.
Wipe with a soft cloth following the grain direction, applying moderate pressure on stubborn spots. For particularly tough buildup, use a soft-bristled nylon brush dipped in degreaser to gently agitate the area without scratching. Never use steel wool, abrasive pads, or rough sponges, as these cause permanent damage that requires professional refinishing to repair. Work in small sections and frequently rinse your cloth to avoid redistributing grease across the surface.
Condition Stainless Steel After Cleaning
After cleaning, apply a dedicated stainless steel conditioner to protect the surface and restore its professional shine. These conditioners contain oils that replenish the protective layer and create a barrier against future grease and fingerprints. Dispense a dime-sized amount onto a soft cloth and spread evenly across the surface using long, grain-following strokes.
Allow the conditioner to sit for 1-2 minutes as directed, then remove excess with a clean paper towel. The surface should feel smooth with a slight slickness when properly applied. Critical warning: Never apply conditioner to logos, control panels, or black stainless steel components, as these areas often have specialized coatings that react poorly to conditioning products. Check your owner’s manual for model-specific guidance on these areas.
Clean Black Stainless Steel Components Safely

Black stainless steel requires entirely different care than traditional finishes due to its specialized coating. For routine cleaning, use only mild soap and water with a soft cloth—never apply vinegar, ammonia, or acidic cleaners that strip the dark finish. The darker surface shows every scratch and abrasion more prominently, making gentle technique essential.
For stubborn spots that resist soap and water, use a cleaner specifically formulated for black stainless steel rather than risking damage with stronger products. Never use abrasive pads, steel wool, or even paper towels on these surfaces, as microscopic scratches become highly visible against the dark background. Pay extra attention to edges and corners where the coating is most vulnerable to wear.
Avoid These Damaging Cleaning Products
Certain common household cleaners cause irreversible damage to stainless steel surfaces. Chlorine-based products like bleach cause pitting and corrosion that permanently compromises the metal’s protective layer. Abrasive pads and stiff-bristled brushes leave visible scratches that accelerate future grease buildup. Generic glass cleaners often contain ammonia that dulls the finish and leaves streaks.
Paper towels seem harmless but can scratch stainless steel when used with pressure or on softer finishes. Instead, use microfiber or cotton cloths specifically designed for stainless steel care. When in doubt about a product’s safety, test it on a small, inconspicuous area first and wait 24 hours to check for adverse reactions before full application.
Clean Grease Filters Monthly Without Damage
Your hood’s grease filters trap airborne fats before they enter ductwork, but clogged filters reduce ventilation efficiency and create fire hazards. Before removing filters, consult your owner’s manual for the specific release mechanism—most slide out on rails or unlatch with a simple mechanism, but forcing them can damage mounting hardware.
Soak filters in hot, soapy water for 10 minutes to loosen grease, adding a kitchen-specific degreaser for heavy buildup. Use a soft-bristled nylon brush to scrub both sides gently, focusing on visibly greasy areas. Never use steel wool or abrasive pads that damage the filter mesh and reduce effectiveness. This monthly maintenance takes just 15 minutes but dramatically extends your hood’s lifespan and performance.
Ensure Complete Filter Drying Before Reinstallation
After cleaning, rinse filters thoroughly under running water until no soap residue remains visible when held against light. Inspect carefully for any trapped grease particles, repeating the cleaning process if necessary. Critical step: Allow filters to dry completely for at least 2 hours before reinstalling—wet filters promote bacterial growth and can cause rust on metal components.
Pat filters dry with a clean towel first, then air-dry on a rack to ensure all moisture evaporates from crevices. Reinstall by sliding or latching according to your model’s design, ensuring proper seating to prevent vibration during operation. A properly maintained filter should last 6-12 months before requiring replacement.
Replace Carbon Filters Every 3-4 Months
Charcoal filters in recirculating hoods capture odors and smoke but become saturated over time. Unlike grease filters, these cannot be cleaned effectively and must be replaced every three to four months—more frequently if you cook with strong spices or fry often. A saturated carbon filter releases trapped odors back into your kitchen rather than capturing them.
Always purchase exact replacement models specified in your owner’s manual from authorized retailers. Using incorrect filters creates gaps that reduce effectiveness and may void warranty coverage. Replacement takes less than 5 minutes but ensures your hood continues removing cooking odors efficiently.
Establish a Stainless Steel Hood Maintenance Schedule
Prevent intensive cleaning sessions with a simple maintenance routine: Wipe exterior surfaces weekly with soapy water (5 minutes), clean grease filters monthly (15 minutes), and replace carbon filters quarterly (5 minutes). This consistent approach prevents the stubborn buildup that requires hours of intensive scrubbing and protects your investment long-term.
Mark these tasks on your calendar with reminders to establish the habit. The minor time investment pays off through improved ventilation performance, enhanced kitchen safety, and maintaining that professional appearance you love. A well-maintained stainless steel hood can last decades with proper care—don’t let improper cleaning techniques shorten its lifespan unnecessarily.


