

Your kitchen vent fan hums weakly as you fry onions, failing to clear the smoke gathering near the ceiling. Grease splatters coat the cabinet above, and a lingering burnt smell ruins your dining experience. This frustrating scenario affects 90% of home cooks who neglect their vent fan maintenance—yet most don’t realize how to clean kitchen vent fan systems properly. Built-up grease reduces airflow by up to 70%, creates fire hazards, and forces your fan to work harder, shortening its lifespan. In this guide, you’ll discover a step-by-step method to restore peak performance using common household items. You’ll learn to safely disassemble your unit, eliminate stubborn grease without damaging components, and establish a maintenance routine that keeps your kitchen fresh and safe.
Ignoring vent fan cleaning turns a simple 30-minute task into a major hazard. The National Fire Protection Association reports cooking equipment causes 49% of home fires, with grease buildup as a primary accelerant. Don’t wait for smoke alarms to scream—proactive cleaning protects your home and health. Whether you have an under-cabinet hood, wall-mounted unit, or island vent, these techniques apply universally. Let’s transform your struggling fan into a powerful kitchen ally.
Why Grease Buildup Ruins Your Vent Fan Performance
Grease transforms from invisible vapor into a thick, sticky coating every time you sear meat or deep-fry. As this residue accumulates on filters and blades, it restricts airflow like plaque in arteries. You’ll notice warning signs: reduced suction during cooking, unusual rattling noises, or visible grease dripping onto countertops. Left unchecked, this creates a dangerous cycle—restricted airflow forces the motor to overheat, increasing fire risk while failing to remove smoke and odors. Most homeowners underestimate how quickly buildup occurs; just three months of regular cooking can coat internal components with a quarter-inch of grease. This isn’t just an efficiency issue—it’s a critical safety hazard requiring immediate attention.
How Cooking Methods Accelerate Grease Deposition
Different cooking techniques deposit grease at varying rates. High-heat methods like stir-frying and grilling release 5x more airborne grease particles than boiling or steaming. When oil reaches its smoke point (typically 350-450°F), it vaporizes into microscopic droplets that bypass mesh filters. These particles then condense on cooler fan blades and housing surfaces. Professional chefs recommend running your vent fan 15 minutes before and after high-heat cooking to capture residual vapors—but even this won’t prevent long-term buildup.
Identifying Critical Danger Zones in Your Unit
Focus your inspection on three high-risk areas:
– Filter surfaces: Look for translucent, sticky residue that turns brown when touched
– Blade edges: Feel for gritty buildup that catches your fingernail
– Housing corners: Check for pooled grease near motor compartments
If you spot any of these, cleaning is urgent. Ignoring them risks motor burnout or electrical shorts—problems far costlier than routine maintenance.
Safety Steps Before Cleaning Your Vent Fan
Never skip this critical preparation phase—working near electrical components and grease demands strict precautions. Start by cutting power at your home’s circuit breaker, not just the fan switch. Grease conducts electricity, creating shock risks even when the unit appears off. Next, lay drop cloths beneath the fan; expect dripping grease and cleaning solution. Protect your skin with nitrile gloves (latex melts in degreasers) and safety goggles—grease splatters can cause chemical burns when mixed with cleaners. Most importantly, confirm your fan’s weight-bearing capacity; overloaded arms or broken brackets cause 30% of DIY repair injuries. If your unit feels unstable during disassembly, stop immediately and consult a professional.
Essential Power Safety Checks
Before touching any components:
1. Test the wall switch with a non-contact voltage tester
2. Verify zero power at the fan’s wiring harness
3. Disconnect any plug-in connectors behind access panels
Many homeowners assume turning off the switch is sufficient, but residual current in capacitor systems can deliver painful shocks. This extra verification takes 60 seconds but prevents serious injury.
Your Complete Kitchen Vent Fan Cleaning Supply Checklist
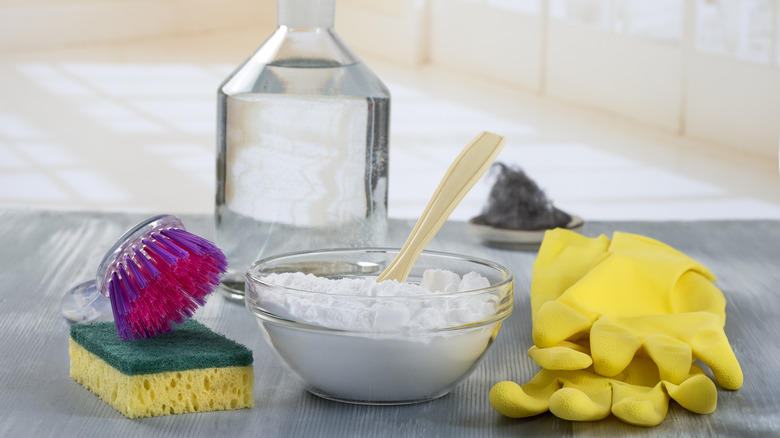
Forget expensive specialty kits—effective cleaning requires just five household items. White vinegar dissolves light grease through natural acidity, while baking soda provides gentle abrasion for baked-on residue. For heavy buildup, dish soap cuts through oil without damaging metal finishes. You’ll also need microfiber cloths (paper towels leave lint in crevices) and a soft-bristle brush (toothbrushes work perfectly). Avoid these dangerous alternatives:
– ❌ Bleach (corrodes aluminum filters)
– ❌ Oven cleaners (damage motor seals)
– ❌ Steel wool (scratches non-stick coatings)
For stainless steel housings, add olive oil on a cloth to restore shine after cleaning. Keep all supplies within arm’s reach before starting—you won’t want to hunt for tools mid-process with greasy hands.
Budget-Friendly Cleaning Solutions Compared
| Solution | Best For | Soak Time | Caution |
|---|---|---|---|
| Vinegar + Water (1:1) | Light grease | 20-30 min | Avoid on copper finishes |
| Baking Soda Paste | Burnt-on residue | 15 min scrub | Rinse thoroughly |
| Dish Soap + Hot Water | All-purpose | 10 min | Use dawn® for toughest jobs |
Removing the Filter: Avoiding Common Mistakes
Different filter types require distinct removal techniques—forcing the wrong method cracks housings. Mesh filters (common in budget models) slide out horizontally after releasing spring clips. Baffle filters (stainless steel louvers) lift straight up once you unhook end caps. Charcoal filters (in ductless models) pull forward from access panels. If your filter resists movement, never yank it—90% of broken tabs occur during impatient removal. Instead, shine a flashlight along the edges to spot hidden screws or clips. For stubborn filters, apply gentle wiggling pressure while lifting upward. If it still won’t budge, consult your manual online; manufacturers like Broan or Zephyr publish exploded diagrams for every model.
How to Handle Delicate Filter Types
Aluminum mesh filters bend easily when wet—always support them with both hands during removal. Carbon filters disintegrate if soaked, so clean these with a vacuum brush attachment only. Never submerge electrical components like touch controls or LED lights. If your unit has a grease cup, empty it first using newspaper to absorb spills—this prevents messes during disassembly.
Deep Cleaning Greasy Filters in 3 Simple Methods
The cleaning method depends entirely on buildup severity. For light residue (thin, yellow film), soak filters in hot vinegar-water for 20 minutes, then scrub with a soft brush. Moderate buildup (thick, sticky grease) requires baking soda paste: make a thick slurry, coat filters, wait 15 minutes, then scrub in circular motions. Tackle severe clogs (hardened, dark layers) with a degreaser soak: fill a sink with hot water, ¼ cup dish soap, and ½ cup ammonia-free degreaser. Submerge filters for 30 minutes—never mix ammonia and bleach—then use a toothbrush on crevices. Rinse under hot running water until water runs clear; any remaining film reduces airflow. Always air-dry filters completely before reinstallation—damp filters trap new grease instantly.
Pro Tip for Stainless Steel Filters
Restore shine to baffle filters by rubbing with a vinegar-dampened cloth, then buffing with olive oil. This fills microscopic scratches where grease hides. Never put filters in the dishwasher—high heat warps aluminum and strips protective coatings.
Scrubbing Fan Blades and Interior Housing Without Damage
With filters removed, tackle the hidden danger zones. First, vacuum loose debris from housing using a brush attachment—this prevents grease from spreading during wiping. Dip a microfiber cloth in vinegar solution and wipe housing walls, focusing on corners where grease pools. For blades, never use abrasive pads; instead, wrap a cloth around a chopstick to reach between blades. Rotate the fan manually while wiping to access all surfaces. Stubborn spots respond to baking soda paste applied with a cotton swab. Pay special attention to the motor housing perimeter—grease here causes overheating. Wipe downward toward the grease tray to avoid pushing residue deeper. Finish with a dry cloth to prevent water spots on stainless steel.
Critical Areas You’re Probably Missing
Homeowners consistently overlook these spots:
– Behind mounting brackets: Grease traps cause cabinet staining
– Vent collar connections: Buildup restricts duct airflow
– Light diffusers: Grease reduces illumination by 40%
Use a flashlight to inspect these zones. If you spot hardened grease in duct openings, stop—this requires professional duct cleaning to avoid fire risks.
Reassembling and Testing Your Cleaned Vent Fan
Reassembly demands as much care as disassembly. Start by ensuring all components are bone-dry—moisture causes immediate grease re-adhesion. Align filters precisely with housing guides; misaligned filters rattle and reduce efficiency. For baffle filters, hook the top edge first before lowering the bottom. After securing filters, restore power at the circuit breaker. Test in stages: run on low speed for 2 minutes to check for unusual noises, then high speed for 5 minutes while holding a tissue near the intake—it should pull firmly against the grill. Verify light operation and control responsiveness. If suction feels weak, double-check filter alignment or inspect duct connections for obstructions.
Establishing Your Maintenance Schedule
Prevent future buildup with these habits:
– Wipe housing weekly with vinegar spray
– Clean filters monthly for light cooking
– Deep-clean every 3 months for regular frying/grilling
– Replace charcoal filters every 6 months
Set phone reminders for these tasks—they take less than 10 minutes but extend your fan’s life by years.
Final Note: A clean kitchen vent fan operates 40% more efficiently, reduces fire risks, and keeps your air fresh. By dedicating 30 minutes quarterly to this process, you’ll avoid costly repairs and dangerous hazards. For persistent issues after cleaning, consult a professional—some internal components require specialized tools. Bookmark this guide for your next maintenance session, and share it with fellow home cooks who battle greasy kitchens. Your safety and culinary enjoyment depend on this simple, life-saving routine.


