
Kitchen rubber floor mats provide essential comfort and safety for anyone spending significant time on their feet while cooking or working in food preparation areas. These durable mats reduce fatigue during long periods of standing and offer critical slip resistance in environments prone to spills and moisture. However, the very conditions that make rubber mats so valuable—constant exposure to food particles, grease, water, and heavy foot traffic—also cause them to collect dirt, stains, and bacteria at an alarming rate. Without proper cleaning routines, your kitchen rubber floor mats can transform from safety assets into hazardous slip risks, bacteria breeding grounds, and sources of persistent unpleasant odors that permeate your entire cooking space.
Knowing the correct methods for cleaning kitchen rubber floor mats preserves their functionality, extends their service life, and maintains a hygienic food preparation environment. Whether you’re managing a busy restaurant kitchen or simply using mats in your home cooking area, implementing the right cleaning techniques saves you money on replacements and protects your kitchen’s safety standards. This guide delivers practical, step-by-step instructions for maintaining your rubber floor mats, from quick daily upkeep to thorough deep cleaning procedures that eliminate stubborn stains and odors.
Why Neglected Mats Become Safety Hazards
Kitchen rubber floor mats that don’t receive regular cleaning quickly develop serious safety issues beyond mere appearance concerns. The textured surface designed to prevent slips actually traps food debris, grease, and moisture within its grooves and crevices. As these contaminants accumulate, they create a slippery film that counteracts the mat’s intended safety function—turning a protective feature into a significant fall risk.
Bacterial proliferation represents an even more dangerous consequence of poorly maintained mats. Kitchen environments provide the perfect breeding ground for harmful microorganisms: warmth, humidity, and organic food particles combine to create ideal conditions for bacteria, mold, and mildew growth. These pathogens thrive in the porous rubber material, potentially contaminating food preparation surfaces and ingredients. In commercial settings, this poses serious health code violation risks and potential foodborne illness outbreaks that can damage reputations and livelihoods.
The abrasive action of embedded dirt particles also accelerates wear on your mats, causing premature deterioration of the anti-slip surface texture. What began as a safety investment becomes a liability when the mat’s protective features degrade due to neglect. Regular cleaning isn’t just about appearances—it’s a critical component of kitchen safety protocols that protects both workers and customers.
How Dirt Accumulation Compromises Mat Performance
When dirt and grease build up on rubber floor mats, they fill the textured surface patterns designed to provide traction. This accumulation creates a smooth, slippery layer that significantly reduces the mat’s effectiveness at preventing slips and falls. The problem worsens over time as more debris becomes embedded in the rubber’s porous structure.
What Bacteria Growth Means for Food Safety
Studies show kitchen floor mats can harbor dangerous pathogens like E. coli and Salmonella when not properly maintained. These bacteria can transfer to shoes, then to food preparation surfaces, creating cross-contamination risks. In commercial kitchens, health inspectors routinely check mat cleanliness as part of food safety compliance.
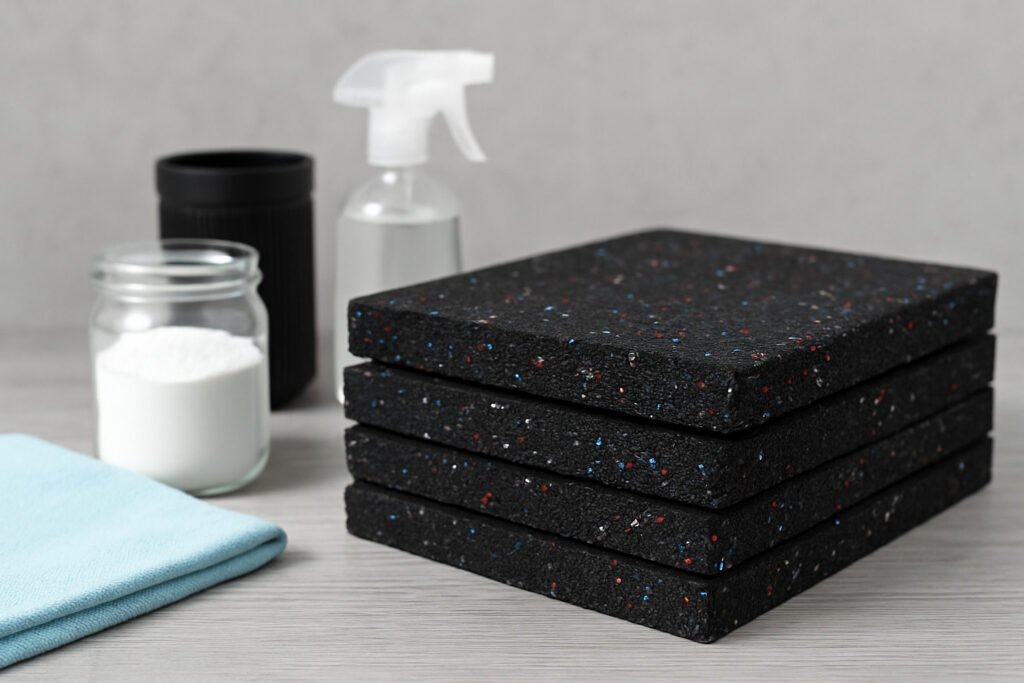
Essential Cleaning Supplies Checklist

Before attempting to clean your kitchen rubber floor mats, gather all necessary supplies to complete the job efficiently without interruptions. Having everything ready ensures you can address the entire cleaning process thoroughly in one session.
Must-have cleaning supplies include:
– Stiff-bristled brush for dislodging embedded debris
– Mild dish soap or pH-neutral rubber cleaner
– White vinegar for natural disinfection
– Baking soda for odor removal
– Bucket of warm water
– Garden hose or pressure washer (for outdoor rinsing)
– Microfiber cloths for drying
– Rubber-safe disinfectant
– Shop vacuum for water extraction
For commercial kitchens or heavily soiled mats, consider industrial degreasers specifically formulated for rubber surfaces. Always verify chemical compatibility with your mat material, as harsh cleaners can cause rubber degradation, discoloration, or loss of anti-slip properties.
Daily Maintenance That Prevents Deep Cleaning Nightmares
Investing just five minutes daily in mat maintenance prevents the heavy soil buildup that makes deep cleaning difficult and time-consuming. This simple routine preserves your mats’ functionality while reducing long-term cleaning efforts.
Begin each cleaning session by removing large debris like food scraps and packaging fragments using a stiff broom or handheld vacuum. Pay special attention to edges, corners, and drainage holes where particles accumulate. For mats in high-spill areas, follow with a quick damp mop using mild soap solution to remove surface contaminants before they dry into stubborn deposits.
Ensure mats dry completely before resuming normal use, as damp rubber surfaces become extremely slippery. This daily attention maintains optimal slip resistance while significantly reducing bacterial growth between deep cleaning sessions.
How to Quickly Remove Fresh Spills
Address spills immediately by blotting excess liquid with absorbent paper towels. For sticky substances like syrup or oils, sprinkle baking soda to absorb the spill before sweeping. Never allow liquids to pool on or beneath mats, as this creates ideal conditions for bacterial growth and mat deterioration.
Why Daily Brushing Extends Mat Life
Regular brushing prevents dirt from embedding deep into the rubber’s porous structure. The mechanical action of bristles dislodges particles while maintaining the mat’s textured surface that provides slip resistance. Mats receiving daily brushing show significantly less wear and retain their anti-slip properties longer than neglected counterparts.
Deep Cleaning Process for Stubborn Kitchen Grime
Weekly deep cleaning removes the accumulated grease, food particles, and bacteria that daily maintenance cannot address. This thorough procedure should occur at least once weekly in home kitchens and multiple times daily in commercial food service environments.
Remove mats from their installation location to access all surfaces, including the underside where debris collects. Take mats outdoors if possible, or to a utility area with drainage. Apply your cleaning solution generously across the entire surface, then use your stiff brush to scrub vigorously in circular motions, paying special attention to textured areas and drainage channels.
Rinse completely with clean water to remove all soap residue, which can attract future dirt and create slippery films. Allow mats to air dry completely before reinstalling—never place damp mats back in service, as trapped moisture promotes bacterial growth and creates slip hazards.
Removing Grease Buildup Without Damaging Rubber
Grease accumulation represents one of the most challenging issues for kitchen rubber mats. Create a paste of baking soda and water, apply to greasy areas, and let sit for 10-15 minutes before scrubbing. For severe cases, use a rubber-safe degreaser following manufacturer instructions. Avoid petroleum-based cleaners that can break down rubber compounds over time.
How to Clean Mats Indoors Without Making a Mess
When outdoor cleaning isn’t possible, lay mats flat in a utility sink or bathtub. Use a handheld shower attachment for rinsing and a shop vacuum to extract excess water. Place old towels around the work area to contain splashes, and ensure proper ventilation during cleaning.
Eliminating Persistent Odors from Kitchen Mats
Kitchen rubber mats frequently develop stubborn odors from trapped food particles, bacterial growth, and chemical reactions within the rubber material. Effective odor removal requires both cleaning to eliminate the source and treatment to neutralize existing smells.
After thorough cleaning and complete drying, apply a generous layer of baking soda across the mat’s surface. Allow it to sit for several hours or overnight to absorb deep-seated odors. For stronger smells, create a baking soda paste with water, apply it to problem areas, and let dry completely before brushing off.
For commercial kitchens or severe odor issues, enzymatic cleaners provide superior results by introducing beneficial bacteria that consume the organic matter causing smells. These products eliminate odors at their source rather than merely masking them with fragrances.
Why Vinegar Works Better Than Air Fresheners
White vinegar’s mild acidity kills odor-causing bacteria while neutralizing alkaline compounds responsible for many kitchen smells. Mix equal parts vinegar and water in a spray bottle, mist the mat thoroughly, and allow to air dry. The vinegar smell dissipates completely as it dries, leaving behind a neutral-smelling mat.
Proper Drying Techniques to Prevent Mold Growth

Inadequate drying causes more mat problems than any other factor in the cleaning process. Returning even slightly damp mats to service creates conditions perfect for mold, mildew, and bacterial growth that shorten mat lifespan and create health hazards.
Never reinstall mats until they’re completely dry throughout their entire thickness. Prop mats upright or hang them to maximize airflow on both sides. In humid environments, use fans to accelerate drying. Commercial kitchens often maintain multiple mats in rotation to ensure adequate drying time between uses.
Sunlight helps speed drying but may cause fading on some rubber formulations—consider this if appearance matters for your application. For quick turnaround in commercial settings, use shop vacuums to extract excess water before air drying.
How to Tell If Your Mat Is Truly Dry
Press your palm firmly against various areas of the mat, including textured sections and drainage holes. If any coolness or moisture transfers to your hand, the mat needs more drying time. For thick commercial mats, check the center by lifting and feeling the underside—moisture often lingers there longest.
When to Replace Worn Kitchen Rubber Mats
Even with proper care, rubber floor mats eventually reach the end of their useful life. Recognizing replacement indicators ensures you maintain adequate safety protection.
Look for these critical warning signs:
– Smooth, worn areas where anti-slip texture has disappeared
– Permanent deformation like curling edges or waves
– Cracks, tears, or holes in the rubber surface
– Persistent odors that won’t dissipate after thorough cleaning
– Discoloration indicating chemical breakdown
Worn mats become safety hazards rather than protective equipment. Don’t wait until accidents happen—replace mats showing significant wear to maintain proper kitchen safety standards.
Conclusion
Proper cleaning of kitchen rubber floor mats represents a small investment of time that delivers significant returns in safety, hygiene, and cost savings. By implementing consistent daily maintenance and weekly deep cleaning routines, you’ll extend your mats’ service life while maintaining their critical safety functions. Remember that complete drying is just as important as the cleaning itself—trapped moisture causes more mat problems than inadequate cleaning. Whether in a home kitchen or commercial food service environment, these techniques ensure your rubber floor mats continue providing the comfort, safety, and hygiene protection they were designed to deliver. With proper care, your kitchen rubber floor mats will serve you reliably for years rather than months, making them a worthwhile investment in your kitchen’s safety infrastructure.


