
Nothing ruins the joy of cooking quite like facing a mountain of grimy pots and pans afterward. That stainless steel pot with stubborn burnt-on tomato sauce, your once-pristine non-stick skillet now marred with scratches, or your cast iron Dutch oven with stubborn food residue clinging to the sides—all these common kitchen nightmares can be solved with the right cleaning techniques. Learning how to clean kitchen pots and pans properly not only saves you time and frustration but also extends the life of your valuable cookware. This guide delivers proven methods for every material type, from everyday stainless steel to delicate copper, so you can tackle even the toughest cleaning challenges with confidence.
Essential Cleaning Supplies for Every Cookware Type
Having the right tools and products ready before you start cleaning makes the entire process faster and more effective. Different cookware materials require different approaches, so stocking your kitchen with versatile cleaning supplies ensures you’re prepared for any mess.
Must-Have Cleaning Tools for Your Kitchen
Keep soft-bristled brushes and nylon scrub sponges on hand for daily cleaning—they effectively remove food particles without scratching delicate surfaces. For tougher jobs, maintain a non-abrasive cleaning pad specifically designed for cookware. Rubber or silicone spatula-scrapers work wonders for loosening stuck-on food before washing. Always use wooden or plastic utensils for non-stick cookware since metal tools can permanently damage the coating. Having multiple brush sizes ensures you can reach every corner of small saucepans to large stock pots.
Effective Cleaning Solutions for Stubborn Residue
Stock your pantry with baking soda, which creates a gentle abrasive paste when mixed with water—perfect for removing burnt-on food without scratching surfaces. White vinegar cuts through grease and dissolves mineral deposits when combined with water and heated. Keep mild dish soap that effectively breaks down cooking oils without damaging non-stick coatings. Cream of tartar works magic on aluminum discoloration, while coarse kosher salt serves as a natural abrasive for cast iron cleaning. Hydrogen peroxide acts as a safe whitening agent for stained interiors, and club soda surprisingly lifts cooked-on residue when heated in pots.
Remove Burnt-On Food from Stainless Steel Cookware
Stainless steel pots and pans show every fingerprint, water spot, and burnt mess, but they’re also incredibly durable when cleaned properly. Mastering stainless steel cleaning techniques keeps your cookware gleaming and prevents permanent surface damage.
Quick Fix for Burnt Bottoms on Pots
When food burns onto your stainless steel pot bottom, fill it with enough water to cover the affected area, add one tablespoon of baking soda, and pour in a splash of white vinegar. Bring this mixture to a gentle boil, then reduce heat and simmer for 15-20 minutes. The chemical reaction loosens the burnt food, allowing it to wipe away easily once cooled. For particularly stubborn messes, create a thick paste of baking soda and water, apply it directly to the burnt area, and let it sit for 30 minutes before gently scrubbing with a non-abrasive pad.
Eliminate Water Spots and Restore Shine
Water spots form when mineral deposits from tap water dry on stainless steel surfaces. Mix equal parts white vinegar and water in a spray bottle, mist onto the affected areas, and wipe with a microfiber cloth using straight-line motions that follow the grain of the metal. For deeper restoration, apply club soda to warm cookware and immediately polish with a dry cloth. Commercial stainless steel polishes work well but require careful application—always wipe in the direction of the grain to avoid creating visible swirl marks on brushed finishes.
Proper Cast Iron Cleaning and Seasoning Techniques
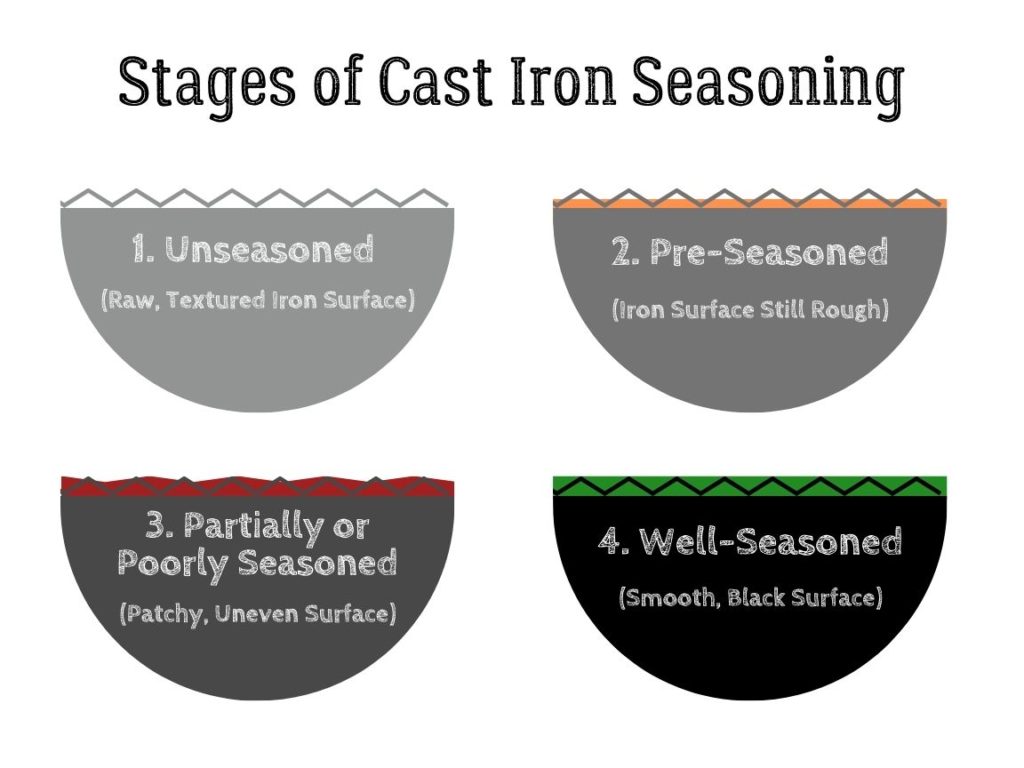
Cast iron requires different care than other cookware materials. The secret to long-lasting cast iron isn’t aggressive cleaning—it’s maintaining proper seasoning while avoiding practices that strip away the protective oil layer.
Daily Cleaning Without Damaging Seasoning
Immediately after cooking, while your cast iron pan is still warm but safe to handle, use paper towels to wipe out excess oil and food particles. For stubborn residue, add a small amount of hot water and use a stiff brush to loosen particles—avoid soaking cast iron, as prolonged moisture causes rust. Rinse quickly with hot water, dry thoroughly with a clean towel, then apply a thin layer of neutral oil while the pan is still warm. Contrary to old beliefs, modern mild dish soaps generally won’t harm a well-seasoned pan, though many prefer to avoid soap for routine cleaning.
Deep Cleaning and Re-Seasoning Process
When your cast iron develops sticky buildup or loses non-stick properties, sprinkle coarse kosher salt into the warm pan with a small amount of water to create an abrasive paste. Scrub vigorously with a cloth, rinse, and dry completely. For severe buildup, apply a thin layer of oil and baking soda, let it sit overnight, then scrub clean the next day. After deep cleaning, always re-season by applying oil to all surfaces and heating the pan upside down in a 400°F oven for one hour. This polymerizes the oil into a hard, protective coating that prevents rust and creates natural non-stick properties.
Safe Cleaning Methods for Non-Stick Cookware
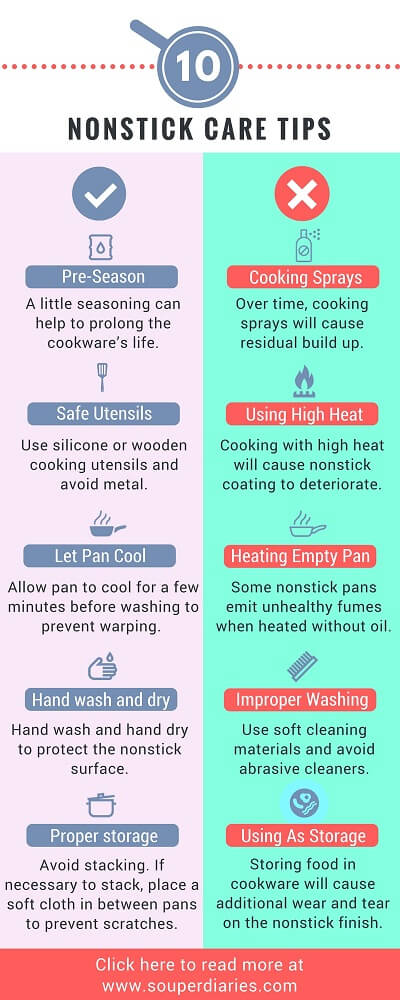
Non-stick coatings require gentle treatment to maintain effectiveness. Harsh cleaning methods and metal utensils quickly degrade these surfaces, causing flaking and reduced performance.
Daily Cleaning Without Damaging the Coating
Allow non-stick pans to cool before washing to prevent warping. Clean with warm water, mild dish soap, and a soft sponge—never use abrasive scrubbers that scratch the coating. For stuck-on food, soak the pan in warm soapy water for 15-30 minutes before attempting removal. A plastic spatula works well to scrape away softened food without damaging the coating. Rinse thoroughly and dry with a soft towel. Never cut food directly in non-stick pans with metal knives or use metal utensils during cooking, as these create scratches that worsen over time.
Removing Stubborn Residue Safely
For burned-on food that won’t budge with soaking, fill the pan with warm water and a drop of dish soap, then bring to a gentle boil for several minutes. This loosens residue without requiring aggressive scrubbing. Alternatively, make a paste of baking soda and water, apply it to stuck areas, and let sit for 15-20 minutes before gentle wiping. Avoid using baking soda with excessive force on non-stick surfaces, as the mild abrasiveness can wear away the coating over time. Never use steel wool, harsh abrasive cleaners, or metal scrubbers on non-stick cookware.
Eliminate Stubborn Stains and Discoloration

All cookware develops stains over time from cooking acidic foods, mineral-rich water, or repeated overheating. Knowing how to safely remove these marks keeps your cookware looking clean and prevents long-term damage.
Remove Aluminum Discoloration Naturally
Aluminum pots develop gray or dark stains from oxidation. Dissolve two tablespoons of cream of tartar in a quart of water, bring to a boil, and simmer for 10 minutes before washing normally. For darker stains, make a paste of cream of tartar and hydrogen peroxide, apply to affected areas, and let sit for 15-30 minutes before gentle scrubbing. Avoid abrasive cleaners on aluminum, which scratch the surface and make future staining more likely.
Treat Rust on Cast Iron and Stainless Steel
For cast iron rust, scrub with a stiff brush and hot water to remove loose rust, then dry thoroughly and re-season with oil. For stainless steel, apply a paste of baking soda and water to rusted areas, scrub with a soft cloth, rinse, and dry immediately. Prevention through thorough drying and proper storage in dry conditions eliminates most rust problems. Never let cast iron sit wet—it will rust quickly.
Remove Water Spots and Mineral Deposits
Hard water leaves white, chalky deposits on cookware. Fill the affected pot with equal parts vinegar and water, bring to a boil, let cool, then wash normally. For heavy deposits, repeat the process or soak overnight. Adding a water softener to your dishwasher prevents future spots on dishwasher-safe cookware. Regular cleaning before deposits build up makes removal much easier.
Prevent Future Buildup With Smart Cooking Habits
Simple practices during and after cooking significantly reduce cleaning time and extend your cookware’s life. Developing these habits makes deep cleaning sessions less frequent.
Cooking Techniques That Minimize Messes
Use appropriate heat levels to prevent burning—medium heat often works better than high heat for most cooking tasks. Add oil or fat to pans before cooking to create a barrier between food and the cookware surface. Cover pots while cooking to prevent splatters. Use appropriate utensils for each material type to prevent scratches that trap food and bacteria. Clean cookware promptly after use rather than letting food dry and harden overnight—a quick soak while you finish eating makes cleanup much easier.
Proper Storage to Prevent Damage
Dry cookware thoroughly before storing to prevent water spots and rust. Store pans with adequate protection between them—nesting pans with paper towels in between prevents scratching. Keep lids slightly ajar to allow air circulation and prevent moisture buildup. Store cookware in a dry location away from humidity to prevent corrosion, especially for cast iron and carbon steel pieces.
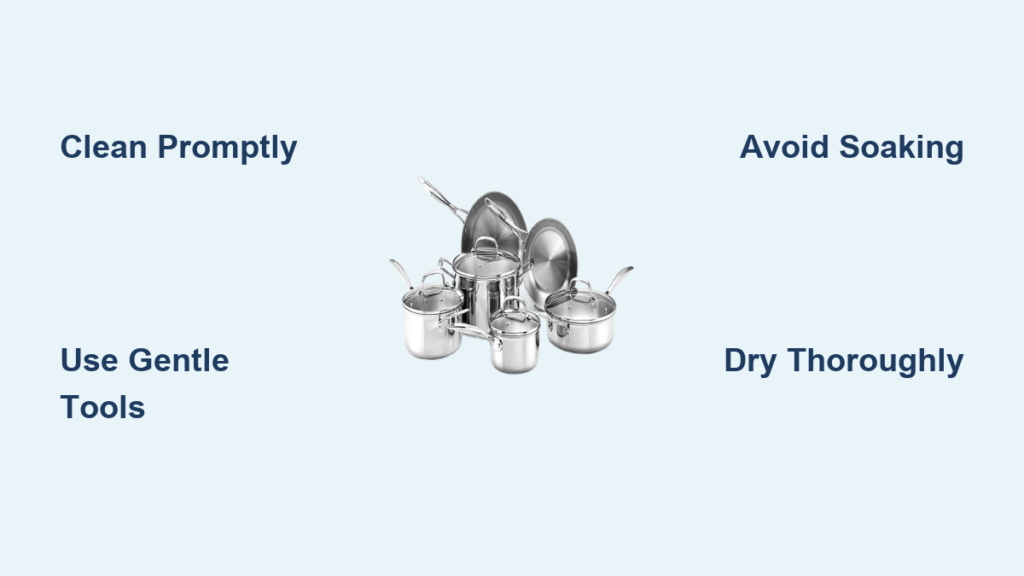
Keeping your kitchen pots and pans clean doesn’t require harsh chemicals or hours of scrubbing—just the right techniques matched to each material type. By understanding how stainless steel, cast iron, non-stick, and other cookware materials respond to different cleaning approaches, you can tackle any mess efficiently while preserving your investment. The key principles apply universally: clean promptly, use appropriate tools for each material, dry thoroughly, and maintain protective coatings. With these practices in place, your cookware will reward you with reliable performance and attractive appearance for countless meals to come. Remember that proper cleaning isn’t just about appearance—it directly impacts your cooking results and food safety, making these techniques essential for any home chef who values both great food and well-maintained kitchen tools.


