
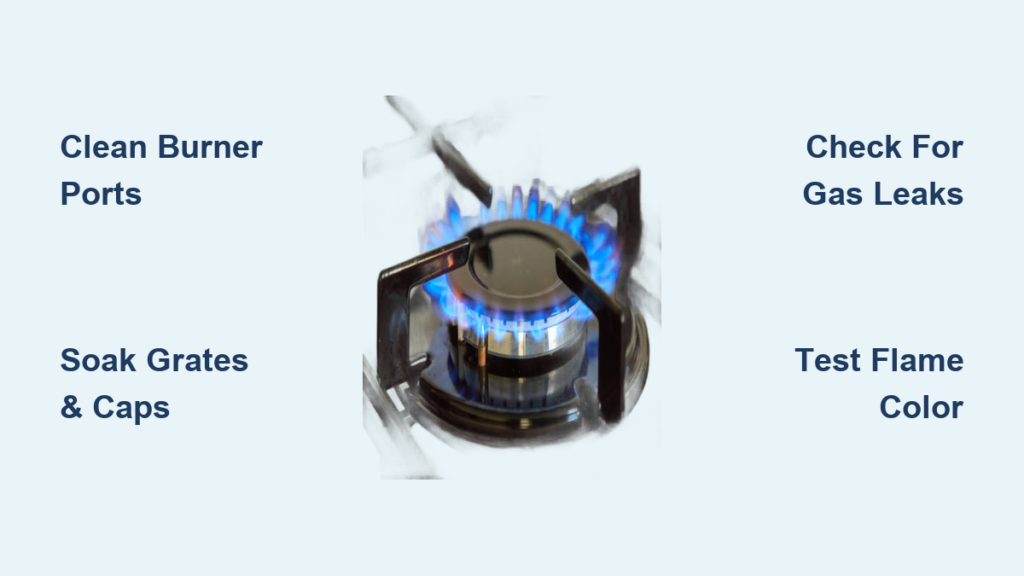
A dirty gas burner isn’t just an eyesore—it directly impacts your cooking performance and kitchen safety. When grease, food particles, and mineral deposits clog your burner ports, you’ll experience uneven flames, gas odors, and inefficient heating that wastes energy. Learning how to clean kitchen gas burner properly ensures consistent heat distribution for perfect cooking results while preventing potential safety hazards. Many home cooks mistakenly believe burner cleaning requires professional help, but with the right approach, you can restore optimal performance using common household items in under an hour.
Neglected burners develop stubborn buildup that blocks gas flow, causing dangerous flare-ups and incomplete combustion. This residue doesn’t just affect appearance; it creates yellow flames that indicate unsafe carbon monoxide production. Regular maintenance prevents these issues while extending your appliance’s lifespan significantly. The process is surprisingly straightforward—no special tools or technical knowledge needed. By following this guide, you’ll transform your burner from grimy to gleaming while ensuring your kitchen remains a safe cooking environment.
Gather Your Cleaning Supplies
Assemble these essential items before starting to ensure a smooth, efficient cleaning process. You’ll need warm water, mild dish soap, white vinegar, baking soda, and a soft-bristled brush or old toothbrush. A lint-free microfiber cloth protects surfaces from scratches while rubber gloves keep your hands safe from cleaning solutions. For clearing clogged ports, keep a toothpick or thin needle within reach—these precision tools remove debris without damaging delicate components.
Consider adding optional but helpful items like a small bowl for soaking parts and paper towels for initial wiping. If your burner grates are extremely greasy, a zip-top bag filled with vinegar solution works wonders for targeted soaking. Avoid abrasive scrubbers like steel wool that can scratch surfaces or harsh chemicals that might damage gas components. The gentle combination of baking soda and vinegar provides powerful cleaning without risking damage to your appliance’s finish.
Perform Initial Cooling and Safety Checks
Never attempt burner cleaning until the surface has completely cooled—this typically takes 20-30 minutes after cooking. Test with your gloved hand to confirm it’s cool to the touch, preventing burns and ensuring cleaning solutions work effectively. While waiting, perform crucial safety checks: sniff around the burner area for any gas odor that might indicate a leak. If you detect that distinctive rotten egg smell, turn off the gas supply immediately and contact your provider—never ignore potential leaks.
Before disassembling components, remove all cookware and clear the surrounding area. Check that burner caps are properly seated in their original positions and haven’t shifted during cooking. This inspection helps you correctly reassemble parts later and identifies any alignment issues that might affect performance. Taking these safety precautions transforms burner cleaning from a risky chore into a secure maintenance task that protects both you and your kitchen environment.
Remove and Soak Removable Components
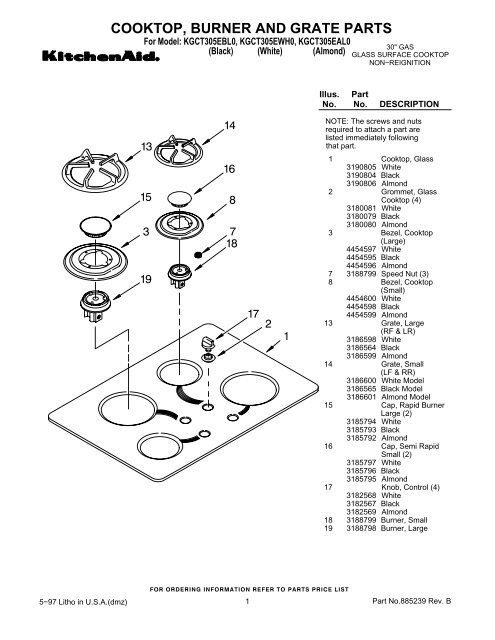
Most gas burners feature easily removable grates, caps, and occasionally burner heads. Carefully lift each piece, noting its exact position and orientation for correct reassembly. Cast iron grates require special handling—they’re heavy and can crack surfaces if dropped. Place them directly into your sink filled with warm, soapy water mixed with ¼ cup white vinegar for optimal grease-cutting power.
Allow components to soak for 15-30 minutes while you clean the base burner. This soaking time loosens baked-on grime significantly, making scrubbing much easier. For neglected burners, extend the soak to 60 minutes or even overnight for particularly stubborn deposits. While parts soak, use a soft brush to remove loose debris from the burner base and surrounding areas. Pay special attention to crevices where food particles accumulate and harden over time.
Clean the Burner Base and Burner Ports
Focus your attention on the burner base, especially around the small ports where gas exits to create flames. Wipe the surface with a vinegar-dampened cloth to dissolve light grease, then tackle stubborn spots with a baking soda paste (three parts baking soda to one part water). Apply the paste, let it sit for five minutes, then gently scrub with your soft brush—the mild abrasiveness lifts grime without scratching surfaces.
Clear each burner port individually using your toothpick or needle. Gently insert the tool and wiggle slightly to dislodge debris without damaging the ports. Work methodically around the burner, ensuring every hole is clear for even flame distribution. Don’t forget the ignition point—the small ceramic component that creates the spark. Clean it carefully with a cotton swab dipped in rubbing alcohol to ensure reliable ignition after reassembly.
Address Stubborn Grease and Burnt Residue

For carbonized grease that resists standard cleaning, create a powerful baking soda-hydrogen peroxide paste (equal parts of each). Apply generously to problem areas and let sit for 20 minutes—the chemical reaction lifts even the toughest residue. For mineral deposits from hard water, spray undiluted white vinegar directly onto affected areas, wait five minutes, then scrub gently. The acid dissolves calcium buildup without harsh chemicals.
Consider eco-friendly commercial degreasers only for extreme cases, choosing plant-based formulas designed for kitchen use. Always ventilate your kitchen well and rinse thoroughly to eliminate any chemical residue. Avoid abrasive pads that scratch surfaces or oven cleaners containing lye that can damage burner components. Patience with natural methods typically yields better long-term results without risking damage to your appliance.
Rinse, Dry, and Reassemble Components
Rinse each component thoroughly under warm running water, using your brush to remove all cleaning residue. Pay special attention to burner ports—leftover debris can cause immediate re-clogging. Shake parts vigorously to clear water from small holes, then dry completely with a microfiber cloth. Allow an additional 10-15 minutes of air drying, especially for metal components that could develop water spots or rust.
Reassemble parts carefully, ensuring perfect alignment. Burner caps must sit completely level for even flame distribution—misalignment causes uneven heating. Replace grates in their original positions, noting any specific orientation markers. Take time to visually inspect your work; properly seated components should sit flush without wobbling or gaps that disrupt gas flow.
Test Burner Function and Performance
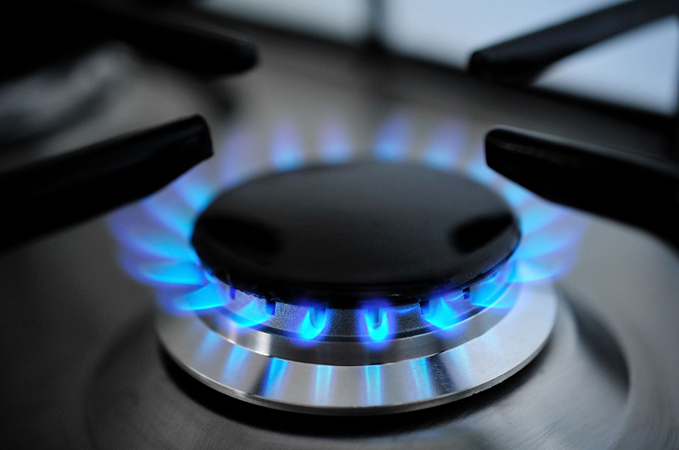
Before declaring your cleaning complete, test the burner’s operation. Turn on the gas and observe the flame pattern—it should be mostly blue with small yellow tips, indicating clean, efficient combustion. Yellow or orange flames signal remaining blockages or incomplete burning that requires further cleaning. Listen for a steady hiss without popping or clicking sounds that suggest gas flow issues.
Verify all burner ports produce consistent flames—gaps indicate still-clogged holes needing attention. Check for gas odors during operation; a faint smell at ignition is normal, but persistent odor indicates a potential leak requiring professional attention. If performance issues remain after thorough cleaning, consult your appliance manual or contact a qualified technician.
Establish a Regular Cleaning Schedule
Prevent future buildup with simple daily habits: wipe the burner surface while still warm (not hot) after each use with a damp cloth. This five-second habit captures fresh grease before it bakes on, dramatically reducing deep cleaning frequency. Weekly, remove grates and caps for a quick wash in soapy water—this takes just minutes but prevents stubborn accumulation.
Schedule monthly deep cleaning sessions focusing on burner ports and base surfaces. Mark this on your calendar or link it to another regular household task. Quarterly inspections should include checking ignition components and verifying proper burner alignment. Consistent maintenance transforms burner cleaning from a dreaded chore into manageable upkeep that preserves appliance performance.
Prevent Future Buildup and Maintain Peak Performance
Implement these proactive measures to minimize future cleaning needs. Use burner covers or drip pans under pots prone to boiling over—they catch spills before they reach burner surfaces. Always cook with lids when possible to contain splatters and reduce airborne grease. Run your exhaust fan during and after cooking to pull grease particles from the air before they settle on surfaces.
Address spills immediately rather than letting them bake on—keep a spray bottle of vinegar-water solution nearby for quick wipe-ups. These small habits compound over time, keeping your burners cleaner with minimal effort while improving overall kitchen air quality and reducing long-term maintenance requirements.
Troubleshooting Common Burner Problems
Weak or uneven flames usually indicate partially blocked ports—re-clean using your toothpick method. Ignition failure often stems from a dirty spark electrode; clean it with alcohol and ensure it’s dry before testing. Persistent yellow flames suggest deeper clogs or air-to-gas ratio issues requiring professional adjustment. If gas odors linger after cleaning, check for proper ventilation or contact your gas provider.
When to Call a Professional
Seek professional help for persistent performance issues after thorough cleaning, suspected gas leaks, or damaged components like cracked burner caps. Never attempt repairs on gas lines yourself—safety should always come first. Consider annual professional inspections for peace of mind and early problem detection.
Regular burner maintenance pays dividends through improved cooking performance, extended appliance life, and enhanced kitchen safety. By implementing these straightforward cleaning techniques and preventive habits, you’ll enjoy consistent, efficient heating with minimal effort. Start with a thorough cleaning session today, then maintain your burner with simple daily habits that keep it functioning perfectly for years to come. Your future self will appreciate the time saved and the consistently perfect cooking results your clean burner delivers.


