
Grease-splattered kitchen ceilings silently accumulate cooking residue that most homeowners ignore until yellow stains and sticky patches become impossible to overlook. Every time you fry bacon or sauté onions, microscopic oil particles rise to your ceiling, creating a grimy film that dulls your kitchen’s brightness and traps odors. Learning how to clean kitchen ceilings properly prevents this buildup from becoming a major project and protects your home from potential fire hazards that lurk in grease-laden environments. The good news is that with the right approach, you can restore your kitchen ceiling’s appearance without damaging the surface—whether it’s smooth painted drywall, delicate popcorn texture, or vinyl tiles.
Identify Your Ceiling Material First

Your cleaning approach depends entirely on what type of ceiling you have, as using the wrong method can cause permanent damage to certain surfaces.
Painted Drywall: Matte vs. Semi-Gloss Cleaning Challenges
Flat or matte paint finishes hide imperfections beautifully but absorb grease readily and clean poorly without leaving visible damage. When tackling matte ceilings, never saturate the surface—excess moisture causes the paper facing to bubble and peel. Semi-gloss and satin finishes tolerate more scrubbing but show roller marks more prominently. Always test your cleaning solution in an inconspicuous corner first, especially on older paint that may flake during cleaning. For both finishes, gentle blotting works better than vigorous rubbing to avoid damaging the paint surface.
Popcorn and Textured Ceiling Cleaning Protocol
Popcorn ceilings crumble when wet or rubbed too aggressively, requiring a specialized approach. Start with dry removal only—vacuum with a soft brush attachment on low suction to extract debris trapped in the texture. For stubborn grease spots, lightly dampen a microfiber cloth (never spray directly) and gently dab the area without rubbing. If you must use a cleaning solution, mix one teaspoon dish soap with one quart warm water, apply minimally with a sponge mop, and immediately follow with a clean damp cloth to prevent saturation. Never attempt to scrub popcorn texture—this almost always causes irreversible damage.
Vinyl Tile and Wood Beam Cleaning Techniques
Vinyl and PVC ceiling tiles tolerate gentle scrubbing with mild detergent solutions and resist grease staining better than porous materials. Focus cleaning efforts on the seams where grease accumulates, using a soft brush to work the solution into these problem areas. For wooden beams, dust first with a microfiber cloth, then wipe with a slightly damp cloth and mild soap solution. Never soak wood surfaces—immediate drying prevents warping and mold growth. Condition wood beams quarterly with an appropriate wood care product to maintain their appearance and protect against future staining.
Gather These Must-Have Cleaning Supplies
Assemble these specific tools before starting to avoid mid-project interruptions that compromise results.
Effective Cleaning Solutions for Different Stains
- Light grease: 1 tsp dish soap + 1 quart warm water
- Heavy grease: Equal parts white vinegar and water
- Stubborn stains: Baking soda paste (3 parts baking soda to 1 part water)
- Water stains: Trisodium phosphate solution (follow package directions)
- Mold spots: 1 part hydrogen peroxide to 2 parts water
Essential Tools Checklist
- Microfiber cloths or dust mop with extension pole
- Sponge mop with removable washable head
- Spray bottle with fine mist setting
- Soft-bristled brush (never use abrasive pads)
- Sturdy step ladder with non-slip feet
- Safety goggles and rubber gloves
Prepare Your Kitchen for Safe Ceiling Cleaning
Proper preparation prevents accidents and protects your kitchen surfaces during the cleaning process.
Critical Safety and Protection Steps
- Remove all items from countertops and cabinet tops
- Cover appliances with plastic sheeting secured by painter’s tape
- Lay drop cloths on the floor beneath your work area
- Turn off ceiling fans and remove light fixture covers if possible
- Place your ladder on a dry, stable surface—not on wet floors
Test Solutions Before Full Application
Apply your chosen cleaning solution to an inconspicuous area using a soft cloth, allow it to sit for 5 minutes, then gently blot. Wait 24 hours to check for discoloration, texture change, or damage before proceeding. This simple test prevents costly mistakes on visible surfaces and confirms your solution is safe for your specific ceiling material.
Execute the Cleaning Process Step-by-Step
Follow this sequence for effective cleaning without damaging your ceiling surface.
Dry Dusting Before Wet Cleaning
Using a dry microfiber duster or vacuum with soft brush attachment, systematically remove loose dust starting from one corner and working toward the opposite side. For textured ceilings, vacuum gently without applying pressure to avoid pulling texture away from the drywall. This crucial step prevents creating mud when you apply wet cleaning solutions.
Proper Solution Application Technique
Lightly mist your cleaning solution onto the ceiling—never soak the surface. Work in 3×3 foot sections, allowing the solution to dwell for 3-5 minutes to break down grease. For stubborn areas near cooking surfaces, apply a baking soda paste with a soft cloth and let it sit for 15 minutes before gently blotting. Always work from clean areas toward dirtier spots to prevent spreading grease.
Rinse and Dry Thoroughly
Pass a clean cloth dampened with plain water over the cleaned surface to remove residue. For drywall ceilings, use minimal moisture to prevent damage. Textured ceilings need extended air drying time—run exhaust fans and open windows to accelerate the process. Never leave a damp ceiling overnight, as this creates perfect conditions for mold growth in the very spaces you’re trying to clean.
Solve These Common Kitchen Ceiling Problems

Address these specific issues with targeted solutions that deliver results without damage.
Grease Stains Near Cooking Surfaces
Grease buildup directly above your stove requires more aggressive treatment. Apply undiluted white vinegar directly to the area, cover with plastic wrap to prevent evaporation, and let it sit for 30 minutes before gentle blotting. Repeat if necessary, but never scrub aggressively—multiple light applications work better than one harsh attempt that damages the surface.
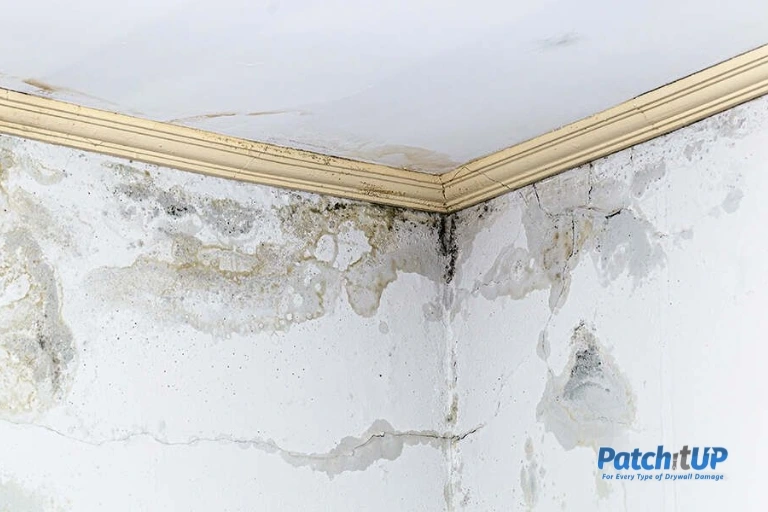
Water Stains From Steam Condensation
Address the moisture source first (improve ventilation or fix leaks), then treat the stain. Apply a trisodium phosphate solution with a soft cloth, allow to dry completely, then apply a stain-blocking primer before repainting. For persistent stains, professional assessment may be needed to determine if mold remediation is required.
Mold Growth in High-Moisture Areas
For small mold spots (less than 10 square feet), apply a hydrogen peroxide solution, allow 10 minutes dwell time, then gently blot with a clean cloth. Never mix cleaning chemicals—vinegar and hydrogen peroxide work separately but create harmful fumes when combined. Improve ventilation to prevent recurrence, as mold will return without addressing the moisture source.
Avoid These 3 Costly Cleaning Mistakes
Prevent common errors that turn a simple cleaning task into expensive repairs.
Never Saturate Drywall Ceilings
Applying too much moisture is the #1 cause of ceiling damage during cleaning. Damp tools—not wet ones—are essential for drywall-based ceilings. Multiple light applications with drying time between work better than one heavy soaking that causes bubbling and peeling.
Skip Abrasive Cleaning Tools
Steel wool, harsh scrub pads, and stiff brushes scratch paint finishes and damage textures. Start with the gentlest approach possible and escalate only if necessary. Your ceiling’s appearance matters more than removing every trace of stain—sometimes acceptance is better than damage.
Neglect Safety Precautions
Ladders on wet floors cause serious falls. Always have someone present when working at height, wear safety goggles to protect against drips, and ensure proper ventilation when using cleaning chemicals. Taking 10 minutes to set up safely prevents hours in the emergency room.
Maintain Clean Ceilings With These Simple Habits
Prevent future buildup with minimal effort through these sustainable practices.
- Monthly: Quick dust with microfiber duster on extension pole
- Quarterly: Light wet cleaning with dish soap solution
- After heavy cooking: Wipe visible grease spots immediately
- Always: Use splatter screens during frying and run exhaust fans
Proper kitchen ceiling maintenance takes just minutes monthly but prevents hours of intensive cleaning later. By identifying your ceiling type, using the right tools, and establishing simple cleaning routines, you’ll keep your kitchen looking fresh while protecting your home from grease-related hazards. Start with a thorough cleaning using these proven techniques, then maintain your results with consistent light cleaning—your kitchen (and your lungs) will thank you.


