
Sticky residue on cabinet shelves isn’t just unsightly—it creates a breeding ground for bacteria and makes your kitchen feel perpetually unclean. When you reach for a cereal box only to find your fingers coated in invisible grease, you know it’s time to master how to clean kitchen cabinet shelves properly. Most homeowners tackle countertops and appliances regularly while neglecting these hidden surfaces until grime becomes impossible to ignore. The good news? With the right approach, you can transform grimy shelves into spotless storage spaces in under an hour.
Ignoring cabinet shelf maintenance leads to more than just unpleasant stickiness. Food particles trapped in grease attract pests, while moisture trapped beneath spills can cause wood to warp or develop mold. Learning how to clean kitchen cabinet shelves systematically solves these problems while creating a healthier kitchen environment. This guide delivers actionable steps for removing even the toughest buildup without damaging your cabinet surfaces, plus smart organization strategies to keep them cleaner longer.
Remove Everything and Vacuum Hidden Debris
Emptying cabinets completely is non-negotiable for thorough cleaning—no shortcuts here. Start by removing every item from your cabinets and sorting them into three piles: keep, donate, and discard. This elimination process reveals expired food products hiding in plain sight and helps prevent future clutter that makes cleaning difficult. Most households find at least one mystery container of something unidentifiable during this step.
Vacuum before wiping to avoid muddy messes. Crumbs and dust accumulate in crevices where they bond with grease to form stubborn residue. Attach your vacuum’s narrow crevice tool and methodically clean along shelf edges, corners, and cabinet bottoms. Pay special attention to the space behind hinges and where shelves meet cabinet walls—these areas harbor the most debris. You’ll be shocked at how much material comes out even from cabinets that look relatively clean.
Discard or clean shelf liners immediately. If your cabinets use liners, peel them away carefully and examine for stains or tears. Vinyl liners with deep-set stains should be replaced, while washable fabric liners can be cleaned in the sink. Never attempt to wipe shelves with liners still in place—this just spreads grime around the edges where moisture can seep underneath and damage cabinet surfaces.
Create Targeted Cleaning Solutions for Different Buildups
The right cleaning solution makes all the difference between effortless cleaning and frustrating scrubbing sessions. For routine maintenance cleaning, mix 1 tablespoon of mild dish soap with 2 cups of warm water in a spray bottle. This gentle formula removes light dust and food residue without risking damage to cabinet finishes. Always test any solution on an inconspicuous area first, especially with wood cabinets.
Combat grease with vinegar power. For cabinets near cooking areas with heavy grease accumulation, combine equal parts white vinegar and warm water in a spray bottle. The acetic acid in vinegar breaks down oil molecules effectively while being safe for most cabinet surfaces. For extreme cases, add 1 tablespoon of liquid dish soap to the vinegar solution—this creates a powerful degreaser that tackles years of buildup.
Make baking soda paste for stubborn spots. When facing dried-on food or sticky residue that won’t budge, mix 3 parts baking soda with 1 part water to form a thick paste. Apply directly to problem areas and let sit for 5-10 minutes before gently scrubbing with a soft-bristled brush. The mild abrasiveness lifts grime without scratching surfaces, making it perfect for removing dried syrup or jam spills.
Scrub Shelves Without Damaging Surfaces
Effective scrubbing technique matters as much as the cleaning solution you use. Always work from top to bottom to prevent dirty water from dripping onto already-cleaned surfaces below. Apply your cleaning solution generously but avoid soaking shelves—especially wood—which can cause swelling or warping. Let the solution sit for 2-3 minutes to break down grime before wiping.
Use the right tools for each surface type. Microfiber cloths work well for most cabinet materials, but add a soft-bristled brush (like an old toothbrush) for textured surfaces or tight corners. Never use steel wool, abrasive pads, or harsh scrubbers that can scratch finishes and create grooves where future grime will collect more easily. For wire shelves, remove them completely and clean in the sink with a nylon brush.
Rinse thoroughly to prevent soap residue. After cleaning with soapy solutions, wipe shelves with a cloth dampened with clean water to remove any cleaning product residue. Soap left behind attracts more dirt and creates a film that makes future cleaning more difficult. For vinegar solutions, rinsing isn’t necessary as vinegar evaporates completely without residue.
Special Cleaning Methods for Different Shelf Materials
Wood shelves require special care to avoid moisture damage. Never spray liquid directly onto wood surfaces—instead, dampen your cloth first and wring it out thoroughly. Work in the direction of the wood grain to avoid creating swirl marks. For oak or other porous woods, minimize liquid exposure and dry immediately with a separate clean cloth. Periodically treat wood shelves with furniture wax to create a protective barrier against future spills.
Laminate and thermofoil shelves tolerate more moisture but can develop white spots from excessive water exposure. Clean with standard soapy water solutions, but avoid letting water pool in corners. For stubborn marks, baking soda paste works wonders without damaging the finish. Always dry completely after cleaning to prevent moisture from seeping into edge banding.
Wire shelves need complete removal for proper cleaning. Take them out of cabinets and wash in the sink with hot, soapy water and a nylon brush. Pay special attention to the areas where items normally sit, as these develop concentrated buildup. Rinse thoroughly and dry completely before reinstalling to prevent rust spots. For heavily rusted shelves, use a paste of baking soda and water to gently remove surface rust before thorough drying.
Eliminate Lingering Kitchen Odors Completely
Even after visible grime disappears, cabinets often retain unpleasant odors from past spills or strong-smelling foods. Place opened boxes of baking soda on shelves overnight to absorb lingering smells—replace every 30 days for continuous protection. For stubborn odors, wipe shelves with a 1:1 solution of white vinegar and water, then leave cabinets open to air dry completely.
Address musty smells with sunlight. If cabinets smell musty, remove everything and leave cabinet doors open in direct sunlight for several hours. UV rays kill odor-causing bacteria and help dry out any hidden moisture. For persistent mustiness, place shallow bowls of activated charcoal on shelves for 24-48 hours—charcoal absorbs odors more effectively than baking soda for severe cases.
Prevent future odor problems by ensuring all food containers have tight-fitting lids before returning them to cabinets. Store strong-smelling items like onions, garlic, and spices in sealed containers rather than leaving them in open baskets. Place cedar blocks in cabinets to naturally repel pests while adding a fresh scent.
Organize Shelves to Stay Cleaner Longer
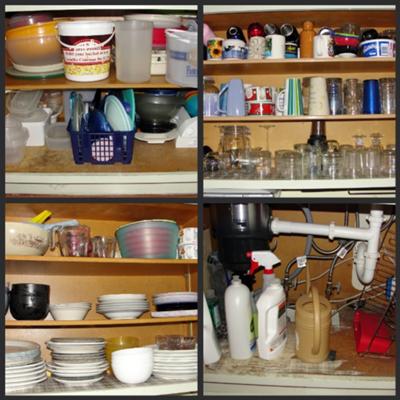
Smart organization reduces future cleaning time dramatically. Group similar items together and store frequently used dishes on easily accessible middle shelves. Reserve lower shelves for heavy items like pots and pans, and use upper cabinets for specialty appliances or seasonal items. This logical arrangement minimizes how long cabinet doors stay open during daily use, reducing dust and grease accumulation inside.
Install protective shelf liners after cleaning to create a moisture barrier. Measure shelves precisely before purchasing liners—custom-cut options prevent shifting and bubbling. Choose vinyl or washable fabric liners for easy maintenance, avoiding paper liners that tear easily and trap moisture underneath. Replace liners every 6-12 months or immediately after major spills.
Use clear containers and labeled bins to corral small items and prevent spills from spreading. Square containers maximize space better than round ones, and stackable designs create vertical organization. Group snacks, baking supplies, or spices in matching containers to create uniform rows that make spills immediately visible before they become major cleaning problems.
Maintain Clean Shelves With Minimal Effort
Preventative maintenance keeps cabinets cleaner between deep cleanings. Wipe shelves monthly with a damp microfiber cloth while doing other kitchen cleaning tasks—this takes just minutes but prevents buildup from becoming severe. Keep a small spray bottle of vinegar solution under your sink specifically for quick cabinet touch-ups.
Address spills immediately rather than letting them dry. Keep cleaning wipes near your cabinets for instant cleanup of drips or leaks before they become sticky residue. The moment something spills inside a cabinet, wipe it thoroughly—this five-second habit prevents the need for intensive scrubbing sessions later.
Schedule quarterly deep cleans to catch problems early. Set a recurring calendar reminder every three months to remove everything, vacuum debris, and wipe all surfaces. These regular maintenance sessions take half the time of an overdue cleaning project and keep your kitchen feeling consistently fresh. Link this task to other seasonal chores like changing air filters to help it stick.
Your newly cleaned kitchen cabinet shelves represent more than just a tidy storage space—they create a healthier kitchen environment and make daily tasks more pleasant. By following these targeted cleaning methods and establishing simple maintenance habits, you’ll spend less time tackling stubborn grime and more time enjoying a kitchen that feels truly clean from top to bottom. The next time you open a cabinet door, you’ll appreciate the effort when your fingers come away clean instead of sticky.


