
Kitchen counter grout collects everything your family cooks with—oil splatter, food residue, soap buildup, and everyday moisture that seeps into its porous surface. Over months and years, this accumulation turns bright white grout into dingy, discolored lines that make your entire kitchen look neglected, no matter how clean your counters appear. The good news is that restoring grout to its original condition requires neither expensive professionals nor harsh chemicals you can’t pronounce. With the right approach, the proper tools, and a systematic process, you can bring tired-looking grout back to life and protect it against future staining. This guide walks you through every method from gentle natural cleaners to professional-grade solutions, helping you choose the right approach based on your specific staining situation and grout type.
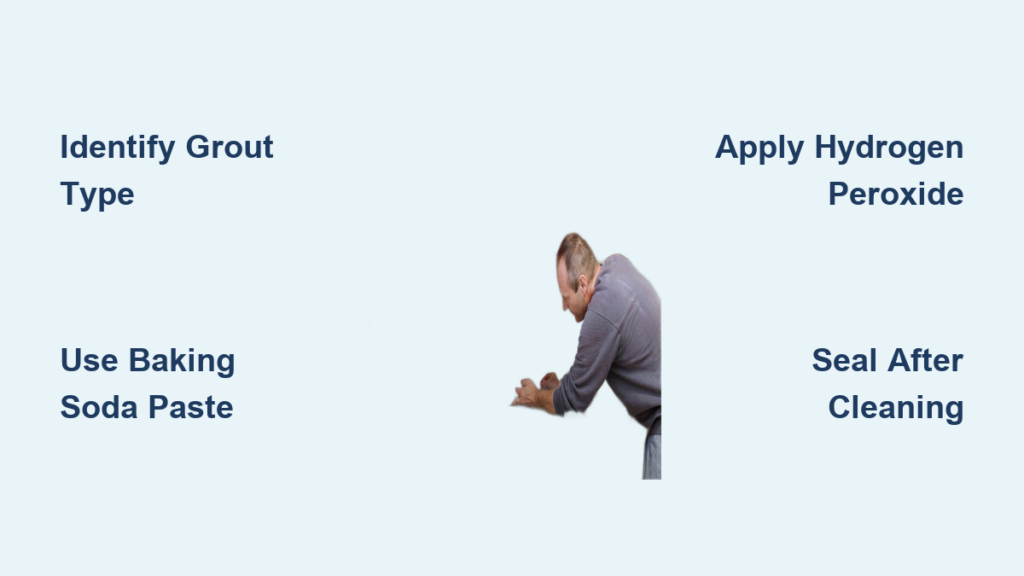
Identify Your Grout Type Before Cleaning

Before selecting any cleaning method, understanding what type of grout lines your kitchen counters determines which approaches will work and which might cause damage. Grout isn’t a one-size-fits-all material, and treating it incorrectly can lead to discoloration, erosion, or the need for premature replacement.
Sanded grout contains visible grit particles and fills wider joints from 1/8 inch up to 1 inch. The sand creates a rougher texture that traps dirt more aggressively, making cleaning slightly more challenging but also more forgiving of vigorous scrubbing. This type appears most often on floors, but some countertop installations use it for aesthetic texture.
Unsanded grout has a smooth surface because it omits the sand additive entirely. Designed for smaller joints of 1/16 inch or less, it coats wall tilings and kitchen backsplashes where finer lines look more polished. The smooth texture cleans more easily but requires gentler treatment to avoid scratching the surface during scrubbing.
Epoxy grout differs fundamentally from cement-based options. Its water-resistant formulation resists staining far better than traditional grouts and handles harsh environments without deteriorating. However, when epoxy does stain, it responds poorly to acidic cleaners that work beautifully on cement-based grout, requiring alternative approaches.
Unsealed grout presents the most challenging scenario. Its open pore structure has absorbed years of contaminants that now dwell deep within the material. Many homeowners discover their counter grout was never sealed during installation, meaning stains have penetrated beyond the surface and may require intensive treatment or professional intervention to address effectively.
Gather These Essential Cleaning Tools First

Successful grout restoration depends on having appropriate tools assembled before you begin. Gathering supplies first prevents mid-process interruptions and ensures consistent application of whatever cleaning method you select.
Grout brushes with medium nylon bristles provide the ideal scrubbing power—aggressive enough to lift embedded dirt without scratching tiles or eroding grout. Keep several on hand, including an old toothbrush for detailed work in corners and along edges. Soft-bristle options prevent damage on delicate surfaces and unsanded grout that scratches easily.
Spray bottles enable even distribution of liquid cleaners directly into grout crevices. They work especially well for vinegar solutions, hydrogen peroxide mixtures, and commercial grout cleaners that require saturating the joint thoroughly. The spray action ensures coverage without waste or mess.
Cleaning solutions range from kitchen staples to specialized products. White vinegar, baking soda, and hydrogen peroxide form the foundation of effective DIY approaches. Dish soap cuts through grease in kitchen environments. For tougher jobs, Zep Grout Cleaner & Brightener delivers professional results, while muriatic acid handles truly stubborn stains on unsealed grout—though this requires careful handling.
Protective equipment shields you from chemical exposure during cleaning. Rubber gloves prevent skin irritation from hydrogen peroxide, bleach, and commercial grout cleaners. Safety glasses protect against splashes, and adequate ventilation prevents fume accumulation in enclosed kitchen spaces.
Fix Light Stains with Baking Soda and Vinegar Paste
The baking soda and vinegar combination ranks as the most popular natural approach for cleaning kitchen counter grout, working exceptionally well against the food residue and soap scum that accumulate in food preparation areas.
Create your cleaning paste by mixing three parts baking soda with one part water in a small bowl, stirring until you achieve a thick, spreadable consistency similar to toothpaste. This paste acts as a gentle abrasive that lifts dirt without damaging grout or tile surfaces while simultaneously neutralizing odors that develop in kitchen environments.
Apply the paste directly to grout lines using a soft-bristle brush or old toothbrush, working in small sections to ensure complete coverage. Press the paste into each joint firmly, making sure it fills the entire depth of the grout space rather than just coating the surface. This thorough application proves especially important for unsealed or older grout that has developed significant buildup within its porous structure.
Once paste covers a section, add white vinegar to trigger the fizzing reaction. Pour a small amount directly onto the paste or spray a vinegar-water solution of equal parts over the treated areas. The chemical reaction between acetic acid and sodium bicarbonate creates carbon dioxide bubbles that penetrate grout pores, dislodging embedded dirt and breaking down grime that normal scrubbing cannot reach.
Allow the mixture to work for five to ten minutes, giving it time to penetrate deeply set stains. During this waiting period, the effervescent action works into the grout’s structure, lifting contamination to the surface where it can be easily removed.
Scrub the grout lines using a back-and-forth motion with your brush, applying moderate pressure to work the cleaning solution into all crevices. Concentrate additional attention on heavily stained areas, and consider extending the waiting period to the full ten minutes before scrubbing stubborn spots.
Rinse thoroughly with a damp sponge or cloth, removing all paste residue. Multiple rinsings may be necessary to eliminate every trace of the cleaning solution, since leftover residue attracts future dirt buildup. Wipe the area dry with a clean microfiber cloth and examine your results—stubborn stains often require repeating this entire process.
Remove Yellowing with Hydrogen Peroxide Treatment
Hydrogen peroxide brings enhanced bleaching and stain-lifting properties that complement baking soda’s cleaning action, making this combination particularly effective for white or light-colored grout that has yellowed or developed stubborn discoloration over time.
Prepare your cleaning paste by combining hydrogen peroxide with baking soda in a bowl, adjusting proportions until you achieve a thick, toothpaste-like consistency. The hydrogen peroxide functions as an oxygen-based bleach that breaks down organic stains without the harsh effects of chlorine bleach, while baking soda provides the abrasive action needed to scrub away residue.
Apply the mixture generously to grout lines using your grout brush, ensuring complete coverage of all stained areas. Allow it to sit for seven to ten minutes, giving the hydrogen peroxide adequate time to penetrate and lift stains from within the grout’s porous structure.
Scrub thoroughly with your brush, working in circular motions to cover every surface completely. The combination of chemical action and physical scrubbing produces results that often exceed expectations for homeowners who have struggled with conventional cleaners.
Wipe away the paste with a microfiber cloth dampened with warm water. For kitchen counters, verify that all residue removes since any remaining paste could contact food preparation surfaces. Inspect results and repeat if necessary for particularly stubborn stains.
Safety note: Always wear gloves when working with hydrogen peroxide, as it can cause skin irritation and allergic reactions in some individuals. While gentler than many commercial cleaners, prolonged skin contact should still be avoided.
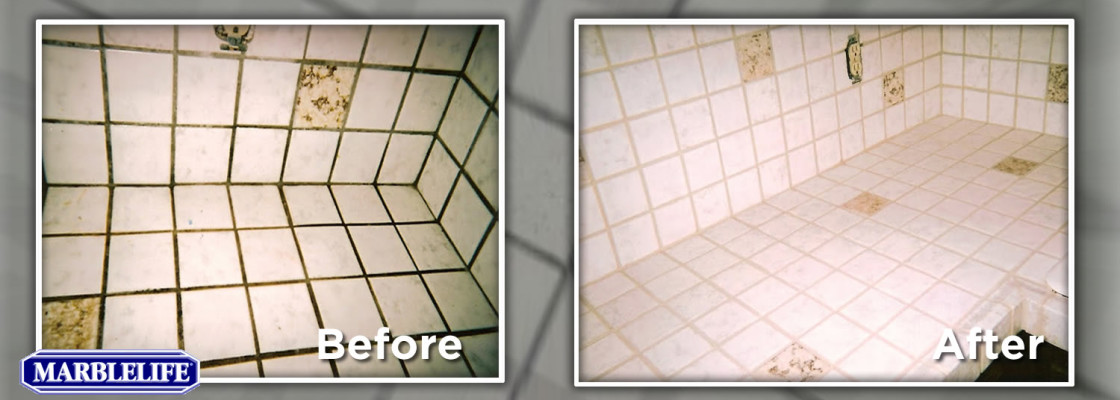
Restore Severely Stained Grout with Zep Cleaner
When DIY methods fall short, commercial grout cleaners deliver powerful solutions that achieve dramatic results on stains resistant to natural approaches. These products contain concentrated acids and surfactants that penetrate deeper and lift more stubborn contamination than household alternatives.
Zep Grout Cleaner & Brightener consistently ranks among the most effective commercial options, earning top ratings for its ability to restore even heavily stained grout to dramatically improved condition. The acidic formula literally melts grime before your eyes, producing visible results that other methods cannot match.
Apply Zep by tipping the bottle and running it directly along grout lines, or use a brush or rag for wall applications and precise control. The watery consistency allows the solution to penetrate deeply into grout pores, reaching dirt that household cleaners cannot touch.
Let the solution sit for three minutes, during which you can actually observe dirt lifting from the grout surface. This visible action confirms the cleaner’s effectiveness and helps identify areas requiring additional attention.
Scrub treated grout lines with a brush, then wash away residue with a wet rag. For large countertop areas, work in sections to prevent the cleaner from drying on the surface before you can rinse.
Critical safety precautions apply: Zep contains strong acids that cause skin irritation and eye damage. Always wear cleaning gloves and eye protection during application. Keep the product away from children and pets, and never use it on natural stone surfaces that acidic cleaners can damage.
Eliminate Mold and Mildew From Kitchen Grout Lines
Kitchen environments create ideal conditions for mold and mildew growth due to regular moisture exposure, food residue, and sometimes inadequate ventilation. Black patches on grout indicate mold presence and require specific treatment beyond standard cleaning methods.
Spray a dedicated mold remover directly onto affected areas and allow it to work for the specified duration, typically several minutes. The specialized formula penetrates mold colonies and prevents regrowth while cleaning visible staining.
Scrub treated areas with a stiff brush, working the cleaner into all affected surfaces. Mold extends deeper into grout than surface staining indicates, requiring thorough treatment to address the complete problem.
Clean with lukewarm water, removing all traces of the mold remover. Rinse multiple times to ensure complete extraction, as any remaining cleaner residue could affect new sealant application if sealing follows treatment.
For stubborn mold issues, apply hydrogen peroxide after the baking soda-vinegar treatment. The additional bleaching and sanitizing action targets remaining discoloration. Apply hydrogen peroxide directly to affected spots and allow it to sit before final rinsing.
Repeat the treatment process if mold returns or staining persists after initial treatment. Persistent mold problems may indicate underlying moisture issues requiring attention to ventilation or sealing gaps that allow water penetration.
Prevent Future Staining With Proper Grout Sealing
Sealing represents the most important step in maintaining clean grout after restoration. Grout’s porous nature continuously absorbs moisture, stains, bacteria, grease, and contaminants without protection. Sealing creates a barrier that repels these damaging substances while allowing the grout to breathe.
Timing matters critically: Grout must dry completely before sealing, or moisture traps beneath the sealer, causing mold growth and sealer failure. Test readiness by sprinkling water over the surface. If water beads up, the grout is ready to seal. If it seeps through, additional drying time is needed.
Select an appropriate sealer for your grout type and application. Penetrating sealers soak into the grout structure to create protection from within, while topical sealers create a surface layer. For kitchen counters, penetrating sealers typically perform better since they don’t alter grout appearance and withstand kitchen conditions effectively.
Apply sealer using a foam sponge, roller, or spray, ensuring even coverage without missing spots. Work in sections and apply sufficient sealer to penetrate the grout without creating excessive surface buildup. Follow package instructions for specific application techniques and drying times.
Allow sealer to dry completely before using the countertop, typically several hours with 24 hours providing maximum cure time. Avoid getting water on sealed grout during the curing period.
Reseal kitchen counters every six months to one year based on usage and exposure. Less heavily used areas may extend to two years between applications. Regular water-bead testing determines when resealing is needed.
Maintain Clean Grout Between Deep Cleaning Sessions
Preventive maintenance dramatically reduces the frequency and intensity of deep cleaning required to keep kitchen counter grout looking its best. Simple habits transform grout care from periodic intensive projects into routine upkeep.
Wipe down countertops after each use, paying particular attention to grout lines where food residue and moisture accumulate. A quick damp cloth pass removes surface contaminants before they set into the grout structure. This single habit extends the time between deep cleanings significantly.
Address spills immediately when they occur. Colored or oily substances penetrate unsealed grout within minutes. Prompt wiping prevents staining and reduces intensive stain removal later.
Implement weekly cleaning using mild solutions like diluted dish soap or the baking soda paste method. Light maintenance cleaning prevents significant buildup from accumulating, making each cleaning session quicker and easier while maintaining consistent grout appearance.
Avoid using bleach on grout, even on sealed surfaces. While bleach may whiten temporarily, it degrades the material over time, leading to deterioration and eventual replacement needs. Hydrogen peroxide provides safer bleaching action when whitening becomes necessary.
Ensure adequate kitchen ventilation to reduce moisture accumulation that promotes mold growth and grout degradation. Range hoods should operate during and after cooking, and exhaust fans benefit kitchen areas with moisture concerns.


